Nissan recommends that owners of 2000 Xterra vehicles replace the SUV's spark plugs every 30,000 miles. Over time, the plugs do not fire as strongly as they once did, which causes less efficient combustion. The vehicle loses power and fuel economy worsens. Spark-plug replacement is a moderately easy task that any owner with a few basic tools and mechanical knowledge can perform in about an hour.
Inspect the new spark plugs to ensure that the porcelain insulators are free from cracks.
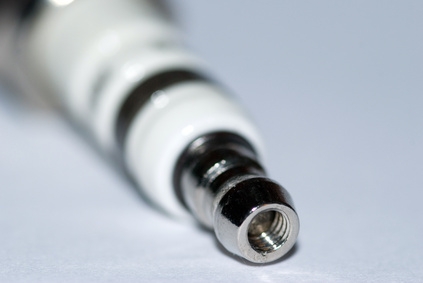
Place the correct side of the feeler gauge into the gap at the end of each plug. Move the gauge in and out a few times to create the proper gap. If the gap is too wide, gently bend the metal tip inward towards the electrode, and re-insert the gauge to check. The correct gap for single platinum tip plugs is 0.039 in., and the gap for double-platinum tip plugs is 0.043 in.
Follow one of the spark plug wires to the space where it enters the engine. There you will see a rubber boot that slips over the end of the spark plug. Grasp the boot and pull it straight off the plug, but do not pull on the wire itself.
Place the spark-plug socket over the plug and turn it counterclockwise to unscrew it from the socket. If it is too hard to loosen, gently tap the wrench to free it. Do not use excessive force to remove the plug, which can cause the plug to break off in the cylinder, leading to costly repairs.
Insert the new plug into the socket and gently tighten it. To avoid cross-threading the plug, slip a piece of 1/4-in. rubber hose to start threading the plug. Slip the hose over the end of the plug and use it to turn the plug. Once the plug is seated in the threads, you can continue with the socket wrench. Use a torque wrench to tighten the plug to 15 ft-lbs. of torque.
Place the boot over the newly installed plug and use a twisting motion to seat it. Mark the wire with a small piece of tape to indicate that you have changed it.
Continue in this manner until you have changed the remaining 3 or 5 plugs (depending on engine type.) Remove the tape from the wires when finished.