Heater hoses connect to the water pump and carry heated coolant to the heater core located under the dashboard. Hoses can crack and split or dry out from engine heat and age. When this happens, you can replace them with factory hoses or cut a new hose to specific lengths. The heater hose connection at the water pump consists of a small metal tube or nipple that allows the hose to fit over it. The nipples can rust and crack like any other metal component. It requires a little patience and finesse to replace one on a Chevy. With a few tools and steps, the you can accomplish the task.
Place the vehicle in park or neutral and set the emergency brake. Disconnect the negative battery cable. Use a floor jack to lift the vehicle high enough to place two jack stands under the front frame near each wheel. Loosen the radiator drain petcock valve and drain the coolant into a pan.
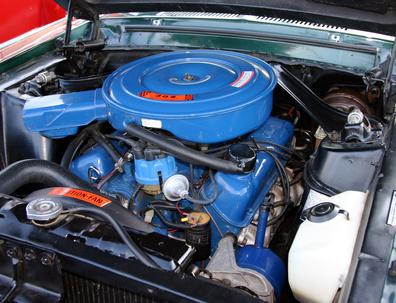
Remove the cooling fan shroud if you need the extra clearance to gain access to the heater hose connections by using the appropriate socket. Some shrouds come in two pieces: a lower and upper unit. Once the bolts and clips have been loosened, pull the front upper out and remove the lower shroud by twisting it on its side and pulling straight up.
Locate the heater hoses. There will be two rubber hoses about 5/8-inch in diameter and they will come from the firewall across the engine and down into the water pump area. Remove the heater hose clamp on the pump with a Phillips screwdriver or compress the spring clip if they have factory designs.
Remove both hoses, one at the water pump inlet and the other at the manifold or engine block outlet (refer to owner's manual for correct Chevy location). Twist the hoses back and forth by gripping the ends with a pair of pliers, if they fail to slide off easily. Locate both nipple tubes. Spray their outside threads (at the base) with penetrating oil. Use several applications and let soak for over an hour.
Fit a box-end wrench over the metal nipple and position yourself to turn it counterclockwise. If you have clearance problems, hit the wrench with a hammer to shock the tube loose. Use the box-end wrench to loosen it the rest of the way. If clearance problems persist, use a pair of vise grips to loosen it. Once you have it removed, clean the thread holes in the pump housing with carburetor cleaner and a small tooth brush. Dry the inside with the tip of a rag. Remove the other tube nipple in the same fashion.
Apply a liberal amount of grease to the threads on the new tube nipples. Start them in by hand and run them in as far as you can. Finish tightening them with the box-end wrench or the vise grips, but finish the final tightening with the box-end wrench.
Reconnect both heater hoses onto the tube nipples. Use new hose clamps and tighten them with the appropriate tool. Reinstall the fan shroud (if you have removed one). Fill the radiator back up with coolant and start the engine. Once the engine has reached normal operating temperature, check the coolant level again and fill as necessary. Check for any leaks.