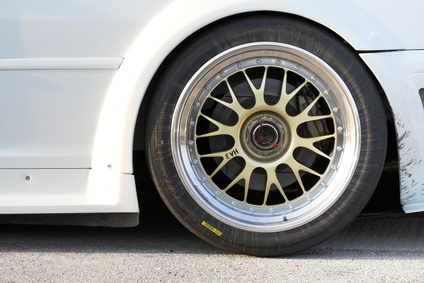
Factory alloy wheels can look very good when coming off the showroom floor. However, if regular maintenance has not been performed the wheels can get that dull or foggy look, losing their original luster. Oxidation, grime, road salts and moisture can attack the metal to leave pits and stains. Gravel can leave impact scratches. Many kits have appeared on the market specifically designed to restore the delicate finish on alloy wheels.
Wash the wheel with warm soap and water, including the tire (which might have tire protectant on it). Concentrate on one wheel at a time in warm weather, making certain the wheels have not run recently, which would raise their temperature. Rinse thoroughly and dry buff with a soft towel. Remove all moisture from inside and outside the rim.
Don the gloves. Use a clean, small piece of towel soaked in lacquer thinner to apply to the rim. Remove all surface wax, oxidation and residual clear coat. This will take several applications and cannot be rushed. Apply more finger pressure with each coat, rubbing vigorously over the entire surface of the rim. Remove any flaking or deep-seated stains. The original paint will normally fade.
Wash the rim with soap and water, then rinse. Dry buff until all moisture has been removed. Mask the rim, separating it from the tire surface, using blue painter's masking tape. Cover the tire's surface with masking paper and tape in place.
Wet the 240 grit sandpaper in clean water. Sand down all of the rim's surface. Do not forget the edges and sides in case of spoke rims. Use several sanding passes. Change out the sandpaper frequently. Switch to the 400 grit wet sandpaper and scour the surface with the same sanding motions. Bring the surface down to a smooth, even texture. Remove the last of any obvious scratches. Take a damp towel and wipe all excess dust off the rim.
Replace any tape that has become wet or damaged. Make sure the surface has been dried. Shake the lacquer paint can until thoroughly mixed. Starting at the top, spray over surface with one pass and then reverse the direction. Work the spray pattern down to the bottom, applying only a thin coat. Let set and dry for 10 minutes. Apply a second or third thin coat (as needed), covering the entire rim. Allow to set and dry for 10 minutes.
Shake the can that contains the lacquer clear coat until mixed. Paint the rim as you did before, using the same motions. Apply two thin coats and let dry. The clear coat will provide a barrier against UV rays, dirt and water.
Repeat the steps for each wheel.