Changing your alternator in your Ford or Mazda Truck or SUV by yourself can save you hundreds in unnecessary repair bills.
The first step in any project is making sure that all power sources are disconnected to avoid shorts in the electrical system and/or bodily harm to yourself. In this instance you will need to disconnect the battery cables from the battery using you adjustable wrench. Make sure you remove the negative(black/-) cable first then the positive (red/+) cable.

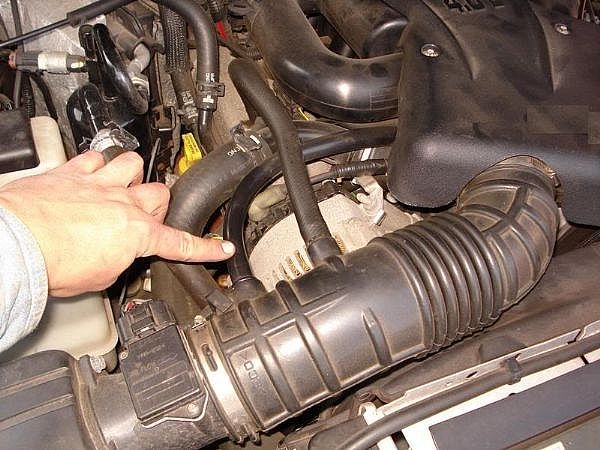
Your next step is to remove the air intake hose from your car using a flat head screw driver. Once both of the screw clamps have been loosened take out the sensor using the end of the screw driver once again to undo the locking device. then remove the two(2)plastic tubes from the air intake hose. Once this has been done it is now time to work the intake hose off of the filter canister and throttle body by twisting it back and forth until it comes off.
Once the hose is off you will need to use the 3/8 socket wrench in the belt tensioner and push it toward the passenger side to give the belt the slack to remove it. Once it is off check the belt for any cracks, tears or any evidence of wear (if needed replace it now).
You should have full access to your alternator now you will need to use your 13mm socket and wrench to remove the three bolts and the adjustable wrench to remove the ground wired attached to the alternator. Remove the sensor wire using the end of the screw driver and then it is free to replace.
To install complete all steps in the reverse order and you have just saved yourself $$$$ and completed this job in under 30 mins for the novice.