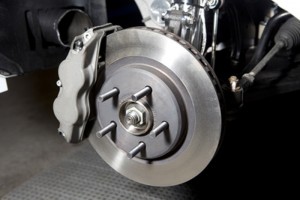
 Car brakes typically last for at least 30,000 miles. Some drivers have reported that their tires have even lasted as long as 100,000 miles. Towards the end of the lifespan of brake pads, they will wear down to the point where the brakes are almost pressing metal against metal in order to stop the vehicle. This wear and tear happens to the front brakes long before the rear brakes as most vehicles rely more on the front brakes to stop the vehicle. This means that you will have to replace your vehicle’s front brake pads much more frequently than the rear brake pads.
Instead of waiting for an inspection to determine if your vehicle needs new brakes, you can (and should) do the job yourself. It is a fairly easy job. Be sure to inspect your vehicle’s brakes at the beginning of both the winter and the summer, if not more frequently. Those who fail to inspect their vehicle’s brakes will only know if they need to be replaced when something bad happens, like a loud screeching sound or when the vehicle fails to stop within an acceptable distance. Avoid these problems by following the steps listed below to replace your vehicle’s brake pads on your own.
Before accessing your vehicle’s brake pads, make sure that the engine is off. If you previously used the car during the day, let it cool down before starting the brake pad replacement process. Use the car jack to jack the vehicle up in the air as if you are replacing a flat tire. Use the jack stand to keep the vehicle securely lifted in the air. Loosen one tire’s lug nuts and remove the tire and wheel. You’ll need a c-clamp at this point. Use the c-clamp to remove the brake pads that touch the rotor. Be sure to tighten the clamp and pull on the piston while removing the brake pad. Then place a new brake pad in place of the worn one. Discard the worn brake pad as it has no value at all. When attaching the new brake pad, use brand new retaining clips in order to secure it firmly in place.
Drivers will also benefit from adding some graphite grease towards the new brake pad ends to improve their sliding ability. However, be very careful to ensure that the grease does not touch the brake rotors. Once the new brake pad is installed and the graphite grease is applied, put all of the nuts and bolts back into place and be sure to tighten them so that the wheel and tire are secure. This is a great opportunity to add new braking fluid. Add it just before tightening the lug nuts on the outside of the wheel / tire. Then repeat this process from beginning to end on the other side of the vehicle if new brake pads are needed there as well. Don’t hesitate to take the vehicle in to an auto shop for the guidance of an automotive repair professional if you are concerned with the quality of your work.