Speedy Auto > Car Tech > 4x4 > Engine

Parking Garage Motor Swap 5.7 Chevy V-8 Engine Plumbing - Jp Magazine

Pete Trasborg Brand Manager, Jp

In the first installation we showed you how we swapped a fuel-injected 5.7L Chevy V-8 into our '94 Wrangler in the parking garage under our office building. Well, since then, our office has come under new ownership that isn't nearly as gearhead-friendly as the old owners were, and we had to relocate the project. So Trasborg took it home and shoehorned it into his over-crowded, one-car garage to continue working on it.

5.7 Chevy V8 Engine Plumbing garage Photo 25882847

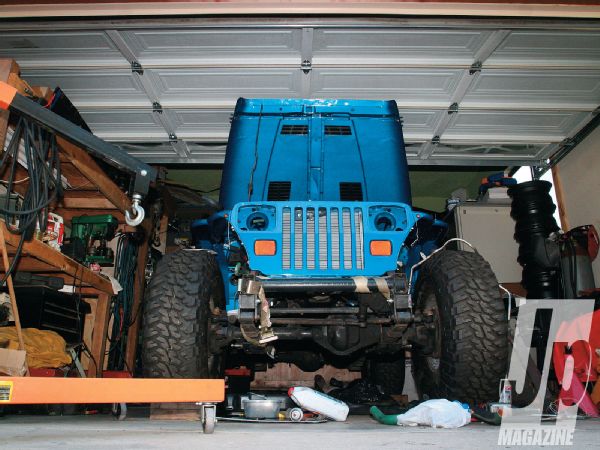
Aside from the relocation, we are staying true to our original idea and installing the engine with hand tools and just keeping it simple. You can certainly still mimic what we do at home, or in your parking garage (as long as you don't get saddled with squares for owners).

For this installment, we went through and worked on tying up all the loose ends, plumbing the engine, fixing a couple of extra issues from buying a used motor, and generally learning a bunch about the LT1. This second-generation engine was a long time coming. When the LT1 debuted in the '92 Corvette, the engine it replaced had been around largely unchanged since 1955. You could make an argument against us here, but the fact is that this is the first time the distributor was moved and the water pump was no longer belt-driven. By letting the engineers loose on the venerable small-block V-8, the '92-'97 LT1 became a stepping stone to the later LS-series of engines.

When it came out in 1992, this engine put out about 50 hp more than the previous generation engine. It is also reverse-cooled, which means that the coolant flows from the radiator to the heads first to increase the resistance to detonation and allow higher compression ratios for more power and better emissions.

Another innovation was the optically-triggered Optispark engine-driven distributor, which indexes on the front of the cam. The Optispark features a disc with 360 slots in it and an optical trigger. The 360 slots fall one per every degree of engine revolution and allow much more accurate timing than the magnetic-pickup of the previous small-blocks. The down side to this ignition is its relatively low location on the front of the engine and the fact that it hides behind the water pump. For us Jeep guys, that means deep stream crossings or even a leaking water pump can kill the ignition. If that wasn't enough, in earlier models there was no way for condensation to get out of the distributor, which can lead to corrosion of terminals, poor idling, and rough running at higher RPMs, to name but a few possible issues.

Because of the changes from the small-block of yore, installing the LT1 took us down a notch. It wasn't that easy to figure out where everything needed to go, even with "before" pictures. So we did a lot of research, talked to friends who have done this before, and figured out a bunch of stuff that might help you out in the future.

PhotosView Slideshow The first thing we tackled was the fuel lines. The Corvette has the fuel lines on the passenger side of the block, but the Caprice-sourced engine had them at the rear of the driver's side of the block. Everywhere we looked, people were telling us to use adapters to -AN fittings and then flare the stock Jeep fuel lines. Upon closer inspection, the Jeep fuel rail and the Chevy fuel rail are the same, you just need to carefully take the plastic fittings off of the Jeep rail and clip them onto the Chevy. Then, we re-bent our existing lines so they ran up the firewall away from the exhaust manifold and clipped them on. No cutting, flaring, or $60 of adapters needed.

The LT1 uses one knock sensor per cylinder bank to retard timing if needed. On higher-mileage engines, it is possible for piston slap or noisy valves to trigger the knock sensor and thus lose power. The LT4 sensors (Napa PN DKS206) and module (GM PN16214681) are less sensitive than the stock LT1 sensors. Just tell the parts guys that you want knock sensors for a '96 Grand Sport Corvette.

Since we had gone this far, it wasn't a far cry to address the oil pump. When we drove the car, it seemed ok, but we were already replacing the oil pan gasket. So we decided to put in a new oil pump (GM PN 1255884) from Summit Racing. If you have a chance, no matter what engine you are working on, you should try to get one of these Fel-Pro oil pan gaskets. They feature a solid core coated with rubber or silicone with anti-stick properties. They won't crush, and they will usually come off when you need to drop your oil pan again.
If you are conscientious about tune-ups and things like cap and rotor changes, you'll hate this engine. While you can still do plug wire changes, a cap and rotor will require a bit more work. In all, once the engine is in the Jeep you will need to remove the smog pump, water pump, serpentine belt, radiator, and break out the pullers because even the harmonic balancer needs to come off. Since our water pump was leaking, we decided to get it over with since we were in there.

The Caprice we pulled the engine out of was an early '94 car, so we ordered the '94 1/2-and-earlier distributor from MSD. With O-ring seals, better venting, a beefy one-piece billet base, and a more sensitive optical pickup, it is the Optispark to have. Once we got our original out though, we noticed that the way it indexes to the cam is different. On the left is our old unit, which is a '94 1/2-and-up distributor (MSD replacement PN 83811). On the right is the '94
1/2-and-earlier model (MSD PN 8381). The car we pulled the engine out of got a crate engine in '02 (thanks LAPD), so the crate LT1 had the updated distributor even though our car should have had the early one. Do yourself a favor and pull yours to look before ordering.
We knew we needed plug wires, so we went back to the MSD catalog for an 8.5 mm plug wire set (PN 32159) and a Blaster coil (PN 8226). The stock LT1 cap relocates the plug wire terminals to the correct side of the engine which places the conductors real close together inside the cap. Running a higher-voltage coil can lead to arcing across terminals. Since we are running the MSD distributor which is designed to prevent that, we aren't worried.
The hoses to the radiator gave us no small amount of problems. We ended up splicing together part of the original Caprice upper hose and part of a new lower hose for an F-body car with an LT1 (Napa PN 8901). Basically we needed a 90-degree bend and a 135-degree bend with about 5 inches between them to get from the water pump to the Advance Adapters aluminum upper radiator outlet.

We got ourselves into this because of the old water pump. We knew it was leaking, but once we got a look inside, we figured the guy we bought the car from was running straight tap water through it. We flushed the block as best we could, and we'll put a coolant flush through it once it's running. For now, we went back to Summit for a new AC Delco high-volume water pump (GM PN 12527740) to combat overheating in low-speed desert heat.
For the lower hose, we used the F-body one again and cut about one inch off of it so it would fit. That smaller green hose is a "steam hose." The LT1 has a port on the back of each head that is designed to let air pockets (steam) out of the heads to prevent hot spots. The steam lines then travel to the throttle body to warm up the air/fuel mixture on cold days and then to the radiator. Some delete the steam lines through the throttle body, but since the lines weren't leaking and this Jeep will see snow and ice, we let them be and ran the steam line from the throttle body to the radiator. We cut about 5 1/2 inches off of the stock silicone Caprice line.
Most guys ditch the huge plastic home plate, but we were making due with what we had, and we think having it there will make the smog demons go easier on us. We used the stock Caprice "home plate" and rubber 90-degree elbow. Most guys just put the Mass Air Flow sensor on that, but it was rubbing hard on our upper radiator hose. So we used the upper portion from an old AEM intake, the stock Caprice rubber MAF collar, the MAF itself, and then an AEM dry-flow filter. It is important to stay away from oiled filters if you have a MAF on your engine, as the delicate sensor element is sensitive to oil.
To cap it off we used a Stant Lever-Lock radiator cap. The black line you see is the coolant overflow line, which can be plumbed back into the stock Jeep overflow or wherever you want. We used two brass fittings to make everything work. The fitting for the overflow is a 1/8-inch NPT to 1/4-inch barb and the green steam line from above goes into the radiator via a 1/4-inch NPT to 3/8-inch barb.