 Alan Huber
Art Director
Alan Huber
Art Director
With the latest Truck Avengers from Holley, virtually any engine size from six cylinders all the way up to monster big-block V-8s can be accommodated. Available to flow air at 470, 670, and 770 cubic feet per minute (CFM), there's one that's just the right size to feed your 4x4's mill.
All Truck Avengers, no matter the size, share the same modifications that make them work as slick in the back country as a pair of freshly-waxed skis. Special metering blocks, vent tube, and spring-loaded needle valves control fuel slosh and spillover during wacky-angle off-road maneuvers. Flooding, stalling, and hesitations are gone in climbs of up to 40 degrees while 30-degree sidehilling and descents are possible if your truck doesn't roll first.
We've put together a few photos with installation and tuning tips for setting up a new Truck Avenger. And for the younger guys, there's no reason to be afraid of a fuel atomizer that doesn't need a PC and umpteen sensors to tune and run. Though carburetors may be old-school to even old guys, believe us, we've used the Truck Avengers and they haven't let us down!
* Torque the mounting nuts to 60-80 in-lb progressively in a criss-cross pattern. Don't overtighten the hardware or you run the risk of warping or cracking the carb's baseplate. You might need to purchase longer mounting studs for your intake manifold if you run a thicker base gasket and/or spacer.
* Connect the throttle and automatic transmission kickdown linkages (or cables). Don't forget a decent return spring and check that it all operates smoothly without sticking or binding. If your original throttle cable won't reach, take a look at the universal cable kits such as those from Lokar Performance Products.
* Connect all the vacuum accessories including power brakes, PCV, ventilation and emissions controls, and the distributor advance to either the manifold port or the timed-spark port. Try each one and see which gives your setup the smoothest idle and best advance performance.
* Hook up the electric choke to an ignition-switched, 12-volt source. Don't use the distributor side of the ignition coil since it might only provide 7-9 volts after the engine has started. Check the source you choose with a voltmeter to be sure it carries 12 volts.
* Finally, attach the fuel line or hose, checking to be certain that it is clear of any debris. Truck Avengers come with a screen-type filter in the fuel inlet but you should add a larger in-line filter for a little extra insurance in the dusty conditions found when wheeling.
* The Golden Rule The most important rule of carb tuning is to check that your ignition system is working and adjusted correctly first. Most driveability problems come from a weak, improperly timed, or poorly adjusted ignition than from a carburetor, especially a brand-new Truck Avenger! Holley wet-flows and calibrates each carb before shipping and you will probably not need to tune them at all except for maybe setting the curb idle speed.
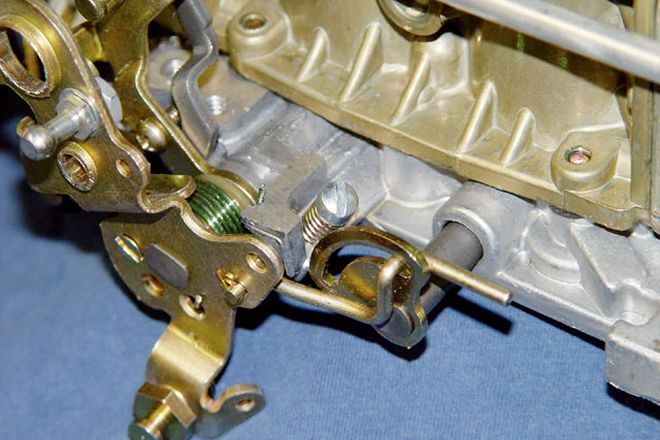
 Curb Idle Speed Adjustment Screw
* Curb Idle Speed Adjustment Crank the engine over a little to fill the float bowls with gasoline, then give a couple of quick pumps of the throttle, and start the engine. Turn the curb idle speed screw if necessary to keep the engine idling. Allow it to reach operating temperature and then readjust the curb idle again to get a nice slow and smooth idle.
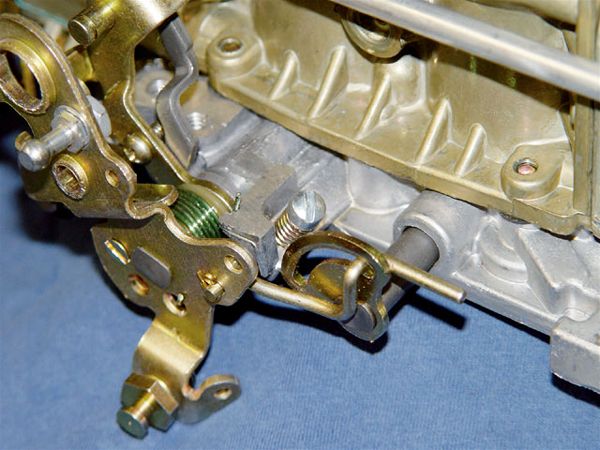
 Fast Idle Speed Adjustment Screw
* Choke Adjustment Again, most of the factory Holley settings will probably work for your 4x4 just fine out-of-the-box, but if you want to tinker and fine-tune things keep reading. The fast idle speed is adjusted by using a 1/4-inch wrench on the screw below the choke housing. Turning the screw clockwise increases the rpm, while counterclockwise, of course, decreases rpm. Try for a final speed of about 1,500 rpm. By loosening the black plastic choke housing you can adjust the duration of the choke. If you want the choke to stay on longer, turn the housing counterclockwise. Turn it clockwise to have choke operation end sooner.
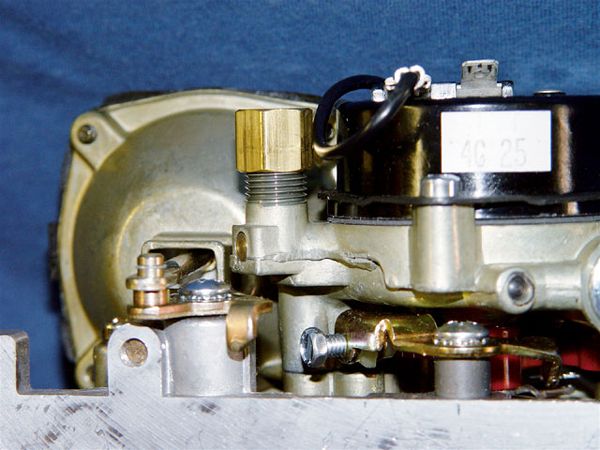
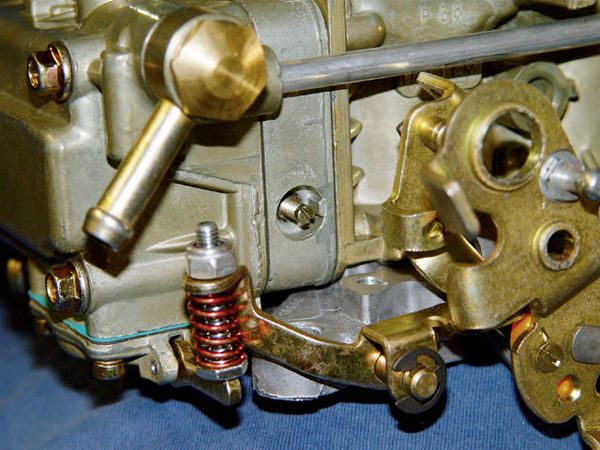
 Timed-Spark Advance Vacuum Port
* Fuel (Float) Level Adjustment Holley includes a pair of clear plugs for the fuel level sight windows that allow you to see right in the fuel bowl. Using the fuel level adjuster, raise or lower the float so that the fuel level is just at the bottom edge of the window. Be sure to replace the clear plugs with the supplied brass plugs once you're done. Keeping a low fuel level is best for most off-roading. Just be careful and don't go so far that fuel starvation happens at higher engine speeds.
* Vacuum-operated Secondary Tuning Holley ships the Truck Avengers with a black-colored secondary spring installed and a silver-colored one in the box that allows the secondaries to open sooner. Most vehicles, especially heavier ones, should leave the black spring in place. Lighter-weight 4x4s might see a performance increase by using the silver spring. Removing the two screws on the vacuum secondary cap is all that's necessary to swap springs.
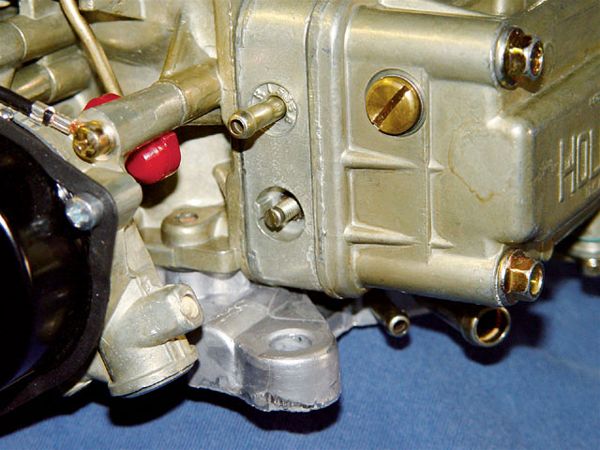
 Fuel Inlet
* Idle Mixture Adjustment If you're sure you want to mess around here, make sure you have a good, nondamped vacuum gauge (or a tachometer and a good ear). Turn each idle mixture screw (one on each side of the primary metering block) always the same amount and in the same direction (clockwise to lean the mix or counterclockwise to richen it). You'll be trying to obtain the highest vacuum reading and the smoothest idle. If you're using a tachometer and your golden ear, try for the highest idle rpm.
* Jetting Changing the main jets requires removing the fuel bowls and a screwdriver. It's almost too easy. But beware, many carbs have been rejetted by well-meaning enthusiasts to the point where they barely function and run poorly. Gasoline internal-combustion engines love about 14.7 parts air to 1 part fuel, which is also known as the stoichiometric (or chemically correct) ratio. Carburetors are usually factory-calibrated to this ideal at sea level. Unfortunately, much off-roading is at an altitude far above sea level. If you feel your 4x4 is running too rich (black smoke and loading up) in the mountains, try decreasing the jet size (in both the primaries and secondaries) one Holley part number for each 2,000-foot increase of altitude over sea level. It's a good idea to learn how to read spark plugs or purchase an exhaust-gas analyzer to find out how you're affecting your air-to-fuel ratio.
Carburetor Number Carb Size (CFM) Primary Jet Secondary Jet Pump Discharge Nozzle Primary Power Valve Secondary Diaphragm Spring R-90470 470 {{{57}}} 57 0.035 25 Black R-90670 670 68 89 0.028 65 Black R-90670-1 670 68 89 0.028 25 Black R-90670-2 670 68 89 0.028 25 Black R-90770 770 74 99 0.035 25 Black
