 Ali Mansour
Brand Manager, 4WD & Sport Utility
Ali Mansour
Brand Manager, 4WD & Sport Utility
As much as we enjoy to wheel, we equally relish wrenching on our Jeeps. It creates a sense of pride and accomplishment, as well as a clear understanding of how everything works. With that being said, sometimes working on our Jeep can be a real pain in the neck! Even with all the right parts, people, and time, things can get overlooked or need to be changed.
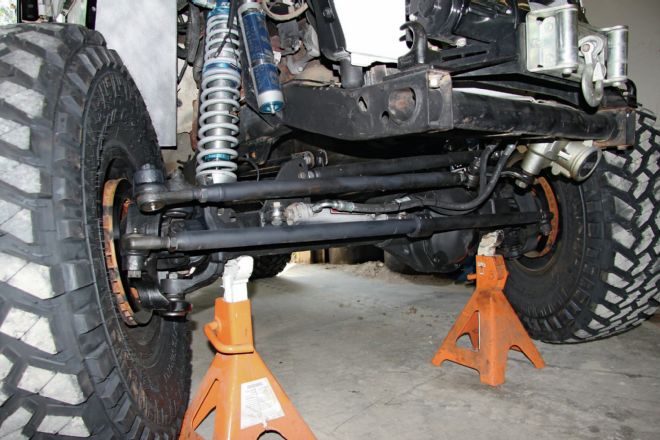
A great example is our ’97 Jeep Wrangler TJ’s steering system. Fit with a custom Dana 60 front axle, the custom crossover steering we previously fabricated made for some undesirable handling characteristics. Some of the challenges we faced when building the Jeep originally was keeping it low, while getting the most up-travel possible. Couple the low COG challenge with long steering links, a hydro-assist cylinder, and a track bar that comes ever so close to the crank pulley at full bump, and we had our work cut out for us.
Most of our current steering woes could be blamed on the length and mounting position of the draglink in accordance with the Jeep’s front track bar. Off by just a few inches, it didn’t take much to disrupt the geometry. The ideal configuration for the track bar and steering linkage is for both to be of similar or equal lengths and mounted in parallel. Having the lengths the same and the bars parallel will allow the system to cycle in harmony.
Fortunately, our ball-joint high-pinion Dana 60 front axle started off life under a ’99-’04 Ford Super Duty truck. While kingpin Dana 60 axles have taken up much of the market share when it comes to aftermarket axle parts, the late-model ball-joint 60s have more than caught up with aftermarket support. To get our steering setup more in line, we decided to go with a crossover steering knuckle kit from Ujoint Offroad. Ujoint is known more for its solid-axle van conversions, but the company also has some components that work great for Jeep projects. Ujoint’s ball-joint steering knuckle kit is a great example of a steering solution that fits a wide range of rigs.
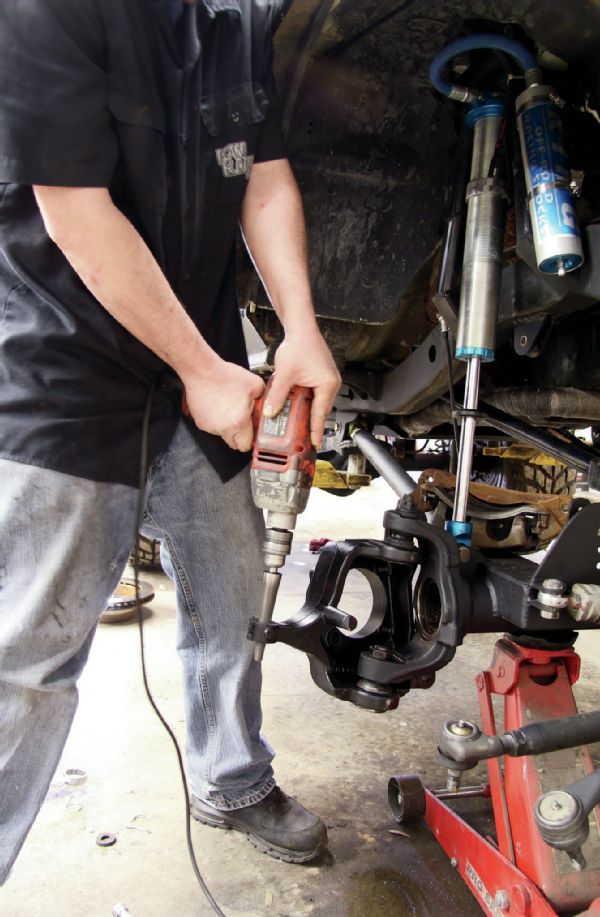
To install the setup, we borrowed some shop space from our local off-road shop, Low Range 4x4 in Wilmington, North Carolina. Swapping the knuckle only took a couple of hours, but we did need an array of tools. While having to go back to rework something isn’t the most enjoyable, it’s all part of owning a modified Jeep.
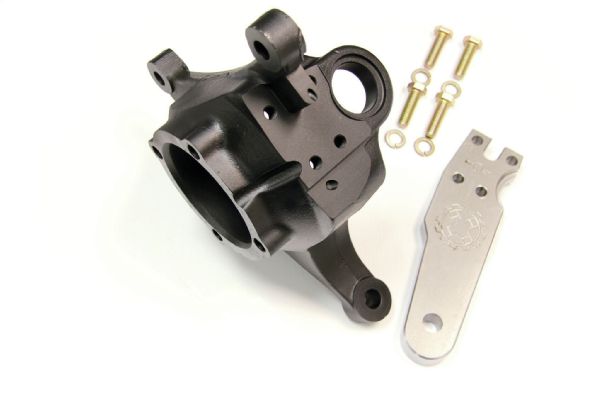
The Ujoint Offroad steering knuckle kit includes a machined passenger-side steering knuckle, steering arm, and four Grade 8 bolts. While the arm ships with a tapered hole for an above mount tie-rod end, we asked for ours to be shipped blank. This was so we could mount our draglink from the bottom. Mounting the joint below the arm helped with frame clearance, which can be an issue with crossover steering systems and low lift heights.
Running the draglink directly to the top of the knuckle creates an immense amount of pressure and leverage. To help distribute these forces, Ujoint has the knuckle and arm keyed.
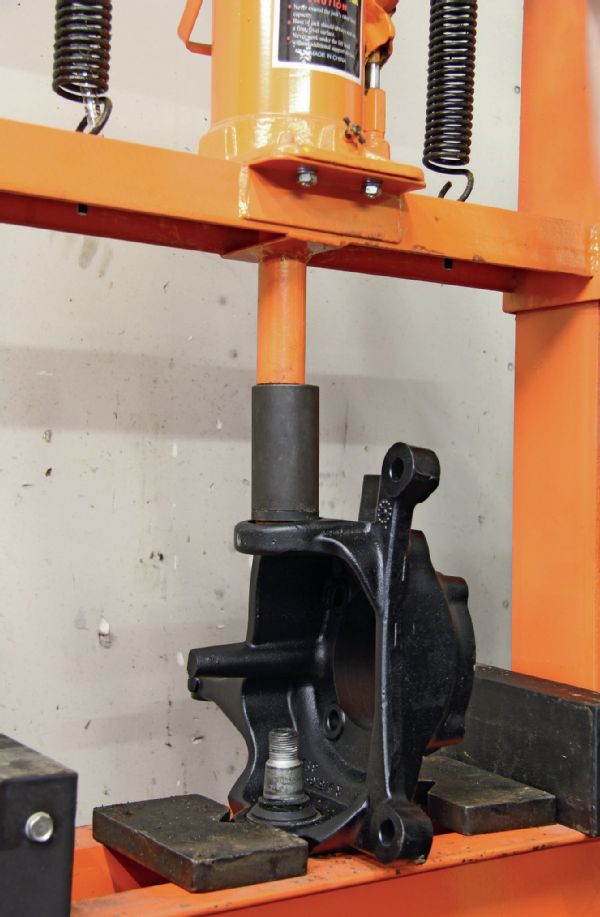
Since our Super Duty-sourced Dana 60 is a ball-joint axle, we used a press to install our new joint set. While heavy-duty ball-joint kits are available, the stock joints are more than capable of supporting our relatively light TJ.
We are using offset GM 1-ton tie-rod ends, which required us to ream the steering knuckles for a larger taper. When using a reamer, always remember to drill a little at a time. Paint marking a spot on the reamer can also work as a guide to make sure you don’t go too far.
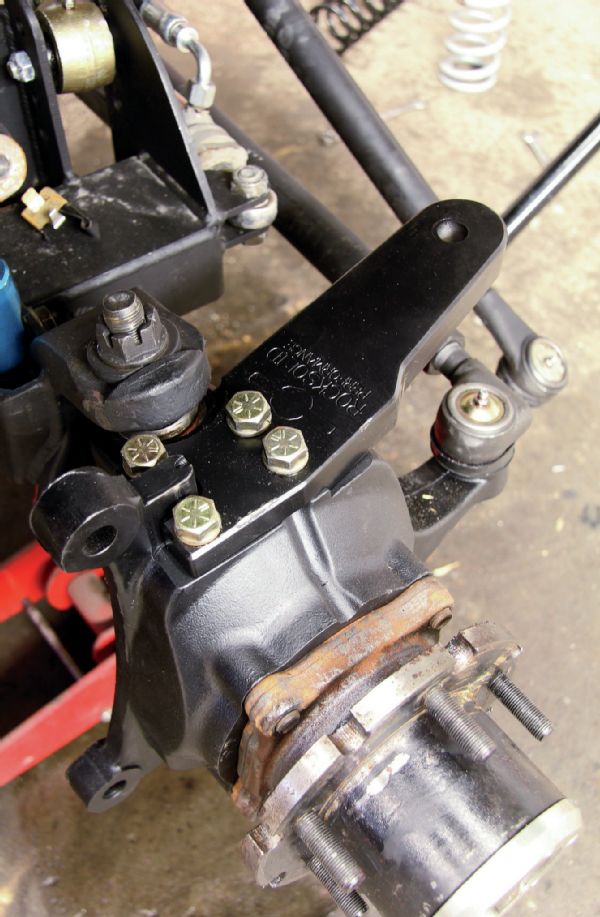
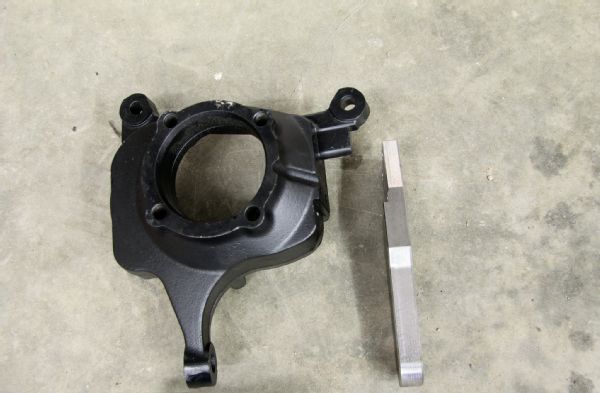
The sweep of the new steering knuckle is in line with the lower tie-rod mount. Since our draglink attaches from the bottom, we reamed our new knuckle in a vice before installing it on the Jeep.
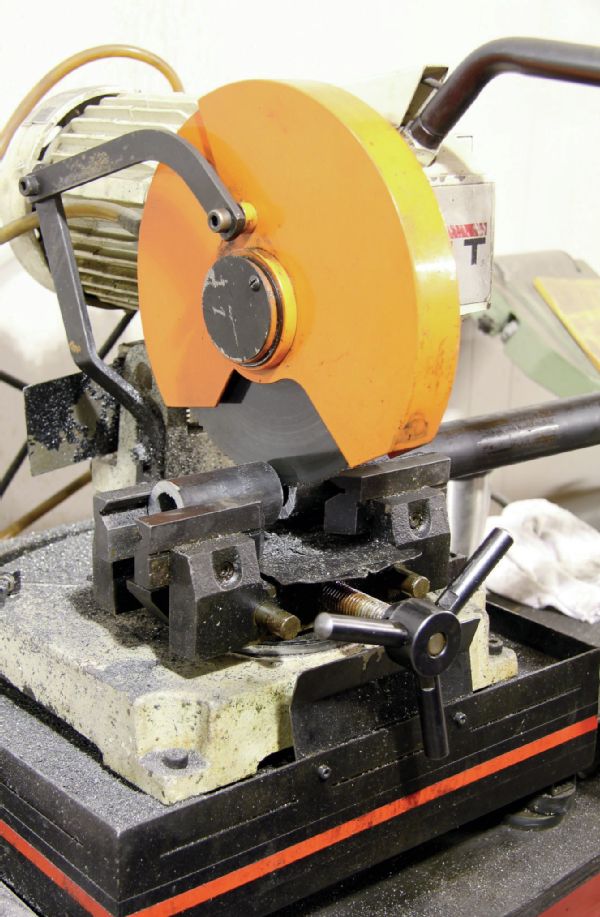
Our draglink needed to be cut down in order to accommodate the new knuckle. We are using 11⁄2-inch, 0.250-wall DOM tubing, which we placed in the cold saw to create a smooth and even cut.

We used a MIG welder to burn the steering insert in place. Since the Jeep sees plenty of moisture and mud in the southeast, tie rods make for a better and more durable steering investment over spherical rod-ends.
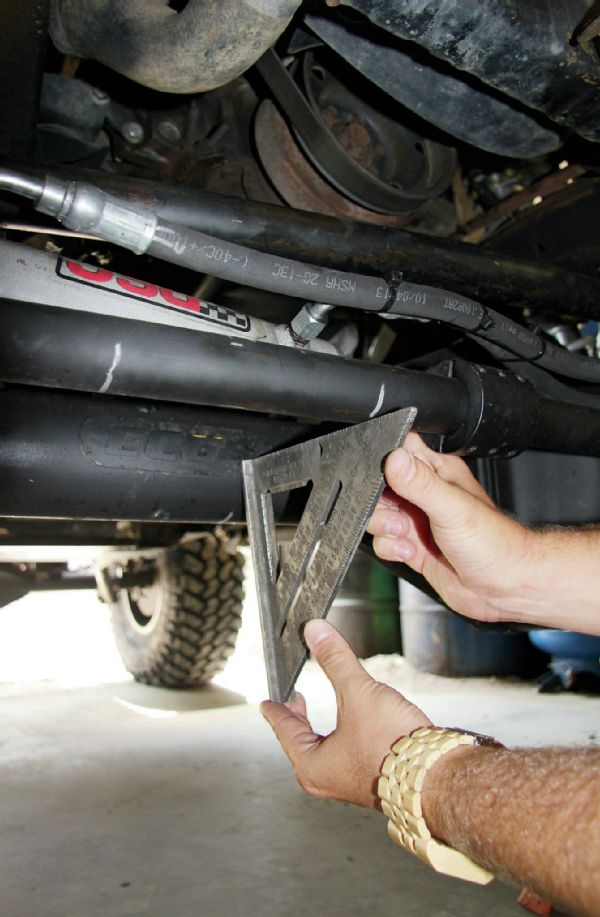
Ram Measuring
Since we didn’t have to change our tie rod, we were able to keep our PSC Motorsports hydro-assist cylinder in place. One question we field frequently is how to make sure that you have the correct cylinder length. The process for measuring is very simple: With your steering links attached, turn your wheels all the way in one direction. Using a right angle, make a mark on the axletube and tie rod. Next, cycle the steering in the opposite direction. With the right angle still in the same spot on the axle, mark the new position on the tie rod. You’ll then measure between the marks you made on the tie rod and that will give you the stroke you need for your ram.