Armed For Duty II 2009 Land Rover LR3 - Four Wheeler

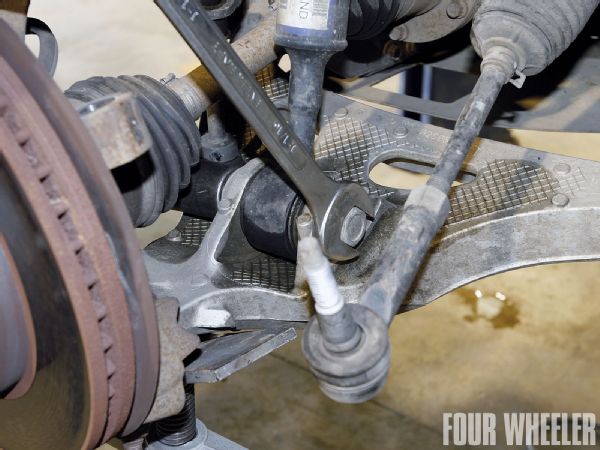
Saavy readers will remember the September '09 issue, where we first showcased some hefty bolt-on upgrades for a 2000 Land Rover Discovery. This time around, the park rangers at Hollister Hills turned us loose on the newest member of their fleet: A 2009 Land Rover LR3 loaned to the park by Land Rover North America. Rangers tell us that this LR3 has proven to be the most versatile vehicle in their fleet-with its nimble size and terrain-conforming air suspension, it simply gets the job done better than most other factory 4x4s can. While that's no surprise to us, we were astonished to learn that the LR3 is often used to patrol the hard-to-reach "motorcycle-only" portions of the park, simply because the rangers don't have to worry about it getting stuck on the tight and often overgrown trail access roads. They also tell us they wish all of their patrol vehicles came with such surefooted capability. It's true-right out of the box, Land Rovers are quite capable in the dirt. However, when subjected to a rigorous regimen of trail work, as is the case with most of Hollister's fleet, even the LR3's factory-engineered trail attributes can be improved by adding a combination of bolt-on products designed to add function and utility to the sharp-looking LR3. Check it out.

2009 Land Rover Lr3 before Photo 31810983 Before: In stock form, this Land Rover might spank the regular mall-cruising luxury SUV. For Hollister Hills, this stocker's capabilities were tailored and improved to prepare it to meet the intense demands put forth by rescue operations in remote areas.

Disco Update
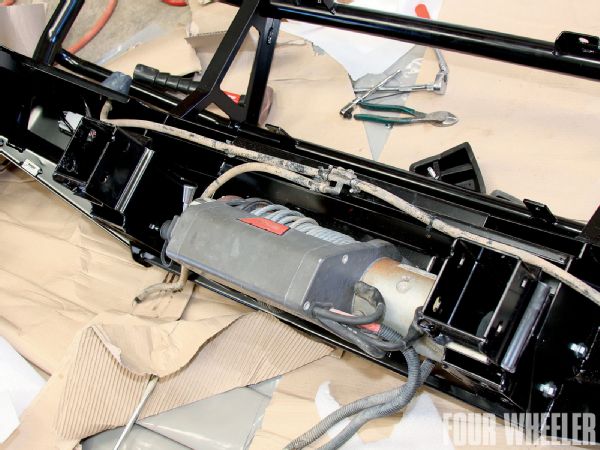
We goofed: In the September 2009 issue, we showed you a Warn XD9000i winch as it was installed inside an attractive ARB bumper on a 2000 Land Rover Discovery. What we didn't know at the time was that ARB recommended a specific style of winch for their bumper system. Mistakenly, we installed a winch that was already on the vehicle and was never intended to work with the ARB bumper. Subsequently, we found it difficult to access the remote control plug and winch engagement lever. Later, the mistake was pointed out to us. Had we read the instructions more closely, we would have found ARB's specific recommendations to use a winch with a remote-mounted solenoid pack, like the 9.5 xp shown above. On that note, we wanted to update everyone on the Discovery upgrades shown in Part One of this series; the vehicle is still roaming the many trails of Hollister Hills each and every day. We're told that the newly installed upgrades have performed flawlessly and without issue thus far. The upgrades have also given the vehicle a newfound favoritism among park rangers. As for the LR3s upgrades, check out the next edition of "Armed for Duty" in the coming months.

2009 Land Rover Lr3 discovery Winch Photo 31811097 PhotosView Slideshow To start, Hollister's head mechanic, Gilbert Mayorquin, positioned the vehicle securely on a lift. Here you can see Mayorquin beginning the process of removing the front plastic fender flares. This entailed releasing several plastic clips and removing two small screws, one of which is hidden and only accessible from inside the headlight opening. With the flares removed, Mayorquin focused on removing the factory plastic bumper from the vehicle. A series of small bolts and plastic clips retain the bumper to the core support. Once these were located, the process was very easy to complete. After the bumper was removed, the underlying collision brace was unbolted from the chassis. This allows placement of the new Rovertym bumper brackets where each frame rail terminates. Next, each bumper bracket was mounted to the vehicle. These brackets were very stout and enable a solid attachment point for the new all-steel bumper. Due to space limitations, the windshield washer reservoir had to be relocated to a space under the hood. Here you can see Mayorquin disassembling the unit. With each mounting bracket loosely attached to the chassis, Mayorquin attached the bumper to the vehicle. Next, he checked to ensure proper bumper alignment before tightening up each of the 18 anchoring bolts. PhotosView Slideshow We ordered a Land Rover-specific Warn 9.5 xp winch for this particular build. This is the same winch that Land Rover offers through its dealer network. The main difference between this specific model and a standard 9.5 xp is in the wiring setup. The Land Rover version has a separate solenoid that enables the winch when the remote is connected to the plug, thus eliminating any possibility of unintentional operation while unattended. This winch is rated at 9,500 pounds and features a high-output parallel series-wound winch motor that's said to be the most durable in the industry. We like the fact that this particular winch has the second fastest fully-loaded line speed Warn model (7.6 feet per minute at 9,500 pounds of rated load). With the new winch mounted securely inside the bumper, Mayorquin turned his attention to the factory fender flares. Due to the width of the bumper, each front fender flare required some trimming to fit. To do this, Mayorquin held the flare in place and marked off where each needed to be cut. Next, using a pneumatic-powered cut-off wheel, he carefully trimmed off the forwardmost portion of each factory flare. Once trimmed, the flares were reinstalled on each fender. The trim job only removed two of the attachment points on each flare, leaving several other plastic snap-clips and two screws in each to secure them to the vehicle. To finish off the look of the bumper, as well as to add some much-needed lighting for rangers who sometimes respond to calls in the park at night, we mounted a pair of Warn SDB-160HB driving lights. These lights are trick because they have two separate beam patterns built right into each lamp. The first pattern is a driving light, offering up to 410 feet of wide-angle illumination-perfect for slow-speed late-night search and rescue operations. The second beam pattern is a 100,000-candlepower spot-type pattern intended for lighting upwards of 770 feet in front of the vehicle-ideal for rapid-response night driving scenarios. We like the fact that these lights come with a complete plug-and-play wiring harness that makes installation a snap. We also think the included control switch with LED feedback is pretty cool looking, too. The Rovertym winch bumper came with bolt-on 3-ton extraction points that will accept a standard 3/4-inch shackle. Durable tow points such as these are absolutely essential for trail service. Here you can see how Rovertym's LR3 winch bumper helps to protect the exterior sheetmetal-every bit as wide as the vehicle's outside-most dimensions, it should, in theory, be the first point of contact when the going gets tough. Notice that the factory fog lamps are retained in the Rovertym bumper-another finishing touch we like. Once the bumper project was completed, we moved on to what Rovertym calls their "lift-kit-in-a-bag for LR3s." Essentially, these small plastic tie-rods enable the factory-equipped air suspension to run in the two-inch-over-stock position at all times. This effectively and affordably lifts the vehicle enough to clear a slightly larger tire, or in our case to improve ground clearance over stock.
As you can see here, the Rovertym LR3 suspension sensor tie-rods are slightly longer than the factory units. They work by fooling the factory computer into thinking the vehicle is sitting two inches lower than stock in the neutral position. The vehicle's computer automatically corrects the problem by pumping air into each of the vehicle's four air springs until the appropriate ride height is achieved. Here you can see the tie-rod installed on one of the four suspension sensors. It took us less than ten minutes to install these little devices, and the only tool we needed was a small 90-degree pick to aid removal of the factory pieces. The new tie-rods simply press on by hand-truthfully, the easiest lift kit we've ever installed. Rovertym informed us that these will also work for the Range Rover Sport model as well. Before: This is the measurement we took prior to installing Rovertym's lift-kit in a bag for LR3s. After: As you can see, two full inches of ride height were realized after the installation.
After: Equipped for self-extraction along with a 2-inch increase in ride height, this LR3 should hold its own and keep park rangers moving through muddy terrain and over rutted trails while on patrol.