 John Cappa
Former Editor, Four Wheeler
John Cappa
Former Editor, Four Wheeler
We all tend to take shortcuts and fix things the way we always have, but sometimes those shortcuts and ingrained methods are wrong and can make your 4x4 life more difficult in the long run. It doesn’t matter if you’ve been doing it wrong for years or have only just started your bad habits; it’s easy to change once you realize there is a better way. We compiled 10 of the more common mistakes made by off-road enthusiasts when working on and operating a 4x4. Here is what you should and shouldn’t be doing.
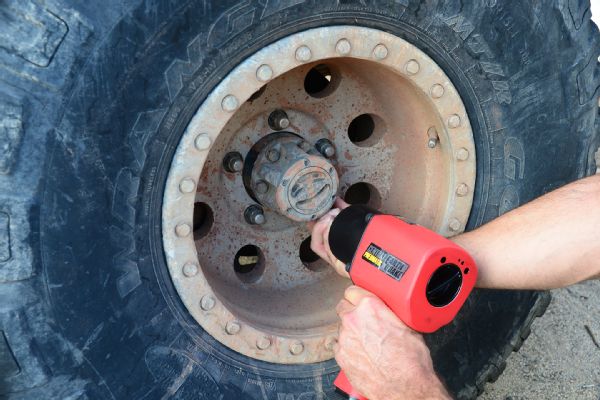
1: You Lug Nut
When was the last time you tightened your lug nuts in a star pattern or actually used a torque wrench to seat them properly? Most of us simply bust out the impact gun, nail down a couple lug nuts until the wheel is seated, and then go to town gunning down the remaining lug nuts. Nine times out of 10, you’ll never have an issue. It will be that one time when a wheel sets itself free on the highway at 60 mph that you’ll have the urge to do it right. Lug nuts should be slowly tightened in a crisscross star pattern and torqued to the proper specification. The proper torque will depend on the vehicle. You can find the exact torque for your 4x4 on the Discount Tire (discounttire.com) website. In most cases the torque spec will be based on the following wheel stud sizes:
Lug Size = Lb-Ft Torgue
7/16 = 55-65
1/2 = 75-85
9/16 = 95-115
5/8 = 135-145
12mm = 72-80
14mm = 85-95
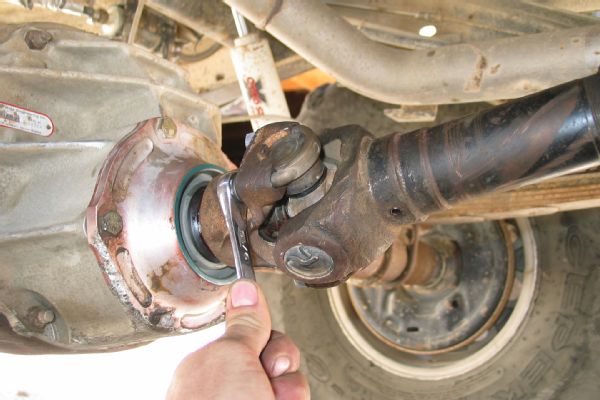
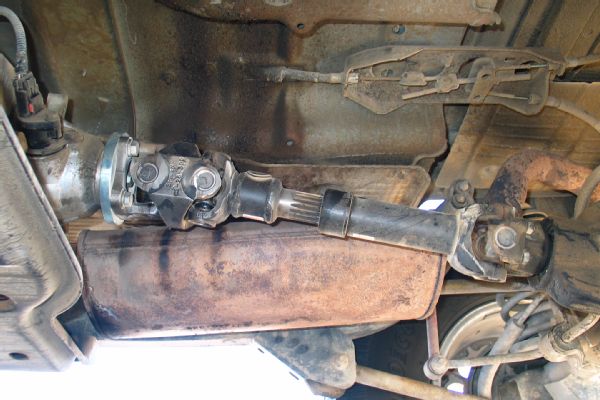
2: U-Joint Smasher
So you loaded your fresh new driveshaft and U-joints into the transfer case and axle yokes of your 4x4, and then proceeded to manhandle the wrench and unknowingly smash the U-joint caps by overtightening the retaining U-bolts. This will lead to shorter U-joint life, but it may not matter if you let your driveshaft bind at full droop and eventually break anyway. Since it’s difficult, if not impossible, to get a torque wrench on most driveshaft U-joint hardware, you have to go by feel. Use the shortest wrench you have that fits and choke up on the handle. You don’t need a ton of leverage to spin the hardware in place. It should be more than snug, but not Hulk Hoganed in place or kicked tight with your size 12 boot.
3: Wrong Luber
Every 4x4 has specific lubrication requirements for each component. If it has a dipstick, you probably check it at least once a year. If it has an inspection plug, you probably inspect it every couple of years. But when was the last time you crawled under your 4x4 and hit every grease fitting with a grease gun? Or better yet, used the proper grease for the correct application? Most experts agree that any grease is better than no grease at all. However, did you know that CV joints generally require a molly grease instead of common lithium-based grease? This would include the center joint of a CV driveshaft and CV-style axleshafts. It can be inconvenient to have two grease guns, but if you want to do it right, there is only one right way to do it in this case.
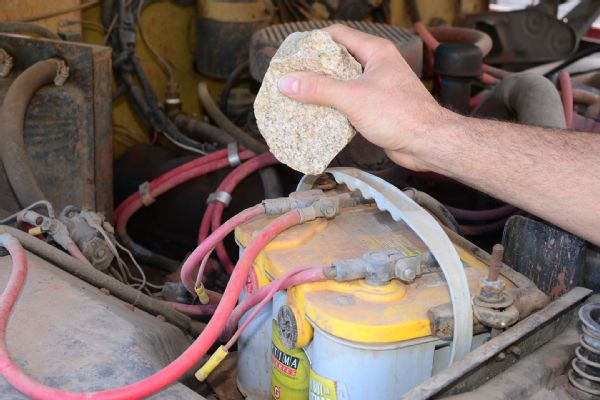
4: Battery Battering
When our 4x4s don’t start on the trail, we know the battery is fully charged, and we suspect the battery connections are loose, what’s the first thing we do? If you answered “Pick up a rock and start whacking on the terminals,” you get an A for diagnostics and an F for tool choice. What you may not know is that an automotive battery is a somewhat fragile component. Beating on the terminals can cause the internal lead plates of a wet-cell battery to become damaged. It can also cause an acid leak at the terminal itself. What does that acid do? Well, once outside of the battery it causes corrosion. Yeah, that’s the nasty white fungus looking stuff on the battery terminals and cables of your 4x4. That corrosion in turn causes a poor connection that leads to you beating on your battery with a rock. Use the correct tools to work on your battery. This does not include any hammering device. Clean the terminals regularly and coat them with a dialectic grease to prevent corrosion and ensure a good connection.
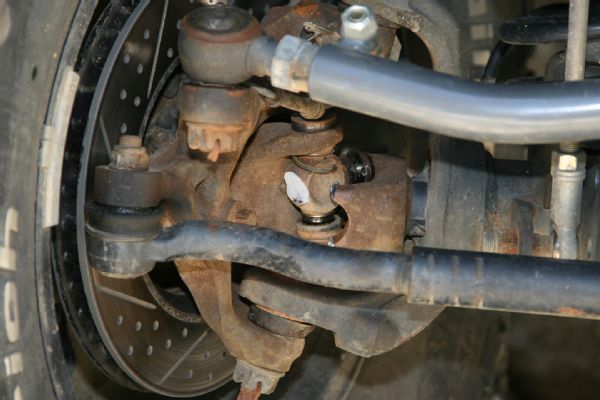
5: Steering Joint Murderer
Aftermarket front axleshaft and U-joint manufacturers absolutely love a driver that turns hard into an off-road obstacle or undercut ledge and stabs the throttle. These companies also love anyone who engages a front selectable locker when it’s not needed, especially when turning on hard, flat surfaces. One of the most failure-prone parts on a 4x4 is the front axle steering joint. In most cases, you should be babying them. Always keep in mind that the joints are considerably weaker when the steering is turned. If you have to attack an obstacle with the throttle, try to line yourself up so that the steering wheel is straight. Also, only use the front locker when you need it. Chirping the front tires and jay-hopping around nearly paved corners is really hard on many different components. Let the differential do its job. Considering all of this, it’s easy to see why a spool is a terrible idea for a trail 4x4 that needs to steer around corners.
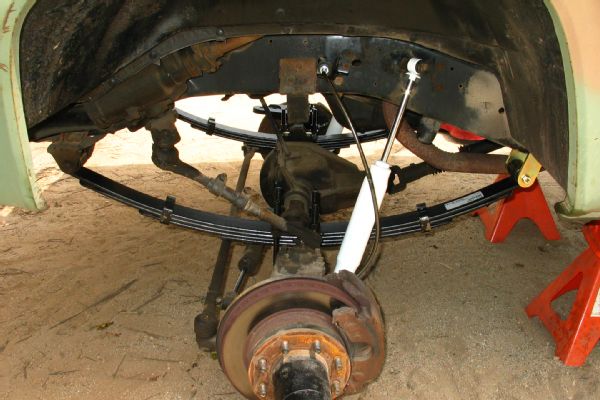
6: Suspension Strangler
So you and a few friends spent the weekend installing your new lift kit. You likely gunned all the suspension hardware in place with the vehicle raised in the air, and now you’re wondering why your 4x4 rides like crap. Well, when it comes to most rubber and urethane pivoting suspension bushings like those found on A-arms, leaf springs, shackles, shocks, and link arms, you shouldn’t hit them with the final torque setting until the 4x4 is sitting on the ground and supporting its own weight. Final torqueing of the pivot hardware with the suspension fully drooped can cause your 4x4 to ride and flex poorly. It can also cause the bushings to wear out prematurely.
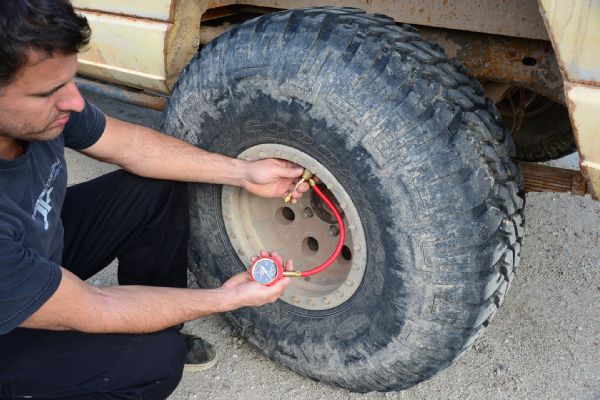
7: Overpressure Air
It’s estimated that 5 million gallons of fuel per day are wasted due to low tire pressure. We’re wondering why we don’t see these people off-road. The majority of 4x4s that we do see hitting the dirt have too much air pressure in their tires. With higher tire pressures off-road, these drivers sacrifice traction and comfort. How much you can air down for better off-road performance depends on the tires you’re using and the weight of your 4x4. In most cases, a smaller vehicle like a Jeep on radial tires can run 10-15 psi. With bias-ply tires, that same Jeep can easily run pressures down into the single digits. Those with significantly heavier fullsize trucks may need to experiment with different pressures until a good bulge in the sidewall is achieved.
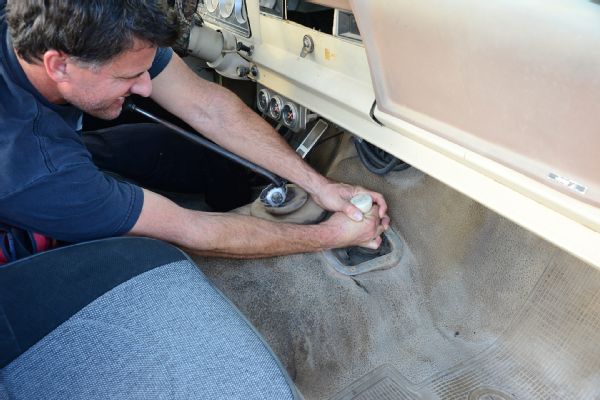
8: Ham-fisted Shifter
Only 15 percent of new car buyers in the U.S. would consider purchasing a manual transmission. Perhaps even fewer should. Many people cause transmission and transfer case damage and unnecessary wear by manhandling the shifters into gear. You should be easing them into gear. Manual transfer case shifters are notoriously finicky. Banging on the T-case shifter with all your weight could damage the shift forks or shift linkage, leaving you stuck. In most cases you can more easily shift a fussy transfer case if you slowly pull the vehicle forward or back just a bit while lightly leaning on the shifter.
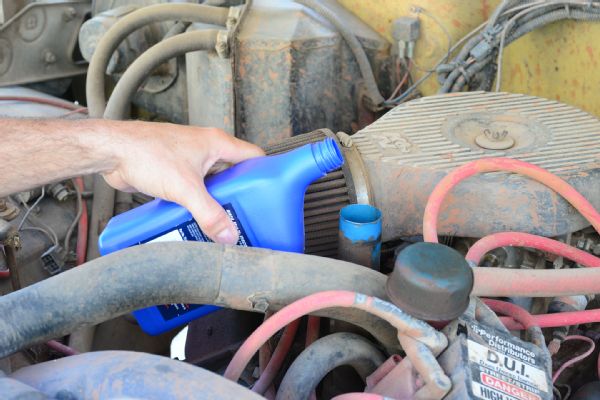
9: Oil Spiller
It’s hard to believe that most of us are misusing the typical plastic engine oil container. It’s understandable because engine compartments nowadays are incredibly cramped. There isn’t a lot of room to maneuver an oil bottle over the oil filler. Anyway, the container is less likely to glug and spill oil if you put hold the bottle as pictured. The same is true of antifreeze containers.

10: Beating Drums
Have you ever adjusted the drum brakes on your 4x4? In theory, you shouldn’t have to adjust them because they are supposed to be self-adjusting. However, the mechanisms inside can often become corroded or gummed up with mud. You do pull the drums off every so often to hose them out, right? It’s also not uncommon for someone to have reassembled them incorrectly during a brake job, causing the self-adjusting feature to not work. Once you’ve safely raised the vehicle and made sure your drums are clean and properly assembled, reinstall the wheels. Adjust the brakes using a brake spoon. You should feel only a slight drag as you rotate each wheel.