It’s no secret that traction is the cornerstone of any vehicle’s off-road prowess. If the engine’s torque doesn’t get to the tires, all the power and suspension upgrades in the world are of little benefit.
That’s why so many pickups, SUVs and Jeeps come with factory-installed locking- and limited-slip (LSD) differentials. But like any part that’s subjected to constant wear and tear, those traction-enhancing components wear out over time.
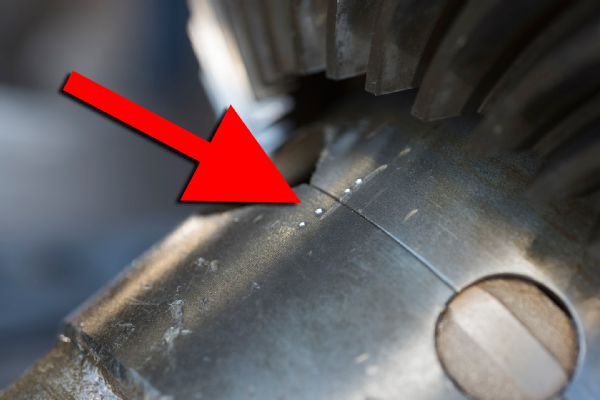
That’s especially true of clutch-type LSDs where the friction discs that provide some level of power distribution to the spinning wheel wear out and lose their effectiveness – often times without the owner even noticing. The Ford Traction-Lok (not to be confused with the Dana Spicer Trac-Lok) found under 1998-2010 Ford Super Duties running Visteon Sterling full-floating axles with rear disc brakes falls into that group.
Shawn Smalley, owner of Mobile Diesel Repair in Oakland, Oregon, says “By the time the factory posi’s in these older Super Duties that are being driven a lot off-pavement or frequently towing trailers reach 40,000-to 60,000 miles, they just aren’t working and need rebuilding. Otherwise, the Traction-Lok clutches are shot and the owner is basically running an open diff.”
The good news for owners of the workhorse Fords is the factory LSD can be easily rebuilt, restoring that traction ability that slowly slipped away over the miles and years. Removing and rebuilding the Visteon Sterling LSD is cheaper than replacing the unit with a new one and it’s easily manageable by anyone with a moderate amount of DIY skill, the most basic of tools, a torque wrench and a micrometer.
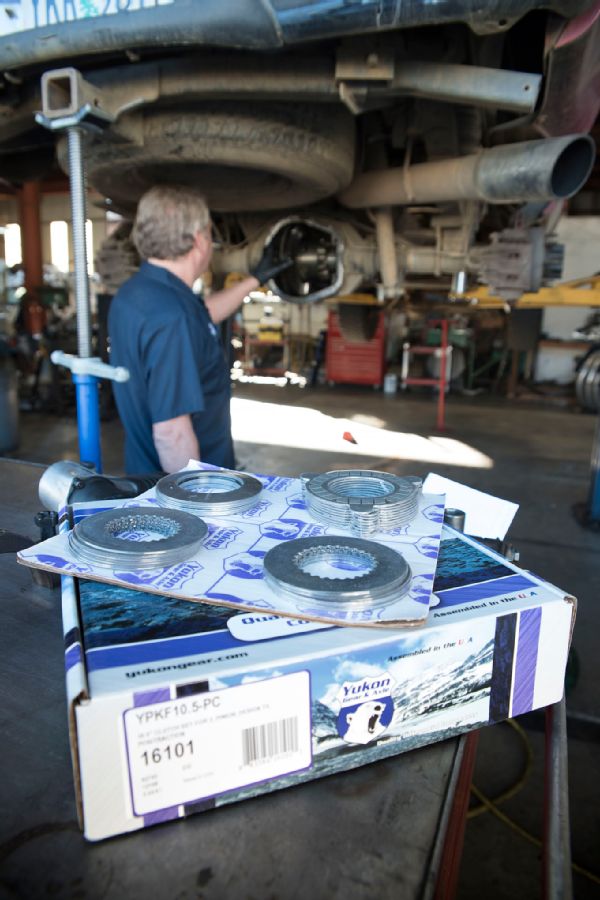
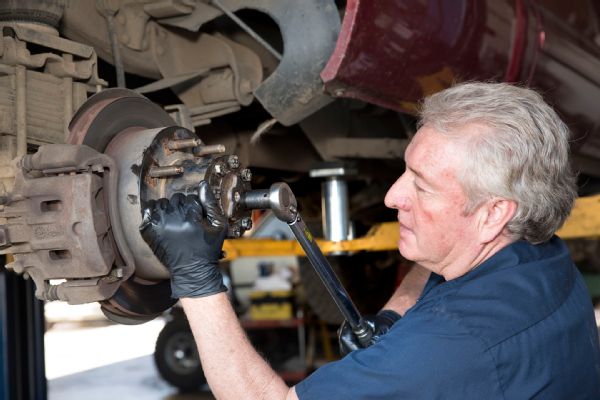
We looked over the shoulder of Mobile Diesel’s Ruben Villalobos as he went through the rebuild process on a customer’s 2001 7.3L Ford F-250 Super Crew 4x4 running the Visteon Sterling 10.5-inch, three-pinion rear axle. The truck’s limited-slip was in dire need of some TLC as indicated by the burned-clutch smell, color and viscosity of the rear diff fluid draining into the catch pan.
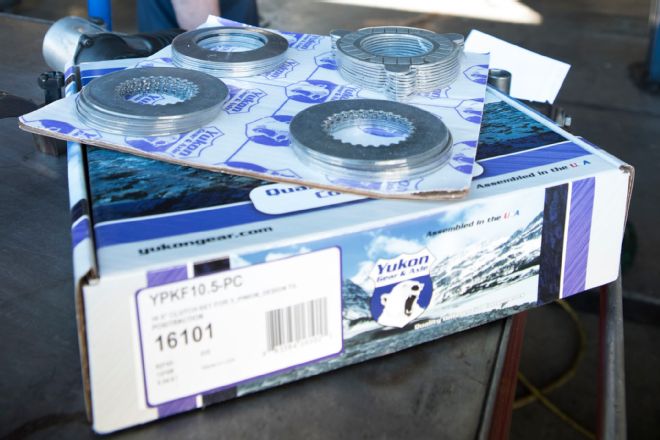
Yukon Axle & Gear’s Visteon Sterling 10.5-inch, three-pinion rebuild kit (#YPKF10.5-PC/$305), which includes new frictions, plates and shims, along with two 4-oz. bottles of Yukon’s friction additive took care of the parts needs for this rebuild.
The customer also stepped up to a die-cast aluminum aFe diff cover to provide better diff cooling for the heavy use he subjects his Super Duty to at work and on weekends towing a big toy hauler. The aFe diff cover will keep any metallic particulates confined to magnetic drain plug, and the aluminum fins help dissipate the heat a lot better than the OE Ford cover.
The nice thing about the rebuilding the Visteon Sterling Traction-Lok is by far the easiest and simplest of limited-slips to refurbish, taking the average DIYer less than four hours to do if it’s their first rodeo.
Here’s how Villalobos handled this 01 Super Duty’s Visteon Sterling 10.5-inch Traction-Lok rebuild to bring back traction like it had when it was new….
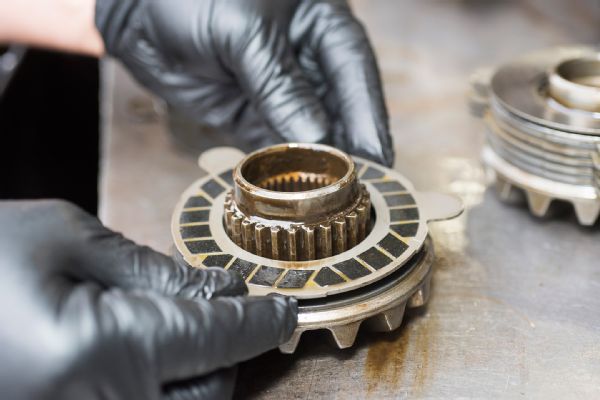
Yukon Gear & Axle kit (#YPKF10.5-PC) has all the parts needed to rebuild the Visteon Sterling 10.5-inch Traction-Lok in this 2001 Ford F-250 4x4’s rear differential.
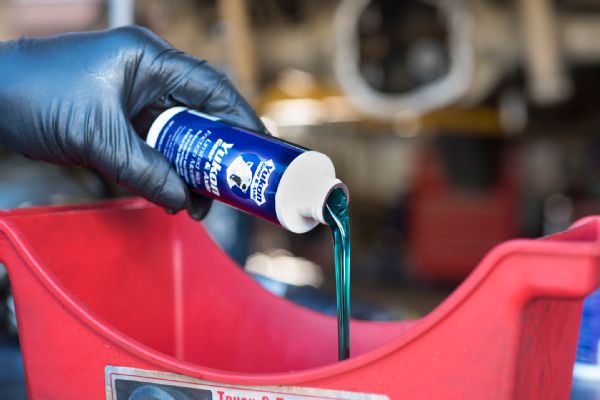
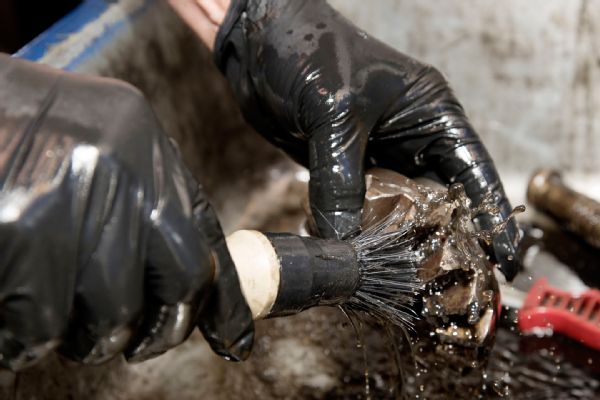
Two 4 oz. bottle of Yukon Limited Slip Friction Additive are poured into a small plastic container so the friction discs can be soaked prior to installation. Yukon recommends at least a 30-minute soak time.
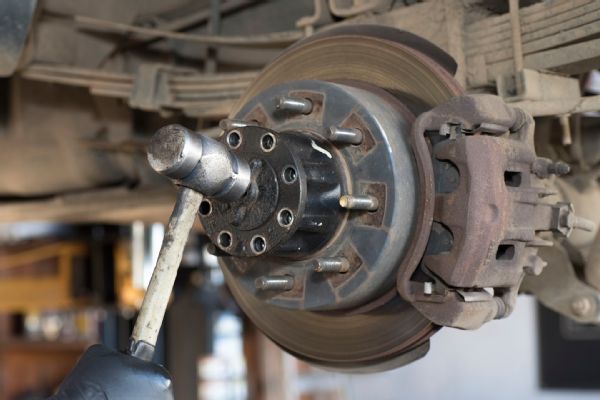
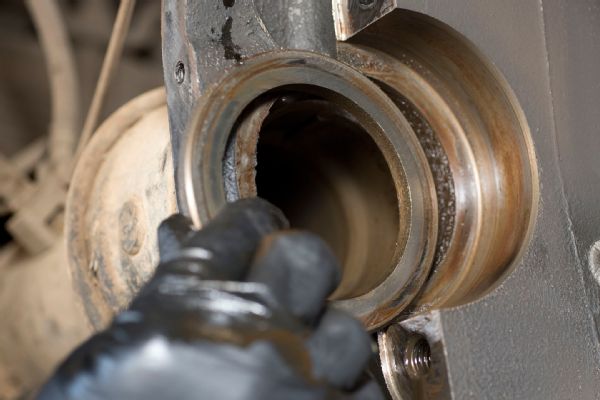
Eight ¾-inch bolts are all the hold each of the Ford Visteon Sterling full-float axles in place. Removing bolts and giving the axle a sharp rap with a hammer will pop the shaft loose from the housing.

Pull out the axle shafts, being careful not to damage the o-ring around each flange that keeps fluid from leaking out the axle tubes.
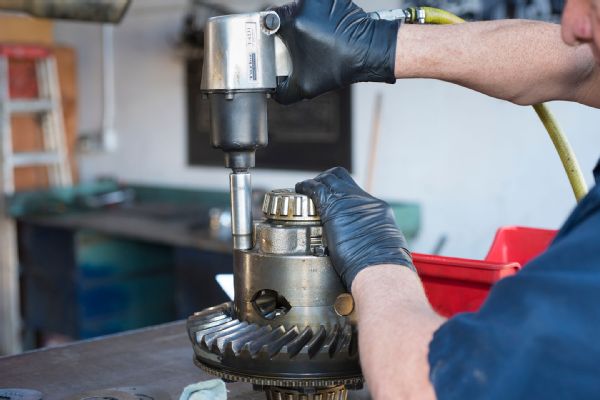
Remove the 13/16-inch bolts that hold the two carrier caps in place, then remove the caps that hold the differential assembly in the housing.
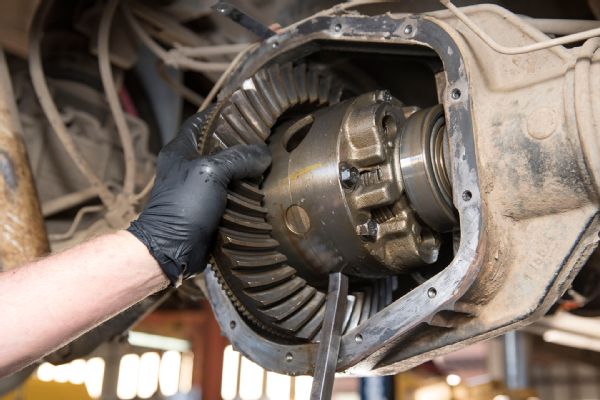
A long-handled screwdriver or small pry bar works best to work the diff assembly out from the axle housing. Note how the Visteon Sterling differential housing uses a two-piece case, while a Dana Spicer is one-piece.

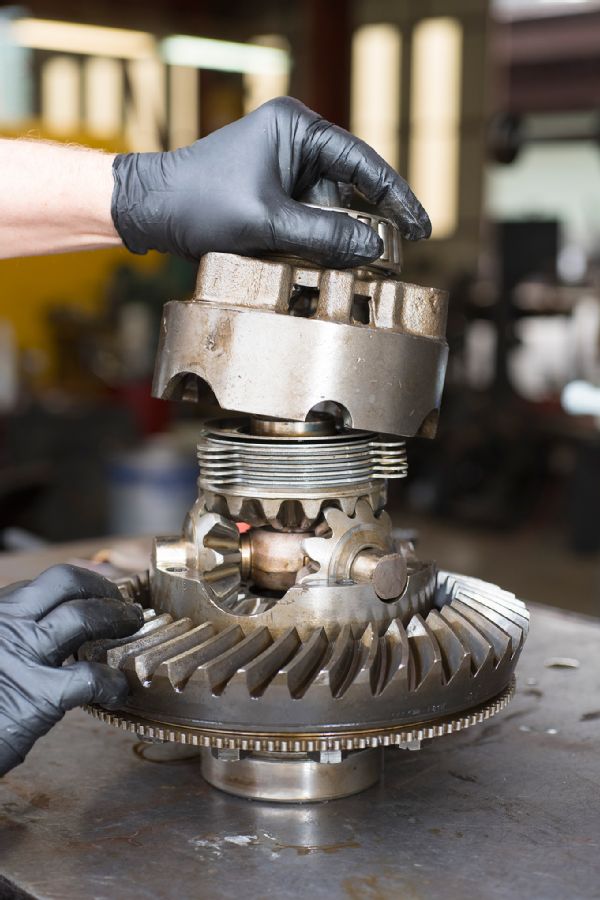
Ruben Villalobos flexes his muscles as he moves the Visteon Sterling 10.5 center section to the work bench. Wearing gloves designed for this type of work is a highly recommended.
Remove the shim from each side of the axle housing and place with the corresponding bearing cap for that side. Do not mix them up. The shims will go back in the same location to keep ring and pinion mesh same as it was before.
Keep the differential bearing caps, bolts, bearing races and corresponding spacer shims separated from the ones for the other side. These parts go back in the same location during the re-install process.

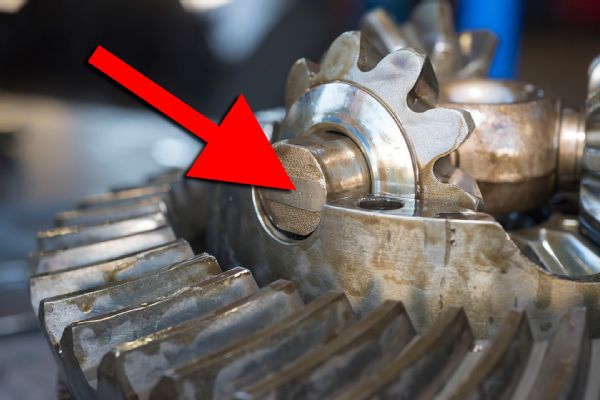
Before any disassembly begins, use a metal punch to mark the the Visteon Sterling 10.5’s two-piece differential case. This is critical as both halves must be put back in the same alignment during the rebuilding process.
Punch marks will help make sure case halves are aligned during re-assembly. Also mark one pinion cross shaft so it is also placed back in the same cradle from which it was removed.
Eight 14mm bolts hold the two case halves together. Remove them and set aside for re-use.
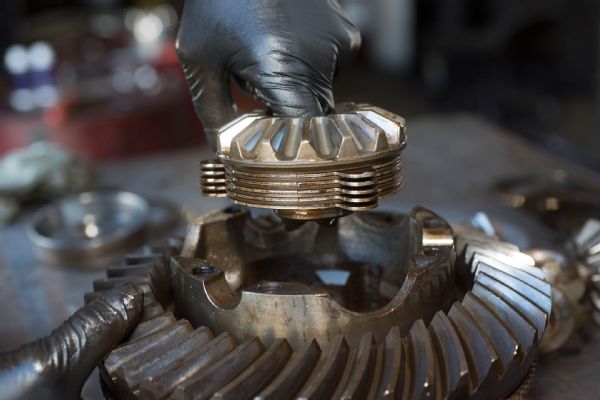
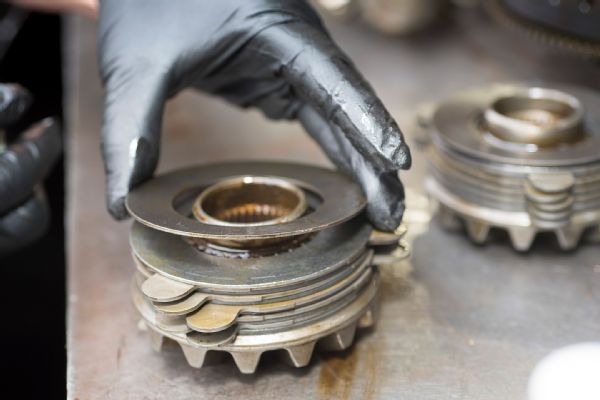
Carefully lift the upper case half from the differential assembly. Let the clutch pack remain in place. Set the upper case half aside to be cleaned.
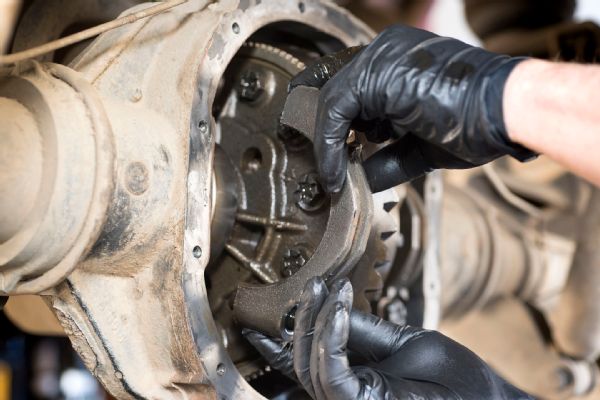
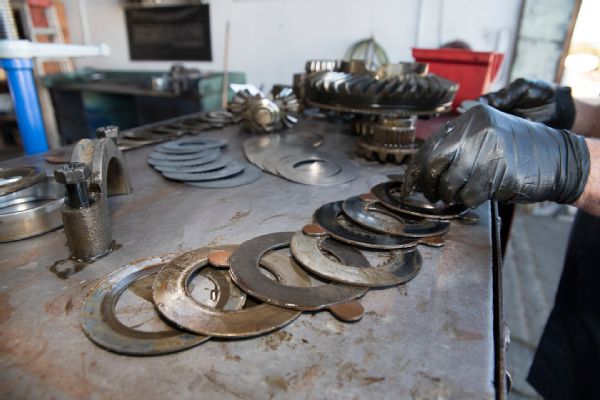
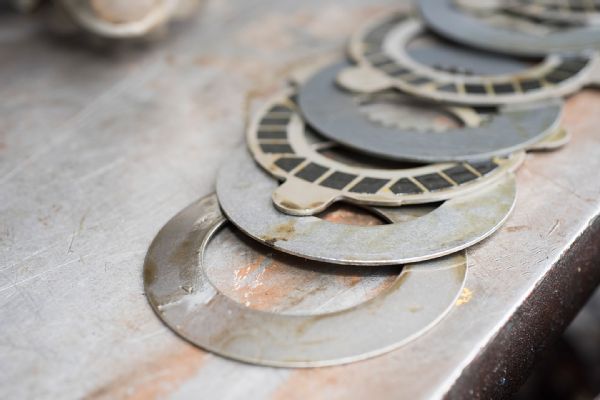
Lift the Traction-Lok clutch pack off the side gear. Then remove each plate and set on one side the work bench in the order in which they are removed. Do not mix them up as they are your reference for how the new plates will go back during re-assembly. NOTE: Don’t assume the clutch packs are in the proper order; they may have been rebuilt before and not assembled properly, which was the case in this truck!
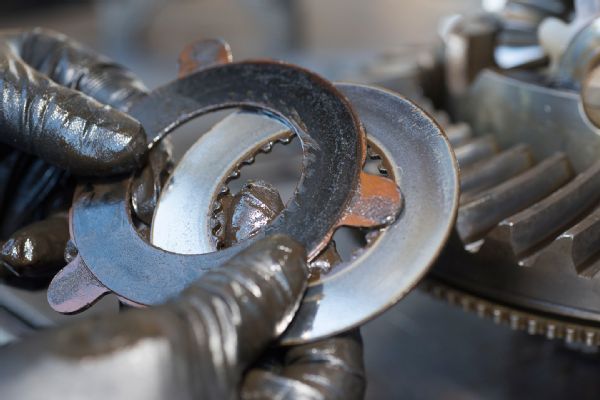
The smell of burned clutch was the result of the Traction-Lok friction discs (dark plate) in this Ford’s limited-slip’s two clutch packs being fried from doing burnouts and just hard use all around.
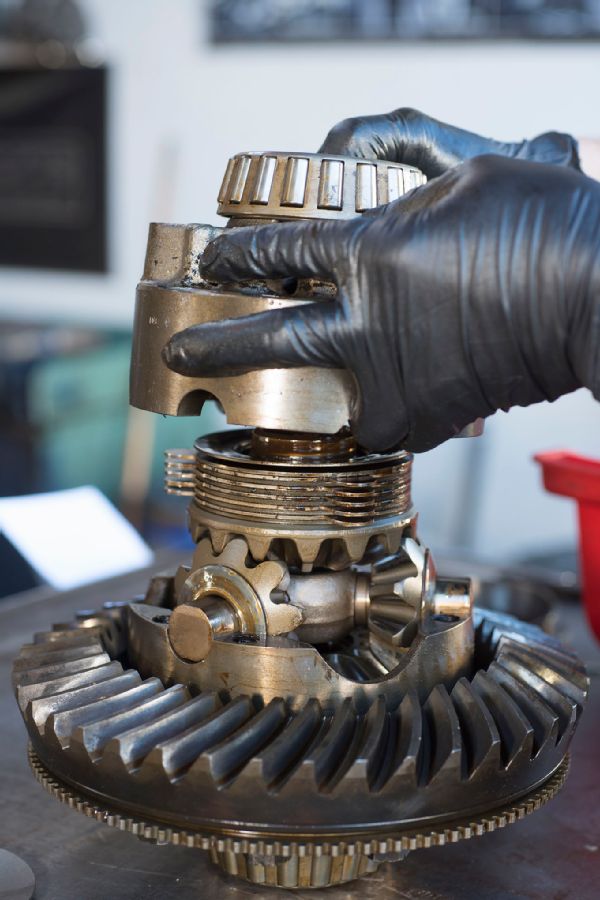
Once the top (passenger’s-side) clutch pack has been removed and disassembled, remove the side gear and set it aside to be cleaned. Remember to keep the parts for one half of the differential set apart from those on the other side.
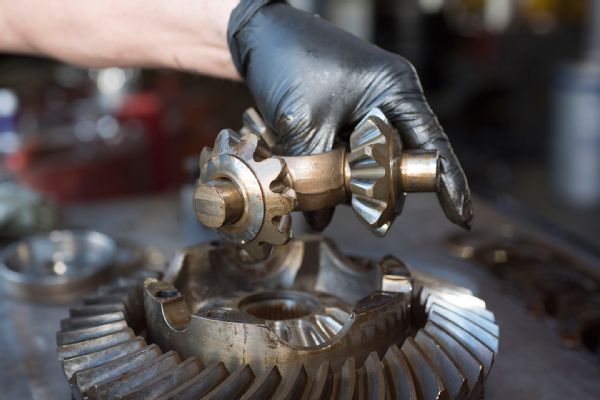
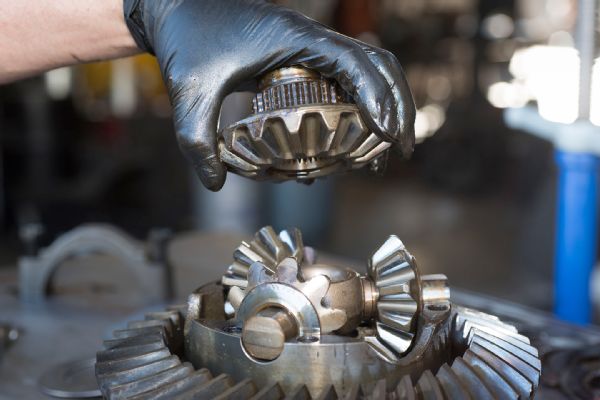
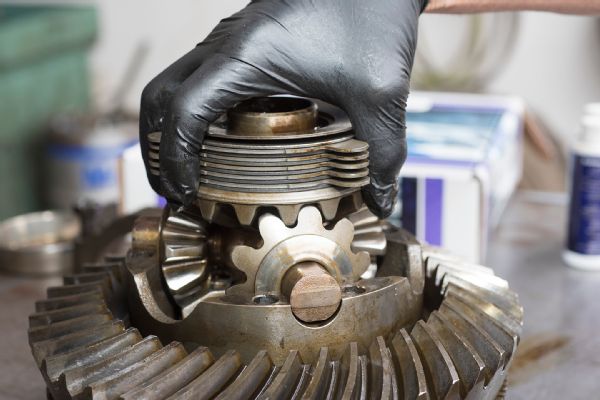
Lift out the three-pinion cross-shaft assembly. Inspect thrust washers and gears for any signs of unusual wear or damage. The parts in this truck were fine for re-use.
After the pinion cross-shaft assembly is removed, reach into the case and extract the ring-gear-side clutch pack. Villalobos noticed this limited-slip had been rebuilt once before—and reassembled wrong as the Belleville spring plate was on the wrong end of this clutch pack.
Villalobos disassembles the ring-gear-side clutch pack and lays the parts out in the order they came apart. This re-affirmed they were not in the correct order when this limited-slip was rebuilt earlier in its life. The Belleville spring is supposed to always be pushing against the case half – with the cup-side facing away from the side-gear.
Cleanliness and attention to detail will ensure the rebuild is done correctly. Villalobos uses JRI automated parts washer in the shop to clean the case halves (with bearings still pressed on), pion shaft and gears. For those without such luxuries in their garage or shop, an old-fashioned parts washer is the next best thing.
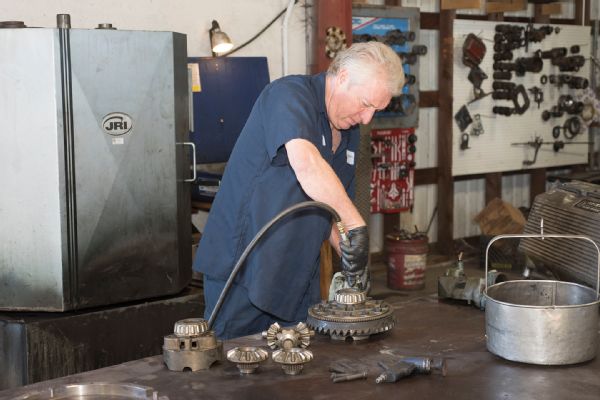
Use compressed air on cleaned parts to ensure there’s no solvents or other contaminants present when the unit is re-assembled.
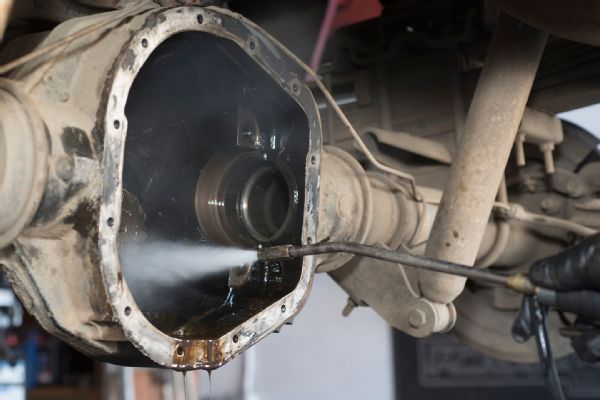
Thoroughly cleaning the axle housing is just as important as cleaning the other parts—maybe more so as this is where damaging contaminants gather, only to be recirculated on the new parts.
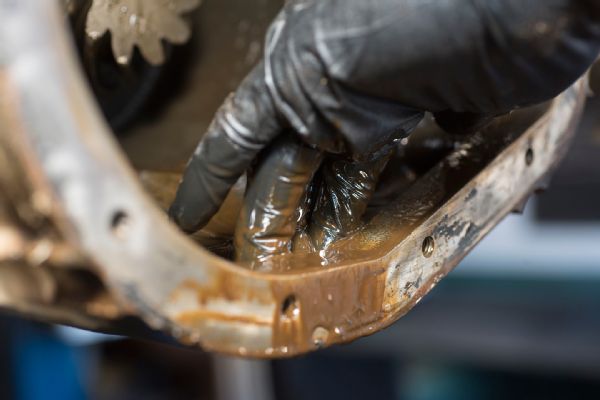
This thick stinky muck in the bottom of the axle housing was the result of not changing gear oil as often as required, water contamination, and the remains of burned friction discs in the Traction-Lok clutch packs.
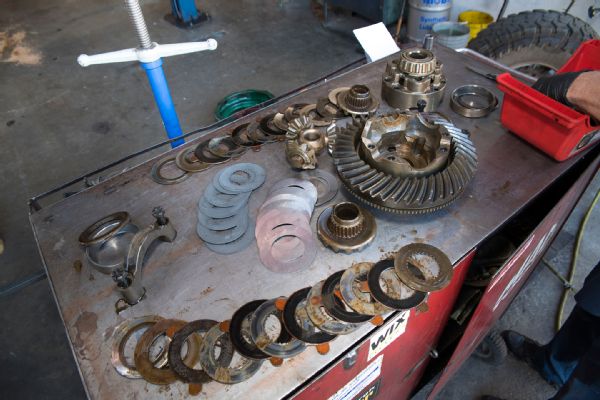
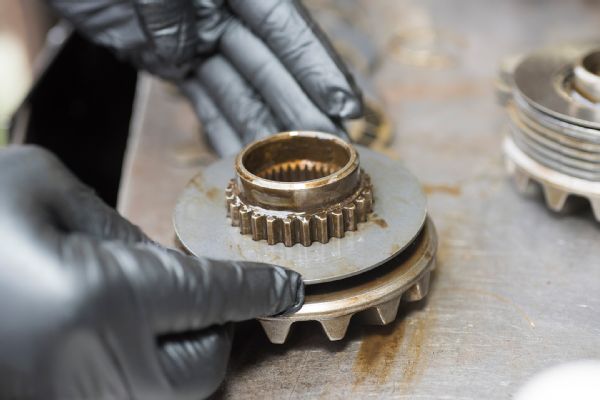
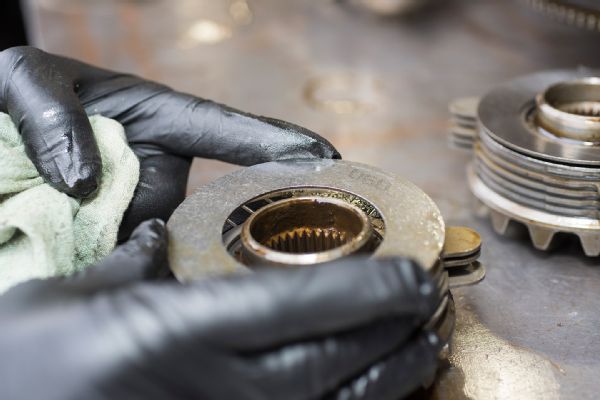
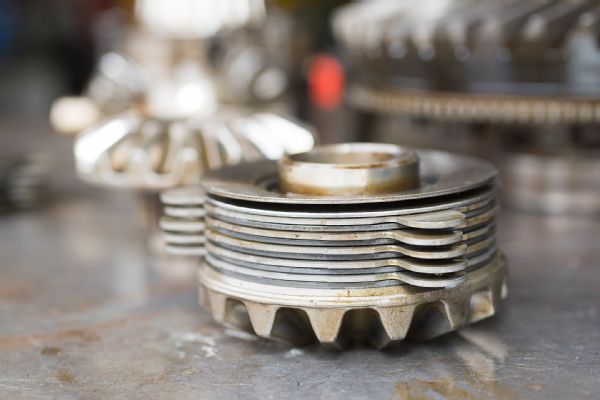
The Ford Visteon Sterling 10.5-inch Traction-Lok disassembled and ready for re-assembly using the Yukon Axle & Gear limited-slip rebuild kit. This is a good time to check gears, bearings and races for excessive wear that requires replacement. This F-250’s parts were still good to go.

Lightly sand the machined areas where the pinion thrust washers seat in each case half to smooth any rough edges or tiny burrs that may be present.
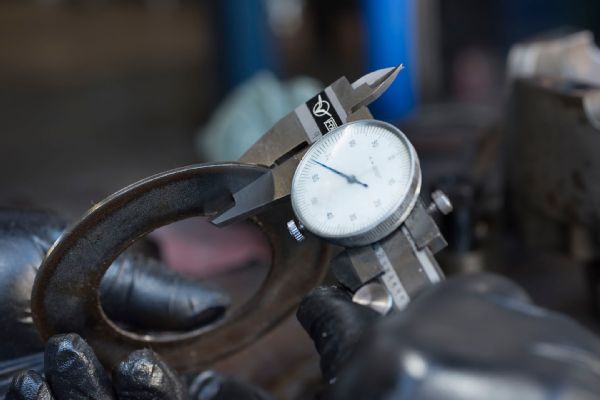
Very important step. Measure the thickness of the spacer shim for each clutch pack. This sets the clutch pre-load. Replace the old shim with the same thickness shim in the Yukon shim pack.
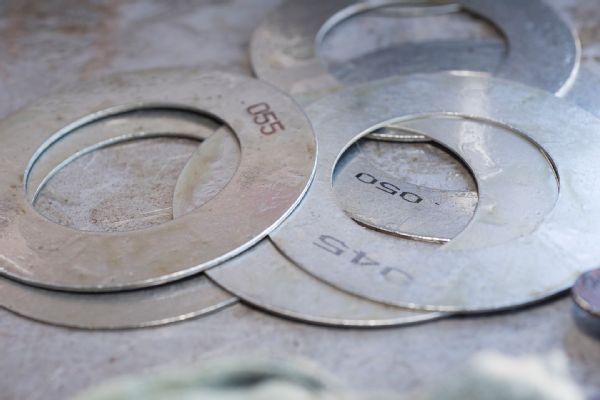
The shim pack in the Yukon kit will cover any combination found in the Ford Visteon Sterling 10.5-inch Traction-Lok rebuild.
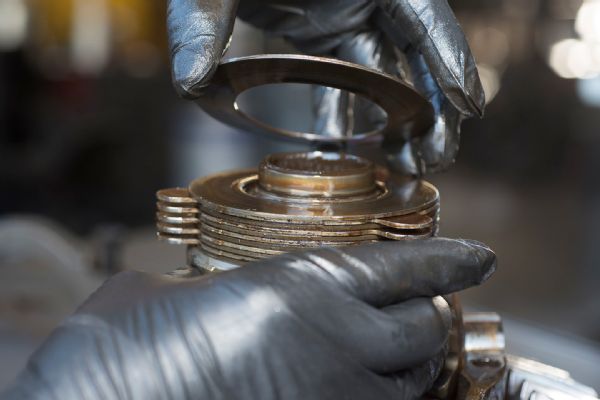
This is how the clutch plates should be lined out for proper installation. The shim and Belleville plate, in that order, are the last to be installed on the side gears.
The first plate is a splined steel spacer that sits against the side-gear face. Wipe each plate with a thin film of the friction additive.
Next up, a friction plate that has been pre-soaked in friction additive. The Traction-Lok’s clutch packs are made up of alternating friction plates and splined steel spacer plates. Villalobos pre-soaked the new Yukon friction plates for 30 minutes in the friction additive prior to assembly.
Follow the same alternating spacer/friction/spacer setup using the same number of frictions and steels that were in the original limited-slip. This F250’s Traction-Lok used five friction plates and four splined spacer plates in each clutch pack. Then place the shim on top. This clutch assembly used a .060-inch shim. Your truck’s will probably be different.
The last item to place on the side-gear clutch pack is the Belleville spring that sets the pre-load. Make sure the cupped side of the spring faces away from the side-gear and toward the differential case.
A properly assembled Traction-Lok clutch pack looks like this one. Note the Belleville spring is on top, cup-side facing upward.
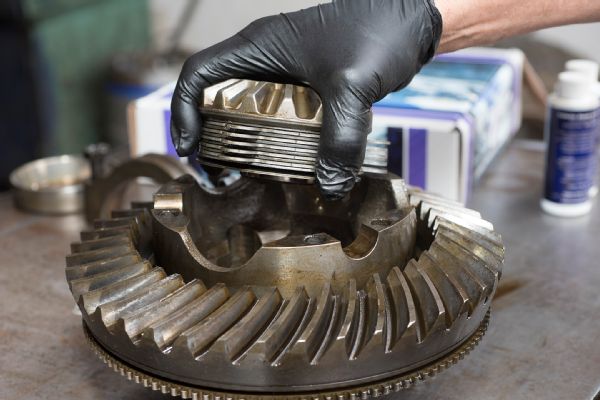
Lower the side-gear and clutch assembly into the carrier. The friction plate tabs will align into the notches in the walls of the case where they are held in place.
Set the three-pinion cross assembly into position making sure: 1) the marked shaft lines up with the marks put on the case before disassembly, and 2) the pinion thrust washers and pinion shafts are lubed with a premium long-life grease before installation.
It’s important to keep the pinion shafts in the same location from which they were removed so any potential seating issues are eliminated
Place the remaining clutch pack and side gear on top of the pinion assembly. Turn the clutch and side gear so the friction plate tabs are align with the deep notches on the rig-gear case half.
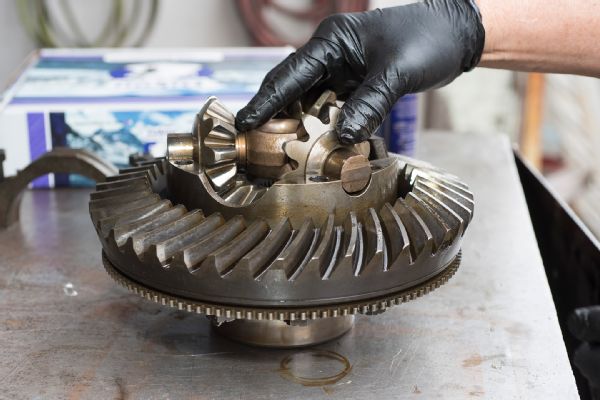
Carefully assemble the two case halves, making sure the marks on each case match up.
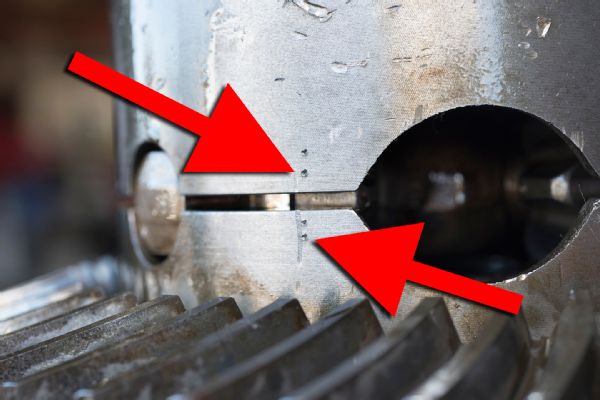
Make sure the alignment marks (put on each case half prior to disassembly) align as well as those on the pinion shaft.
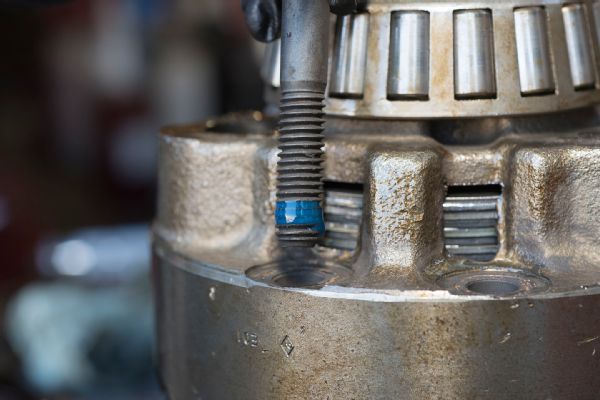
Use a good thread-locker on the bolts that hold the case halves together. Tip: Yukon Gear & Axle techs recommend putting a thin bead of the same thread locker along the two case halves if the truck is putting a lot of power to the ground. Torque bolts to 90 lbs./ft.
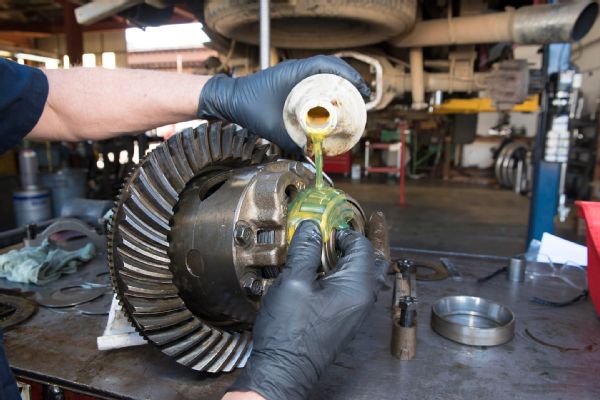
After the limited-slip is assembled, pour a little 80W/90 over the carrier bearings to make sure they are lubricated before sliding the unit into the axle housing. Yukon recommends not using synthetic gear oil with the Traction-Lok.
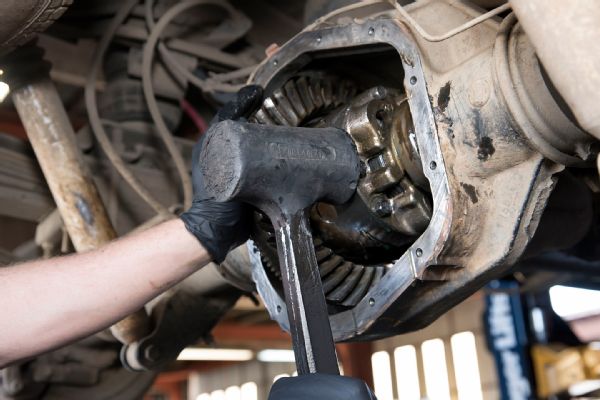
Reverse the removal process. Install the old spacer shims into the axle housing on the same side from which they were removed. Installation of the diff itself will require using a hard rubber mallet to force the carried into the housing. Once in, bolt on bearing caps and torque them to 80 lbs./ft.
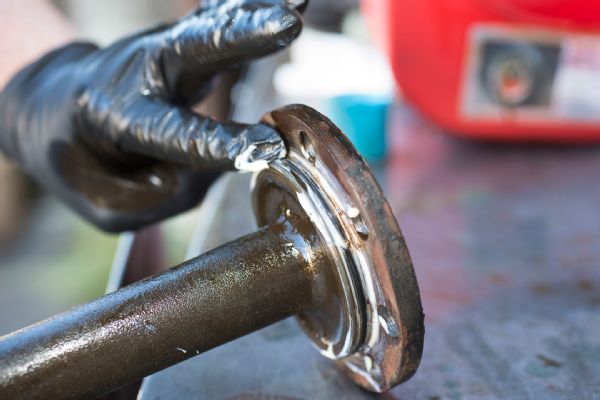
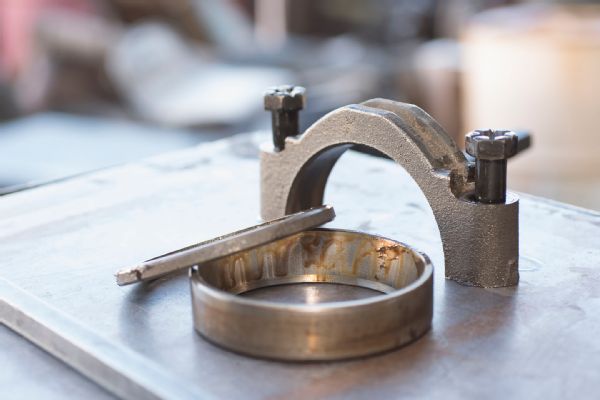
Check axle shaft O-ring for any nicks. Replace if needed. Apply white lithium grease to the axle O-ring and slide axles back into place
Mobile Diesel Service’s Villalobos torques the axle retaining bolts to 80 lbs./ft. per spec, wrapping up this Visteon Sterling Traction-Lok rebuild in less than three hours.
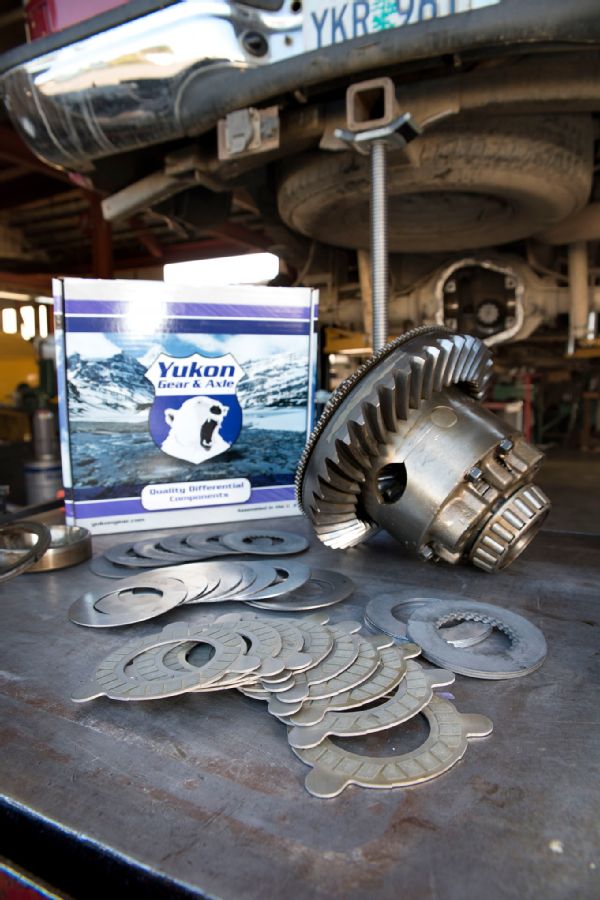
Yukon Gear & Axle kit (#YPKF10.5-PC) has all the parts needed to rebuild the Visteon Sterling 10.5-inch Traction-Lok in this 2001 Ford F-250 4x4’s rear differential.