The GM Corporate 14-bolt rear axle is considered one of the best options for the ultimate in high strength for a trail/street machine. Found in four different variations from 1973 to 1996, the GM-based rearend packs a serious arsenal of wheeler-friendly attributes, some of which include a third pinion support; a removable front pinion support; built-in carrier preload adjusters; a full-floating design which relieves the (stock) 30-spline axleshafts of weight-carrying duties and hence increases torsional strength; and a massive 10.5-inch ring gear. These axles are easy to find in wrecking yards across the country and will typically cost you somewhere in the neighborhood of $300 to $500 depending on condition. All 14-bolt axles feature a uniquely shaped differential cover that employs 14 bolts to secure the cover to the centersection-hence the name.
Another commonality of the (pre-1988) 14-bolt is drum brakes. Unlike disc brakes, drum setups hold heat inside a contained drum assembly. With little or no air flowing over critical areas where friction occurs, drum brakes fade quickly, significantly reducing net stopping power. Unfortunately, enthusiasts still rely on the 14-bolt's antiquated drum brake technology today. Despite the fact that these brakes were never intended to handle the added leverage of plus-size tires, we see them on the trail all the time. While drum brakes will slow a vehicle down, you simply cannot expect the same performance as you would from discs. The reason for this is that 70 percent of a vehicle's braking force occurs at the front end. This is why all vehicles built since the mid-'70s employ disc brakes up front. The reason most pickups and SUVs came with rear drum brake arrangements (into the late '90s) was largely due to the higher cost of manufacturing associated with disc brake setups. Over the years, as vehicles have become lighter to achieve higher fuel economy standards, manufacturers have phased out the portly drum brake setups in favor of lighter disc arrangements. As such, brake performance has increased. However, so has the cost to manufacture a typical rear axle-a cost that is generally passed on to the consumer. This leaves the budget-minded truck builder in a tough spot where sacrificing stopping power is the only realistic option.
 The ORD 14-bolt disc brake conversion sheds more than 50 pounds of weight from the rear axle assembly and greatly improves brake performance over the OE drum arrangement. Discs are also better than drums because they are self-cleaning-no more worn-out drums from running in mud, sand or silt. The kit includes two caliper mounts, spacers and all the necessary hardware required to mount the system to the factory four-bolt backing plate flange on the axlehousing. We like the fact that this conversion costs less than rebuilding the factory drum brakes. This kit was designed to work with any single-wheel GM Corporate 14-bolt full-floating axle with the drum secured behind the wheel bearing hubs. This kit will not work if your drums slip off from the outside or with dual rear-wheel axles.
To combat this problem, the folks at Off Road Design (ORD) developed a bolt-on 14-bolt disc brake conversion kit that will not break the bank. ORD does not claim that this setup will improve braking performance in all conditions, but they do tell us that the setup will perform more consistently for trail environments where outside elements such a water and mud can diminish stopping power greatly on drum brakes. The system is easy to install and typically costs less than rebuilding the factory drum arrangement. By design, the discs shed heat more effectively, thanks to their exposed surfaces. They also take advantage of centrifugal forces and are able to shed water and mud more quickly than drums- so there are fewer ill effects on brake performance. All things considered, it's a win-win scenario for the 14-bolt owner. Check out the highlights from the conversion process.
Other Things To Consider
This conversion does not include a mechanical parking brake option, so another type of parking brake is recommended. This could be a line-lock or a transfer case-mounted parking brake setup. ORD is currently developing a line-lock kit to complement this conversion, but was unable to provide us a release date at the time of print. Some vehicles may need an adjustable proportioning valve to properly supply enough brake fluid volume and pressure to the rear disc brake calipers. Some vehicles work just fine with the factory setup, but you will not know until you actually test it. Factors that can affect brake bias include wheelbase length, center-of-gravity height, overall weight, axle type, driving style and terrain. The proper brake setup really varies from one rig to the next, so you may need to experiment a little to get the desired braking levels. It is also possible to adjust the front-rear brake bias by selecting a different caliper size. There is a heavy-duty brake option on the 3/4-ton pickups that used a larger piston caliper. ORD recommends running larger calipers up front and a smaller caliper in the back. Once these items have been addressed, the vehicle should exhibit improved braking performance. If something does not seem right, you may need to upgrade to a 3/4- or 1-ton master cylinder, but know that the 1-ton system requires switching to hydroboost.
 The first step in the installation process is removal of the factory drum brake setup. To do this, the full-floater axleshafts must be removed from the housing.
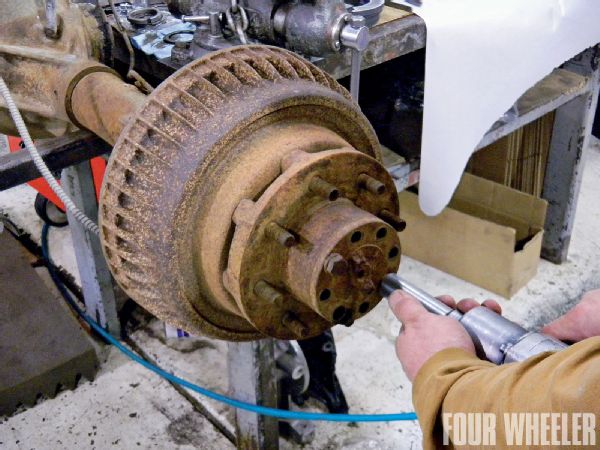
 Next, the wheel bearings and adjusting nuts must be removed to free up of the wheel hub and drum assembly from the axlehousing.
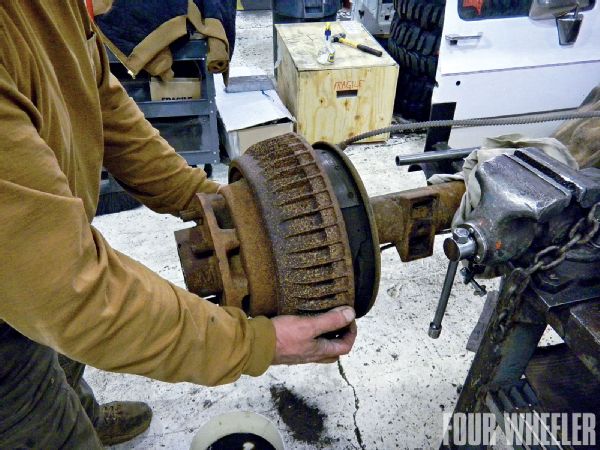
 With the hub and drums removed, you can gain access to the four mounting bolts that secure the factory drum backing plate to the axlehousing.
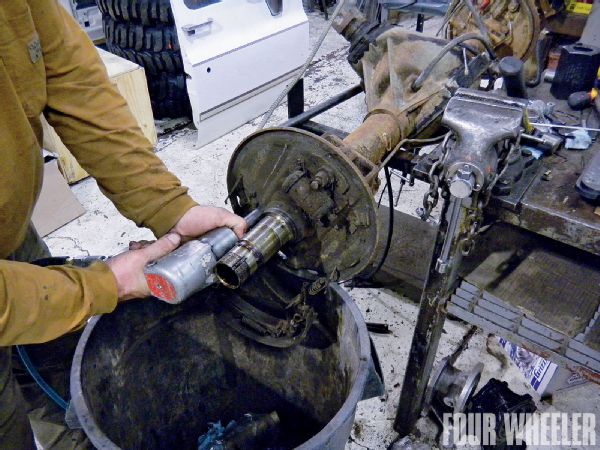
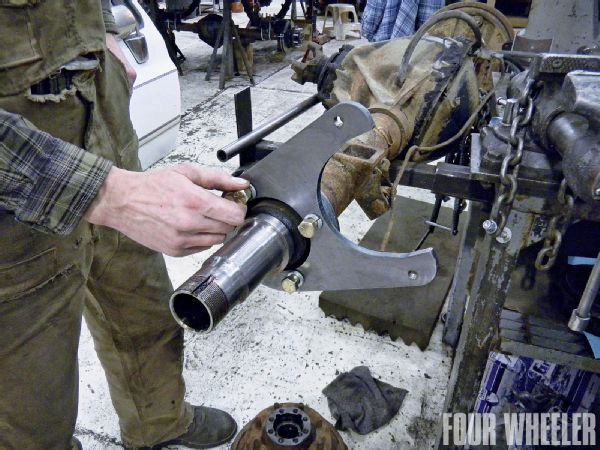 It is always a good idea to clean the spindle, axleshaft and axle bearings with a solvent prior to reassembly. You do not want dirt contaminating any of these critical wear surfaces. Once clean, the new caliper-mounting brackets are installed on the axle flanges. ORD supplies spacers that need to be installed between the bracket and housing flange. The bracket should be orientated approximately 45 degrees up at the rear of the housing, as shown here.
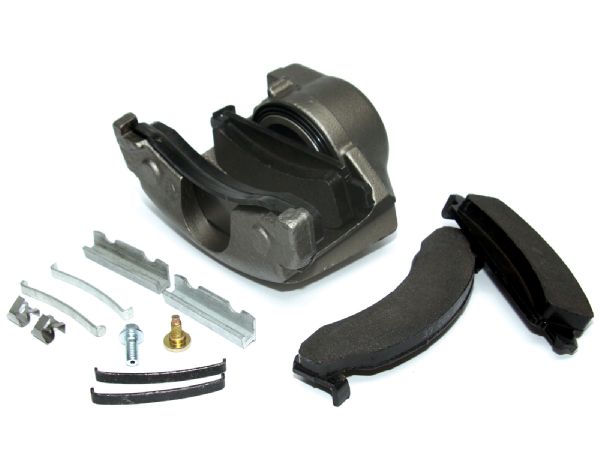 ORD does not include new brake rotors or calipers with their kit because these items are readily available at just about any local auto parts store or wrecking yard. Due to the high weight of these items, it simply does not make sense to ship them by mail. This helps keep the cost of the conversion down. To complete the conversion, the customer must source a pair of brake rotors from a '73-'87 GM 3/4-ton front axle and calipers from a '73-'87 1/2- or 3/4-ton front axle. We purchased this set recently from Boyce Equipment in Ogden, Utah.
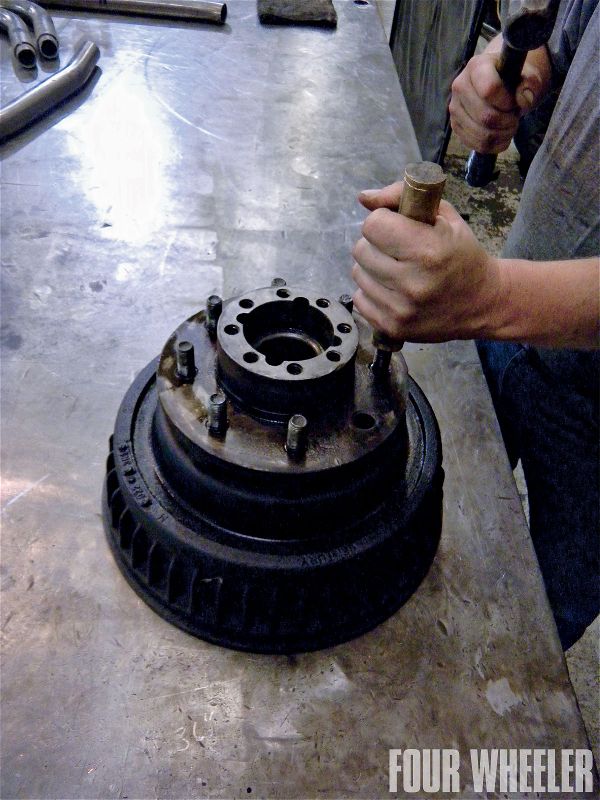 The next step involves installing new studs into the hub/drum assembly. First, the old studs were removed from the unit. A hammer and a soft drift made this process easy to complete. If you have access to a press, better yet.
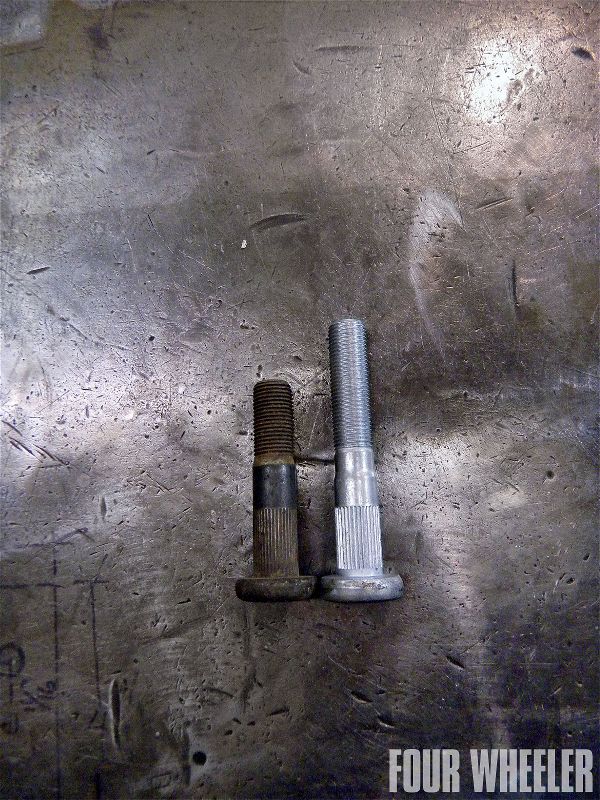 Here, you can see the difference between the old studs and the new studs used for this conversion. The ORD kit does not come with new studs, but they do offer them as an option. The ones pictured here are the longer dually type, ideal for the thicker wheel centers found on most aftermarket truck wheels.
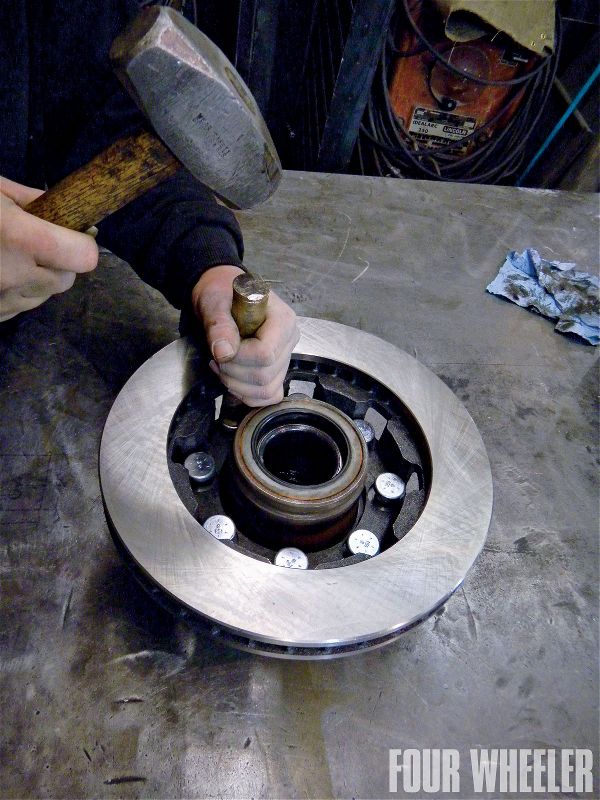 Using a hammer and a soft drift, the new studs were installed into the hub assembly along with the new rotors as shown.
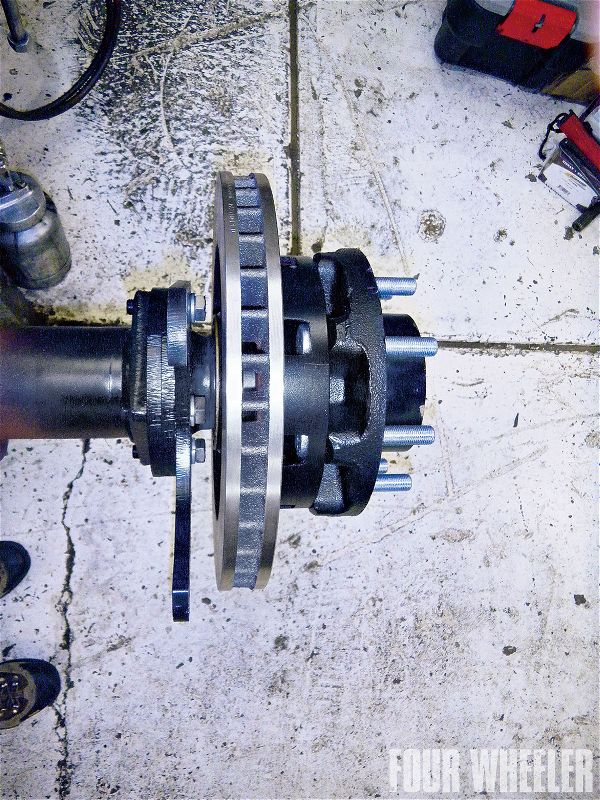 This is how the new hub assembly should look with the new brake rotors and caliper mounting brackets installed correctly.
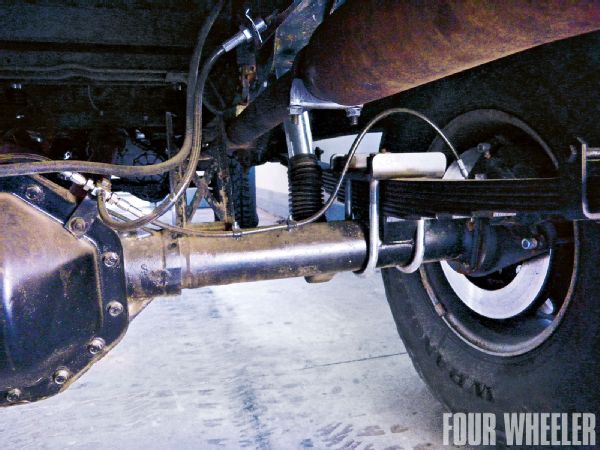
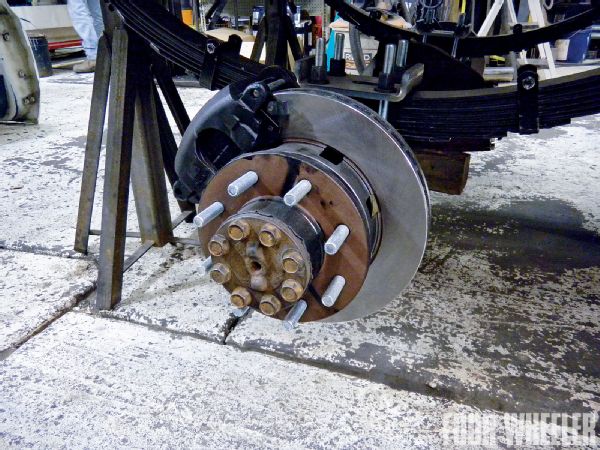 This photo shows the entire setup installed under a vehicle with new calipers installed and plumbed. Once the whole system was installed, new brake lines were installed and the system was bled.
Brake Lines
ORD offers optional 16-inch braided stainless brake lines for $65 at the time of print. Keep in mind that the customer must specify either a 10mm or 7/16-inch banjo bolt. Also available is a "long line," as shown here. Both kits use Kevlar/stainless braided lines.