1993-1998 Jeep Grand Cherokee Build - 4-Wheel & Off-Road Magazine

1993-1998 Jeep Grand Cherokee Suspension Build - A Grand Conversion Kevin McNulty Former Editor, Mud Life 1993 1998 Jeep Grand Cherokee passenger Side View Photo 11485530

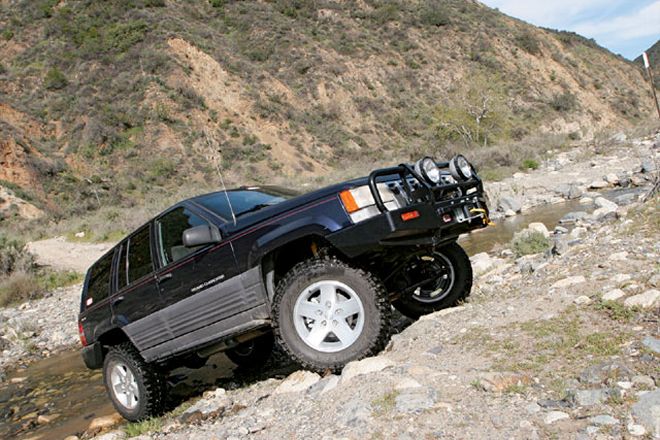
The '93-'98 Grand Cherokee is a great building block for a trail rig. And if you can get past a couple minor problems such as the undesirable unibody, the ZJ has lots of interior room for stashing all kinds of adventure gear. Also some versions of the Grand came with the powerful 5.2L or (only for '98) the 5.9L V-8 engine, and even better, the aging Jeep can be purchased today for a song.

I've had a '97 Grand for a few years now, but it had just been taking up a parking space at the office. I hadn't driven it more than 500 miles in the last two years because I was unhappy with the aftermarket suspension and axle conversion that had been installed on it. The Jeep had a full locker in the rear, which made the rear tires chirp and squeal every time it turned a corner. The locker also clicked and ratcheted, and when it unloaded it caused the vehicle to violently jerk. The factory suspension didn't ride too badly and was comfortable, but the installed aftermarket suspension was obnoxious and squeaked like a horse-drawn buckboard.

Other issues I had with my ZJ were the Dana 30 axle up front and the weak Chrysler rear axle with aluminum center-section in the rear. These axles are great for everyday street driving and mild four-wheeling, but anything beyond that and the dependability becomes questionable, especially with a V-8. There is a plethora of upgrades available for the Dana 30 axle, but it's still a Dana 30, and there aren't many parts available for the aluminum rear axle. It's best just left alone or swapped out.

1993 1998 Jeep Grand Cherokee front View Photo 11485470

I knew that if I let the Grand sit long enough a solution for the vehicle's problems would appear, and in the Apr. '08 issue of 4-Wheel & Off-Road, I reviewed the new Dana 44 Rubicon (JK) axles available from Jeep. As soon as the boys from Mopar told me they were going to start selling these crate axles, I immediately thought of my abandoned ZJ. What else could I ask for? The axles are far stronger and have 4.10 gears with selectable electric lockers.

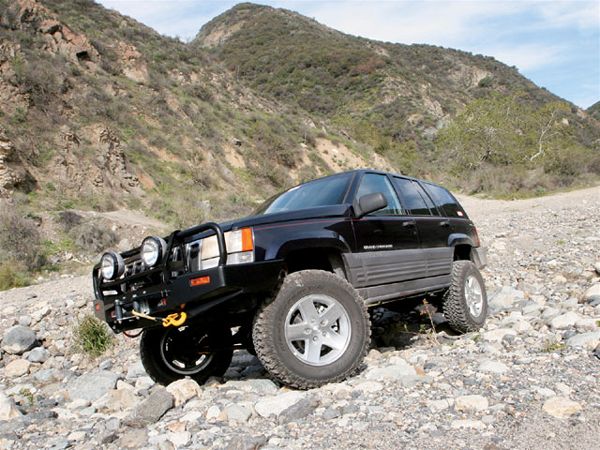
I needed a well-mannered suspension so I called JKS Manufacturing. I have been reviewing the JKS suspension components for a while now and I really like how the control arms are fit with rubber bushings rather than Delrin or polyurethane, and the rubber bushings dramatically help reduce the transfer of road noise into the vehicle. The bushings don't squeak or require any maintenance, and they help absorb torsional force while four-wheeling. The control arms and rubber bushings also offer a smoother, softer, and quieter ride. JKS didn't have a complete bolt-in kit for my Jeep, since this is a custom axle swap and build, so I ordered adjustable control arms, track bars, sway-bar disconnects, and super-cool ACOS Pro adjustable coil spacers with bumpstops for the front.

The key was to build a daily driver/adventure Jeep with a suspension that was safe, comfortable, reliable, and controllable at high speed. I didn't want or need a super-slinky rig with 20 inches of articulation capable of crawling over small mountains. I ordered ARB Old Man Emu Nitrocharger gas shocks, coil springs, and steering stabilizer. The OME components are designed and tested in Australia's harsh outback conditions. I have had good experience with OME suspensions in the past.

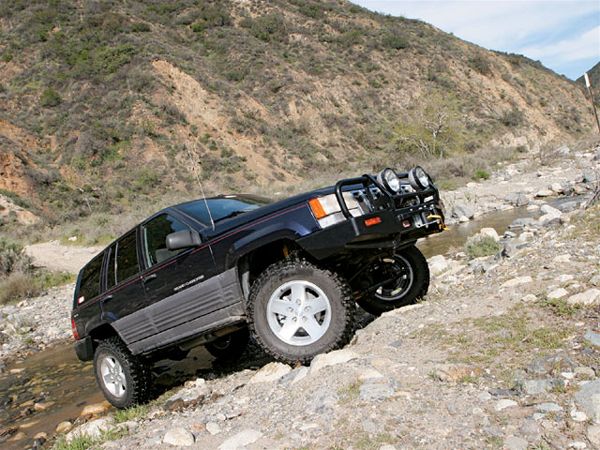
This was a comprehensive axle and suspension conversion, which required lots of fabrication and suspension geometry know-how. The front swap was almost a direct bolt-in, however the rear axle required the most fabrication. After the swap, the ZJ rode comfortably, was quiet, and is now far more capable than factory.

PhotosView Slideshow 1. The JK Rubicon axles were the perfect swap for the Grand Cherokee. These replaced the much weaker factory Dana 30 front and aluminum 44 rear axles on the '97 Grand. The crate axles came with 4.10 gears, electric lockers, and disc brakes, and the front axle is also high-pinion. The axles can be ordered from any Jeep dealership. The front axle (PN P5153825) and the rear (PN P5153826) can be purchased for about $1,400 eac 2. The JK front axle is high-pinion, making the conversion a more attractive swap for the price. Do the math! If you can find a good high-pinion Dana 44 at a junkyard it will cost you about $200, a locker is $400 to $800, and then you have to get brakes, gears, knuckles, axleshafts, and other assorted parts. By the time you are done rounding up all the parts you just spent more than $2,000. 3. The adjustability of the JKS arms makes it easy to dial in the caster and pinion angle. The arms don't lock so they will turn and rotate with the vehicle for better articulation and suspension movement. The rubber bushings absorb road vibration and movement for a quiet and comfortable ride. The greaseable control arm is protected internally by a spring-loaded crankshaft type seal which keeps the arms from being contaminated. 4. Getting the rear axle in the vehicle required cutting off all the factory hangers and mounting points. This is very time consuming if you don't have the proper tools. We used a plasma cutter and then took a grinder to the rest of the material. I picked up a Wrangler TJ hanger and suspension mount kit from Mountain Off-Road Enterprises (M.O.R.E.). The kit included the coil spring, shock, track bar, and control-arm mounts. 5. There's a lot of measuring for any axle swap. Like a good carpenter would say, measure twice and cut once. In this case measure as much as you can, tack your part on, measure again, and then weld. It's far more difficult and messy to cut something apart after it's been welded together than to pull two pieces of board apart. 6. After measuring, center the axle and tack the hangers and mounts until all components are properly aligned. I tacked all the hangers and mounts in place, and then checked the ride-height and clearances. PhotosView Slideshow 7. I figured out how to increase the length of the wheelbase with some minor adjustments and trimming. This was due to the Hanson rear bumper and the ARB front bumper which opened up the wheelwells, allowing better fitment of larger tires. After figuring out what the ride height was going to be, I trimmed the factory gas-tank skid to clear the rear axle's differential. 8. The rear axle required a lot of welding. If you can't weld, don't attempt this. Safety is a major factor with any axle swap. If your axle falls apart at high speed on the freeway, you could die. Have a professional weld up your junk or take a welding class at the local community college. 9. The M.O.R.E. hanger kit worked perfectly. Very little sanding and grinding was needed before welding the bracketry in place. After welding the lower coil mount to the axle, I notched it and then welded in a piece of 1/2-inch steel tubing to hold the coil spring in place. I also drilled a hole in the mount to bolt the factory spring retaining clip in place for additional support. I used the rear factory JK track bar because it fit well and was longer. The longer the track bar the less side-to-side movement the vehicle will have, giving the vehicle more stability. A custom-fabricated double-shear, lower track-bar bracket was used to accommodate the longer track bar. 10. The new front axle's hangers and control-arm mounts lined up almost perfectly with the ZJ. The only major fabrication was moving the upper coil-spring mounts on the ZJ's body. I had to cut them off for the ACOS Pro bumpstops, so I fabricated new upper mounts out of 1/4-inch steel plate and moved the mounting points outward 11/2 inches. 11. The more parallel the track bar is to the drag link, the less bumpsteer the vehicle will have. Using the JKS adjustable front track bar really helped due to the way it's angled. I fabricated an upper drag-link mount similar to a TJ, and made the drag link out of DOM steel tubing. At each end of the drag link I welded threaded bungs. At the knuckle side of the drag link I used the factory rod end from a JK drag link, while the pitman-arm side is a rod end from a TJ. The tie rod came from a two-wheel-drive Sahara JK Wrangler. 12. I used 2-inch-lift Old Man Emu front Jeep JK shocks on the front (PN N196). These OME springs are about 2 inches taller than the factory ZJ spring (PN OME930). Because of the ACOS Pro adjustable spring mounts I couldn't use too tall a spring, otherwise a level ride height from front to rear of the ZJ couldn't have been achieved. 13. I used the factory ZJ brake line on the rear axle after drilling out the banjo holes to fit the new JK banjo bolts. I had to slightly trim (arrow) 1/4 inch of material off the two ridges of metal on the caliper to accept the ZJ brake lines. To hold the line in place on the driver side of the axle I drilled a hole in the track-bar mount and tacked on a nut. I also welded a nut on the lower spring mount of the passenger side. I replaced the front brake lines with extended JK lines. 14. Getting the JK locker to actuate is a two-wire hookup. This is about as easy as it gets. The other two-wire plug can be used for indicator lights for the switches that show whether the locker is on or off. 15. The switch wiring to actuate the lockers is a simple two-wire hookup. I mounted the switches on the side of the transmission's shifter for easy reach. I thought about mounting them in the overhead console but I would have had to run 8 more feet of wire, which wouldn't have been worth the hassle. Mel Wade at Off Road Evolution helped by letting me use his shop, and his technical advice greatly helped me complete this axle swap. 16. Tom Wood's supplied the custom double-cardan driveshafts for this conversion. These are the 1310 series of driveshafts which have proven to be extremely durable over the years. Since I am not running these driveshafts over the rocks day after day, with proper maintenance they should last for years. These shafts came with a stronger pinion flange for the differentials and were balanced, polished, and clearcoated 17. The Grand now has a very comfortable luxury-vehicle performance ride, and I am extremely happy with the JKS and ARB suspension components. The track width on the ZJ went from approximately 58.5 inches to 62.5 inches. I used the factory Wrangler JK wheels and the backspacing is 53/4 inches, which brings the wheels and tires back under the vehicle. The tires protrude only about 11/2 inches beyond the wheelwells. The wheelbase is now 108 inches, compared to the factory 105.9, and I can definitely notice better stability.