Weeping or Leaking Jeep Axle Seal - Jp Magazine

Weeping or Leaking Jeep Axle Seal - Time To Weep Christian Hazel Brand Manager, Four Wheeler weeping Leaking Jeep Axle Seal grinding Cutting Axle Photo 10013755

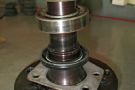
They're one of those parts you rarely think about until they go bad. And then you're usually content to just check the diff-oil level every now and then. But neglecting a weeping or leaking axle seal can cause bigger problems. Foremost of which is oil contamination on your brakes. Once your brake pads or shoes become contaminated, they've got to be replaced. And until they're replaced, not only won't the contaminated brakes stop the vehicle effectively, but they can cause a vicious pull to one side when the brakes are applied. It can be enough to send you into oncoming traffic.

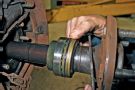
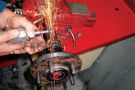
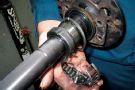
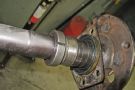
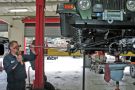
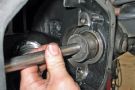
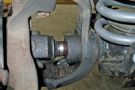
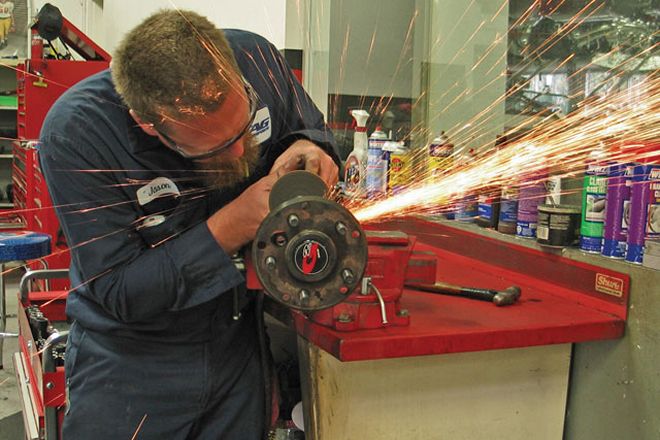
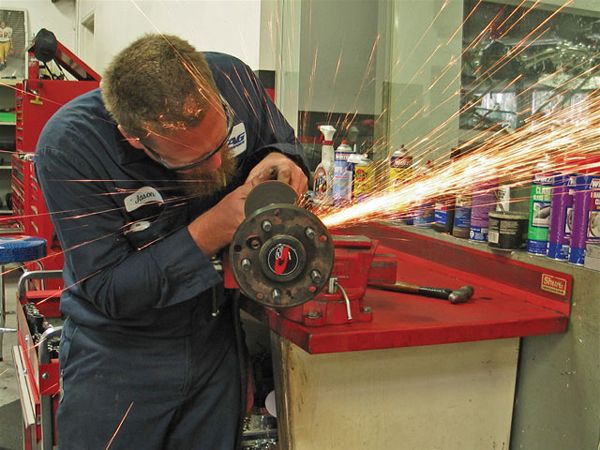
So when we noticed the seals on our '97 TJ's Rubicon Dana 44 housings were starting to go, we quickly packed our cameras and headed down to TAG Motorsports in Escondido, California, to have our buddy Jay Miller slap in some new seals. While it's not terribly difficult, it's no 10-minute operation either. The front differential carrier needs to come out to get at the inner seals. And if your Jeep has a Dana 44 rearend, certain early versions of the Dana 35 for Wranglers, or any ZJ or WJ Dana 35, the rear seals are pressed behind the axle bearings. Here's how Miller made sure our oil stayed where it's supposed to.

PhotosView Slideshow If your rear has seals installed in the axlehousing, it's simply a matter of removing the shafts, prying out the old, and tapping in the new seals. On a Dana 44 like ours, however, the seal rides behind the axle bearing and retainer. If this is the case, the axle bearing, collar, and seal need to be replaced as a unit. In some cases, the rubber portion of the seal may still be good, and simply applying a bead of RTV on the outside of the seal where it indexes the housing bore (finger) will stop the leak. 154 0807 04 z+weeping leaking jeep axle seal+cutting grinder 154 0807 06 z+weeping leaking jeep axle seal+bearing retaining collar A cutoff wheel is used to cut away the bearing roller cage to fully expose the bearing retaining collar. A slit can be cut into the collar so it can easily be cracked with a chisel and hammer. If you don't have a cutoff wheel, you can carefully drill a series of holes in the collar to get the same effect. Once the collar is split, the pressure holding it on is released, and it and the bearing shell can be removed. After applying some high-quality grease for protection upon initial use, the seal, then a new bearing, then the retaining collar are pressed onto the shaft. Jay Miller applied a thin bead of RTV on the outer diameter of the new seal and reinstalled the shaft. Once he stripped down the axle, Miller used a long rod to knock out the inner seals. Care must be taken to avoid accidentally nicking the pinion or carrier race bores. After putting RTV on the outside of the seals, Miller used the same rod to reach through the axletube to knock the new inner seals in with a seal driver. It helps to have an extra set of hands and eyes to guide the seal driver and ensure the seals tap into the bores squarely. On the front axle, our inner seals were so bad that gear lube was actually making it past the aftermarket outer axle seals. The bummer with the front axle is that the brakes, hubs, shafts, and differential need to be removed to get at the inner axle seals. To do the job properly, only the pinion and knuckles can remain on the housing.