Jeep NP231 Transfer Case Slip Yoke Eliminator Install - 4Wheel & Off-Road Magazine

Jeep NP231 Transfer Case Slip Yoke Eliminator Install jeep Tansfer Case Sye Install transfer Case Photo 9768704

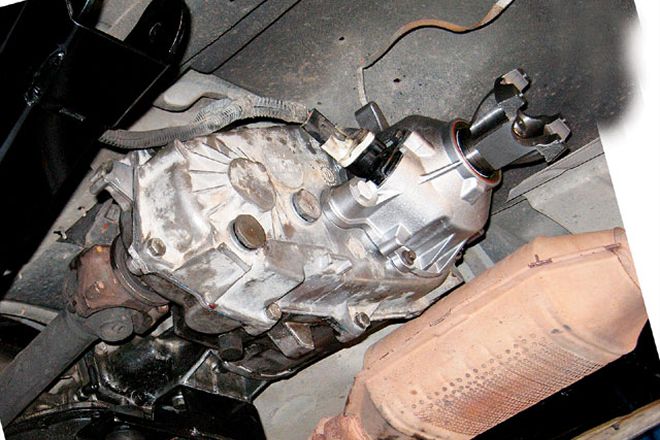
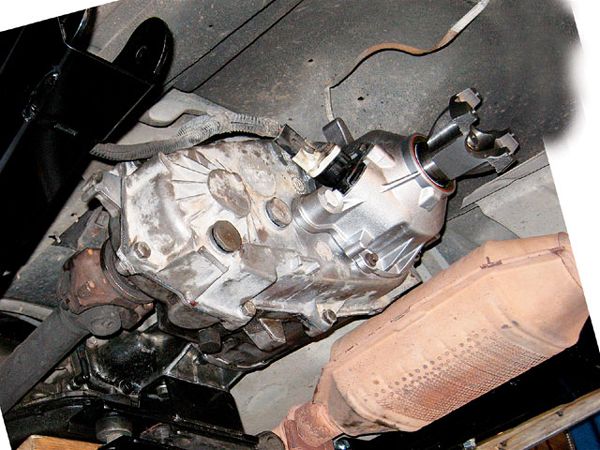
Blowing a rear driveshaft on a stock Jeep is fairly common and can ruin your wheeling weekend. The slip-yoke design on most NP231 transfer cases means that once you remove the driveshaft slip yoke out of the case and try to drive away, all the fluid will come pouring out the seal. In addition, acute rear driveline angles are a limiting factor when lifting short-wheelbase Jeeps. For example, YJ Wranglers' stock rear driveshafts are only about 13.5 inches long, so driveline angles increase quickly as the Jeep is lifted. At approximately 6 inches of lift, short-wheelbase Jeeps require a longer rear driveshaft and possibly a transfer-case drop or CV joint at the transfer-case yoke to make the joints function within their designed operating range.

To cure these ills of a stocker, Jeeps equipped with the NP231 transfer case ('89-'01 XJ Cherokees, '88-'06 Wranglers) can benefit from a slip-yoke eliminator (SYE). This relatively simple modification to the transfer case allows for a longer driveshaft and even a constant-velocity (CV) style driveshaft. The conversion accomplishes several things at once: It increases driveshaft length about 4.5 inches (6.5 inches on TJs), enables the use of a CV joint that is capable of operating at greater angles, and prevents transfer-case fluid loss in the event of rear driveshaft failure (a huge benefit for limping in from the outback in front-wheel-drive). The extra driveshaft length flattens out the driveline angles, which can eliminate the need to lower the transfer case (which would hamper ground clearance) and can minimize driveshaft-joint servicing and replacement.

PhotosView Slideshow 1. Removing the transfer case makes the job easier, but it can be done on the Jeep. After draining the oil, remove the tailhousing bolts and the rear housing. This reveals the first of several snap rings that need to be removed. It's wrapped around the mainshaft and holds the rear output-shaft bearing in place. 2. Next, note how the speedometer drive gear is clocked in the tailhousing (this is important for reassembly) before carefully removing it. 3. Stand the transfer case on end and support it with a block of wood. Remove the bolts that secure the tailhousing to the back half of the case and gently pry the housing upward, using caution not to damage it. This can be tough because the pieces are glued in place with silicone.

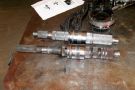
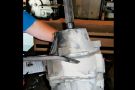
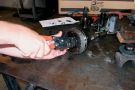
These kits are available in two prominent forms, including "super short" kits that require electrical speed sensors to be used. However, most Wrangler and XJ Cherokee owners can benefit from a "standard" NP231 SYE kit. One example is the system offered by Superlift as a recommended part of its taller YJ, XJ, and TJ lift kits. Components include a high-quality mainshaft, a new aluminum tailhousing, a few snap rings, and a new yoke-everything except a longer driveshaft (length varies depending on application and lift height).

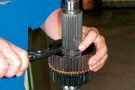
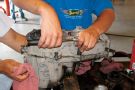
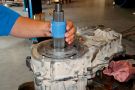
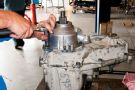
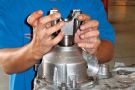
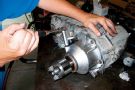
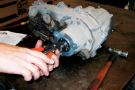
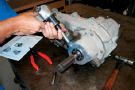
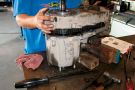
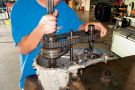
Installation requires partially disassembling the transfer case. Luckily, NP231s are straightforward, and the only somewhat-specialized tool required is a pair of sturdy snap-ring pliers. Although the transfer case doesn't have to be removed from the vehicle, the process is a little easier on a bench. Check out how simple it is for even a shade-tree mechanic to install a slip-yoke eliminator.

PhotosView Slideshow 4. Remove the bolts that secure the back case half and gently pry it away (again fighting a silicone seal). Once the seal is broken, carefully lift the case half off of the main body, taking care not to damage the oil pump. 5. Remove the nut on the front output yoke and tap the yoke off the shaft. This yoke and nut will be reused. Slide the spring off of the end of the shift fork and save it for later. Grab the front output shaft and the mainshaft and pull them upward with the chain and shift fork, which should all come out as an assembly. 6. Remove the chain from the mainshaft and save it with the front output. Next, remove the large snap ring that holds the sprocket hub to the mainshaft. Once the mainshaft is free, look for needle bearings inside the bore of the hub. If present, they need to be pressed out (later 231s do not use them). PhotosView Slideshow 7. A mainshaft comparison illustrates the SYE kit's length benefit. Also note how the OE mainshaft (bottom in the photo) has spiral-cut splines for the speedometer drive gear. This is a well-known weak point in the original design. This kit's new shaft doesn't have the spiral gears and also accommodates a 32-spline yoke, making it considerably stronger than stock. 8. Slide the sprocket hub onto the new mainshaft, ensuring that the hub ring (where the shift fork rides) is installed with the "thick" end toward the end of the mainshaft that will accept the rear output yoke. The unit won't function properly if the hub is installed backwards. Make sure that the hub's snap ring is fully seated in its groove. 9. Aside from the snap rings, the only tricky part is sliding the new mainshaft in place. The mainshaft, chain, shift fork, and front output shaft should all be installed as one assembly. An extra set of hands is handy for guiding the shift fork into its hole in the front case. 10. Apply silicone sealer to the gasket surfaces on the case halves. Verify that the pickup tube is properly seated in the oil pump on the back case half, then gently slide the pump and case half into place. Reinstall the bolts and torque them in a star pattern. 11. Slide the plastic speedometer drive gear onto the mainshaft and gently seat it on top of the oil pump. Install the gear with the "thin" end of the spirals up as shown and secure it with the supplied snap ring. 12. Apply a bead of silicone to the case and install the kit's new tailhousing on the back of the transfer case. The rear output bearing and oil seal are already installed. The tailhousing will only install one way; use the factory bolts and tighten in a star pattern. 13. Lubricate and install the original front output yoke on the shaft, then secure it using the supplied star washer and original nut. Lubricate the oil seal and new rear yoke's outside area, then slide the yoke onto the mainshaft. Position the supplied rubber star washer and new nut on the end of the yoke, then tighten. 14. After installing the speedometer drive gear (make sure it's clocked correctly), this 231 is ready for installation. The SYE kit allows the 231 to hold up behind V-8 power, and the longer driveshaft will span the extra distance created by a 7-inch YJ suspension lift without a transfer-case drop or high-pinion axles.