The white flag was out. I looked right, my eye line just cresting the head support of my Kirkey seat and all I could see was the blur of lights and the nose of another racer.
Brakes. Downshift. Turn. We're coming out of Turn 4 and I'm planted into the aluminum seat, neck and neck with the other driver and I reach for the shifter one last time. I pull back and hammer down even harder than before and start to pull ahead.
Five hundred feet and closing to the finish, inches separating my competitor and me. Three hundred feet. We're getting closer and City Boy is starting to inch away, just five more seconds to the finish.
The crowd is going wild and I make one last attempt to put my foot all the way through the..."Seriously dude. Get out of the car, I have to finish welding this seat bracket."
Damn it Pete Epple! But, he was right. This seat certainly wasn't about to install itself and before I can spend any more time daydreaming about racing, we have a long way to go.
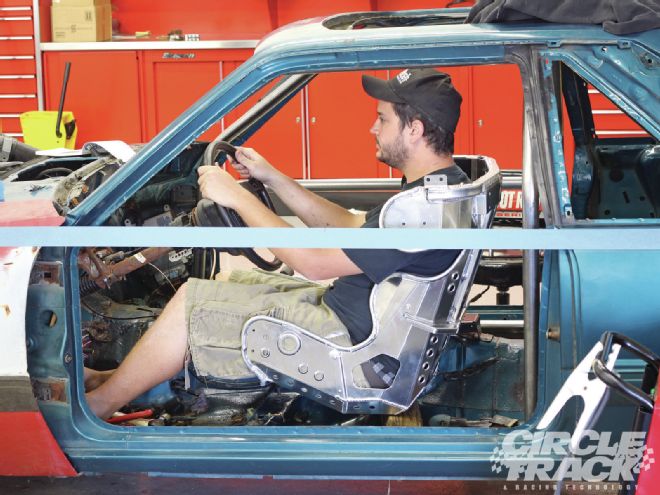 To some, this may look like a half complete seat, an idiot, and a 4x4 block of wood in a piece of junk Mustang. To us, it looks like the beginning of a crucial part of fabrication—the driver seat and horizontal door bars in the City Boy.
In fact, since you last saw the City Boy get the initial rollcage work done, Pete and I (mainly Pete) have spent countless hours and many late nights working on the car after work, without seeing much visible progress. But honestly, that's OK, since much of the effort here is really spent thinking things out, measuring, checking and measuring some more before making any cuts.
In this edition of the City Boy chronicles, we're going to spend some time talking about properly installing a seat in our Mini Stock as well as going over our complete plan for fortifying the rollcage and adding some much needed safety to the driver's compartment.
If you recall, when we left you last, we were waiting on a new full-containment seat to arrive, so that we could build a solid seat structure, install it into the Mustang, and finish the rest of the horizontal door bars.
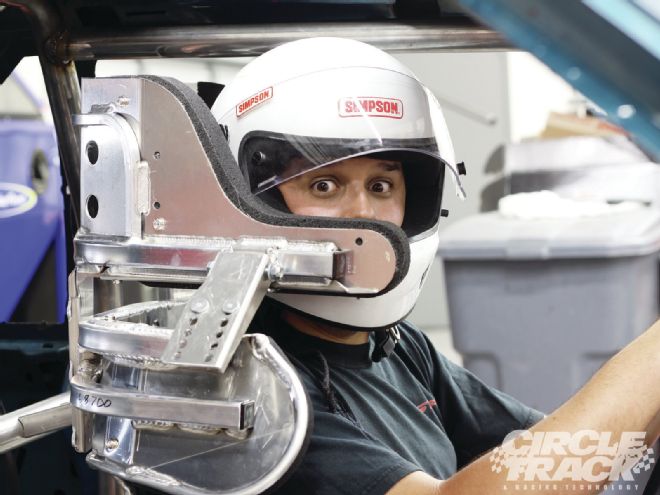
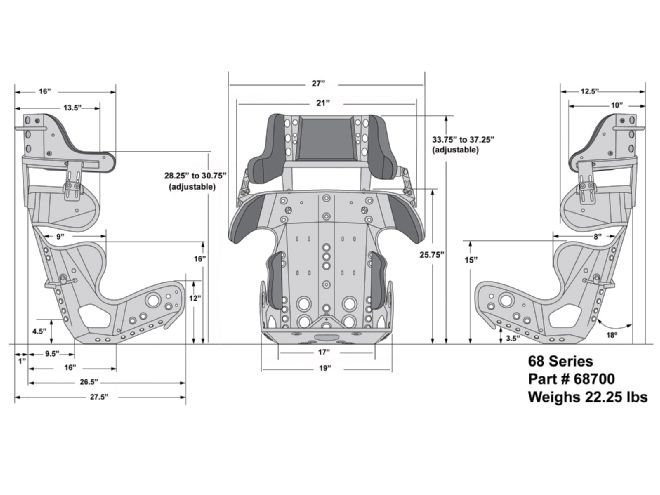 Kirkey Racing builds a plethora of great race seats and, for our Mini Stock project, we chose the company’s 68-series 18-degree full-containment layback seat, which we ordered from Summit Racing.
Not a couple of days after calling up Summit Racing and placing our order, complete with measurements, we had a Kirkey 18 Degree Layback Full Containment seat hanging out in our mailroom and enough DOM tubing to almost finish our project.
Now, we know what you're thinking and yes, an 18-degree layback full-containment seat may sound like overkill in a Mini Stock, but you just can't put a price on safety. Actually, to that end, you can put a price on safety and the Kirkey only cost us 565 bucks, which is far cheaper than a trip to the hospital, or even one visit to a chiropractor.
The Kirkey is also extremely comfortable and thanks to the TIG-welded, 0.100-inch thick 5052-grade aluminum construction; it's light enough to use in our project without any concern.
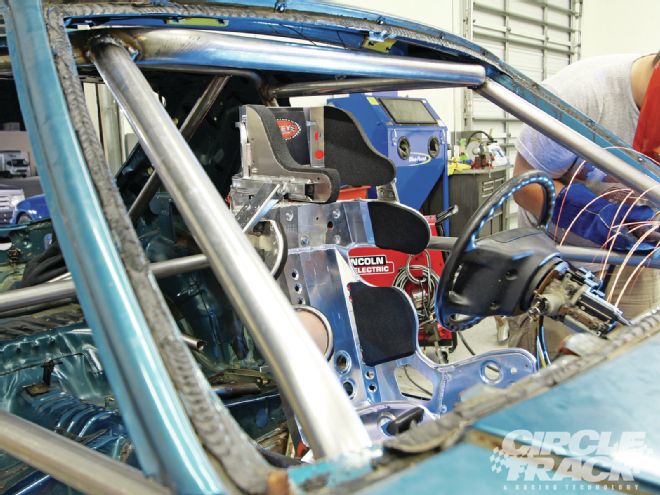
 Before we could install the seat or make any decisions regarding its placement, Pete Epple had to install the first horizontal door bar on both the driver and passenger sides. By the rules, we need at least four horizontal bars on the driver side and three on the passenger.
As we said, ordering the seat from Summit Racing was easy, but mounting it in the Mustang was an entirely different story. To keep it in place and safe, the fabricators at Kirkey Racing recommend attaching it to the chassis in six places—four under the seat bottom and two just below the shoulder belt area.
Being that our Mini Stock Mustang still has the stock floor intact, we could have used it as a base for our seat, but the position was all wrong (too low) and the stock sheetmetal in these cars is flimsy and thin from day one, let alone several generations later.
With the floor ruled unsafe by our lead fabricator, Pete Epple, we got to work installing a hoop that attached to our lowest horizontal door bar, the stock rear interior bulkhead of the Mustang and the main hoop's horizontal bar, a design that basically created a floating tube frame to which we could secure our seat. To get the layback correct (18 degrees), Pete simply fabricated a square lower bar, which welded to the floor hoop and bolted the seat in place.
Wondering how we went from installing a really nice and pre-bent Competition Engineering 'cage kit to bending our own hoops? Enter Lowbuck Tools and the company's awesome Lowbuck Hydraulic Tubing Bender.
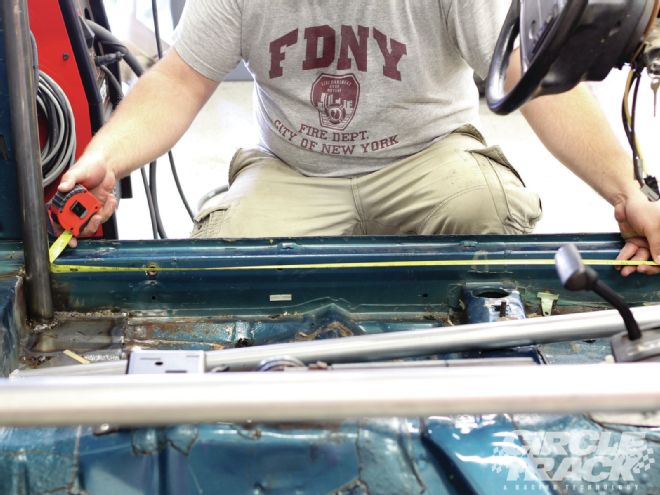
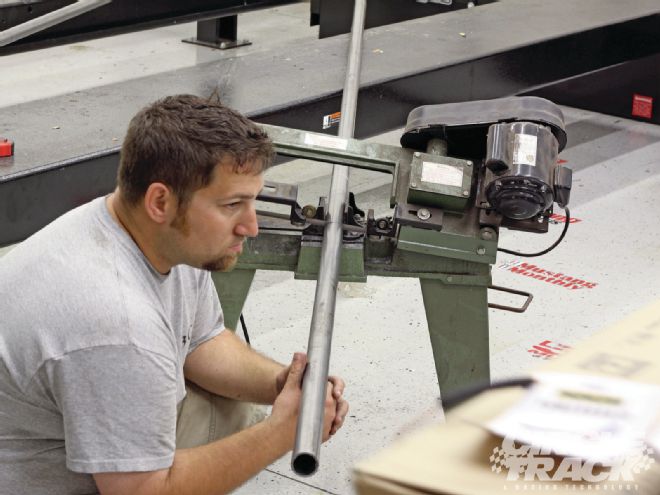 After measuring the distance between the main hoop and the A-pillar down bar, Pete jumped over to the band saw and started cutting. As always, remember to measure twice and cut once!
Built for anyone looking to bend tubing without the hassle and expense of a gigantic setup (that would be us!), the Lowbuck bender comes pre-assembled and ready to work right out of the box.
To use it, Pete literally pulled it out of the box, placed in on the floor of our makeshift chassis shop, and started bending. At $510, it certainly lived up to its name and, along with the Lowbuck notcher that we showed you last time and a band saw that we borrowed from a friend (thanks Marc), we were able to bend, notch, cut, and weld almost anything we can think of, without having to shell out our hard-earned, and much needed, cash to a real chassis shop. Anyway, enough about the cool stuff, let's get to work!