There's no escaping the fact that if your project is based on an original steel body, at some point you're going to come up against tackling the bodywork, which will more than likely involve some rust repair, or patch panel installation, but will almost certainly require some dent removal.
There are a number of books on the subject and even classes that offer hands-on instruction, and all are useful to a degree, especially when you get the chance to receive one-on-one advice on what you're doing right or wrong in a classroom situation. But all instructors, be they live or in the form of written word, will have their own preferred methods. We recently had the opportunity to attend one of Ken Sakamoto's three-day School of Metalwork classes at Sunchaser Tools (see page 46) in Pasadena, California, that proved both entertaining and educational.
Paint and bodywork are not subjects many rodders feel comfortable with-they're almost as taboo as upholstery or wiring. Why is it many of us are perfectly happy with a wrench in our hands, but swap it for a body hammer or dolly and we're lost? Professional bodywork costs thousands, but it doesn't take long to learn the skills to achieve an acceptable finish without paying professional rates. If you're the type of person who wouldn't balk at fabricating a chassis, and who is at ease with a welder and grinder, you're perfectly capable of tackling bodywork. As for upholstery, well...
Hammers and Dollies
Before you start pounding on metal you'll need to familiarize yourself with your tools. There are numerous dollies available in various shapes and sizes, but a general-purpose dolly, as well as toe and heel dollies, should suffice for beginners. Likewise, a general-purpose pick, or chisel, hammer will get you started. As you become more proficient you may want to expand your arsenal with specific dollies for specific jobs. Try to avoid cheap tools, though, as they are generally manufactured from softer metal, won't last as long, and could even be dangerous.
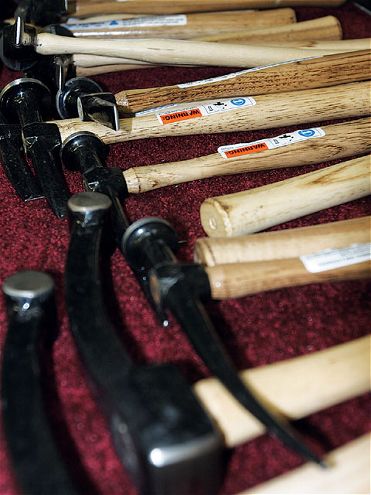 There's a body hammer for every occasion, or at least every application, though a general-purpose chisel hammer is a good starting point.
Something that came as news to us while attending Ken's class was that hammers and especially dollies should be prepared, ground and polished to keep them in prime condition. Ken advised that body hammers should have a slight crown to their face, and that the edges should be beveled. When the hammer face is prepared properly it'll be less apt to leave small divots in the metal.
He also advised grinding general-purpose dollies to achieve a crown, paying attention to remove any high spots on the face. After all, whatever imperfections are on the dolly will transfer to the finished job. Both hammers and dollies should then be faced using a 120-grit flapper wheel followed by a fine deburring wheel on a bench grinder.
Understanding Sheetmetal
We are dealing with damaged-dented, bent, and generally twisted-sheetmetal here, and the first step to repairing damaged sheetmetal is understanding how it moves and stretches, and the necessary steps to return it to its original contour.
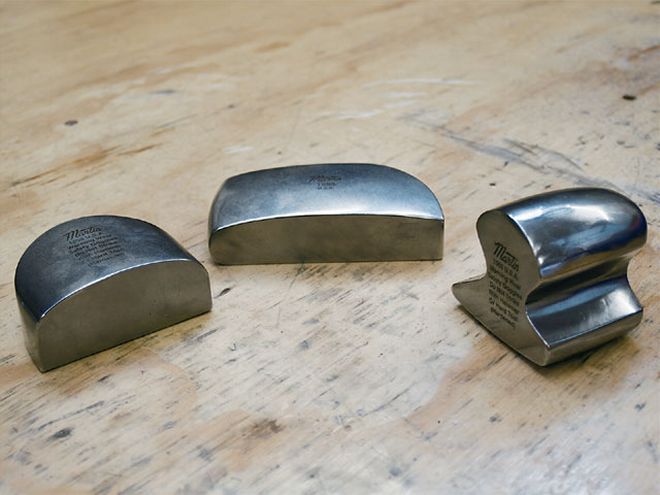 From the left: Heel, toe, and general-purpose dollies. All bodymen have their personal favorites, and therefore their advice will often contradict one another's when it comes to which is best for an application, but a general rule of thumb is to use whatever closely matches the original contour of the damaged panel.
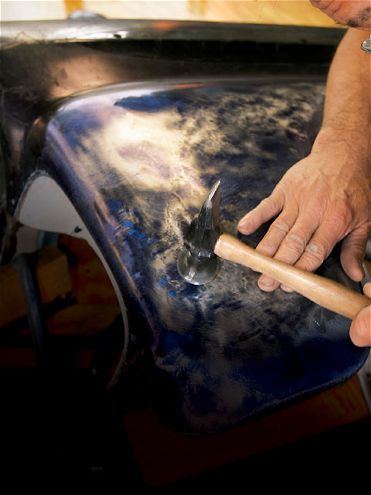
A simple small dent on a flat or gently curved panel is the easiest to remove, and as long as the backside of the panel can be accessed, the dent can be erased using a hammer and dolly, hammering from the front side only. With practice, a crease can be removed in the same way.
Sometimes there will be more than one dent and one will affect the ability to pound out the first, holding the metal out of shape. Often with a dent on a curved panel-such as the edge of a roof-when a dent forms, it will spring back slightly, producing ridges on either side of the dent that are higher than the surrounding sheetmetal. These crescent-shaped high spots will restrict the ability to remove the dent unless they are tapped down. They are not stretched areas, so they will tap down easily.
With large dents, it may be necessary to start pounding from the backside using a dolly, often starting at the edges and working toward the center of the dent. This may take some creative use of tools-dollies, spoons, or even prybars-depending on the gauge of the steel and the complexity of the damage, or its location.
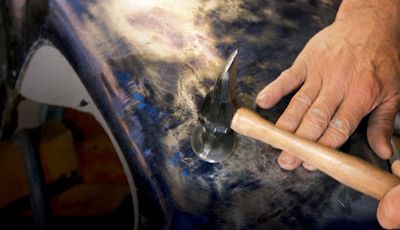
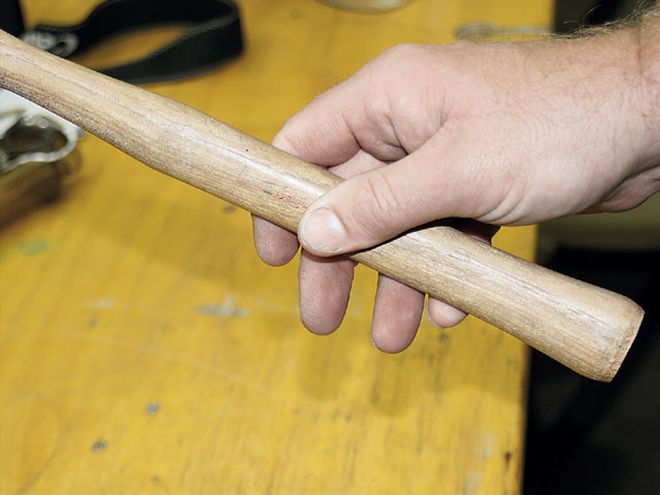 Hold your body hammer as shown and your arm will be less strained. You're not hammering nails into something so you don't need to grip it tightly.
Shrinking And Stretching
It is very rare that a hammer and dolly will be all you need to metal-finish a panel. To get it good enough for a skim coat of filler maybe, but not if you want to get it to the stage where it just needs a coat or three of primer before topcoat. For decades bodymen have used body files to finish panels. These are coarse files that look like rasps and remove metal a lot quicker than regular files. But they do remove metal, making the panel thin in places and therefore affecting its strength and structure.
Body files are usually used after another age-old process has been used to straighten or shrink sheetmetal: the oxyacetylene torch. Heating localized areas and then using a hammer and dolly to shrink them is a traditional method, but often requires numerous passes with the torch. It's also time consuming. But it is satisfying once you get the hang of it!
The latest method of heating and shrinking metal is the Shrinking Disk. There are imitators out there, but the original was designed and patented by Ken Sakamoto of Sunchaser Tools. A serrated metal disc, when spun at 5,000 to 6,000 rpm against the sheetmetal, will heat any high spots (though not to red hot as with the torch) without touching the surrounding areas. Cooling the worked area causes the heated high spots to shrink before another pass is made. Once mastered, this method doesn't take long at all before the panel is virtually like new.
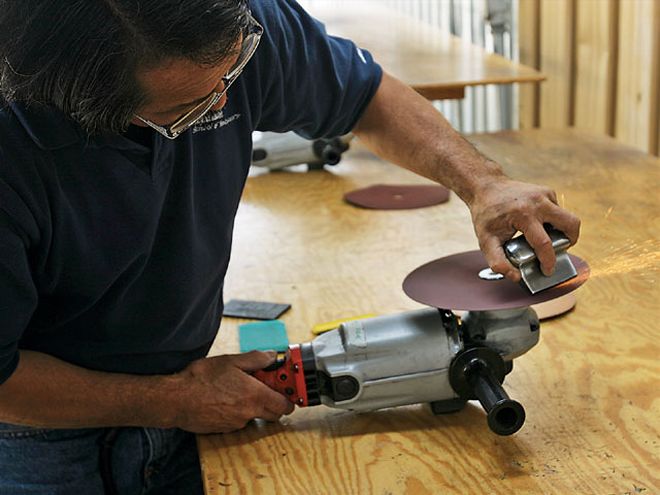 The hammer's face, as well as high spots on the dolly's face, was ground smooth using a grinder. (A belt sander would work just as well.)
Back To School
Ken Sakamoto, with over 30 years of metalworking experience, operates Sunchaser Tools and the Sunchaser School of Metalwork. You'll find hobbyists to experienced bodymen at the three-day classes, though the majority are metalwork novices. The class we took included all ages and skill levels, from Phoenix, Arizona's Billy Branch who was four days away from retirement, to 20-year-old Nikki Taylor, Ken's first female student, who was keen to learn how to repair her own '56 Chevy truck.
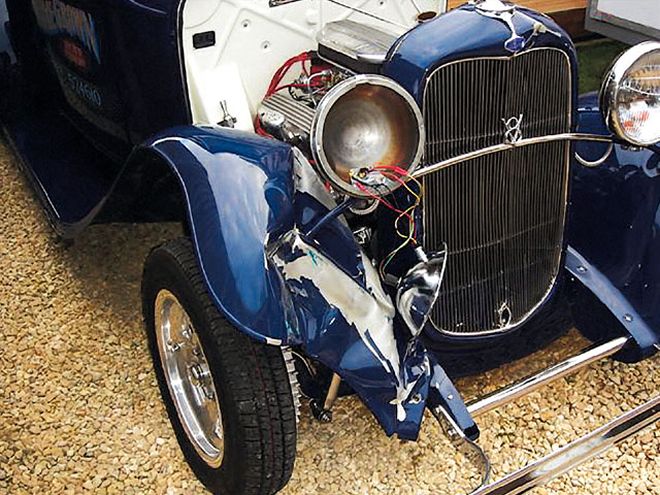
The classes start with a basic theory lecture, explaining in simple terms the composition of sheetmetal and why it expands, shrinks, or stretches when hit or heated. The lecture is followed by some simple tool preparation techniques. This is the first time some students have ever used a grinder. Another lecture on correct use of hammers and dollies-how to hold and swing the hammer, which dolly to use, how to raise a dent by hammering from the topside and why it "rises"-follows before students are presented with a 16-inch square piece of sheetmetal and invited to hit it with a ball-peen hammer and bend the corners over. They then learn how to return their panels to as-new condition. The first day ends with Ken demonstrating how to remove large dents from a Model A fender, and how to use his patented Shrinking Disk-or "the big eraser" as he refers to it-to metal-finish the fender to a point where it requires no filler before primer.
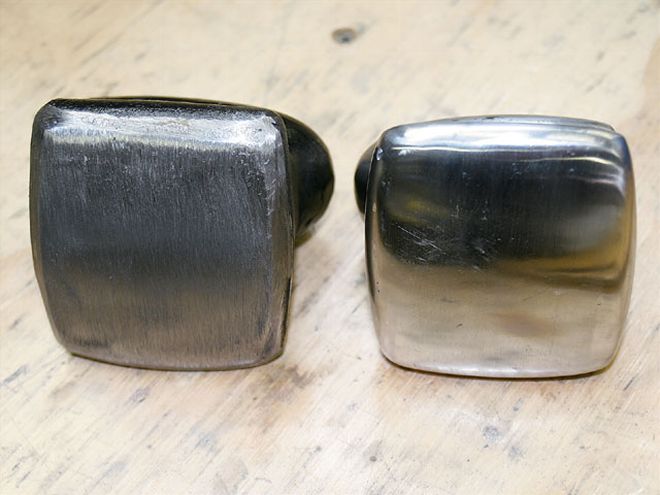 On the left is a dolly fresh from the grinder, while on the right is a correctly prepped dolly with a smooth convex surface and mirror-like finish.
This is the tool many students may have previously seen Ken demonstrate at shows, and its promise of metal-finishing bodywork with relative ease is what persuades many to enroll in the class. Having now had the chance to use the disk, I can confirm that it does work! Hammer and dolly work is required to bring the panel up to where most would then add filler, but the disk heats the high spots, which then shrink when cooled with a wet rag. Added bonuses are that no metal is removed and the process is much quicker than the traditional method of using an oxyacetylene torch followed by hammer and dolly work to shrink sheetmetal.
Day two sees some students using the Shrinking Disk to finish their flat practice panels, while others straighten project panels they brought from home. There are additional lectures on more complicated dent removal, such as on compound curved panels, with the third day devoted to the students switching day two's roles, and again more lectures-this time on dolly, spoon, and sanding block selection, plus basic gas welding techniques.
Although Ken is in the business of selling tools, he takes great pains not to give students the "hard sell," though inevitably he will recommend certain tools. The Friction System, for instance, not only includes Ken's self-designed Shrinking Disk, but backing pads, Strip-It discs, and, importantly, an instructional video. Though it is probably most beneficial to novices, the three-day course is bound to teach even the most jaded bodyman something new, and the Shrinking Disk is a worthwhile addition to the toolbox of anyone who would rather not use plastic body filler by the bucket load!