 Gary Eaker's new A2 wind tunnel makes real aerodynamic testing affordable to Saturday night teams that have never had the option before.
Wonder no moreYou hear the advice all the time from the "know-it-alls" in racing (yes, that applies to us, too): No matter how small your track or how slow your car, good aerodynamic practices can help improve your lap times.
Yes, that advice is true. As a general rule, if you have to apply the brakes anywhere on the racetrack, you need more downforce. When that downforce is achieved aerodynamically (as opposed to achieving it by weight), it is doubly beneficial because it is gained without the disadvantage of inertia trying to push you into the wall as the car turns. The problem is that wind tunnel testing is expensive, so the information provided to Saturday night racers is too often based on tests done on Nextel Cup cars or theory with no real-world numbers to back it up-until now, that is.
Noted aerodynamicist Gary Eaker has been operating his own private wind tunnel, AeroDyn, in Mooresville, North Carolina, for a few years now. AeroDyn has been quite successful with its Nextel Cup clientele because it is one of the most affordable wind tunnels in the country. That all changed with Eaker's newest innovation, affectionately known as A2. A2 is the little brother to the AeroDyn wind tunnel, and was designed for the express purpose of making wind tunnel testing accessible to race teams that may not have the support of big-money sponsorships. A2 doesn't have all the bells and whistles that AeroDyn offers, such as a simulated rolling road and yaw control, but it does offer solid, repeatable aero testing that can be greatly beneficial to a race team.
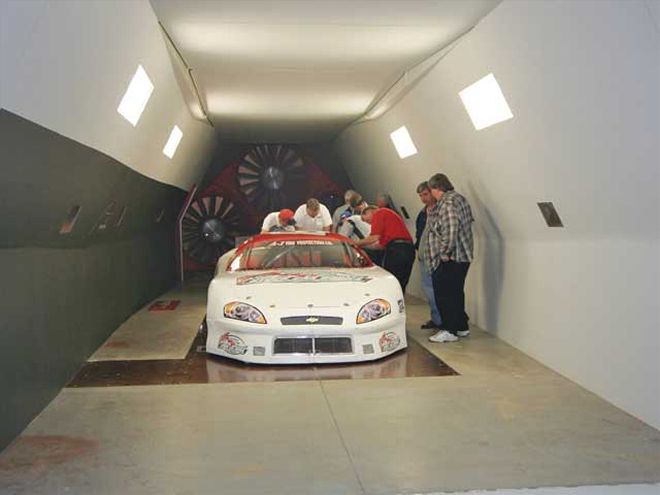
We've always wanted to get a real-world short-track car into a wind tunnel to see how it performed, but as experienced by most race teams, the cost was too prohibitive. When Eaker opened the A2 facility, we finally had our opportunity. We joined drivers Freddie Query and Preston Peltier at A2 as they ran Query's Super Late Model asphalt car through a series of tests. Query and Peltier are both savvy veterans and came prepared to make the most of their time in the tunnel with a complete list of all the tests they wanted to perform and all the hardware they needed to get it done quickly. We followed along to see what worked and what didn't. Over the course of approximately five hours, Query, Peltier, and a handful of volunteers were about to pull off 33 tests. The following are some of the most interesting tests we witnessed.
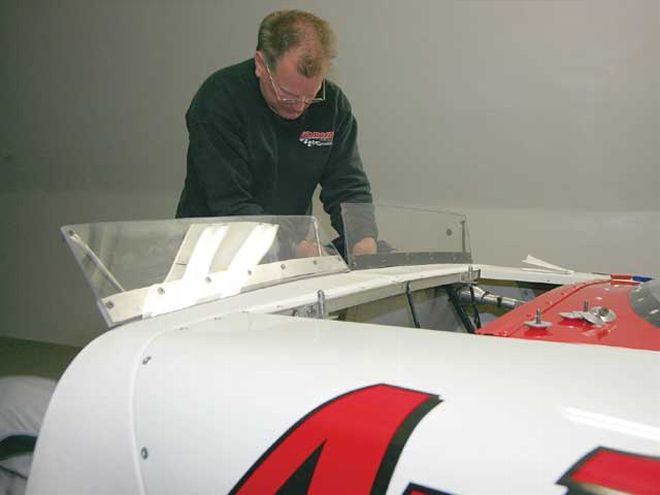 Car owner Freddy Query tests a taller spoiler angle. Wind tunnel testing showed that the spoiler was stalling at the taller angle and offering little benefit to go with the increased drag. That was something that would be difficult to determine during a test session on the track.
Spoiler Angle
After making a few baseline runs, the first test with the car fully taped in qualifying trim and sitting at inspection ride height involved raising the spoiler angle from 50 to 70 degrees. This was done to see how it affected front versus rear downforce balance, but the surprise was how little it actually helped downforce at all. Downforce improved by 11 counts in the front and only 8 in the rear, while drag increased dramatically. Normally, a team testing a downforce car in a wind tunnel cares very little about drag numbers. In this instance, it shows that the spoiler was already approaching its stall angle closer to 50 degrees and wasn't helping appreciably at 70.
Because the spoiler is behind the rear axle, downforce here has a mechanical cantilever effect on the car, which reduces load at the front. Raising the spoiler angle (as long as it isn't stalled) will increase rear downforce and mechanically decrease load on the front tires. Lowering the spoiler will have the opposit effect. For reference, one count in a wind tunnel is equal to 1 pound of downforce on the track at 135 mph. It does not change with the weight of the car, only speed. The second interesting thing to note from this test is that by moving the spoiler, the downforce improved more over the front wheels than the rear. Aero, it should be noted, is as much about creating pressure differentials above and below the body sheetmetal as it is about air actually hitting a surface and pushing it down. The spoiler actually causes air to dam up in front of it, and the high-pressure zone created by the spoiler can reach all the way to the hood. The car responded as much as it did at the front because the chassis is remarkably open. There is no front or rear firewall to speak of. The Super Late Model has an offset chassis, and the only area boxed off with sheetmetal is the driver's compartment. Because the area underneath the body is so open, the front and rear wheels are easily able to "talk" to each other, so a change at the rear of the car will affect front downforce much more than a car with a full firewall.
Tape
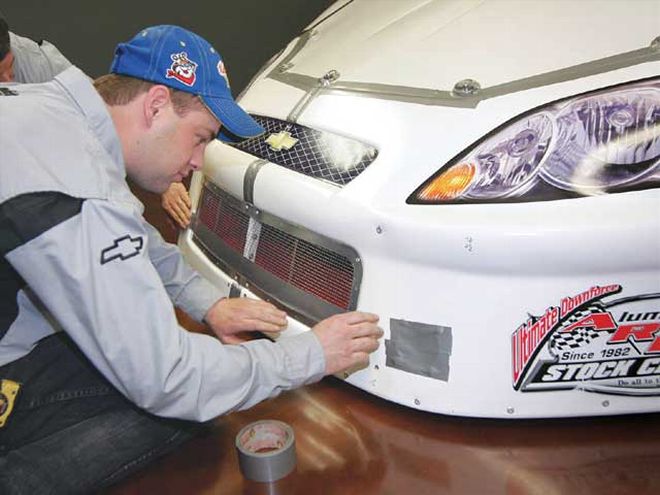
As you might expect, taping up the grille and brake ducts is one of the most effective things you can do when it comes to legally adding downforce. On our ARP-bodied car, taping up the nose was worth over 100 points of front downforce. At 135 mph, that's 100 pounds of extra pressure adding grip to the front tires.
Peltier took things a little farther to see if taping all the body seams to seal them off would further improve the aero. This, as you might expect, had no noticeable effect.
Finally, we experimented to see how a partially taped grille opening affected the car. Adding two strips of tape over the bottom portion of the 28.5x5.75-inch grille added approximately 25 counts of downforce over an untaped grille, while two strips across the top of the opening added approximately 31 counts. This is probably because the tape at the top of the grille created a solid surface for the air to move across that was unbroken all the way to the windshield.
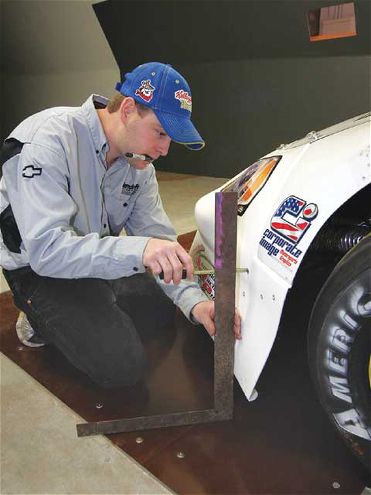 Preston Peltier makes a quick ride height check. Because the car's attitude (or the way the body sits) plays such an important role in aerodynamics, it is important to keep track of how every change affects it.
Inspection Height versus Actual Height
It is common knowledge that your race car is rarely at inspection height when it's at speed on the racetrack. Of course, that's fine on the setup plate because you can set such things as camber gain to account for suspension movement. Conversely, testing a car's aerodynamics at ride height or inspection height is a little more problematic. The car's attitude can significantly affect its aerodynamic performance.
If the front end drops because of aerodynamic downforce or simply because the driver applied the brakes, that increases the car's rake, or body height from front to back, which will increase downforce. If the car rolls over on its right side through the turns and lifts the left-front fender, that will allow more air underneath the car, raising the pressure and reducing downforce. Before testing in a wind tunnel, you need to track your car's attitude through a turn and try to mimic that in the tunnel. The easiest way to do this is simply to record your bump stop locations on the shocks after a set of hot laps.
In the wind tunnel, the car needs to be off of its springs and locked at the height you choose. You can do this by fabricating a set of solid struts out of metal tubing that will replace the shocks and springs. If the body moves once the air hits it, it will throw off your findings.
Query and Peltier brought two sets of struts to set the car both at ride height and at the attitude the car will normally be in through the turns. We won't give away those heights because they have worked really hard to develop their shock and spring packages, but we'll say the effect was dramatic. It also changed many of the things we had already tested. As you can imagine, the nose was significantly lower than ride height when the car was set at racing attitude. This not only dropped the front valence closer to the ground, reducing pressure under the car and raising downforce, but it also raised the rear spoiler angle.
If you remember, the spoiler was already reaching stall above 50 degrees on this particular car, so a taller spoiler did no good. Query and Peltier were forced to deviate from the planned test schedule slightly to find the best spoiler angle when the car was raked forward.
Another example is a false radiator box floor the team had tested. The bottom of the radiator box on this car is flush with the bottom of the grille opening. In an effort to build-in a deep gurney lip of sorts (racers may also know it as a belly pan), the team fabricated a piece of sheetmetal that ran from the bottom of the radiator forward to the bottom of the valence. When the car was at ride height, the sheetmetal actually ran downhill from the valence to the radiator. The difference in height was minimal-less than half an inch-but it was enough to hurt downforce. However, when the car was reset at racing attitude, the increased rake indicated that the false floor was closer to the ground at the valence than it was at the radiator, and it helped downforce.
Go Testing
If you are still trying to understand the difference between kingpin angle and caster, then you might not be ready to test in a wind tunnel. On the other hand, if you are confident in your setup skills and are looking to take your team to the next level, starting an aero program may be just what you need to do. The A2 wind tunnel was designed to be affordable for touring and even serious Saturday night teams. First-time customers can get two hours of testing for $690, and the price stays reasonable for longer test sessions.
Gary Eaker, the owner of A2, understands most teams using his wind tunnel won't have an engineer on staff, much less a trained aerodynamicist, and may need a little help making the most of their time. Because his staff is adamant about not sharing secrets learned by another team, they cannot coach you on what to do. Fortunately, he has written a workbook that can help a team prepare for and make the most of a test. He says there are also local engineers who can be hired to help a team if they prefer that option.
Here are some tips Eaker says should help a team make the most of its time under the fan:-When you are at the wind tunnel, you aren't learning anything unless the fan is blowing. Do all the prep work you can at your shop beforehand. Plan in advance all the changes you wish to make and prefabricate anything necessary to minimize time between "blows."
-Aero is notorious for interactions between seemingly "independent" mods. This means that virtually everything in aerodynamics affects something else. Be prepared to be surprised by something you didn't expect. Build time into your testing plan to deviate and test an idea that may have popped up from the previous test.
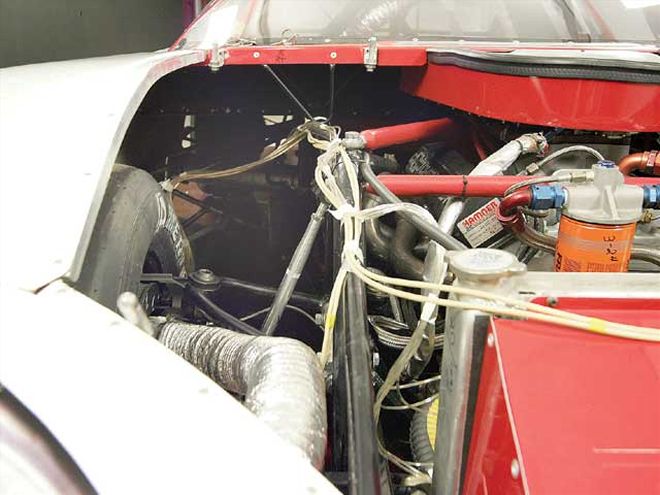
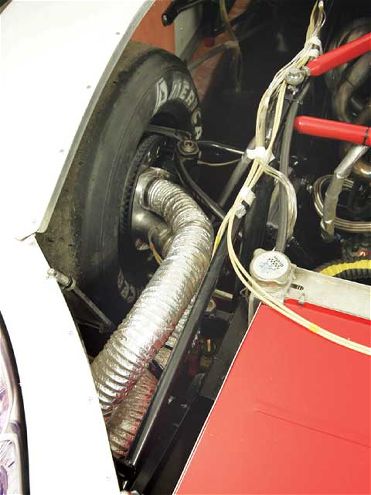 To lock the car in a static position once the wind starts blowing, it is necessary to replace the shocks and springs with a solid strut like this one. Query and Peltier use a threaded rod to make ride height changes easier.
-You should have a goal for your test. Do you want to try a bunch of different things just to see how they affect the car? Are you trying to correct specific handling problems? Maybe you are looking at different aero packages for different applications or tracks.
-A2 has anemometers to measure airflow through ducting. Don't concentrate only on downforce. You can also test to see which duct routing method gets you the most airflow to your brakes, or which radiator box design allows the smallest grille opening while still maximizing flow to the radiator.
-If you are testing things such as fender shape, begin with the minimum volume (a convex fender versus flat). This will allow you to build up the area or surface with panels or filler materials.
-During a test in the A2 tunnel, the wind speed is 85 mph. This is enough to blow things off the car. The leading edges of applied pieces should fit well and be securely fastened to the car (pop rivets work well). Don't depend on tape to hold everything in place.