If you didn't know better, you might think this Brookville Model A roadster pickup body is actually having a fighter plane cockpit built into it, and in some ways, you wouldn't be too far off. Created soon after WWII by a hot rodder named Duke Hallock, this split, or "V'd," windscreen not only added an enormous amount of style to early lakes racers and street driven hot rods alike, but also transformed the flat original Model A windshields into slippery aerodynamic wind splitters, just like fighter planes of the time. Imagine the thoughts that would cross one's mind upon first sight of a hot rod running one of Hallock's V'd windshields.
As stylish and functional as they might have seemed, not too many of these frames were produced-they just weren't very economical. Jump ahead a few decades and all that has changed thanks to the availability and casting costs of aluminum and to Hot Rods & Custom Stuff.
Now, as easy as you might think these windshields are to install, there are a few issues that you, the installer, will have to confront. First off, these frames are cast without mounting holes or the groove for the glass. However, being constructed entirely of aluminum, drilling and tapping the mounting holes is relatively easy, and will allow you to customize your installation as you see fit. Milling the 1/4-inch groove for the glass to sit in will necessitate a quick trip to your local machinist, or to a buddy down the street who owns and knows how to operate a mill. To perform these important steps for us, as well as the rest of the installation, we looked to Hot Rods & Custom Stuff of Escondido, California. These guys are pros, and had the entire operation done (with the exception of having milled the glass groove) within about 2 hours. For the rest of us, a long weekend in the garage should be more than enough time, but like any other installation performed on your project, take your time, measure once, and cut twice. Or something like that.
You must first remove the top section of cowl in order to gain access to the windshield base/mount. This section is going to be removed permanently for obvious reasons.
It's always a good idea to weld a brace across any area of body structure where a major support is to be removed. As you can see here, a simple piece of angle iron does the job just fine.
Now the original windshield post mount can be removed by cutting at the base of the mount, where the original windshield post meets the body.
Try cutting as close to the windshield post mount base as possible, but you can always leave a little meat to grind off later. When you first drop the new windshield frame down into the post, you may need to grind a little here and there for a super-fine custom fit.
Looking down into the freshly cut post, you'll notice the dash mounting bungs (one on each side) that will need to be trimmed in order to slide the new windshield post down far enough.
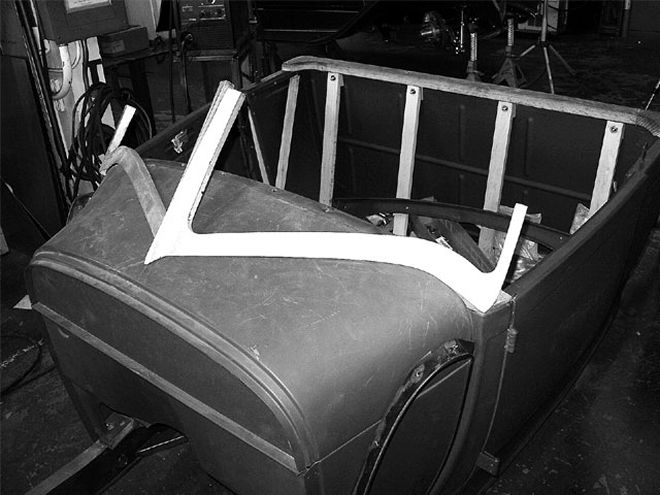
Slip the frame into the post for a trial run to make sure it will drop down into the post all the way. The thick cast portion that slides down into the body should be drilled and tapped to bolt in from the inside, behind the dash.
Since these frames come in two separate pieces, some care and ingenuity will be necessary to bolt both parts together, and to the cowl. We suggest building a trim piece that will either secure or hide the securing bolts down the center of the windshield. We also suggest drilling and tapping the underside of the frame to secure the frame from under the cowl.
We used a pneumatic reciprocating saw to remove about half of the bungs' length; however, an electric Sawzall would accomplish this just the same.
These windshield frames fit quite nice straight out of the box, but with some special care and ability, the aluminum frame can be ground for a perfect fit to the body.
With the Hallock windshield mounted to the cowl, some thought will be necessary in regard to how the dashboard will now mount to the cowl.
As you can see in this shot of the finished car, the dash was simply molded in place for a clean smooth look.
One great aspect of using aluminum is how beautifully it polishes. Combine that with some creative paint schemes, like the nostalgic looking scallops you see here, and what's left is a very aggressive looking hot rod with fighter plane cockpit styling. Notice how the paint job helps to exaggerate the windshield's shape, and at the same time helps the windshield look natural on a car that originally had a flat windshield and very straight bodylines
Hot Rods & Custom Stuff
2324 Vineyard Ave
Dept. SRM
Escondido, CA 92029
(760) 745-1170
www.hotrodscustomstuff.com