After wrenching on Scarlett, our ’72 coupe project car, for well over four years now, you may wonder what’s left to do. We started with easily reversible bolt-on mods such as a Zex nitrous oxide kit, stock-replacement brakes from Wilwood, a suspension rebuild that included a Van Steel rear coilover conversion, Corbeau seats and harnesses, and ECPB electric conversions for the headlights and wiper door. This was Stage 1; bolt-on, reversible and reasonable. We went down the rabbit hole during Stage 2 when we tore the car down to install a FAST-managed 416ci LS3 backed up to an American Powertrain T-56 Magnum, and then installed Vintage Air A/C, custom gauges, and all the wiring to make it work. What we didn’t do was anything to get the power safely to the ground. Despite a certain detached journalistic curiosity about how long the rear diff would live when you pull the pin on over 600 hp, prudence demanded a safer alternative. Welcome to Stage 3, where we build, equip and install a custom C7-based Street Shop chassis that will let us safely manage that kind of power without damaging the car or driver.
Before we get to the “what,” we need to answer the “why”—why perform the sometimes-drastic modifications and make the substantial financial investment in a new chassis rather than adding new components to the original? After all, if our g-meter is to be believed, Scarlett hit 1 g with her new suspension, and there’s no arguing with the track performance of stock-framed cars like Ridetech’s 48 Hour Corvette or Danny Popp’s wicked blue ’72. These are, however, the exceptions that prove the rule.
The first limiting factor to the original frame, other than age and—in many cases (though not ours)— rust, is its flexibility. That’s the reason why you can’t always open the doors when the car is on a lift. Upgrades like stiffer springs can only work effectively if they have a firm surface to work against; otherwise, it’s the frame that gives, not the spring. When I stiffened the springs on my old ’71 big-block convertible, the chassis flexed so much it would pop the rear latches of the convertible top loose just going down my driveway. No matter what you add to the frame, that flexibility remains, limiting the effectiveness of other modifications. This isn’t a new discovery. The Chevy Power Manual had extensive instructions on how to stiffen a C3 chassis for racing use, and that was over 30 years ago.
Some flex can be attributed to design, but the more obvious issue is construction. The framerails are folded from sheetmetal some 0.095-inch thick and stitch-welded rather than welded the entire length of the seam. Adequate … perhaps, but not optimal.
The second limiting factor is the use of a factory-layout suspension. While there are many excellent upgrades that offer significant improvements to the stock three-bar independent rear (trailing arm, camber bar, and the ever-dynamic halfshaft) there are intrinsic geometry problems the aftermarket hasn’t yet fully solved. No matter the parts you bolt into the factory holes, using the original pickup points means accepting those limitations, which are unsurprising when you remember the C2/C3 suspension debuted in 1963. Even more radical options such as the Guldstrand five-bar conversion intended to overcome some of the shortcomings of the often-unpredictable Shark rear suspension are still a far cry from the Short/Long Arm type suspension that’s now been under Corvettes since 1997. When you start with a clean sheet of paper, however, and don’t mind cutting a little fiberglass, the world opens up.
While there are several companies making chassis that use later-model suspension components, we chose the Athens, Alabama-based Street Shop, Inc. Founded by Tray Walden in 2001, Street Shop is one of the pioneers in custom chassis, with three patents to its credit, and C3 frames range from a drop-in model featuring late-C4 suspension all the way to a C7-based version using the latest in Corvette suspension technology. You won’t have a hard time guessing which one we picked. Even though the C7 components take up more room (which requires reworking the luggage area of the car), and costs more than the C4 option, when we considered the performance gains and the ability to take larger tires offered by the C7 version, we felt it was best in line with our build philosophy for this car.
Starting with mandrel-formed ’rails made of 2x4x0.120-inch wall rectangular tubing, all Street Shop chassis are jig-built using components designed and manufactured in-house on equipment such as its high-definition CNC plasma cutter and Haas CNC mill.
Although some components like halfshafts are made to its specs, most C7 suspension parts are OEM Corvette pieces, so things like spindles and A-arms are easily available from your local dealership or parts house, ensuring ready parts availability for years to come. As for things like brakes and shocks, the sky, as we’ll see later, is the limit.
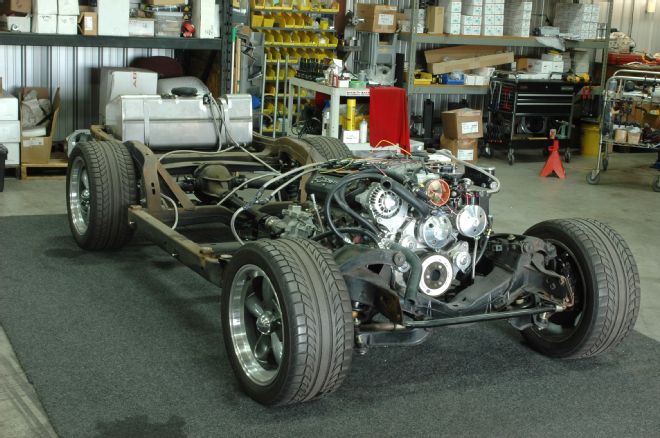
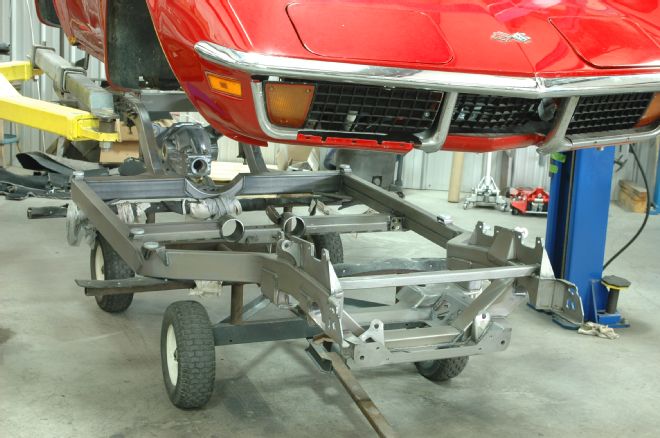
01. Here is Scarlett’s factory chassis after the body lift. While we were able to make substantial improvements to it, the performance of the parts we added is ultimately limited by the foundation, and the 50-plus-year-old design of the C2/C3 chassis leaves much to be desired when compared to the modern Corvette chassis.
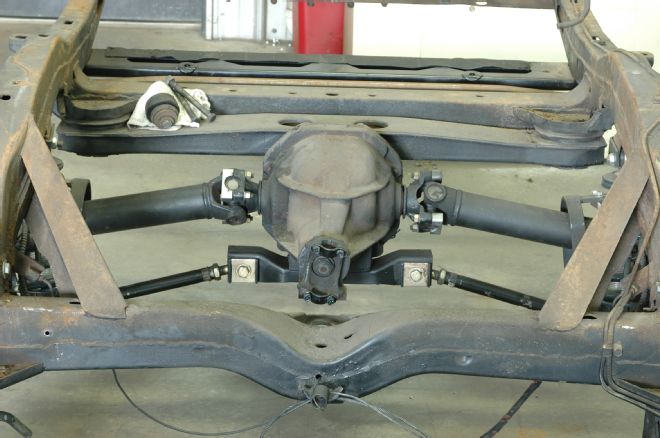
02. The C3 rear suspension has two links that control the camber gain of the rear wheels: the lower camber bars, which we upgraded, and the halfshafts, which tend to wander in and out of the differential, leading to sometimes dramatic changes in handling. It was state of the art when it was introduced to the U.S. … around the same time as Beatlemania.
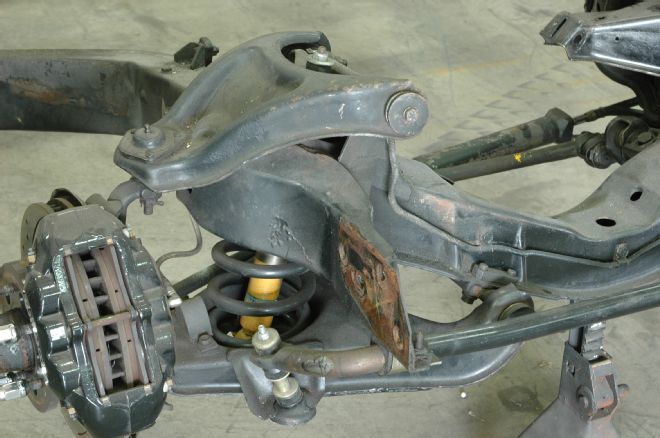
03. The front C3 suspension has a C-channel construction in the front framehorns and the stamped steel control arms. Not installed in this photo is the front shock tower brace we previously installed between the upper control arm mounts to minimize flexing under load.
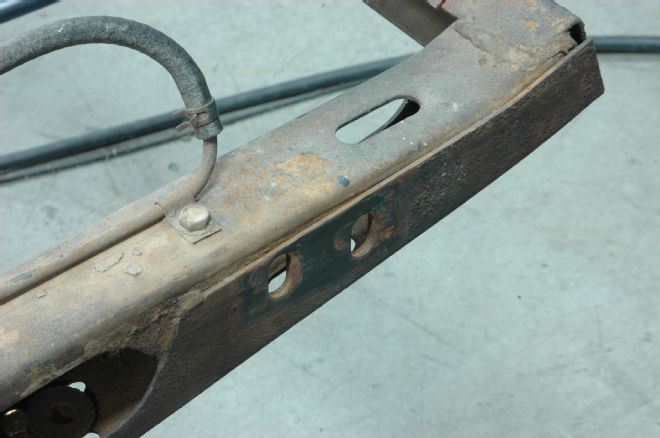
04. One of the shortcomings of the original frame is in the material, a sheetmetal roughly 0.095-inch thick that has been bent over and welded to create the ’rails. While perhaps adequate for the cars as delivered, the amount of power we’ve put in Scarlett requires something with far greater strength.
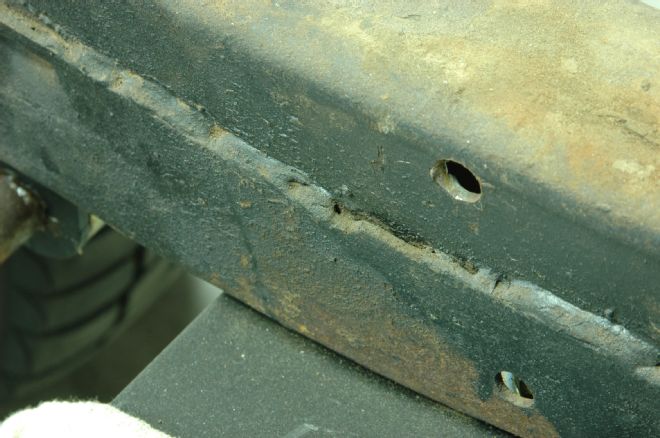
05. In addition to the thin material used, factory frames also were stitch welded rather than fully welded down the seams, which meant even the limited strength of the material used was not fully realized.
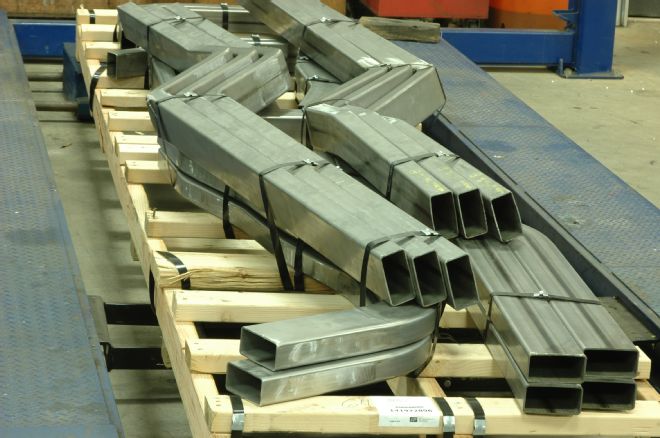
06. Here’s what a Street Shop frame starts as: mandrel-formed framerails made of 4x2-inch box tube, which is substantially stronger than the factory ’rails.
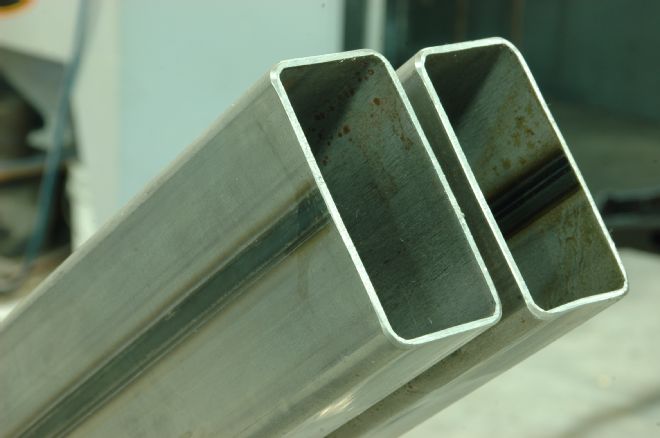
07. In addition to the strength increase of using square tubing as opposed to a bent piece that’s partially welded, the tubing walls are 0.120-inch rather than the nominal 0.095-inch of the factory frame material. Even with the added material, a finished C4 or C7 frame weighs about 50 pounds less than a factory frame.
08. Here is a Street Shop frame for a C1 shown with late-C4 rear suspension. In C2 and C3 applications, the C4-equipped frame installs without modification, making it a popular option for those who want to later return the car to original for resale value.
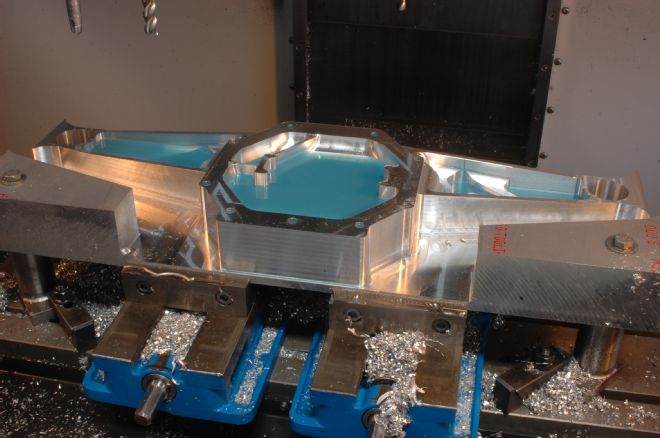
09. If you were looking closely in the previous photo, you realized the “batwing” used for the C4 suspension is not a factory cast piece. Street Shop machines its own batwing/rearend housing in-house from a massive piece of 6061 aluminum.
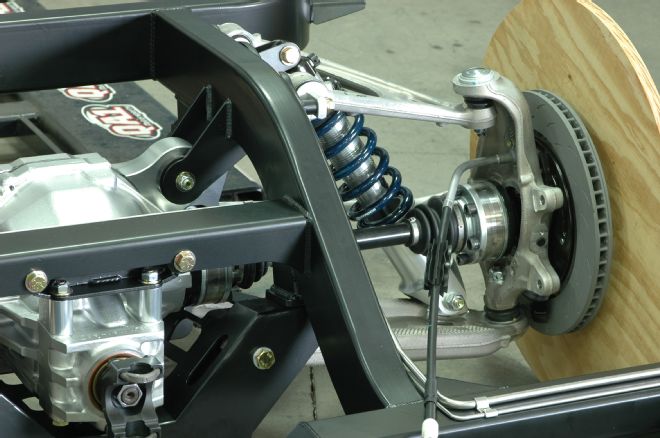
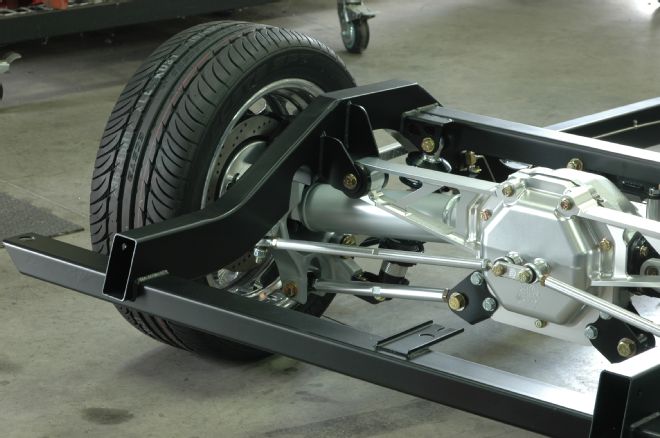
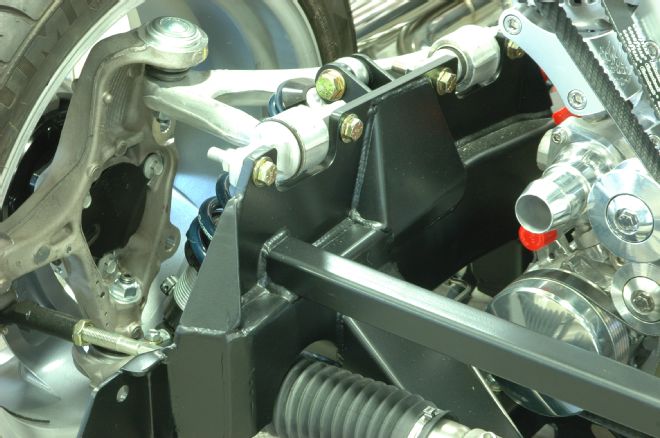
10. The rear suspension of a C7-based chassis. While the C7 installation is obviously more involved—the A-arm design takes up more room, which means heavily modifying the luggage area—there’s a tremendous performance advantage to be found in using the suspension from a current-production Corvette.
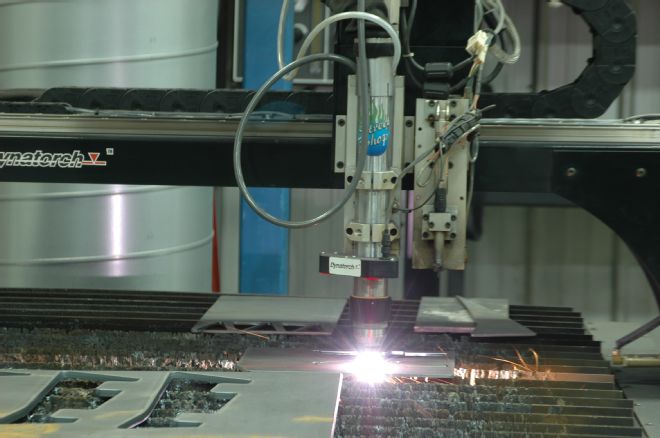
11. Cutting frame components using an HD CNC plasma cutter. The ability to draw things in a CAD program and then quickly turn that drawing into cut steel makes it possible for Street Shop to fabricate virtually all of the pieces required to build the chassis in-house.
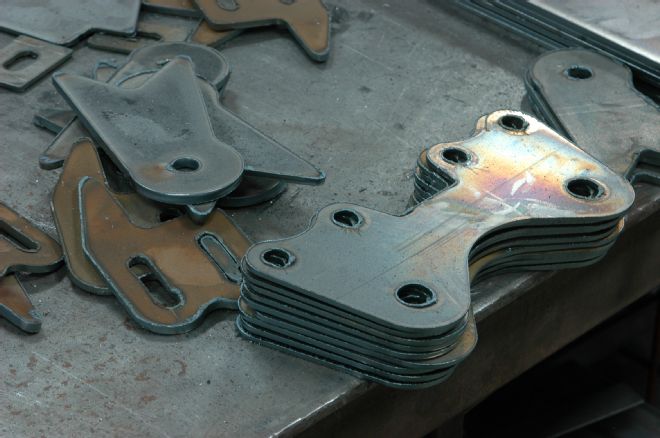
12. Parts after being cut on the HD plasma table. After the plasma cutter and depending on which parts they are, they will either go to the Betenbender press brake for bending into their final shape or to the frame jig where they’ll be clamped and welded into place.
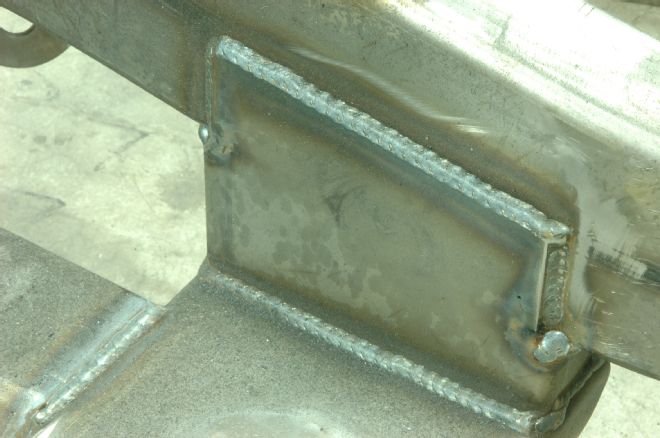
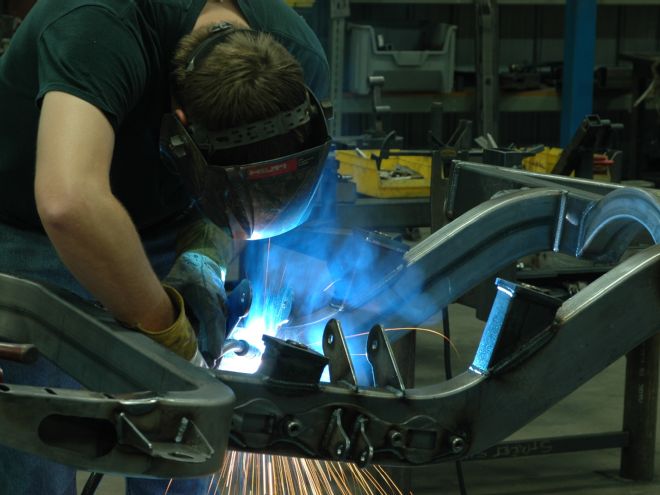
13. The front crossmember shown where it meets the framerail. Note the consistency of the weld and how it’s fully welded around its perimeter. This is standard for pretty much all joints on the frame.
14. The rear of the frame, showing the mounting point for the upper A-arm of the C7 rear suspension. Note that the bracket is fully welded on both the outside and the inside.
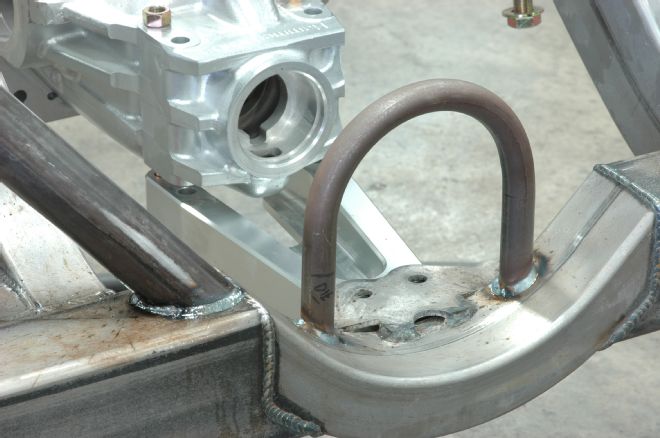
15. While frames can be built on a standard package, they’re more often built to spec for a customer’s specific needs. In our case, we asked for a driveshaft loop that would contain the shaft should it break during hard use. This will meet the requirements of racing sanctioning bodies.
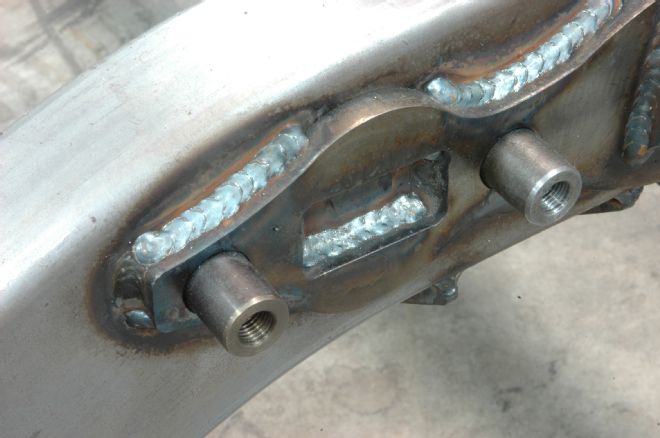
16. The front, passenger-side mount for the upper A-arm. Note the thickness of the 3/8-inch material used as well as the reinforcement front, rear and middle, and the welded-up reinforcement bar that ties both sides together, much as we used a shock tower brace on the factory frame.
17. The completed chassis ready to be fit to the body. This is usually done prior to powdercoat in case any minor adjustments need to be made—and to keep from scratching up the frame’s finish.
Catch up on the rest of Project Scarlett:
How to Convert a C3 Corvette to Electric Windows: 1972 Corvette Scarlett Project Car
A Different Way to Route Engine Wiring Through the Firewall on a 1972 Corvette
1972 Corvette Scarlett Project Car - C3 Column Rebuild
Wiring in Accessories Into Our 1972 Corvette Project Car
1972 Corvette Scarlett Project Car - Taming the Rat's Nest
1972 Corvette Scarlett Project Car - Dash Prep and Radio Installation
1972 Corvette Scarlett Project Car - Dash Wiring Harness Installation
1972 Corvette Scarlett Project Car - Dash and Gauge Installation
1972 Corvette Scarlett Project Car - Replacing the Factory Wiring Harness
1972 Corvette Scarlett Project Car - Vintage Air Gen 4 Underdash Components
1972 Chevrolet Corvette Scarlett Project Car - Cooling System and Hydroboost
1972 Chevrolet Corvette Scarlett Project Car - EFI Fuel System
1972 Chevrolet Corvette Scarlett Project Car - Six-Speed Manual
1972 Chevrolet Corvette Scarlett Project Car - Sidepipe Install
1972 Chevrolet Corvette Scarlett Project Car - LS3 416 Installation
1972 Chevrolet Corvette Project Car - Powertrain Swap Preparation
1972 Chevrolet Corvette Project Car - Seat Install, Part 2
1972 Chevrolet Corvette Project Car - Seat Install, Part 1