Replacing a timing belt on your Hyundai Santa Fe is a very difficult job. The belt, which turns the engine, crankshaft and camshaft, must be positioned exactly, during removal and installation, in a position known as the Top Dead Center position. The following procedure is specific to a 2001 model with a 2.7 liter V6 engine, and it will vary depending on your vehicle's exact engine type. Consulting your mechanic is highly recommended.
Remove the rear seat cushion in the vehicle and unscrew and open the cover for the fuel pump module. Disconnect the fuel pump's electrical connector, then run the engine until it stalls, depressurizing the fuel system.
Disconnect the vehicle's negative battery cable.
Disconnect the electrical connectors to the ignition coils to disable the ignition system.
Raise the car's front end and support it on jack stands, making sure the vehicle is in park and the parking brake is on. Remove the front wheel and the splash shields for the engine and the fender well--the splash shields should require a Torx wrench.
Unscrew and remove the engine cover.
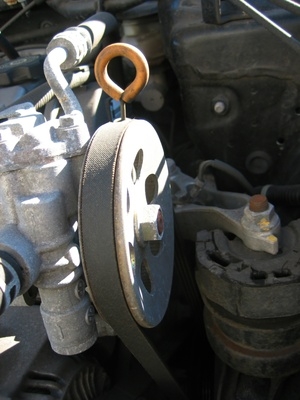
Loosen the tension on the drive belt using a breaker bar and socket on the tensioner, and remove the drive belt. Unbolt and remove the pulleys for the power steering pump, tensioner and idler using a wrench.
Unscrew and remove the bolt on the crankshaft using the breaker bar, while keeping the crankshaft from turning with a strap wrench. Remove the crankshaft pulley with a puller that bolts onto the crankshaft hub.
Unscrew and remove both timing belt covers.
Remove the number one spark plug, pulling out its wire and unscrewing it with a wrench and spark plug socket. Insert a pressure gauge in its place.
Turn the crankshaft clockwise using the breaker bar and socket until pressure is read on the gauge, and then until the notch on the crankshaft pulley lines up with the 0 mark on the timing plate.
Unbolt and remove the timing belt tensioner assembly with the belt.
Compress the timing belt tensioner's push rod very slowly with a vise, and insert a metal pin, Allen wrench or drill bit into the push rod's holes, then remove the tensioner from the vise.
Connect the timing belt tensioner and, using a torque wench, tighten the tensioner's fixed bolt to 20 foot pounds, the arm bolt to 40 and the pulley bolt to 40.
Align all the timing marks on the sprockets and install the timing belt. Place the belt on the crankshaft first, followed by the idler, the left camshaft, the water pump, the rear camshaft and tensioner.
Pull the pin out of the tensioner after double-checking to see if all the marks are still aligned, thus causing the tensioner to snap into position.
Turn the crankshaft clockwise two full turns with your breaker bar, and check the timing marks again.
Wait five minutes and then check the tensioner rod's position. It needs to protrude by .27 to .31 inch.
Reinstall the timing belt covers, then reconnect the crankshaft pulley with its bolt and the strap wrench.
Install the pulleys for the power steering pump, drive belt idler and tensioner. Rotate the tensioner, slip the drive belt back on the pulleys and slowly release the tensioner.
Reconnect the engine cover and the front wheel and lower the vehicle off the jack stands. Connect the electrical connectors for the ignition coils and fuel pump along with the negative battery cable.