Our 1960 Corvette project is progressing nicely, and like all homebuilt cars it seems to take longer than expected. After changing the front suspension in our C1 we decided to move to the rear and update that as well. After reviewing the options, and there are many, we decided to stay with a solid rear axle and leaf springs on our original chassis. We did this for several reasons: simple function, ease of installation, and (finally) they do call these cars “straight axle Corvettes” for a reason.
There are several interesting pieces on the original 1960 Corvette rear suspension. The multileaf rear springs work well enough but under hard acceleration are prone to spring wrap. For that reason Chevrolet added a strut bar that mounts to the top of the rear axle housing and runs forward to the framerail. On this former drag race car these bars had been unceremoniously whacked off with a cutting torch, but not before the strut bars had caused cracks around the mounts on the frame. We TIG-welded the cracks and left the brackets in place. Replacing the factory setup was a good ol’ set of “slapper bars” mounted to the spring plate, aka “traction bars.” These bars were discarded after removing the original rearend. Likewise, the well-worn air shocks would find a home in the scrap barrel.
Removing the old rearend was a straightforward affair, large breaker bars and air impact wrenches made short work of the removal process. We decided to replace the rear springs with a set of Corvette Central monoleaf springs. New shackles and front spring bushings and pins were also sourced through Corvette Central. The new springs will give us a stance 2 inches lower than stock, with the added bonus that no upper strut bars would be required since spring wrap is not an issue with the new monoleaf springs. A set of QA1 single-adjustable shocks and the factory sway bar complete the rear suspension. One final touch would be the factory Corvette axle limiter straps. We installed these straps to limit the rear axle drop, which also prevents the driveshaft from hitting the X-member. We couldn’t help but smile thinking that the factory saw this as a reasonable solution to the problem. It appears with our new suspension the possibility of the axle dropping that low will not be an issue, but the straps are there “just in case” and to add to that all-important Corvette flavor. I should mention that rather than use the supplied rivets we bolted our straps together with 10-24 stainless steel button head bolts, which proved to be much easier.
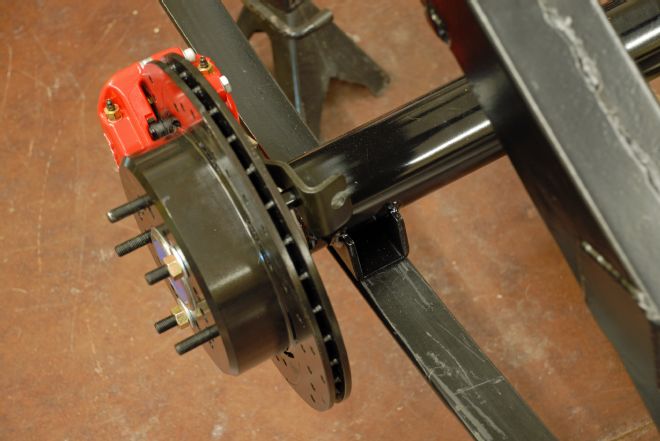
Having a new suspension is one thing, but we still needed a way to spin the rear wheels. Once again we looked at rebuilding the existing 4.11 Posi-traction unit and decided a better choice was to sell this piece to someone restoring a C1. Rather than spend our hard-earned green on new parts and a rebuilding the 1960 unit, we put an order in at Currie Enterprises for a new 8-inch Ford rear housing. We opted for a 3.55 final gear with TrueTrac limited-slip and factory-style spring pads mounted to the 3-inch axletubes. We specified a steeper than normal 7.5-degree pinion angle so our Inland Empire 3-inch aluminum driveshaft would be straighter than the original driveshaft angle. This ensures there will be no binding between our TCI Automotive 700-R4 transmission and the Currie rear. This driveshaft angle was arrived at by taking the total driveshaft angle and dividing it by two. We opted for the aluminum driveshaft because the 700-R4 will last longer with the lighter driveshaft. The rearend also uses late-model, large bearings and was fitted with Wilwood disc brakes. Our housing was 59 1/4-inches from face-to-face of the brake rotors. We also ordered a set of U-bolts from Currie and when the unit arrived it was a simple matter of painting the housing and bolting it in place. Finally, we filled the housing with 9+ racing gear oil from Currie.
Now, you may be wondering why we decided on the 8-inch rear rather than go with the more popular and stronger 9-inch rear when the cost between the 8-inch and 9-inch rear is minimal. There were several reasons. First, our engine will be in the 325hp range, something the Currie 8-inch can handle with ease. Add in the fact that we are running street tires and there is no concern with strength. Second, the 8-inch weighs less than a 9-inch rear. Third, the 8-inch is similar in size to the original rear so there is no need to notch the spare tire well.
And so in a weekend we had converted our 1960 Corvette rear suspension to a modern version of the solid rear axle arrangement. The new Currie rear axle, Wilwood brakes, Inland Empire Driveline aluminum driveshaft, QA1 shocks and Corvette Central monoleaf springs all improve performance and weigh less than the original units. We feel we have made a serious upgrade in performance and drivability with these new parts and the good news is this swap is within easy reach of your average backyard Corvette builder.
01. When we bought the car it still had the stock multileaf suspension along with a set of traction bars, aka “slapper bars;” remnants of a bygone drag race period.
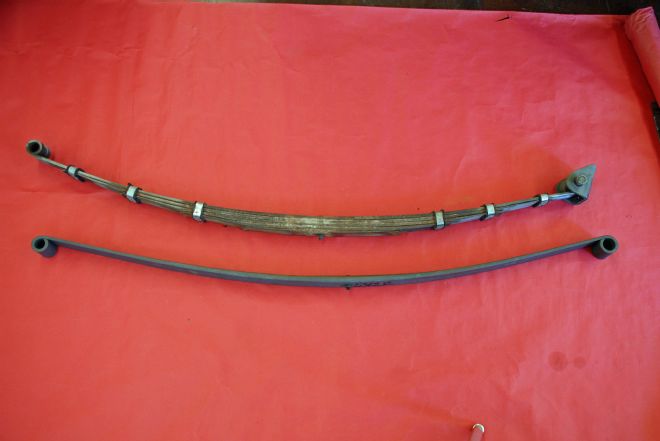
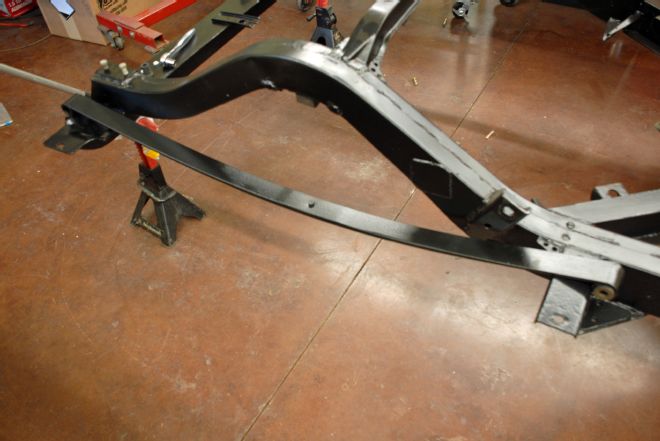
02. We removed the stock multileaf springs (top) in favor of a new set of monoleaf springs from Corvette Central. The new springs lower the car 2 inches, are lighter and do not require strut bars to prevent spring wrap.
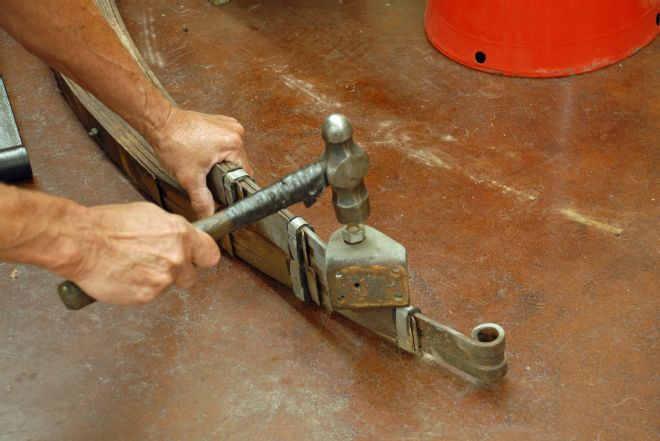
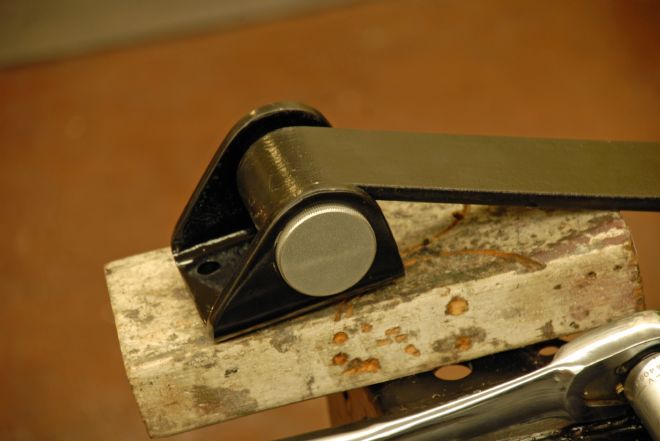
03. While reproduction front leaf spring mounts are available, we opted to use the originals. A few blows with a good sized hammer persuaded the spring pin to exit the mount.
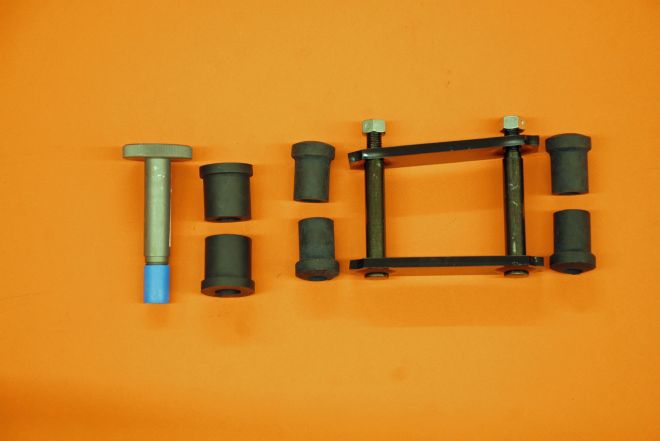
04. We ordered a new eye pin and bushings for the front of the spring along with new rear shackles to mount the monoleaf springs.
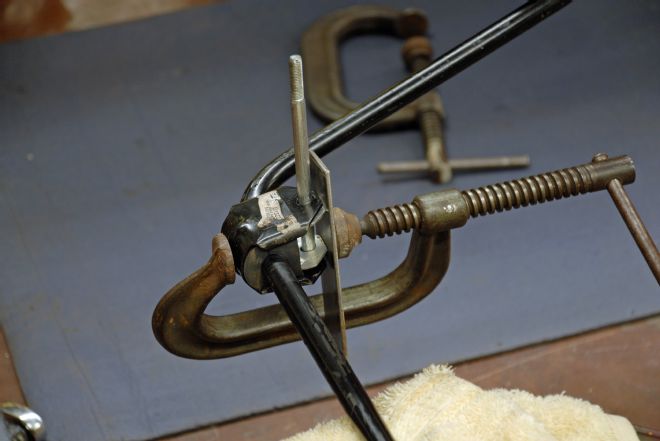
05. After installing the rubber bushings in the spring eye we used a large C-clamp and a socket to squeeze the eye pin into place. The flat side of the eye pin goes toward the framerail.
06. After we prepped and painted all the components with Eastwood 2K Chassis Black, we carried the springs to the chassis and installed new shackles and bushings in the shackle mounts on the rear crossmember and springs.
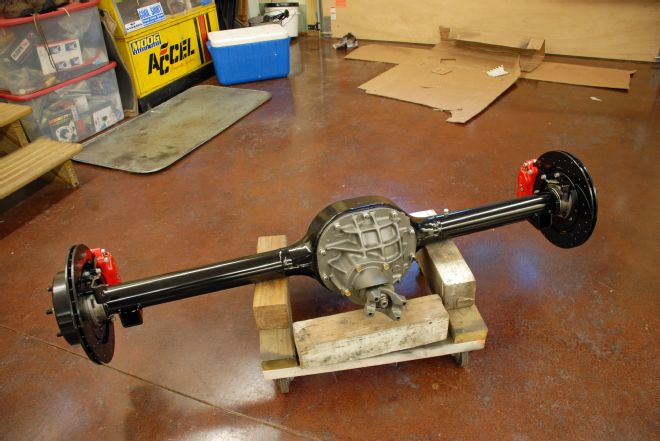
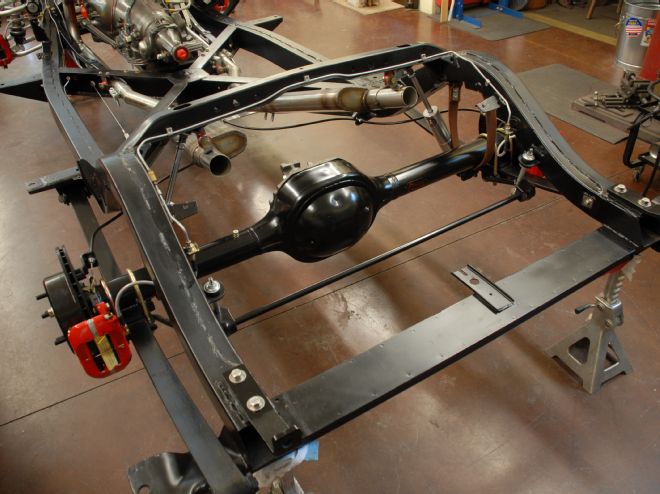
07. The new Currie Enterprises 8-inch rearend is filled with a TrueTrac differential and a set of 3.55 gears. Currie built the housing to our 59-inch width specifications. Wilwood brakes provide performance in a great looking package.
08. We installed both springs to the rear shackles but did not attach the front bracket to the chassis just yet.
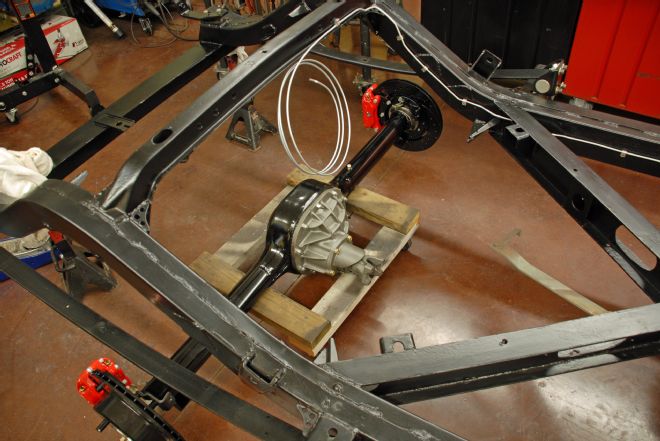
09. This homemade cart sure made rolling the Currie rear under the frame easy. Then we dropped the front of the springs down, rolled the rear back in place and we were ready to install the front of the springs.
10. We positioned the rear axle spring pad over the eyebolt on the new monoleaf spring. Happily, our spring pad measurement (47.25 inches center to center) was spot-on, and the pads were placed to provide a 7.5-degree pinion angle.
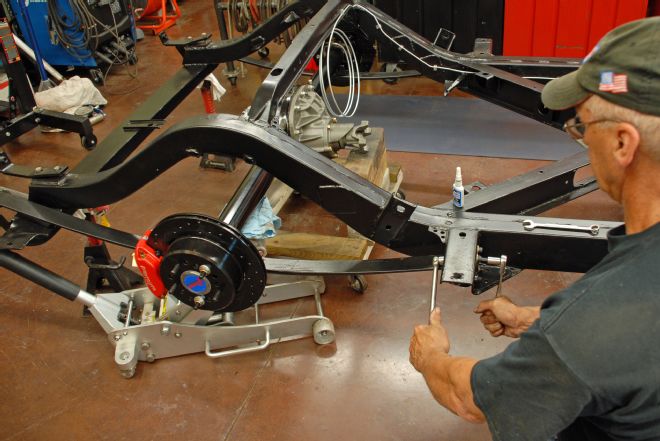
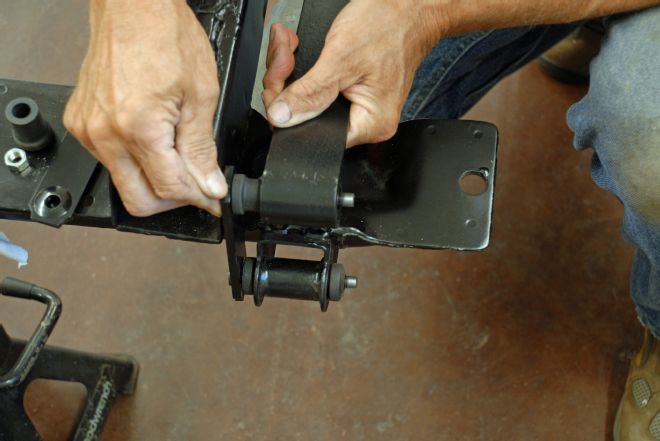
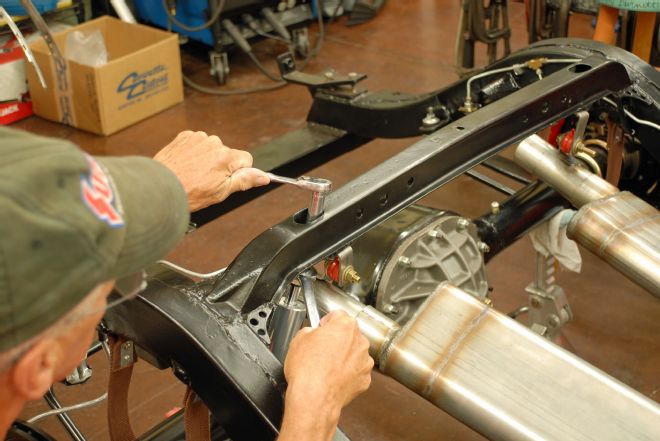
11. With the chassis supported by jack stands under the rear crossmember, we used a floor jack to carefully lift the spring into position. We installed the four bolts and used a drop of blue Loctite for good measure.
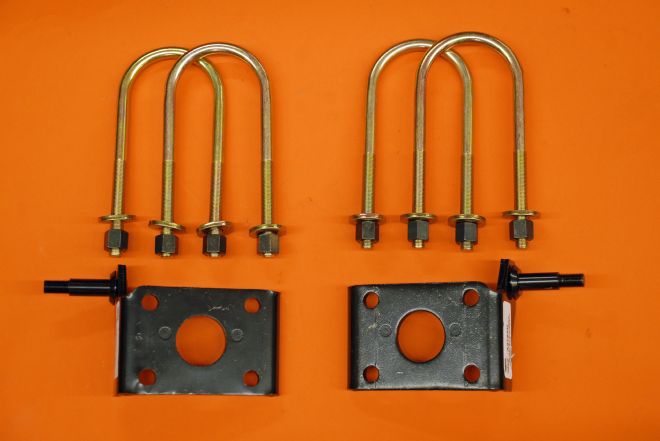
12. Our order for the Currie rear axle assembly included a set of 3-inch U-bolts that work perfectly with the reproduction lower spring plates from Corvette Central. This made the Currie rear a true bolt-in operation.
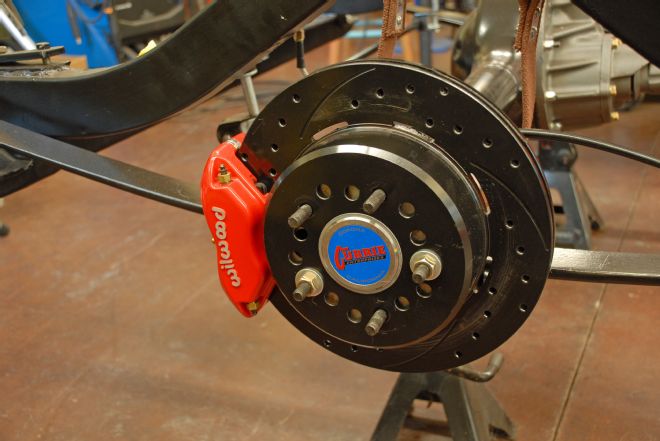
13. The team at Currie installed our Wilwood brakes, saving us the trouble of removing axles to install brackets. We simply ran brake lines and connected the parking brake cables.
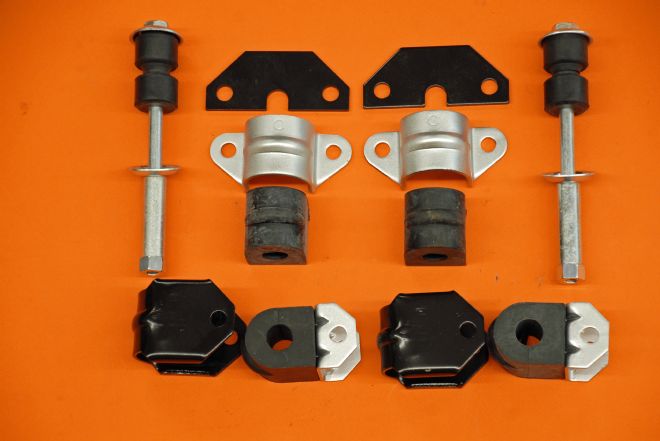
14. With the rear axlehousing bolted in place, we turned our attention to the factory rear sway bar, also sourced through Corvette Central. All mounting components were included along with the new sway bar.
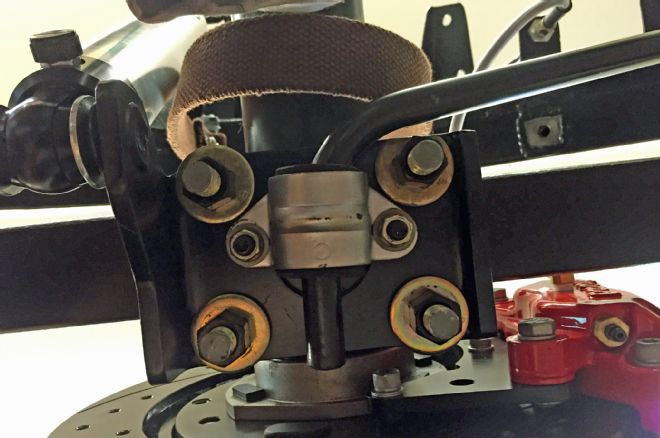
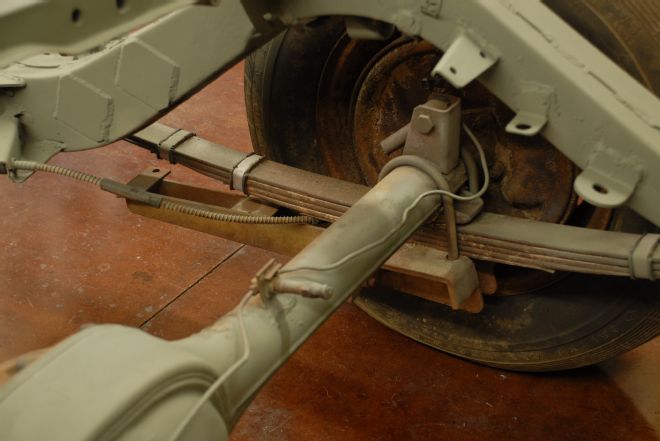
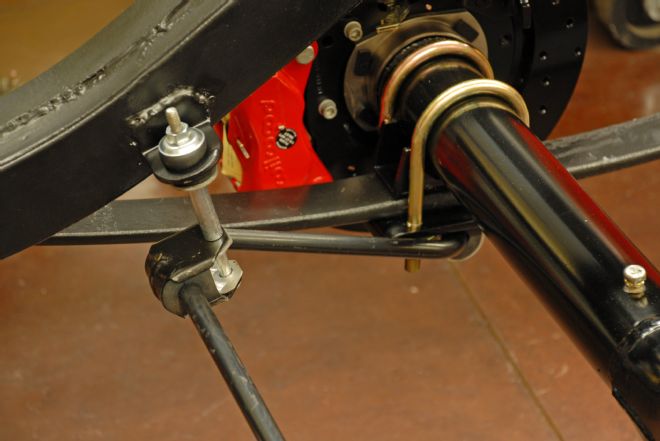
15. The sway bar attached to the bottom side of the spring pad. There are two studs welded to the bottom of the spring pad, this bushing and bracket set mounts to the studs.
16. We found a C-clamp helped to compress the new rubber bushing enough to allow the long drop-link bolt to align with the inner and outer bracket holes.
17. Looking from above, the leaf spring suspension is a study in simplicity, yet by using 2-inch lowering springs, adjustable shocks, limited-slip differential and the factory sway bar, our 1960 Corvette should provide very pleasing handling.
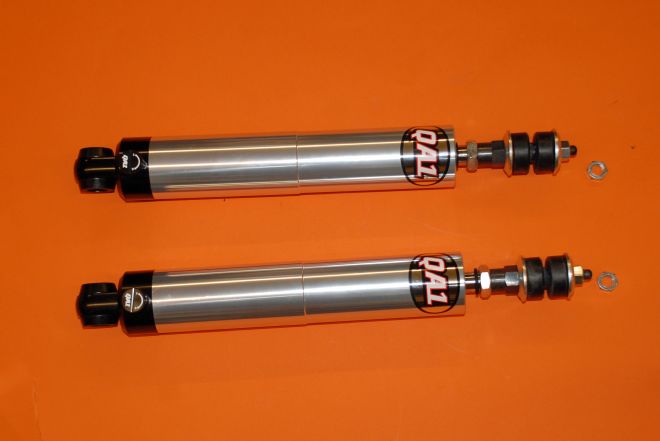
18. Since we are using 2-inch lowering springs, we found QA1 TS-703 single-adjustable Stocker Star shocks would work perfectly. Of course, all applications vary so it is best to work directly with your shock supplier before ordering.
19. Installing the QA1 single-adjustable shock was a simple, bolt-on operation. We began by mounting the top stud-mount first. Tighten the nut until the rubber bushing is compressed (not crushed), then install and tighten the lock nut.
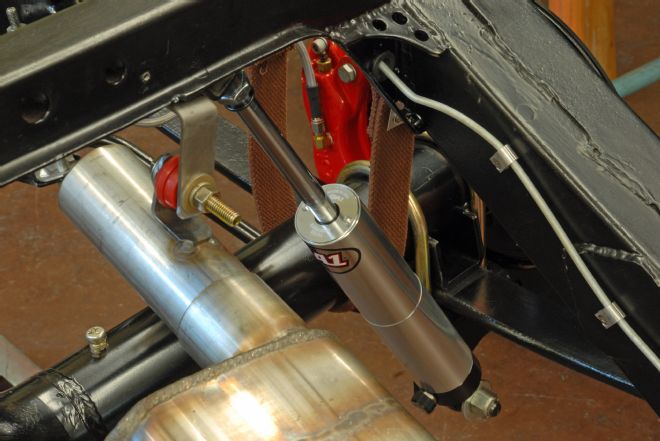
20. The lower shock mount then slides onto the stud on the lower spring plate. We used a stainless locking nut and washer on the lower stud, which was not included with the spring plate.
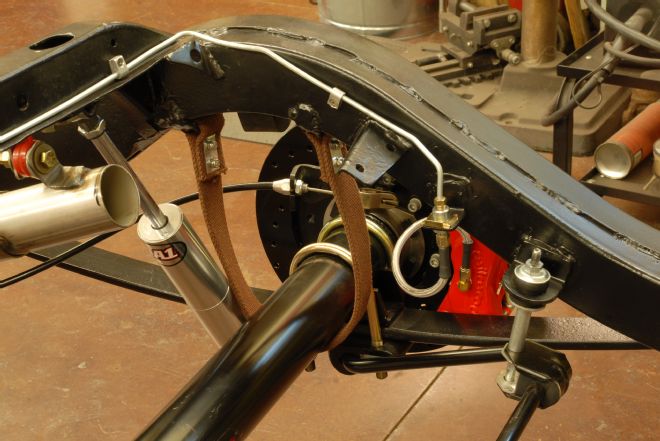
21. We installed the axle travel limiting straps to complete the rear suspension. The straps come with rivets for a factory installation, but we opted to use 10-24 SS button head bolts with locking nuts. That completes our rear suspension installation.