Ok, let's get overly simple: Your classic Mopar has come from the factory with a leaf-spring suspended rear end. This setup has been installed in cars and trucks since the automobile's humble beginnings. It works well in factory-designed situations, and with a little work, it even works well in high performance applications.
The leaf spring isn't just under your car to give a cushy ride, it has two jobs that it needs to accomplish; one is to support the weight of the car over the axle, and the other is properly locating the axle. But, while it is handling those two tasks, there are forces working against it that can be detrimental to performance. Here's an example that you might not have thought about. Let's say you're doing a little "spirited" driving, and you come into a corner a little "hot." Even under normal driving conditions, the shifting weight of the car causes the inboard spring to “get shorter” as its arch increases as the car leans outward. Conversely, the outboard spring gets longer as it flattens out under the increased force. Since leaf springs are not centered on their arch, this movement also causes the rear end to "turn" slightly. Think of it like this, as the inboard spring "shortens," that end of the axle travels slightly forward. As the outboard spring lengthens, that end of the axle travels backwards. Now, the forward/rearward movement is very slight, but none-the-less, the movement is adverse when it comes to handling.
If you're a drag racer, you know that a leaf-spring suspension is prone to wheel hop. This is the result of the axle literally trying to wrap up the spring while launching. The more torque an engine produces, the worse the problem can get. Not only is this bad for launching, this motion also causes breakage.
So you might be wondering if there is a better solution. That question has sparked debate for a long time, and the debate will likely never end, but the four link rear suspension is definitely an option for those wanting a rear suspension that possesses more versatility.
With a multilinked suspension, the links serve to hold the axle in place (in lieu of a leaf spring), and transfer the motion from the axle to the frame without flexing like a spring. The task of supporting the car's weight is now done by shock absorber that is wrapped with a coil spring. There are two basic styles of four-link suspensions, a triangulated four link means that the upper two links from the rear end to the car form a V shape, and this “triangle” help keep the axle from moving side to side. A non-triangulated four link has upper and lower links (bars) that are parallel. Since a parallel four bar has no “V,” the axle will be able to move from side to side. To stop the side-to-side movement, a track bar (also called Panhard) is needed. This bar simply connects the left side of the axle to the right side (or vice versa) of the frame, and keeps the axle in place. Parallel four-link systems have been around for many years, and you typically see them used on street rods or all out race cars.
For the rear suspension of our '69 Charger (Project 50), we felt that the versatility of a four link would be just what the car needed. After all, this car will be driven, autocrossed, and drag raced. That's why we decided to use Reilly Motorsports' Street-Lynx rear suspension. The Street Lynx allows us to easily set our ride height, and unlike leaf springs, the four-links maintain a proper pinion angle, and offers adjustment for locating the car's instant center. Since the car will see time on autocross and/or road courses, the added adjustability is welcome.
If you plan to do this install yourself, plan on a weekend. You will need to have some welding skills, and having a friend around will definitely help.
1. Since our Charger is already a shell, we didn't need to remove the old suspension before installing the Reilly Motorsports Street Lynx set up. The base for the system is this crossmember that gets it's positioning by utilizing factory locating holes in the car.
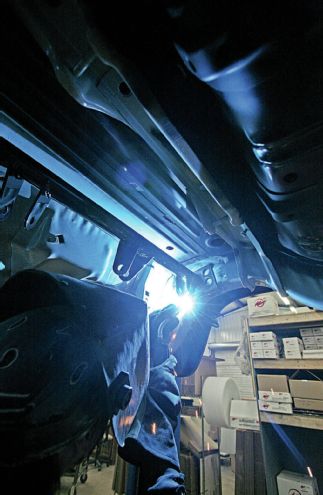
2. Once the crossmember is properly positioned, it can be welded in place.
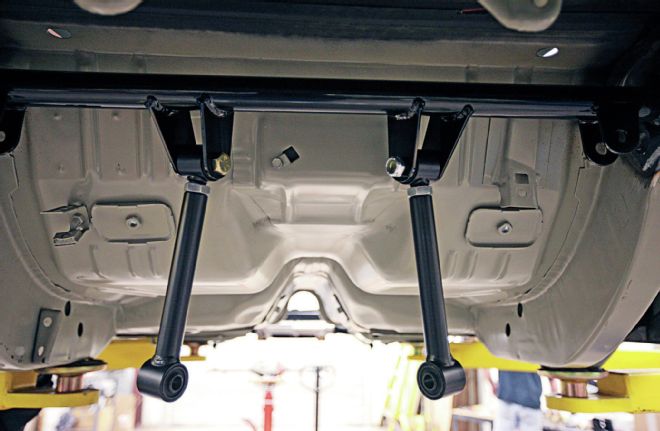
3. This is a triangulated four-link, meaning that the upper control arms are farther apart where they mount to the rear end, than they are where they attach to the new crossmember. All four bars are length-adjustable, giving an almost infinite amount of adjustability.
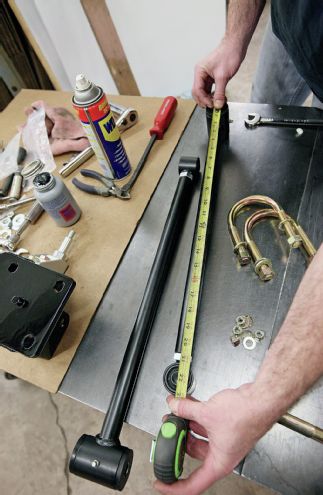
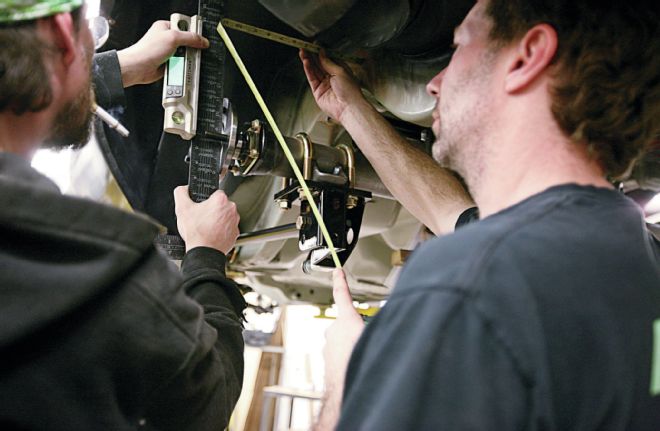
4. Following the instructions, we set the length of our lower bars.
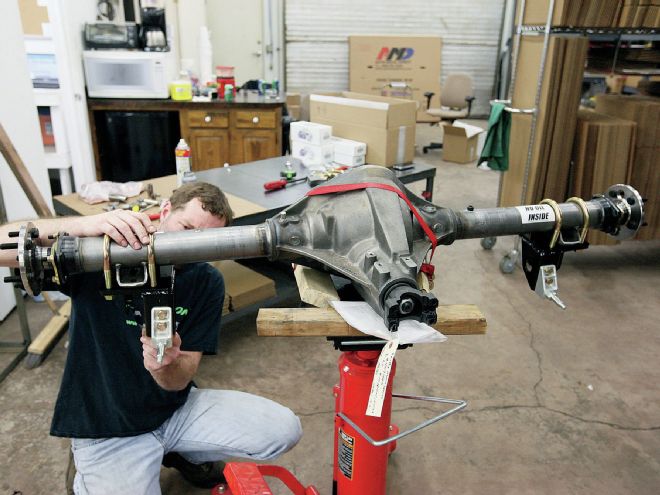
5. The mount for the lower bar and the coil over shock bolts onto the rear end, directly over the factory perch. We're using a Strange 60, with a set of 4.10 gears.
6. By setting the lower bars at the instructed length, proper axle location is easy.
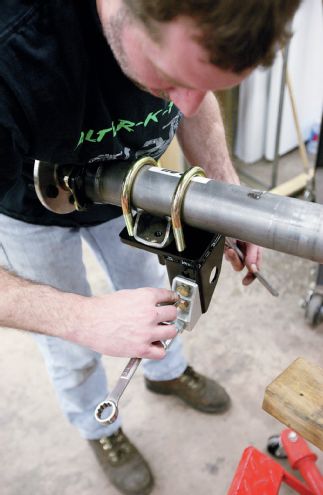
7. Before you begin any welding tot eh upper control arms, you will need to make sure that the rear axle is properly centered in the car.

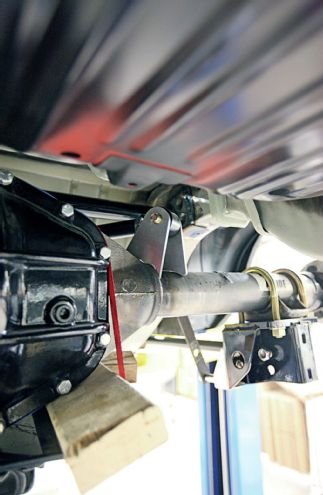
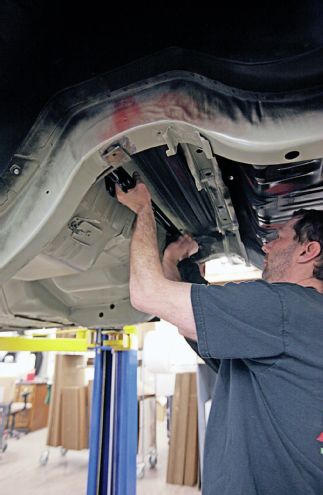
8. More welding is required to attach the upper control arms to the rear housing. The supplied tabs are bolted to the control arms, and then placed on top of the rear-axle tubes.
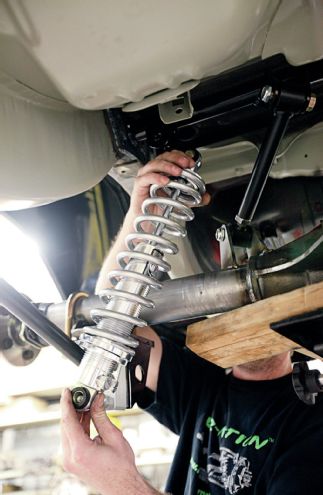
9. The rear shocks and springs are body specific according to the weight. Bill has the spring you'll need, just tell him what car you have.
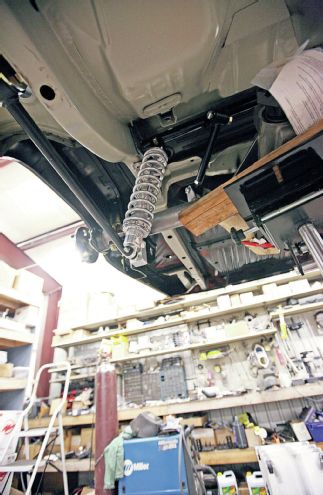
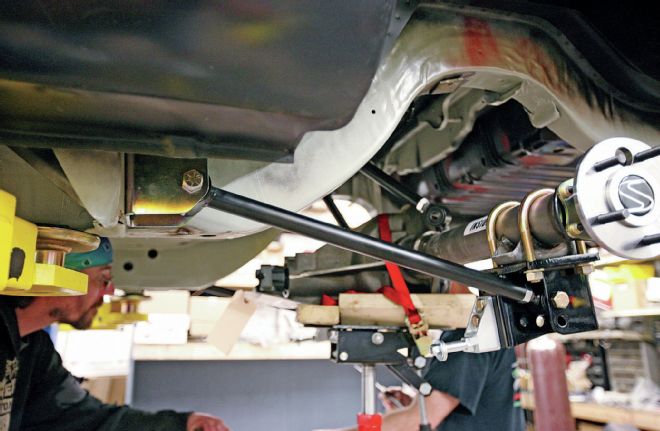
10. Looking from underneath, you can see how the triangulated system keeps the rear properly located.