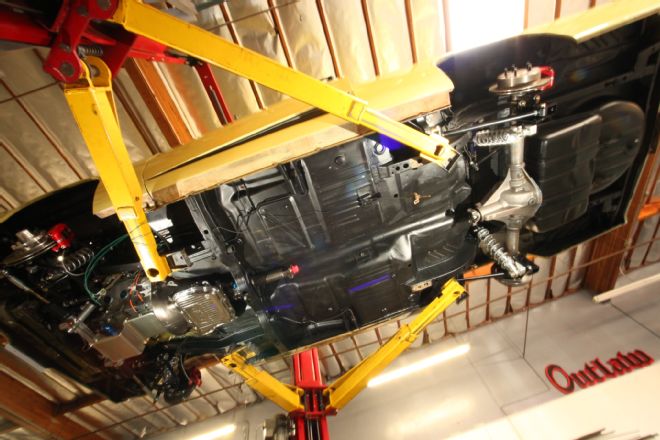
 In this “before” photo, it’s easy to see the front suspension structure—or subframe—and the rear suspension rails. Note how they are only superficially connected to each other by the body and floor. As it sits, all of the engine torque and suspension loads must pass through the body, which easily twists in its advanced age.
It’s a well-known fact that cars with unibody construction—aka unit-body, subframe, or stub frame design—are designed to satisfy an automaker’s need for both strength and low manufacturing cost. Quite literally, the body panels are what provide the chassis with stiffness. Yet in spite of some very clever engineering, both of these goals are ultimately in contradiction with each another. As you lower the cost of production, the stiffness—and thus the handling and ride quality—goes down. In the 1960s, Chrysler was arguably the most successful of the Big Three at walking the cost/performance tightrope, but as the decades rolled on, the compromise of a unibody chassis comes increasingly to light. As we'll see, chassis subframe connectors can cure this problem.
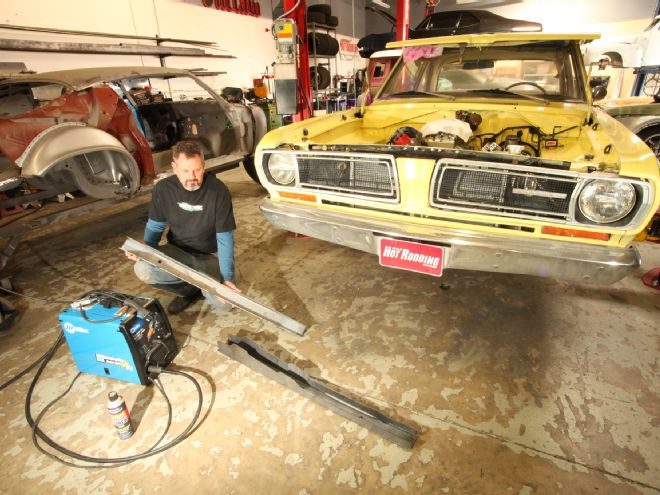
 While simple looking, these formed and contoured steel rails are going to transform pretty much all driving-related aspects of our Mopar project, from cockpit noise and road manners, to cornering, braking, and launching. These A-body pieces are made by US Car Tool and sold by Reilly Motorpsorts for $199 a pair. The left and right rails are unique and will only fit one side of the car.
The compromise of using only the body panels for chassis stiffness manifests itself as shaking, twisting, and flexing. If unchecked, this shows up as cracks in paint, wrinkles in sheetmetal, misaligned body panels, and cracks in glass. The cause is that the front suspension cradle is not linked solidly to the rear suspension structure—except through the thin body panels of the floor and greenhouse.
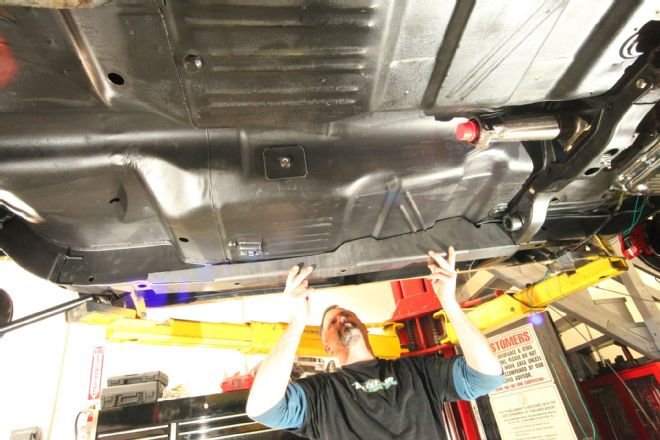 Installation begins by trial fitting the subframe connectors to the car. Note how nicely they conform to the shape of the floor pan from the start. You’ll still need to grind and tweak them to get the gap down small enough to safely weld them.
...over time, the weld points and stressed areas of the body shell begin to yield. Even the best-kept cars fall victim.
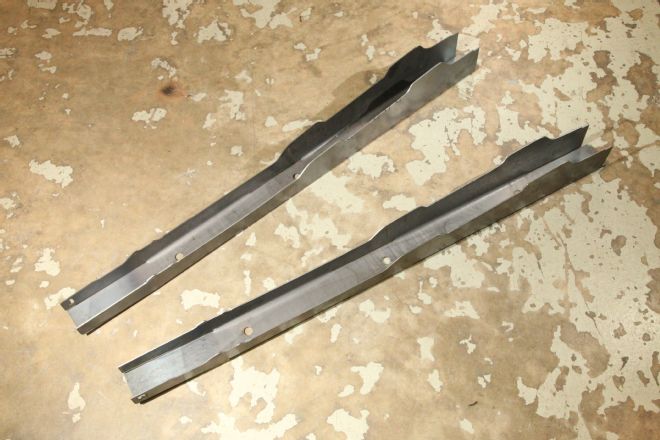
In the ’60s and ’70s, the Mopar A-, B-, and E-body chassis offered some of the best performance available at that price, but over time, the weld points and stressed areas of the body shell begin to yield. Even the best-kept cars fall victim. Since rebuilding the Mopar’s unit body from scratch is impractical, the best bet it to install a set of weld-in subframe connectors from US Car Tool, sold through Reilly Motorsports (RMS) for $199 a pair.
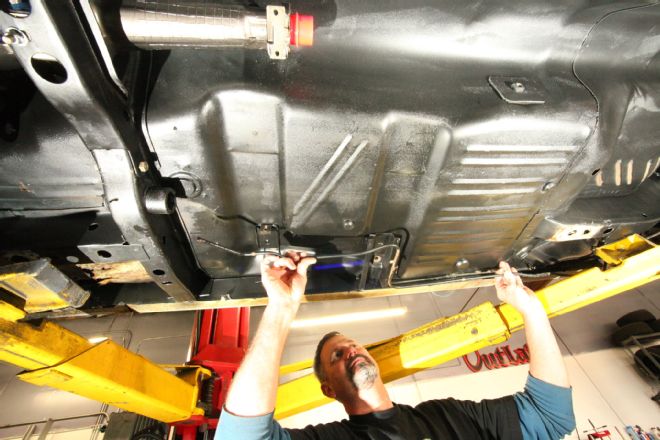
 In the previous photo, you can see where the service brake line snakes through the connector towards the front. Here’s a close-up of the channel Ron Aschtgen made for the line to pass through. The parking brake assembly was also removed—we’ll be relocating that at a later date, but most often it will pass over or under the connector.
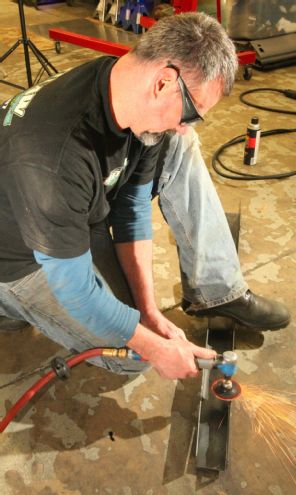 Trial fitting the subframe connectors is an iterative process, and here Ron is grinding away a high section that he marked with a Sharpie marker. The connectors also have a series of break-out tabs that conform to various years and models of Mopar A-body, depending on the shape of the floor. These are either broken off, or welded solid as needed.
When the front suspension moves one way and the rear moves another, the old body panels pay the price. But that’s not all. The suspension is unable to do what it’s designed for and the car can handle in unpredictable, non-linear, and unsafe ways. And we haven’t even begun to talk about adding more power, bigger brakes, better suspension, or stickier tires.
These subframe connectors are beefy form-fitting c-channels that connect the front and rear frames of the uni-body Mopar, and tie to the body at the same time. Moreover, these are also available for Mopar B-body, and E-body. Note that while we are installing them on an A-body, they are even more effective on a Mopar B-body, since these cars are longer and heavier. The installation of the B-body version of these subframe connectors is nearly identical, so fans of intermediate Mopars take note.
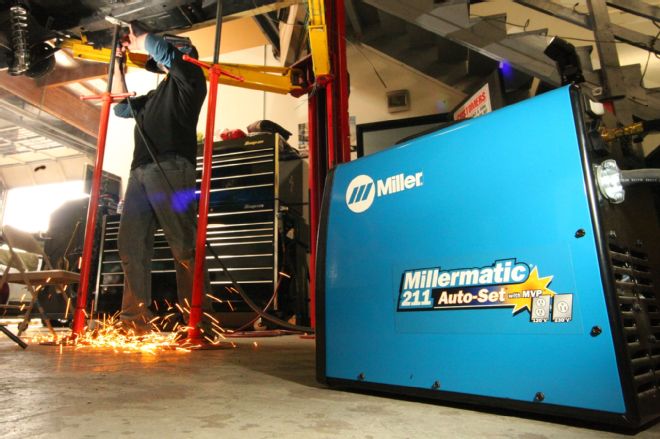
Since our 1968 Plymouth Valiant (a ’64-76 Chrysler A-body) is already equipped with the RMS AlterKtion front coilover suspension and the RMS Street Lynx rear four-link coilover conversion, we would be committing structural suicide by not installing a set of subframe connectors. It was a no-brainer to order the subframe connectors, and it only took a half day to install them using our Millermatic 211 MIG machine.
 We will be replacing our fuel system soon using Aeromotive components, and the stock six-cylinder fuel line was useless to us. Here, Ron removes the OE fuel line before the final subframe connector fit on the passenger side.
Ron Aschtgen of Outlaw Motorsports (Riverside, CA) is helping us assemble Project Valiant, and he handled the subframe connector installation for us. As Ron discovered, the US Cartool units fit our A-body very closely, their contoured sides needing very little trimming and grinding to create a gap small enough to make effective MIG welds with the Millermatic 211.
Some minor fine-tuning with the fit is to be expected on something like this, and along those lines, we also had to relocate the service brake, parking brake, and fuel conduits. Nevertheless, the end product of vastly improved chassis stiffness was worth that small amount of trouble.
Now we’ve got the best of both worlds, with plenty of stiffness to handle the torque...
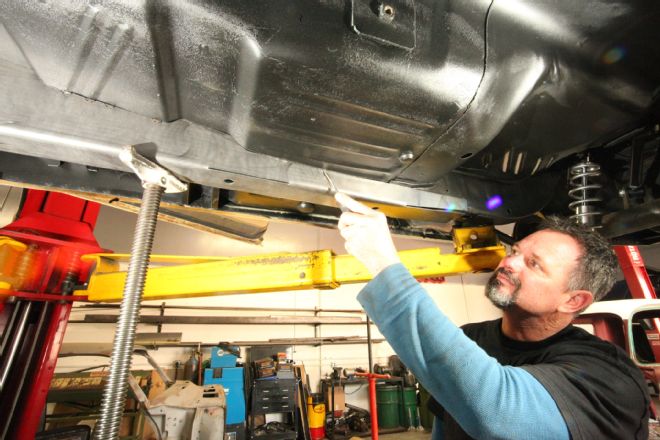 Satisfied with the floor-to-connector gaps, Ron scores the floorpan with a punch to outline the weld areas. Note the open slots at the corner of the subframe connector. These make the manufacturing process easier, but will be welded closed as work progresses.
As a result of this half-day’s work, our Valiant is for all intents a full-frame chassis—in fact it’s even better than that. We have given up absolutely none of the existing strength in the Mopar’s gusseted and boxed unibody—a strong point that traditional full body-on-frame cars—such as GM’s A-, B-, and G-bodies—never had.
Now we’ve got the best of both worlds, with plenty of stiffness to handle the torque from our 657hp Indy low-deck wedge, as well as the higher cornering and braking loads from our RMS suspension and Wilwood disc brakes. This ol’ Mopar chassis now has another half century left in her!
 After scoring the outline of the subframe connector on the floor, it’s time to grind away any paint or undercoating in the affected weld area. You’ll see that we no longer have torsion bars on our crossmember. If your car still uses torsion bars, you’ll want to support the car’s weight on the axles, not by the subframes as we’re doing.
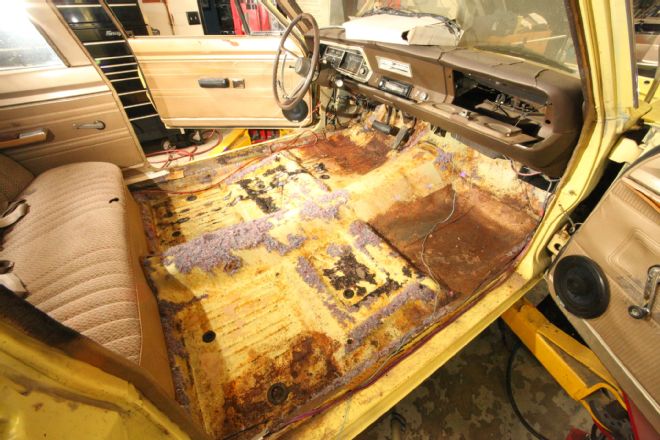 It’s super important to remove the carpet from the interior before any welding—or you’ll end up with a car fire. This was also a good chance to see how our floors looked. The floor pans are pretty shot, so we’ll be replacing them soon. We’ll bring you a story on it.
 With the subframe connectors supported by polejacks, Ron started welding the subframe connectors to the floor using our Millermatic 211 MIG machine. The floor is much thinner, so you’ll want to start your weld by focusing heat in the connector, then moving into the floor. Welds should be about an inch long, no more. Stitch them every foot or so, letting them cool before you hit them again.
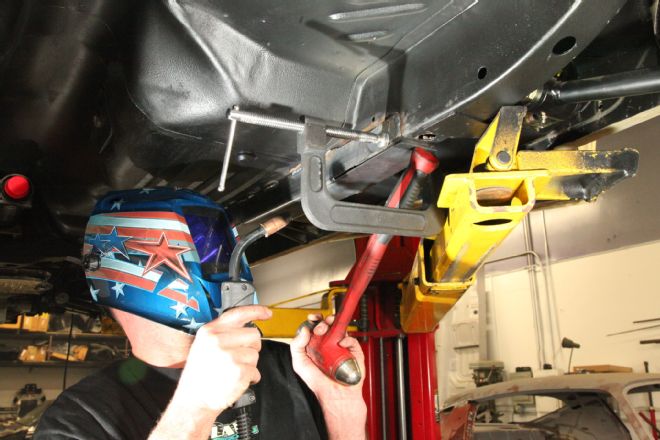 Before welding the rear framerails, the sides of the subframe connector need to be drawn against the factory rails using a large c-clamp. The handle of the hammer is being used here to pinch the top piece to the rail as it’s being tack welded.
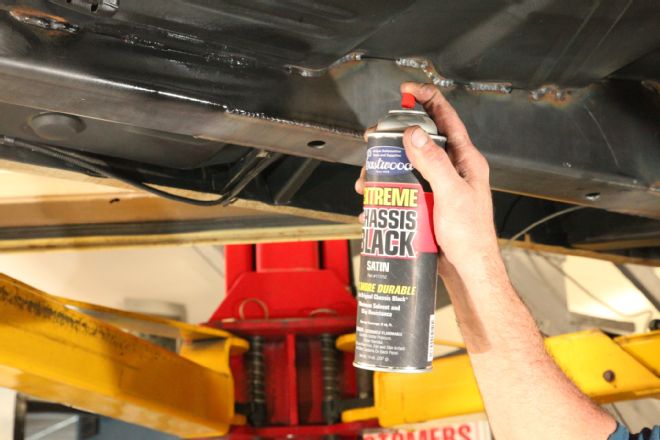 When the welds have cooled, cover the bare metal with a nice coat of Eastwood Extreme Chassis Black. This is no ordinary satin black paint, but extremely durable resin-impregnated protection for exposed areas that see lots of punishment. Use it once, and you can pretty much forget about it!
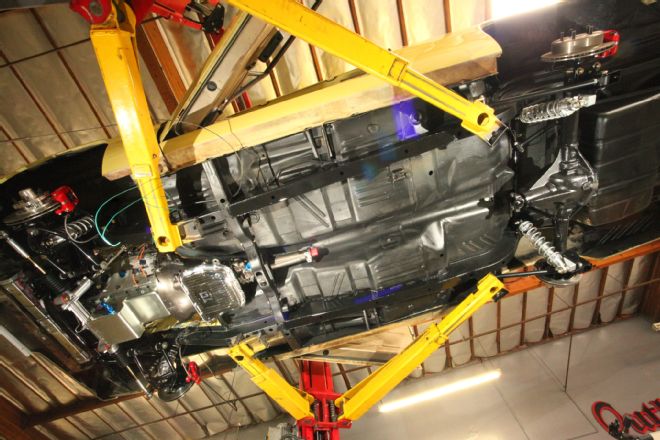 Compare this photo to our “before” photo. The RMS-supplied US Car Tool subframe connectors tie the entire car together structurally, and box in the rocker panels and torsion bar crossmember with a degree of strength that full-frame cars can only dream about. The extra weight—about 24 pounds—is centrally located and very low in the car.