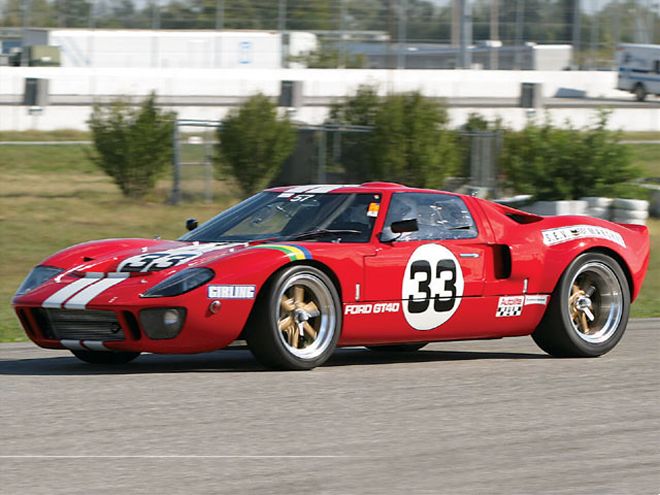
 Follow along as my boys and I align our RCR40 Mk I in the garage and get it ready for some quality track time or grocery getting.
If you've been following the build of this car, then you know that we're almost finished with our street or race RCR40 Mk I. The idea behind this series of articles was to document the build of a streetable yet extremely competitive open track GT40 from Race Car Replicas (RCR). We finished a great race engine that runs on pump gas, and we completed some necessary chassis setup by calculating spring rates and evaluating our bumpsteer.
The next step for our GT40 is to step into the mystical world of wheel alignment. Sure, it would be easy to just take our specs to the alignment shop and let the lasers and computers dial us in, but where is the fun in that? I have seen racers on TV using strings and common garage tools to make alignment adjustments, but I never understood the science behind it. So I decided to pay another visit to Mike and Joe at Cooksey Racing.
After Joe explained how the garage alignment is done, I realized this was going to be a job that I'd need my whole pit crew to successfully complete. So, I got on the intercom and "asked" my boys to turn off the TV and meet me in the "Cobra Lounge." Dylan and Reed might only be 10 and 8 years old, but they are really pretty handy. Spending time with the boys in the garage is what it's really all about, but I digress
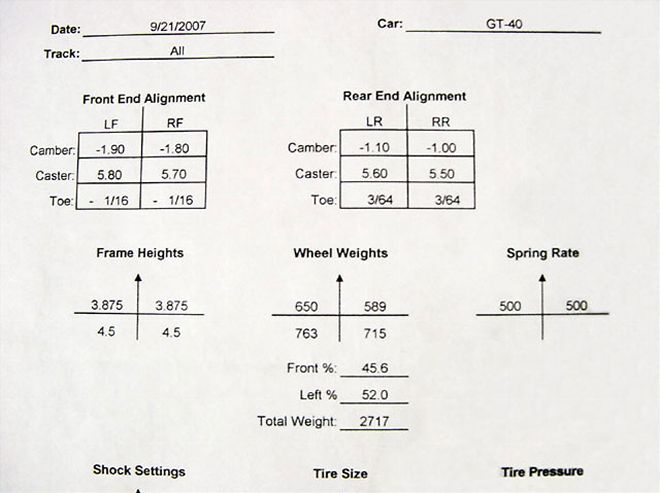
To begin the alignment process, we needed to find a flat, clean garage floor. Next, we needed to double-check our ride height front and rear to make sure it's sitting in the correct position because this could throw our numbers off. We had the car professionally aligned and weighed earlier this year, so we'll put the RCR40 back to those specs.
Here are the specs we're setting the chassis to. The RCR40 will be set up for a 200-pound driver and 11 gallons of fuel.
When it comes to "stringing" a car, the key to accuracy is finding two points that form a line on one side of the car, perpendicular to the axles. This is usually along the framerail, one in the front, and one in the back along either side. From these two points we'll derive the entire toe-in or toe-out measurements. We'll measure out from those points an equal distance using some homemade tools and set our first string up along one side of the car. Once the first string is stretched, you will need to set up a second string along the other side of the car. These strings need to run parallel to each other, so just take a few measurements and square it up. When you get this far, you're ready to start your alignment process with caster, then toe-in or -out measurements and, finally, camber. When we're all done, we'll need to go back and check all three one more time.
If you remember back to the last article, we experienced a little toe-out as the front end goes into a bump. We want to make sure that if we have a toe-out bumpsteer, then we need to set the static toe to a slight toe-out position. It is important to never cross from toe-in to toe-out or vice versa. That will create instability at speed and under hard braking. This is an example of why it is so important to check bumpsteer before you have your car aligned. I've always assumed that a little toe-in is best, but that's not the case in all situations. On a car with an independent rear suspension this will also apply.
One of the most useful chassis tools I have is my caster/camber gauge. They can be purchased from most racing supply shops. This one came from www.HRPWorld.com. Simply place it on your rim and you can quickly gauge the amount of camber you already have. Caster can be measured a few different ways. Caster is the amount of angle we allow our spindles to "lean back." On some cars with custom spindles you can get lucky if the spindle has a flat side that is naturally perpendicular to the ground. In that case just lay your angle finder on that side for an accurate measurement. If you don't have a flat, perpendicular side, then you will have to use your caster/camber gauge. Caster is measured by noting the wheel camber at 20 degrees to the left and 20 degrees to the right. Fortunately, the RCR GT40 has billet aftermarket spindles that give us a nice flat edge to measure from in order to set our caster.
Now that we've gone through the process of stringing our car to set the toe, checking the caster and adjusting the camber, we are ready for a test-and-tune day at the track. Remember that this is a preliminary alignment, just like any other alignment done at home or at the fanciest shop. The reason I say "preliminary" is because the only way to test the accuracy of your alignment is to take your tire temperatures after a few hot laps. In the final installment we will take the car to a track and make our final engine and chassis adjustments. If the engine runs smoothly and the tires have a nice even heat range across all tires, and if the car brakes and turns smoothly, then we are set! It's never that easy, but I think we are very close. We can then make all the final adjustments at the track. We'll be able to adjust our sway bars, set our shock damping and rebound, balance our brake bias front to rear, and check our alignment. Watch for this next article in the upcoming issue.