
Despite a bit of slow progress on the Tudor (solely on my part), things are still progressing. Our recent accomplishment with the '33 at Circle City Hot Rods entailed plotting, configuring, and routing the brake lines—and out of that we managed to pull some tips and tricks regarding various methods, as well as problem solvers, for the above mentioned.
Personally, I find chassis plumbing one of the more enjoyable facets of building hot rods; I also find it quite nerve wracking. First off, there's no fabrication involved, other than the exception of welding flex line tabs, so it's rather clean and straightforward. However, when it comes to complex routing of the brake lines, be it along the contour of a shapely rearend housing or snaked through the tight confines of crossmembers, getting your bends accurate can be tricky. And that's with standard galvanized steel tubing; dealing with stainless is a whole 'nuther animal in itself … and that's precisely what the Tudor's getting.
With stainless tubing, your “fudge” room is drastically limited; often, you get one chance to make that sharp bend, not to mention appropriate flare. With that in mind, due to the cost factor involved with stainless, it's a good idea to have spare pieces of steel tubing around—for practice as well as potential templating (make compound pieces out of steel first, then transfer to your final stainless piece). Otherwise, if you're like me—not a certified pro tubing bender—plan on having a lot of scrap stainless leftover. (In many cases, bending by hand seems the easiest method, but in my experience, you'll never achieve as clean a bend as with the proper tool … but I still cheat every now and then!)
Flaring standard steel tubing is fairly simple, but achieving the correct flare (45-degree double for pressurized brake systems) is critical for adequate sealing purposes. With stainless being much harder—and often more brittle—it's even more crucial … and harder to achieve, literally. Your typical flaring tools generally aren't up to the task (at least for consistent use), and may hinder more than help. For this, I've found a tool up to the task: Eastwood's Pro Flaring Tool. The multi/turret-headed flaring is designed for ease of operation with phenomenal results, even with stainless. At a fraction of the cost of higher-end hydraulic kits ($229.99 from Eastwood), if you find yourself working with brake/fuel tubing on a semi-regular occasion, it's well worth every bit of the purchase price (if not, go in with a friend or two!). So far, I've run countless stainless flares through ours, and so far, die wear is minimal—something few other flaring tools I've dealt with can handle.
Finally, there are a couple "specialized" tools that, for my fellow non-pro plumbers out there (even some of you pros could benefit as well), come in real handy. With fittings attached, you're limited to how tight/sharp a bend you can make—a set of bending pliers, such as the ones shown from Lisle, are great for additional tweaking, as well as under-correcting over-bent lines. And when it comes to repairing bent tubing, a pair of line straighteners, such as those shown from Summit, is another must-have.
For the Tudor's brake and fuel plumbing necessities, Inline Tube was sourced for a full set of stainless line, fittings, and various accessories. It should also be noted that, while stainless is generally tough to manipulate, Inline's particular stainless turned out to be fairly easy to bend, and little to no issues were ever encountered with flaring (problems that did arise were all operator error!).
 1. For quick, easy, and effective brake plumbing, standard galvanized steel tubing is sufficient; for a bit more flare (that can be interpreted in a couple ways!), stainless is the way to go, despite its additional cost and added effort to work with. Our kit was supplied with fittings/accessories from Inline Tube. The soft lines were acquired from the local brake parts outlet.
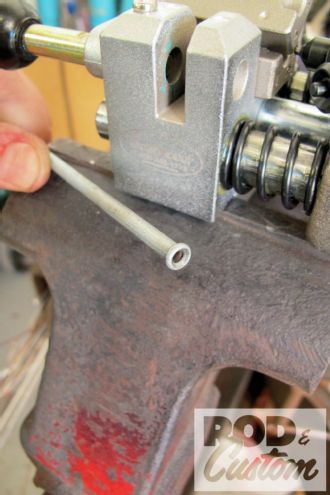
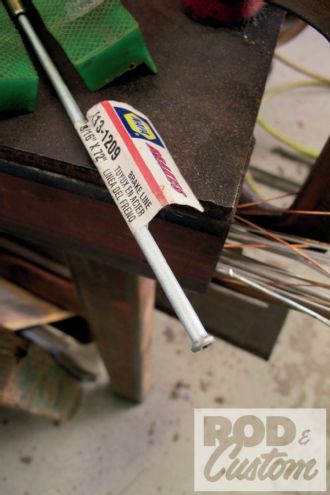 2. This is your standard 45-degree double-flared steel tubing—typical of what you find at NAPA (as the sticker indicates). We’re not dealing with “standard” for this exercise, however, so let’s start out with the first “specialized” tool required to deal with non-standard tubing.
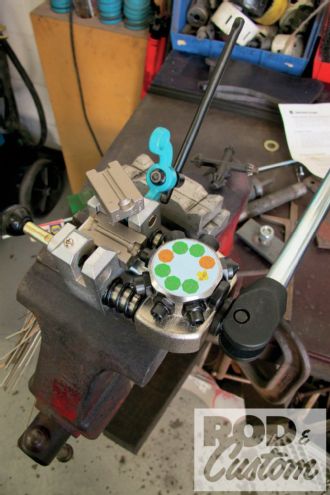
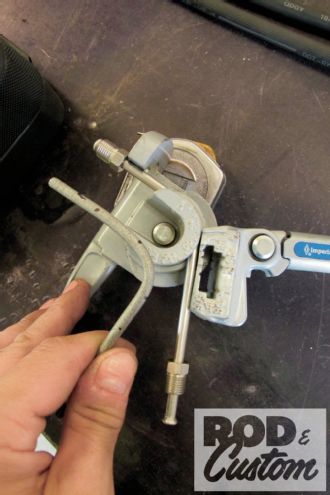
 3. The average manual flaring tool can’t hold up to working with stainless consistently. Eastwood’s Pro Flaring Tool, however, can—and quite aptly, at that. Able to handle 3/16 to 3/8 tubing (as well as 4.75 mm) in both 37- and 45-degree flares, the vise-mount/hand-operated tool makes flaring quick, easy, and virtually foolproof (depending on operator, that is).
4. The average manual flaring tool can’t hold up to working with stainless consistently. Eastwood’s Pro Flaring Tool, however, can—and quite aptly, at that. Able to handle 3/16 to 3/8 tubing (as well as 4.75 mm) in both 37- and 45-degree flares, the vise-mount/hand-operated tool makes flaring quick, easy, and virtually foolproof (depending on operator, that is).
3. The average manual flaring tool can’t hold up to working with stainless consistently. Eastwood’s Pro Flaring Tool, however, can—and quite aptly, at that. Able to handle 3/16 to 3/8 tubing (as well as 4.75 mm) in both 37- and 45-degree flares, the vise-mount/hand-operated tool makes flaring quick, easy, and virtually foolproof (depending on operator, that is).
4. The average manual flaring tool can’t hold up to working with stainless consistently. Eastwood’s Pro Flaring Tool, however, can—and quite aptly, at that. Able to handle 3/16 to 3/8 tubing (as well as 4.75 mm) in both 37- and 45-degree flares, the vise-mount/hand-operated tool makes flaring quick, easy, and virtually foolproof (depending on operator, that is).
 5. The process is quite simple: first orientate (markings dictate placement) and align the corresponding dies with the correct size tubing. The Sharpie mark is a reference I used when measuring lengths of line when compensating for fittings.
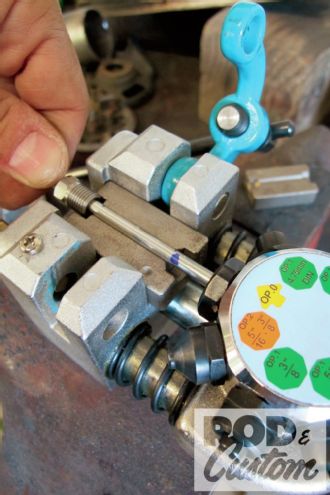
 6. Once the tubing is squared up and positioned correctly in the dies (the blunt head on the turret helps ensure the tubing is seated the right depth), the T-clamp is locked in place, preventing the tubing from moving during the forthcoming flaring steps.
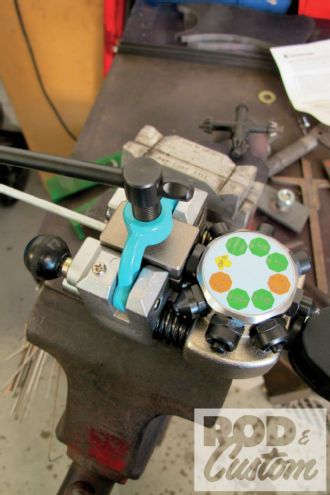
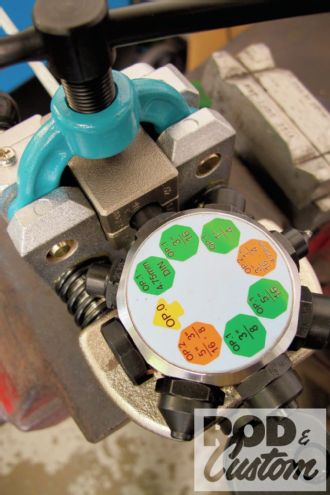 7. Match up the corresponding dies on the turret (3/16 in this case), and follow the operating procedure: OP.1 followed by OP.2 (always start on green!), and …
 8. Match up the corresponding dies on the turret (3/16 in this case), and follow the operating procedure: OP.1 followed by OP.2 (always start on green!), and …
 9. … bam: perfect 45-degree double flare. Of course, it’s not foolproof—errors can easily occur, but only if you don’t follow the correct steps! Something as simple as mounting a guide block backward can ruin a flare. Also, when flaring an already-bent piece, remember to install the fitting “before” flaring!
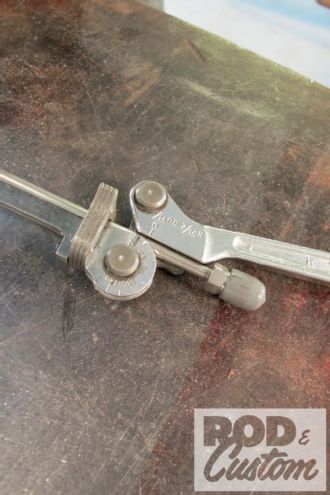
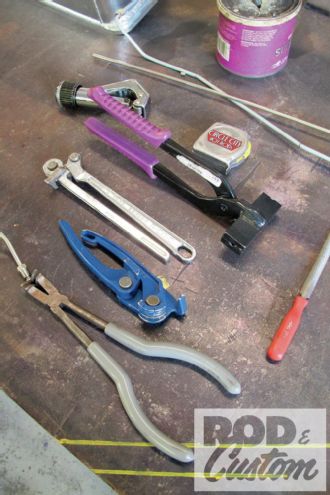 10. The other facet of chassis plumbing necessitating specific tooling often requires more than one device—at least it does for us non-pros. Shown are various tubing benders, line pliers, and straighteners.
 11. One thing you learn quickly when it comes to successful line bending is knowing where to start making particular bends—start too soon and you’ll shorten your overall line; not far enough and you’ll need to shorten somewhere down the line. Use a Sharpie to help guide your way.
 12. One thing you learn quickly when it comes to successful line bending is knowing where to start making particular bends—start too soon and you’ll shorten your overall line; not far enough and you’ll need to shorten somewhere down the line. Use a Sharpie to help guide your way.
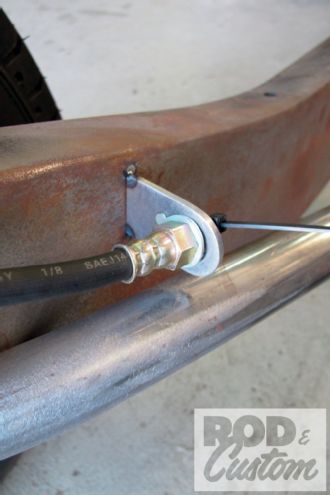
 13. As noted with flaring, it’s critical that your fitting is in place when bending flared lines—and not just in place, but “past” the bending point. Due to this, radius amounts can be limited.
 14. As noted with flaring, it’s critical that your fitting is in place when bending flared lines—and not just in place, but “past” the bending point. Due to this, radius amounts can be limited.
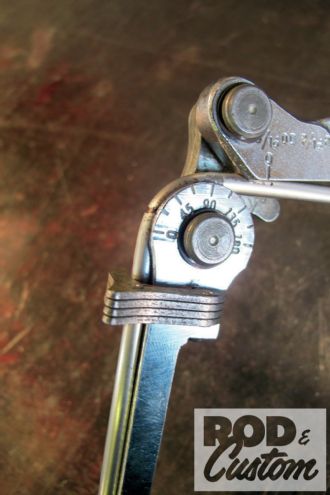
 15. When you do find yourself limited with tubing benders—or need to undo too much of a bend—these tubing pliers can be a savior. The Cornwell Tool truck supplied these gems from Lisle for $40.
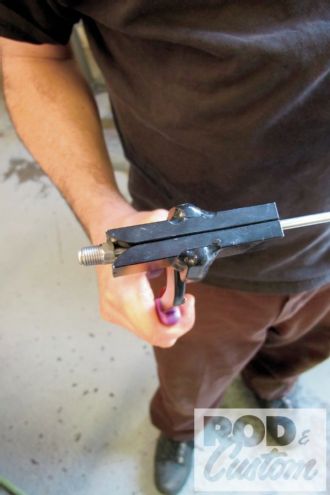
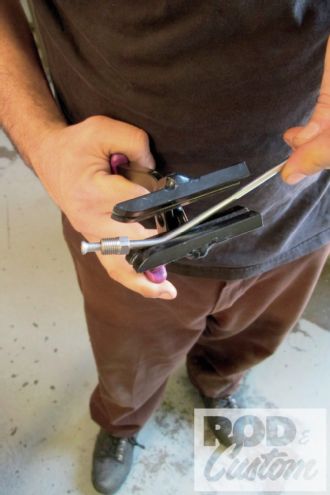 16. But what about flattening out a bent line? That, too, can be handled with a basic hand tool. Specific to the tubing size like the above-mentioned pliers, these obtained from Summit proved to bail out a few failed attempts when dealing with routing the brake line along the rearend housing.
 17. But what about flattening out a bent line? That, too, can be handled with a basic hand tool. Specific to the tubing size like the above-mentioned pliers, these obtained from Summit proved to bail out a few failed attempts when dealing with routing the brake line along the rearend housing.
 18. Speaking of routing, that was the intended accomplishment of this go-around with the Tudor. It all started at the wheel cylinders, beginning with the Lincoln-esque 12-inch drums up front. In a later installment, we’ll focus on the specific mating of the round Ford spindles to the Lincoln backing plates.
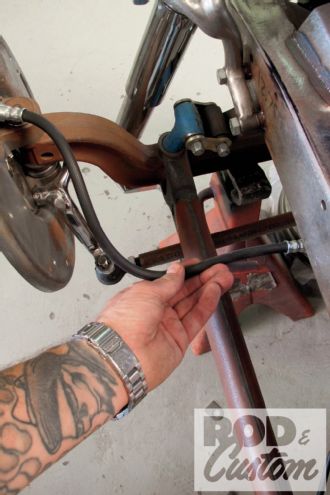
 19. Working with wheels off, chassis/frame elevated greatly aids in routing brake plumbing; however, maintaining certain “obstacles”, such as steering box, exhaust, and so on, is important to avoid “component conflict” down the line.
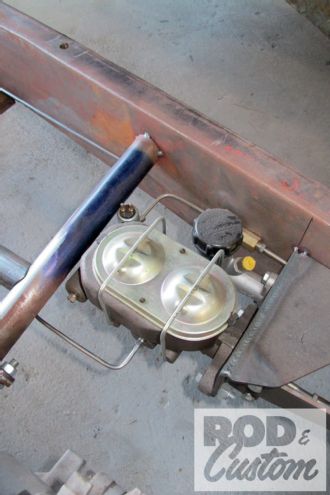
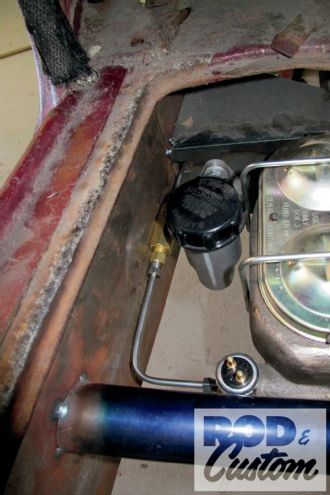 20. Also keep in mind plumbing necessities when plotting/routing lines; residual check valves and proportioning valves need to be considered before/during, not after flaring and bending any length of line. Same goes for the brake light switch.
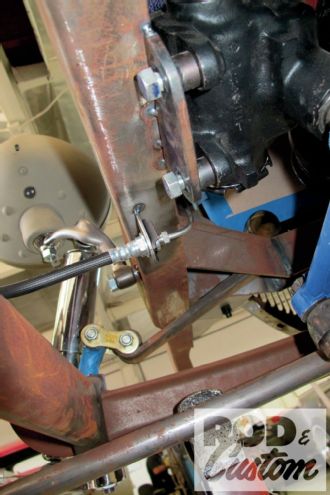
 21. When incorporating flex line tabs, make sure and give ample room for tools when tightening fittings.
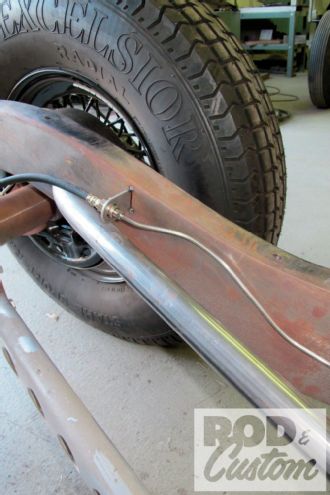
 22. As noted, bending/shaping lines by hand is simple and, sometimes, effective; but nothing compares to a layout done with the proper tools. You may never see the chassis plumbing when all’s said and done, but you’ll know in the back of your mind!
 23. As noted, bending/shaping lines by hand is simple and, sometimes, effective; but nothing compares to a layout done with the proper tools. You may never see the chassis plumbing when all’s said and done, but you’ll know in the back of your mind!
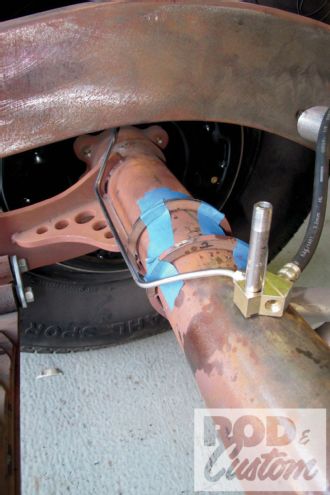 24. Obviously, the banjo rearend proved to be the trickiest. Snaking around the various suspension bracketry, even the banjo itself, not to mention incorporating a needed vent, offered challenges, but none that couldn’t be tackled.