As the saga of the POS unfolds, you'll see its various transformations in standalone articles rather than a 738-part series. This way, a story does not necessarily hinge on the one before it, so if you haven't been able to follow the process from the outset, you can still glean useful information without missing a beat.
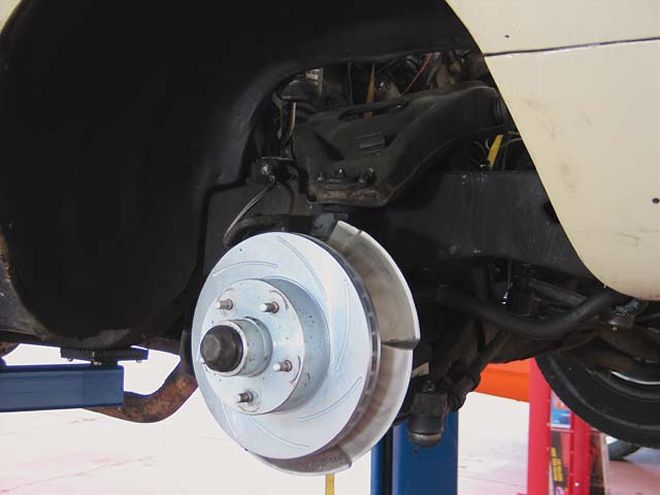 1. After you've secured the car and removed the wheel and brake caliper, this is what you'll see.
Later we might present the rehab of the POS floorpan, the attachment of the left rear quarter, or the completely redone interior. This month, though, we'll show you how to refurbish the front suspension with parts and a process that can be applied to any second-gen Camaro. In this way, we beat the recalcitrant project car at its own nasty little game.
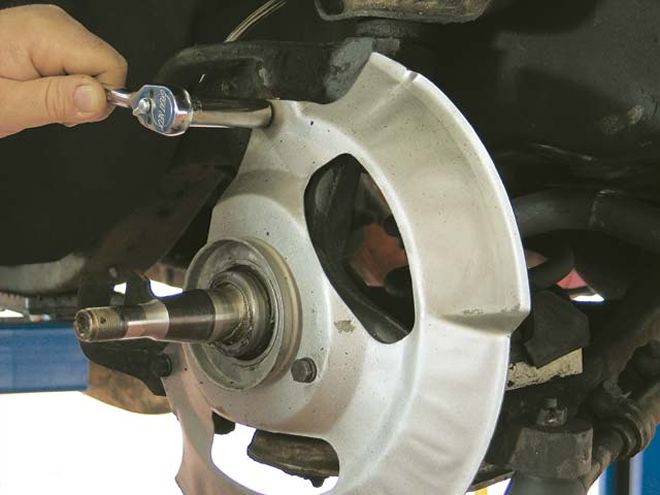
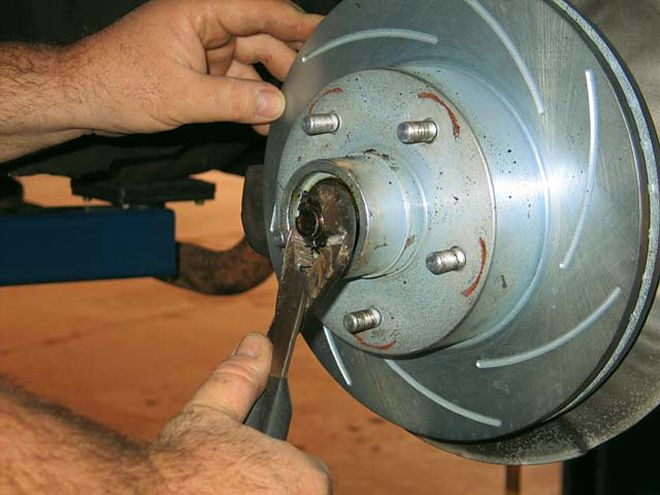 2. Get out the nippers, clip the ends of the cotter pin, and pluck it out. Then remove the castle nut so you can pull the rotor off.
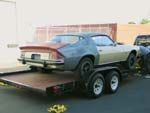
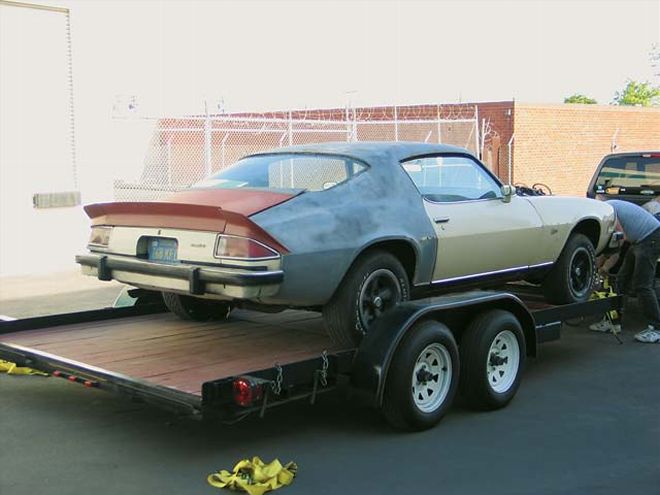
Images don't portray the severity of POS' ravaged sheetmetal or its general state of neglect; its resurrection will be a major undertaking quite out of the staff's realm simply from a time factor. Our tacit partner in this considerable task is Johns Customz & Performance as piloted by John and Joe Barbera and John Morrow. Because it is the antithesis of the pristine California beater, scarred by mildew, rust, dents, and yes--Bondo "bodywork" done with waxed paper (!)--it ought to have much more relevance to those of you in most every other part of the country.
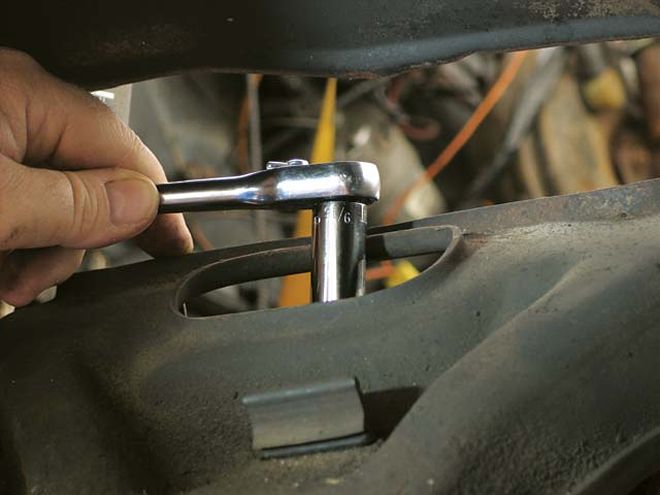
 3. Loosen the three bolts and take off the backing plate.
Enlisting the skills of JC&P, an unusual hot rod consortium able to execute every phase of vehicle construction (engine, drivetrain, chassis, bodywork, paint, upholstery, audio, and so on under one long roof) was key to the project's success. We trailer the POS to Johns, lay the key on the table, and come back to collect a completed missile without lifting a finger, so to speak. The Barberas and Morrow believe that the quality of their work is their signature, and they won't put their name on something that isn't the best it can be.
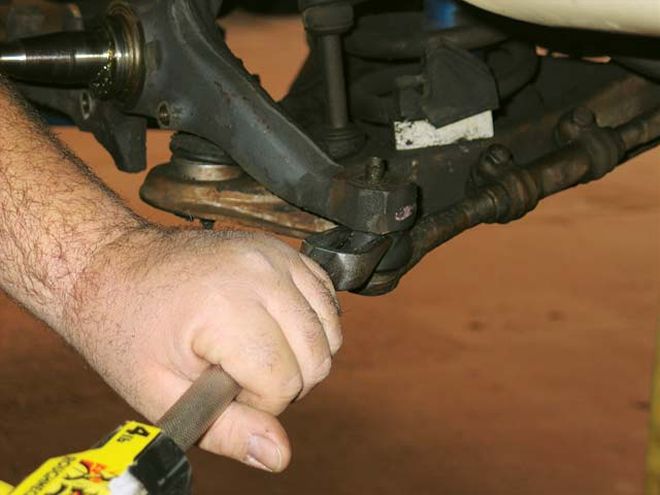 4. Loosen and remove the tie-rod end.
But first, a caveat. Be sure that the parts you bought are the ones you need. It really stinks when it's midnight and you discover that the bolt's too long or missing altogether, or the bushing's too small, or the bearing doesn't fit the spindle.
We asked Johns to do as much as they could with handtools, like you would, but several times the advantage of compressed air was imperative. And even a 20-ton hand-operated press was stymied by the control-arm bushings, so you must be resourceful. The Camaro has coil springs that are slightly curved when installed. To preserve the curvature of the compressed spring, install the spring compressor with the short arms on one side (the inside of the curve) and the long ones on the other.
 5. Remove the post fastener on the shock absorber (top), then attend to the bottom two fastened to the control arm. Pull the shock out and arc it into the trash bin.
In this episode, we'll install Performance Suspension Technology (PST) 2-inch-drop spindles, Polygraphite control-arm bushings, ball joints, dust boots, snubbers, coil springs, tie-rod ends, and an idler arm and temper the package with Edelbrock IAS shock absorbers. The Edelbrock units are produced in-house for the ultimate in quality control and feature the patented Ricor inertia active valve that, depending on the road surface, controls the amount of oil allowed through the valve, thus increasing or decreasing the damping force.
The next time you see the POS, we'll outline the installation of the rear suspension and the Strange Engineering Dana 60 axle it will support.
The Products