A vehicle’s steering system is called upon to perform reliably and without issue mile after mile. The linkage connecting the steering box to the knuckles is serviceable. Equipped with grease fittings, it’s to be lubricated as part of your vehicle’s regular maintenance plan, and, in plain view under the car, it’s rather easy to gauge its condition should any portion require replacement. It’s a task most repair shops can easily handle for you.
What about the components that connect the steering wheel to the steering box? The steering column resides inside the vehicle and because it isn’t exposed to the elements, it’s generally in good shape. The steering shaft connects the portion of the steering column that protrudes through the firewall to the steering box.
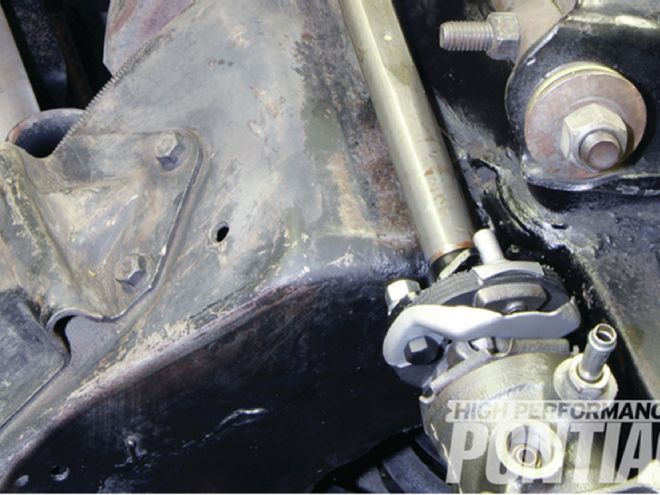
To account for irregularities and chassis flex that occurs during normal driving conditions, the fittings on either end are flexible. On the lower end is a reinforced rubber coupler that’s commonly referred to as a “rag joint.” At the upper end is a floating universal joint that was thoroughly packed in grease during vehicle assembly and was permanently sealed by a rubber boot. As a non-serviceable connection, the boot was part of the steering-shaft assembly, and its intent was to keep grease in and contaminants out of the joint. However, given its close proximity to the exhaust manifold and continuous exposure to high underhood temperatures, it’s not uncommon to find the rubber boot brittle or torn today, which allows grease to flow out, making a general mess within the engine compartment.
Our T/A’s steering shaft was a classic example of what’s typically found on most Pontiacs today. We had known for quite some time that its rubber boot was torn but learned to live with it, simply because the task of replacing it appeared challenging. The steering shaft can certainly be removed with the engine in the vehicle, but while our engine was out for a rebuild and the brake booster was out for plating, there was no excuse for not addressing it. (Plus it was much easier to photograph!)
Quite the opposite from our expectations, we found the task actually quite simple to perform. Best of all, the boot, which was never available separately from GM, can be purchased from most any retailer selling 4x4 components for only few bucks. So follow along as we renew our Firebird’s steering shaft in an afternoon’s time!
21 The steering coupler was repositioned onto the steering coupler flange and the retaining nuts and lock washers were reinstalled and tightened to 20 ft-lb using a 9⁄16-inch wrench. (If you had to loosen or remove any of the steering-gear bolts, they are retightened to 70 ft-lb using a 5⁄8-inch wrench at this time. Before venturing onto a busy street, work the steering wheel in both directions to be sure the steering system feels tight and smooth. If everything feels good, you’re ready for the open road.) ">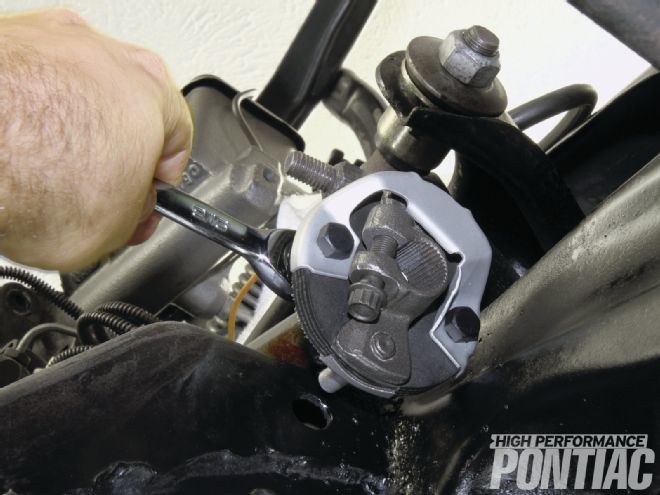 <strong>21</strong> The steering coupler was repositioned onto the steering coupler flange and the retaining nuts and lock washers were reinstalled and tightened to 20 ft-lb using a 9⁄16-inch wrench. (If you had to loosen or remove any of the steering-gear bolts, they are retightened to 70 ft-lb using a 5⁄8-inch wrench at this time. Before venturing onto a busy street, work the steering wheel in both directions to be sure the steering system feels tight and smooth. If everything feels good, you’re ready for the open road.)