 <center>Honest Charley Garage has assembled a state-of-the-art chassis that will carry the 2013 AMSOIL/STREET RODDER Road Tour ’51 Ford for many trouble-free miles.</center>
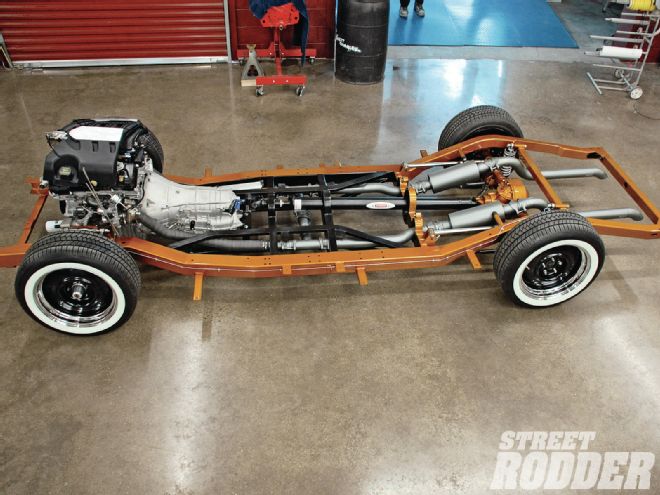
Building a street rod is a constant cycle of fabrication, assembly, disassembly, final fitting, and, at long last, final assembly. That is precisely what we've been following at the Honest Charley Garage as they build the 2013 AMSOIL/STREET RODDER Road Tour car. The '51 Ford will be riding on a Fatman Fabrications chassis that provides modern suspension, more strength than the original frame, and the perfect stance.
After completely disassembling the chassis it was prepped for paint. Greg Cunningham made the call to paint the outer framerails in PPG body color, while the centersection of the frame would receive several coats of Eastwood 2K Aero-Spray Chassis Black. This leaves the outside of the frame looking good, while the durable and functional satin black in the middle makes working on the car easier, a scratch is easily matched in with the Eastwood product. After Ben Giuilano laid down the finish paint it was time for final assembly.
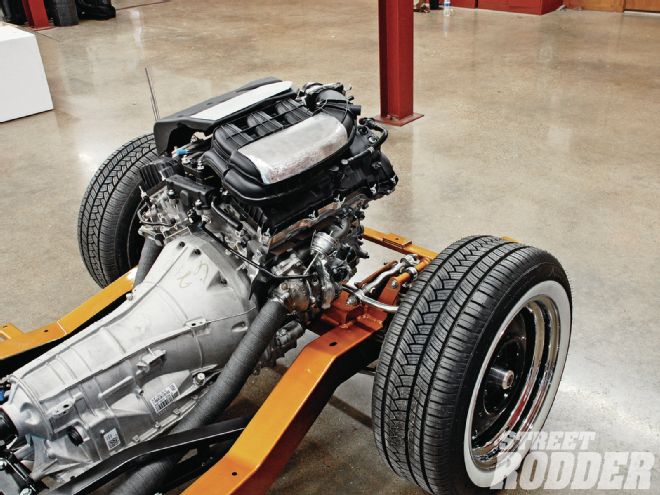
We did an in-depth story on how Fatman Fabrications actually built the frame, now it is a matter of showing the chassis completed with the Ford twin-turbo, EcoBoost 3.5L V-6 motor mounted in the frame along with the exhaust system and the complete front and rear suspension. Before we drop the motor in for the last time you'll need suspension, so we'll start there.
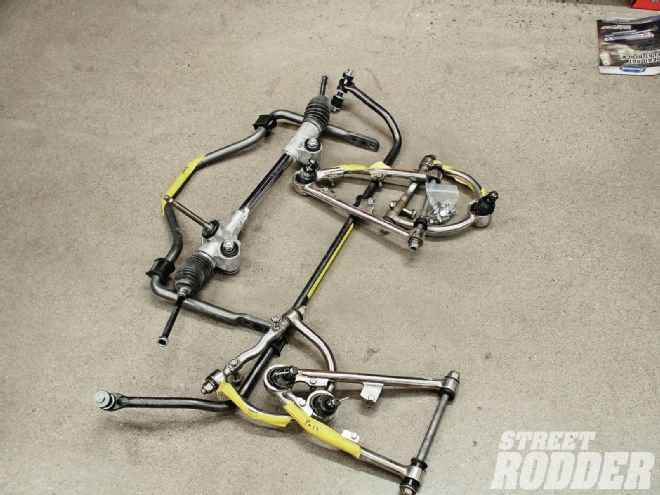
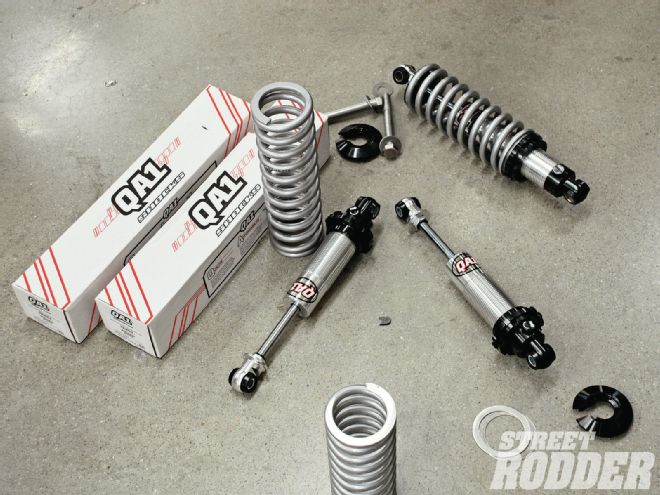
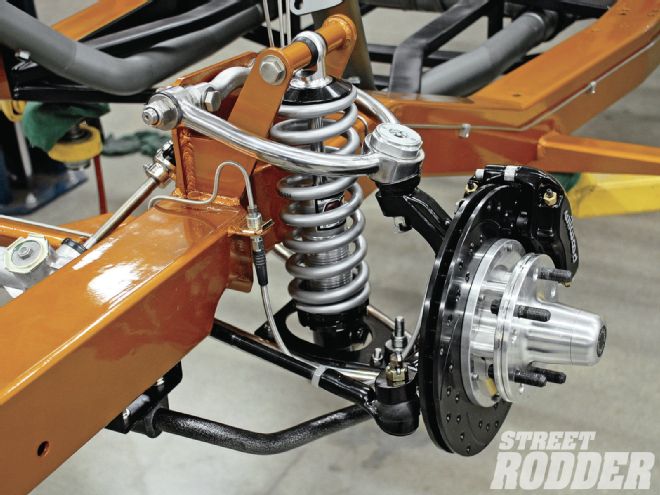
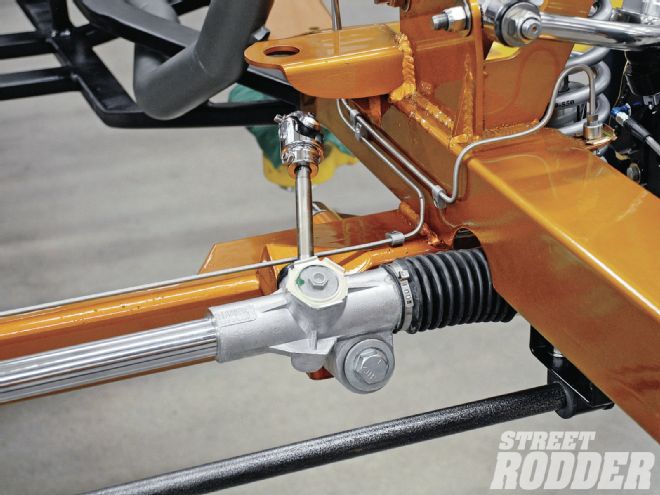
Up front the Fatman fully independent suspension is based around polished stainless steel control arms with QA1 coilover shocks, providing both the springing and damping, all wrapped up in one very attractive package. The fully adjustable aluminum body shocks mount spring. This means we can dial in ride height adjustments and stiffen or soften the ride with the shock absorbers. While most Fatman Fabrications chassis come with a power rack-and-pinion steering system, we were forced to eliminate the power portion of that equation due to the lack of room around the turbo exhaust system and oil filter.
With the suspension under the car, it was rolling and while that is a good thing, so is stopping. To that end the team at Honest Charley Garage installed the Wilwood aluminum calipers on all four corners, and then plumbed from the Wilwood aluminum master cylinder to the calipers with stainless steel line. The Eastwood tubing bender and flaring tool were indispensable during this process.
At this point we had the two most important things out of the way: stopping and steering. Now we needed to put some power to that QA1-suspended, 9-inch Ford rearend-equipped Fatman chassis. After bolting the EcoBoost V-6 to our custom motor mounts we managed to get the Dynotech driveshaft to align with the Ford rearend. Because the Ford transmission has the output shaft high on the case, team Honest Charley had to do some slick motor mount fabricating to get it all in proper alignment.
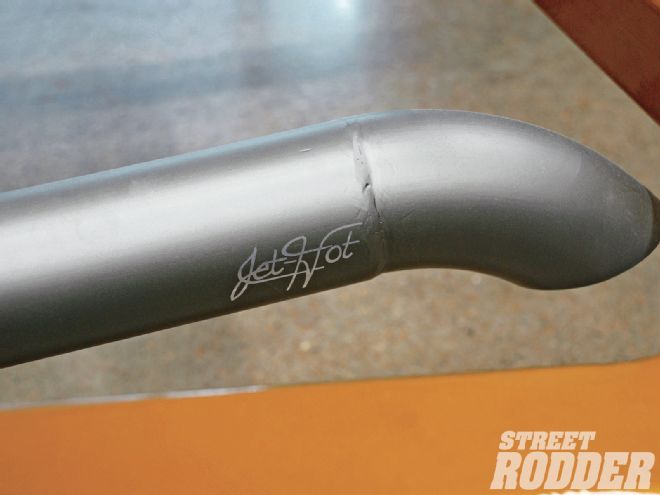
Final plumbing for the twin turbos will have to wait until the body is back in place, but from the exhaust side of the turbo back, the big 3-inch stainless exhaust tubing and Flowmaster mufflers were installed, but not before all exhaust components were coated with Jet-Hot's new 2052 dark gray coating that adds a definite all-business look to the exhaust coating.
When the chassis was assembled it was almost too pretty to cover up, but then again few days are more exciting than the day the body is bolted to the chassis for the last time.
After the standard paint preparation the chassis was treated to PPG primer and topcoats; the Eastwood gun handled this part of the job.
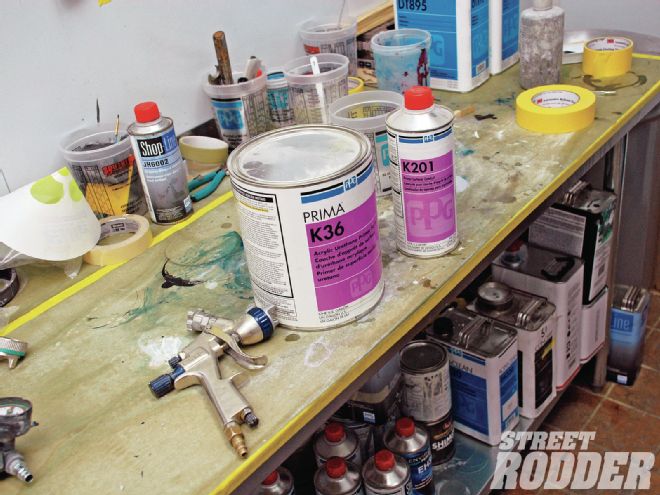
This is what we consider to be the "work zone" on the car, so a utilitarian finish was needed. Eastwood 2K Aero-Spray was used. It's a catalyzed paint that is very tough.
The front suspension consists of polished stainless steel upper and lower control arms and a powdercoated sway bar, all from Fatman Fabrications.
The QA1 coilover shock absorbers provide a fully adjustable suspension in one very clean package. The aluminum body shocks are adjustable and the ride height can be dialed in with the proper springs.
The gold paint, polished control arms, and beefy sway bar all add up to a high-performance street rod suspension.
Dropping a Ford twin-turbo EcoBoost V-6 in a '51 Ford frame creates some space problems, like the interference of the oil filter and the steering shaft.
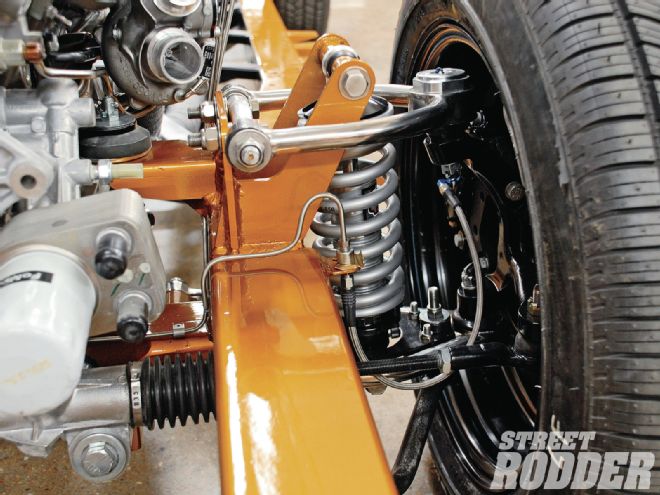
The solution was to eliminate the power steering rack and replace it with a manual unit. Now the steering shaft will clear both the oil filter and the turbo plumbing.
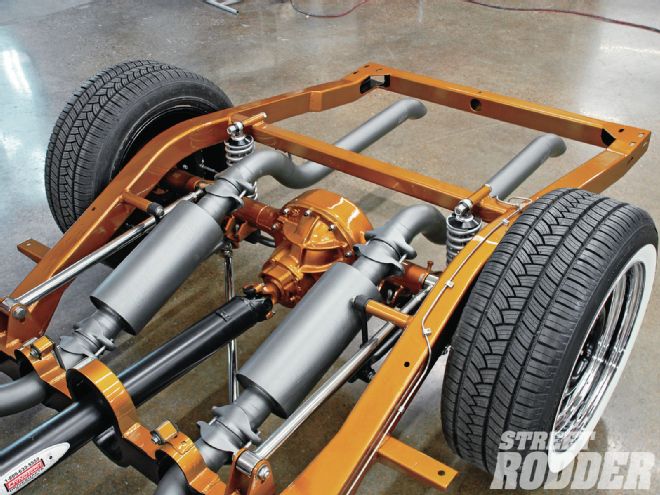
Moving to the rear of the chassis, the 9-inch Ford rearend is located with five-bar arrangement and suspended with QA1 coilover shocks. Tucked under the rear housing is a sway bar too.
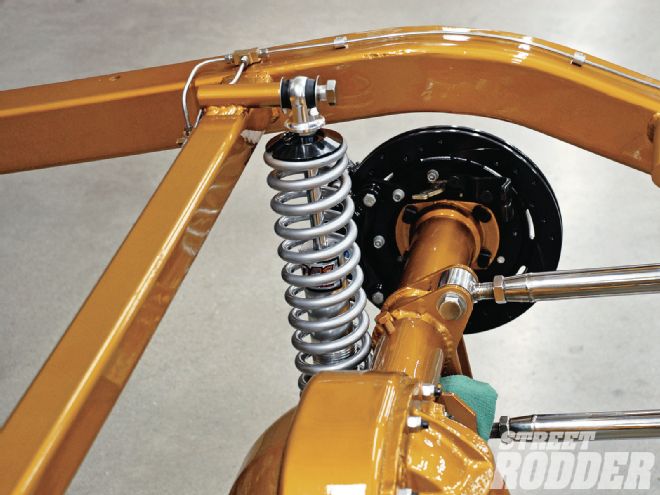
Wilwood four-piston aluminum calipers provide plenty of stopping power on the rear of the car. Drilled and slotted rotors complete the high-performance brake package.
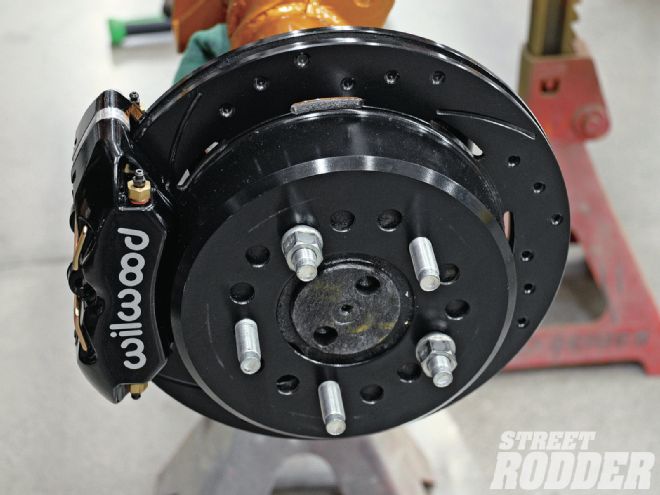
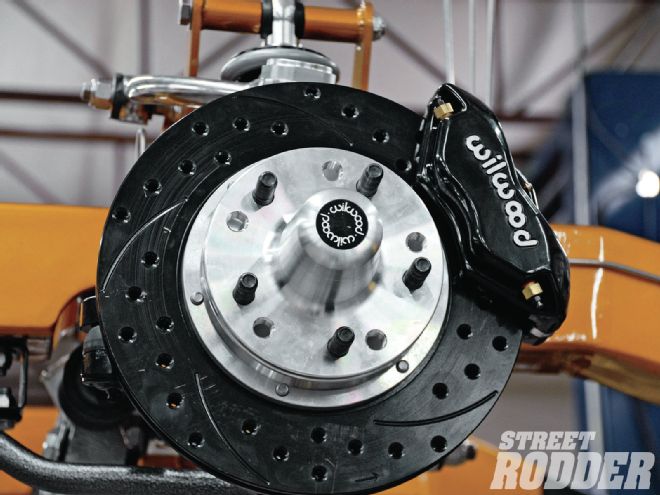
Up front you'll find another set of Wilwood four-piston calipers mounted over Wilwood aluminum hubs and two-piece drilled-and-slotted rotors.
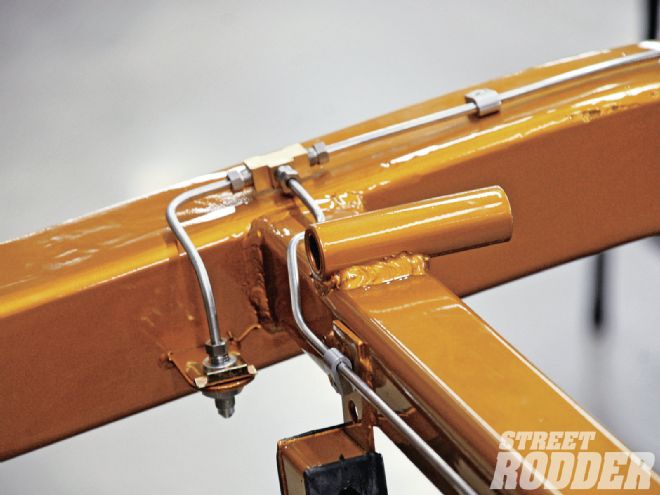
Routing the stainless steel brake lines consisted of a braided stainless flex line to each brake caliper, making the brake line fabrication a bit more complicated. Bending and flaring were done with Eastwood brake tools.
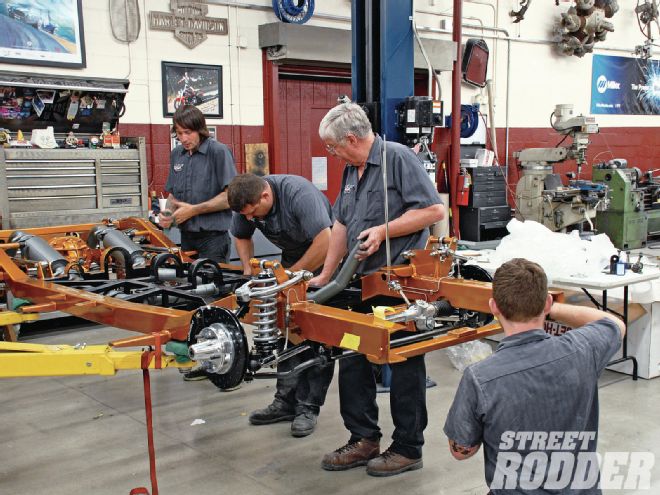
By the time the chassis was ready for final assembly time was running out, so it was a huge Honest Charley Garage team effort to complete the project.
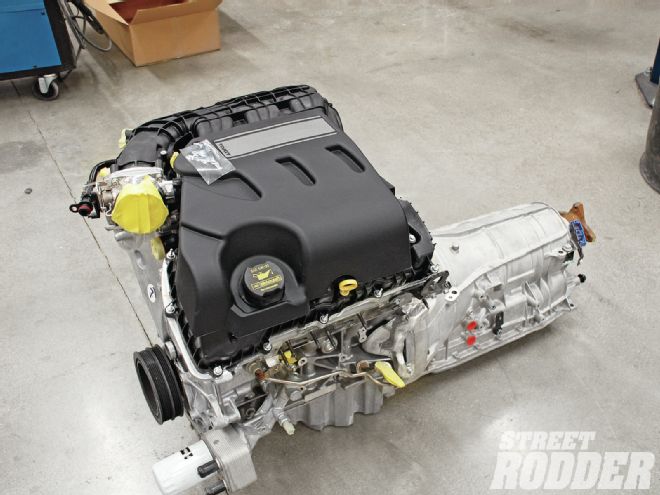
Power for the '51 Ford comes in the form of a Ford 3.5L, 365hp, 420 lb-ft of torque, twin-turbo-charged V-6.
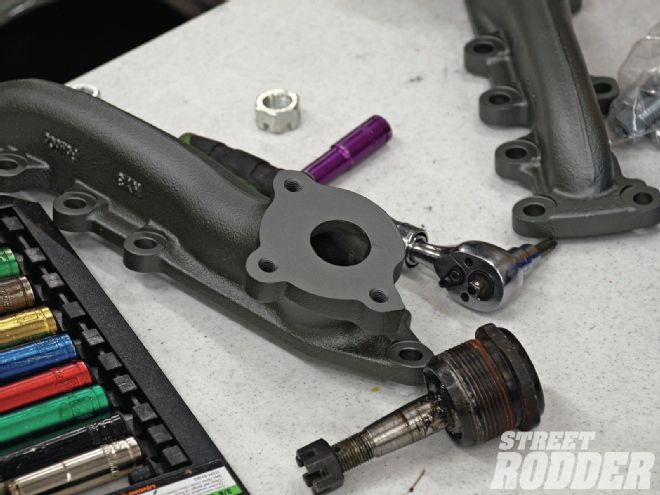
We found this interesting: the exhaust manifold exit flange has a hole that is just over 1 inch in diameter, yet the turbo dumps into a 3-inch exhaust system. That means high velocity in, low restriction out.
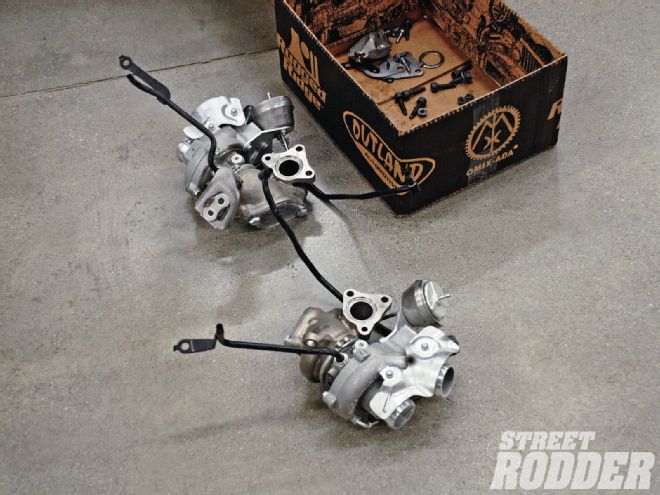
These turbos may look small, but because there are two small turbos, virtually all signs of old-fashioned turbo lag have disappeared--small package, big performance.
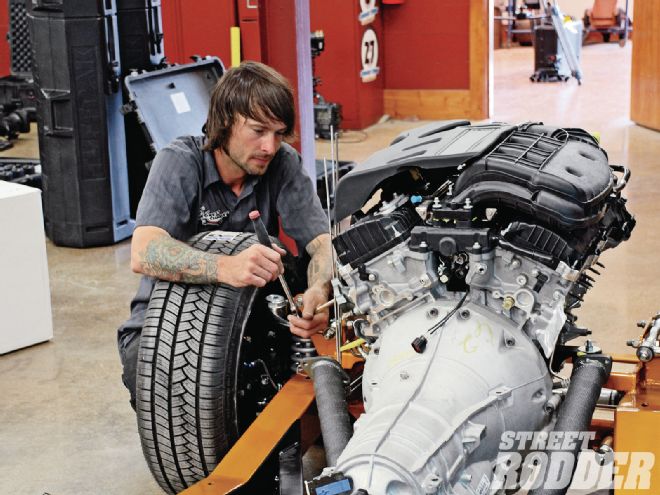
Hal Everett is mounting the left side turbo to the Ford EcoBoost motor. Designing the electronics to make this motor run was a tall order, but the guys from FAST came through with shining colors.
The Ford EcoBoost V-6 is coupled to a 6R80 from Powertrain Control Solutions SelectShift transmission that provides six-speeds. The 6R80 transmission isn't long, but it's taller than most traditional transmissions.
The big 3-inch exhaust system includes a crossover or H-pipe and fitting it all in the network of crossmembers took some fabricating skills. Note how high the output shaft is on the 6R80 tranny, this required the building of a larger floor tunnel.
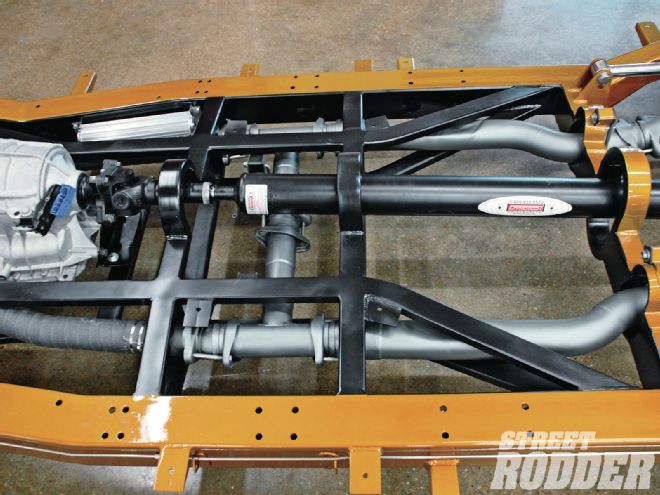
Out back a pair of Flowmaster mufflers is nestled between the framerails and on either side of the Dynotech Engineering driveshaft. The dark gray coating by Jet-Hot sure looks great on the exhaust.
Speaking of Jet-Hot, check out the cool Jet-Hot script logo on the tailpipes and yes, they can custom apply your logo too!
Things get pretty tight toward the rear of the car. Here we can see how the sway bar brackets just barely clear the exhaust. That rear sway bar will help limit rock 'n' roll to the radio.
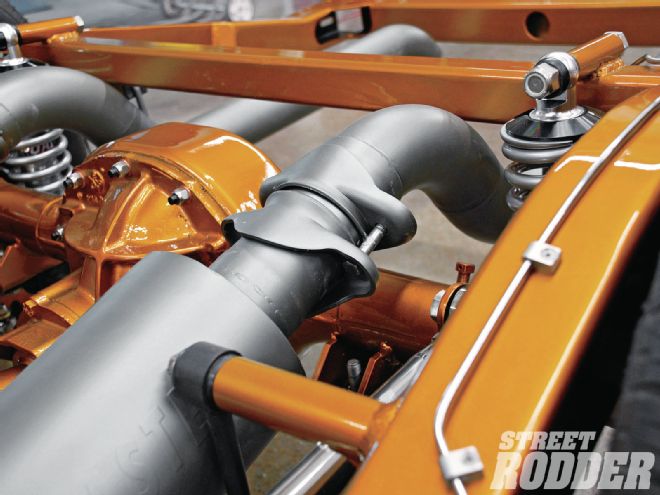
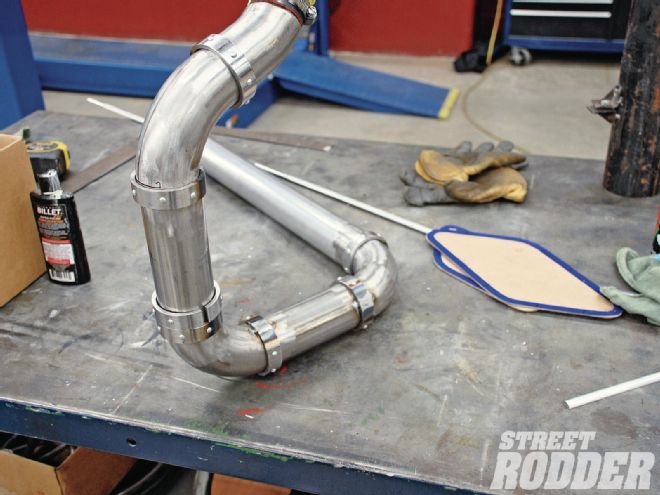
The turbo plumbing from out of the turbo to the hand-built intercooler and back to the intake required some careful fabrication. This is the tubing being fabricated prior to being coated.
Looking from the rear of the chassis you'll find a very well fabricated and engineered package. Attention to detail is everywhere on this chassis.

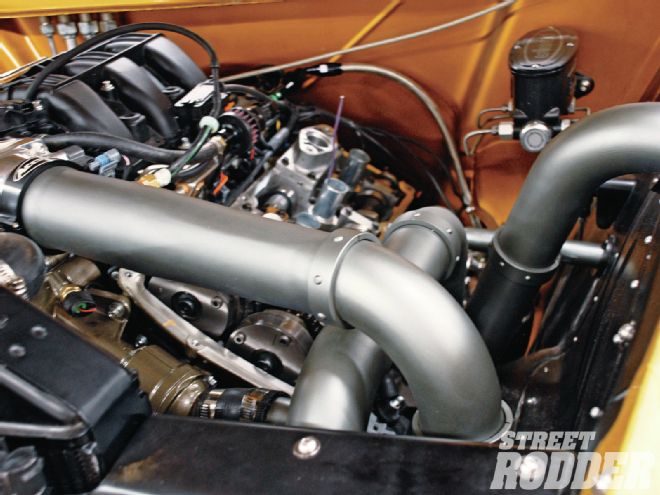
We couldn't resist giving you a sneak peak of the turbo-plumbing underhood. The Jet-Hot coating gives a very cool look to the pipe work.
Check out these videos of the Honest Charley Garage team get Fatman Fabrications all put together.
To see more videos covering the build of the 2013 AMSOIL/STREET RODDER Road Tour Car please click here.