If you've been reading along with the build of our '05 GTO, you're familiar with the nicknames the car has received-most notably, Shamu. From the factory, the '04-'06 GTO is an incredible performance car with a high level of comfort, but it's not the most impressive car on a road course or around the cones because it's designed to be a street car, not a race car. We want to shift the balance of our project car more toward the performance side of the scale since though it's driven on the street, it's a true weekend warrior at the road course.
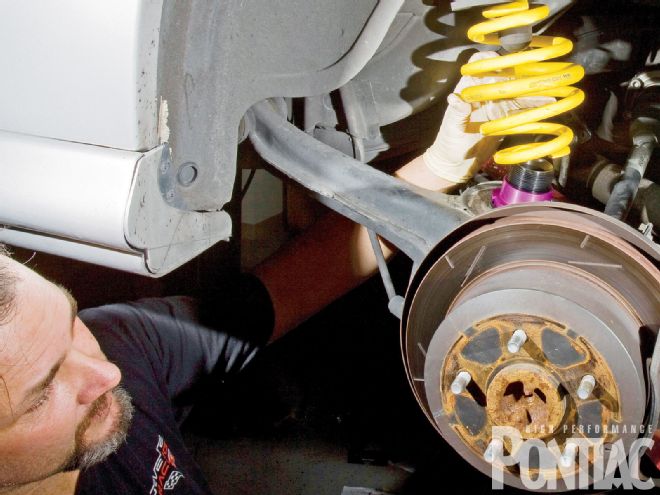 Greg Lovell installs the GTO's KW rear coil spring during our suspension install.
As we've progressively improved upon some of the shortcomings of its chassis with brake and swaybar upgrades, we've yet to address some of the most important parts: the bushings and struts. After completing the GTO Suspension Buyer's Guide (HPP, Mar. '10) and getting a better idea of where to start, we contacted two companies offering excellent solutions for our Goat.
In the last issue, you read about the parts we used up front, why we chose them, and how we installed them. In this issue, we continue to do the same for the rear suspension. Andy Kollar of Kollar Racing offered us some knowledge on each bushing we would replace and why, and Jay Chen from KW Automotive served up some insight on his company's products.
The Parts
Andy provided Lovells crossmember bushings (N92350) to reduce wheelhop, rear control arm bushings (N61483) to sharpen suspension performance, and camber-adjustable rear control arm bushings (X63109). "The factory does not provide for camber adjustment in the rear," says Andy. "This kit allows you to correct the factory alignment and is a must for all cars with a 0.75-inch drop or more. Failure to correct the rear camber will result in accelerated tire wear."
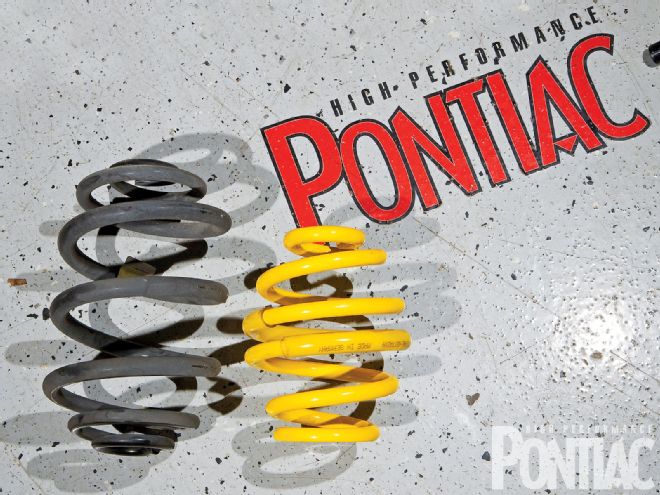
For our shock selection, we went with the KW V3 coilover suspension. Unlike the front, it uses a remote adjustable perch located in the factory spring location. The KW suspension retains the front McPherson-style coilovers, while the rear uses the factory inboard spring location, which reduces unsprung weight and shock static friction in the rear. Currently, there isn't a true coilover system for the '04-'06 GTO that has the coil spring mounted to the shock. In spite of this, KW assures us that this system is very effective, and it provides a similar setup for many other applications.
The rear springs included have a progressive rate that is more performance-oriented than the factory springs. This will, of course, come at some cost to ride quality.
These parts are more durable than the stock items. The bushings are polyurethane and should last the lifetime of the car, and the shock bodies are constructed from stainless steel. KW's website features videos of the shocks operating while completely submerged in saltwater. After a while, the traditional shock corrodes and freezes up. We won't have to worry about driving under water-for now (kidding).
Installation
As we suggested with the front suspension, it's best to have a professional install the components, or at least have one on hand, but the task can be handled by a mechanically minded hobbyist.
 After about five minutes, Greg had made very good progress. We would already be moving on to the other side with a torch but this was the safer option.
Greg Lovell of Anti Venom (no relation to Lovells suspension) was back in the HPP garage to help us with the rear suspension install. We found the back of the car was much less involved than the front, and we didn't need to use the press. There was, however, some drilling and creativity involved. Read on to find out more.
PARTS PART PART NUMBER PRICE Lovells Crossmember Bushings N92350 $160 Lovells Rear Control Arm Bushing N61483 $48 Lovells Camber Adjustable Rear Control Arm Bushings X63109 $100 KW Varient 3 Coilover Kit 35262002 $2,295 TORQUE SPECS Control Arm to Cradle 74 ft-lb (Support Brace) Rear Cradle to Body 52 ft-lb (Support Brace) Inner Adjustment Link 46 ft-lb Outer Adjustment Link 46 ft-lb Shock to Control Arm 85 ft-lb Shock to Body 10 ft-lbInitial Driving Impressions
With all of the parts we've selected for the Goat and a proper wheel alignment, it feels ready for open-course service and has been transformed into one hell of a street car. The Lovells bushings eliminated all of the play the factory bushings are notorious for, and allow the KW suspension to work to its full potential. There has been an improvement not only in steering feel and brake-pedal feel, but also in cornering stability and turning response.
This has transformed our little Goat into a totally different car that has almost endless adjustability. That can also pose a problem though. With this much adjustment, it's hard to know where to start. In the next installment, we'll discuss how to properly adjust an adjustable coilover for the street and road course, and explain alignment setups. We'll head out to the track and identify how the suspension characteristics change with each adjustment.