Traditional hot rods are the driving force in street rodding today. The vintage look is red hot and while the "real hot rod" never went away, the efforts directed toward this traditional look has never been greater. New parts, pieces, paint colors, and interior fabrics have been introduced to enable street rodders to build, modify, and upgrade cars in traditional fashion. While for some, building a traditional hot rod involves finding original vintage parts from a particular era, for the majority of street rodders, building a vintage-style hot rod involves the blending of parts old and new to form a new car that embodies the spirit of hot rods past. If you believe that hot rods are evolutionary rather than revolutionary, the use of these new pieces will provide you with the perfect palette to build the "new traditional" hot rod.
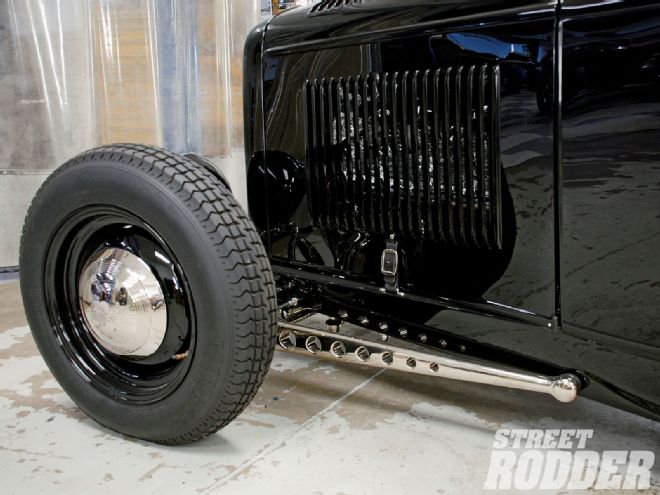
 The look of the wishbones on Alan Johnson's roadster combines vintage style with modern precision. These units are nickel-plated aluminum, but polished stainless steel units are in the works.
The trick for street rodders is to build on that heritage without losing the somewhat intangible spirit of hot rodding. And that's exactly how we ended up at Alan Johnson's Hot Rod Shop. With 18 years of building and a string of great street rods to his credit, last year Alan and Angie Johnson decided to build a traditional hot rod: a black roadster based on a Brookville body and in true Johnson tradition, a chassis filled with one-off parts.
One of the many pieces on the car that captured the attention of street rodders are the wishbones. The design is traditional, the concept advanced. Like all of the Perfection Hot Rod Parts by Alan Johnson (PHRP), it all begins with a vision. The concept was simple; make a set of split wishbones that would look like a vintage hot rod part, but using new technology. After many hours of CAD drawing, the design was settled on and the first set of wishbones were whittled out of aluminum using a CNC machine. Now for those of you who think "billet is bad" you'll be rethinking that opinion. Special effort was taken to make the parts appear to be fabricated pieces rather than a single piece of machined aluminum. This isn't your '90s block and whittle parts; these pieces don't have a sharp edge on them anywhere. The batwing bosses on the front appear to be nicely filled and finished welds, rather than machined aluminum. Likewise the taper at the rear of the front wishbones recall the look of a tie-rod end, albeit a highly finished one at that now carries a specially made Teflon-lined bearing mount. The holes add the perfect hot rod touch to the 'bones and in either polished or painted form, these are definitely real hot rod parts. It is interesting to note that similar split wishbones were fabricated for Doug Cooper's incredible Ridler-winning, Johnson-built B-400, but those units carry a machined web that was less traditional in design.
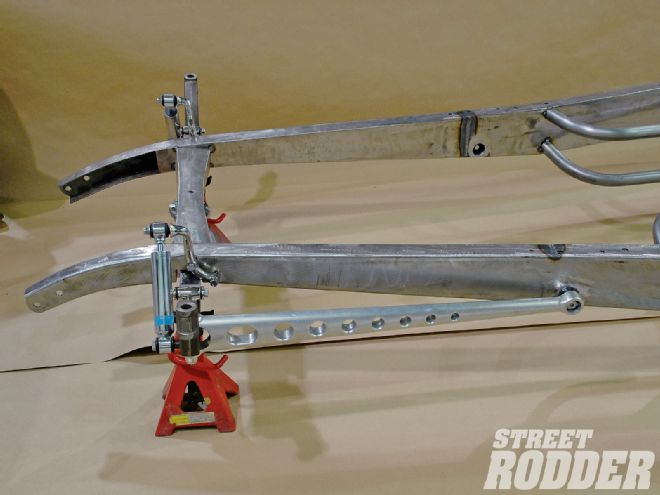 The PHRP by Alan Johnson wishbones look great on any early chassis, but since they are non-adjustable some special care must be taken during the installation. These units are the Hot Rod Hole Shot wishbones, other styles are available.
The original pieces are machined from aluminum, and yes, you can get a set of those if you so desire PHRP is in the process of having identically shaped pieces done using investment cast stainless steel. This will help reduce costs and you'll enjoy the durability of a polished stainless steel finish. And there's more good news, matching rear wishbones are also available. Since there are some special requirements for using these new wishbones, we stopped by Johnson's Hot Rod Shop to see how these non-adjustable wishbones should be installed. We're using a Deuce chassis as an example, but similar techniques apply to any straight-axle car, and yes, they can be retro-fitted to your existing street rod or incorporated in your next chassis build.
Since the wishbones are not adjustable, we must be certain to locate the axle mounting points perfectly. We'll start up front where a 5-inch dropped Magnum axle with 2 1/4-inch axle bosses and a pair of spring perches from PHRP mount a Posies 30-inch main leaf buggy spring. This is all standard, but to accurately set your caster you must first know the diameter of the front and rear tires. In this case the rear tires are 31 inches tall, allowing for "tire squat" Alan Johnson figures on a 30-inch-diameter rear tire and generally front tires are around 25 inches, 24 1/2 with the squat factor. By drawing a line through the centerline of the front and rear wheels we arrive at a 4-degree "rubber rake," or angle formed by the big and little tire combination. The chassis was set in the frame jig on 4 degrees. Since all measurements and angles are relative to a level ground, the jig is leveled front to rear and then the framerails are set at 4 degrees. If you are working on your garage floor try to level the floor and if possible roll the axle under the frame on the tires you will use on the car, low air pressure will simulate the squat factor.
Johnson prefers a bit of extra caster up front, so he installs his custom-flat crossmember between the framerails at a 7-degree angle. Clamping the front spring into this crossmember will build in the desired 7 degrees of caster. Disassemble the spring and use just enough leaves to support the weight of the frame with the shackles at midrange. A block of wood can simulate the missing leaves and permit the spring clamp to tighten, be certain the spring locator bolt is in the center hole of the crossmember. What you must avoid is setting up the frontend with the shackles bottomed out on the spring perch, or shackles too high, they should be midrange. If you are working with an existing frame, the front crossmember may be welded in with caster ranging from 3-7 degrees according to the manufacturers specification, which is fine.
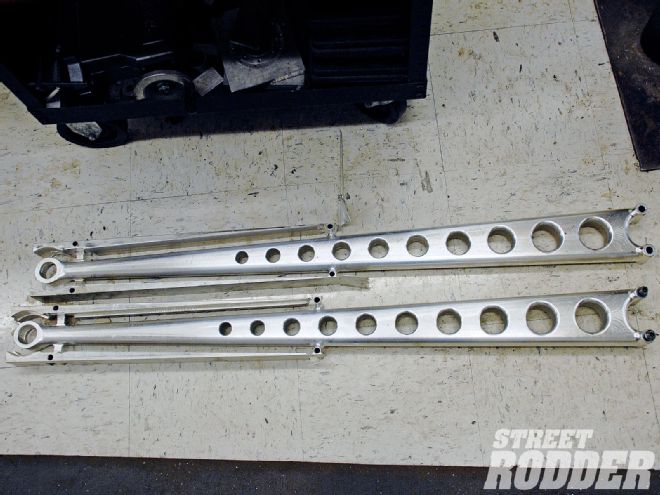 So, just where do you vintage 'bones for your hot rod? If you're thinking about an archaeological dig in the dry lakes you'd be wrong, rather they are formed on a CNC machine or investment cast in stainless steel.
Since final ride height is determined by the height of the frame off the ground, there must be ample room between the axles and the frame for suspension installation and movement. All of these numbers were already calculated for us and since this chassis is going to support a '32 Ford body with no fenders, tire to body panel clearance is not a problem. If you are planning on using fenders, be certain your ride height provides ample tire clearance during suspension travel.
So, with the crossmember installed at 7 degrees and the new wishbones attached to the axle using tradition-style spring perches by PHRP, it was time to locate the mounting points for each wishbone. In the case of a Deuce with fenders the wishbone will generally locate under the framerail, while this low-slung highboy chassis will have the wishbones located through the framerails.
With the centerline of the front axle scribed on the top of the framerail, measure the distance from the axle centerline to the center of the rear mounting pin 33 7/16 inches and scribe a line. Now measure from the main cowl bolt hole forward 1 3/16 inches, and this should bring you to the same scribed line. The exact same measurements and line should be used and marked on the other framerail. Now, to double check your axle location, measure both sides from a known point on the frame, we used the front body mount hole. The measurement should be the same on both sides. Next we measured from the front axle centerline scribe mark, diagonally across the chassis to rear wishbone mount line, and then we switched sides and measured again. These triangulated measurements should be exactly the same and by taking triangulated measurements we are certain the axle is perfectly square in the chassis.
Next we lifted both of the wishbones until the axle bosses showed 7 degrees of caster, matching the crossmember which is set at 7 degrees; there's no effort involved and no binding of the shackles. If your caster specification is 5 degrees, obviously you will rotate the wishbones until the axle boss is at 5 degrees. Using a square, we scribed the line from the top of the framerail, down the side of the 'rail. This is our location from axle to wishbone mounting point. With the axle at 7 degrees we used the bearing mount threaded pin on the wishbone to locate the vertical placement along this scribed line and made a mark. A center punch established the exact location of the mounting hole. Measurements were checked one more time and then using a 1 3/4-inch hole saw the framerails were drilled to accept the wishbone mounting pocket. These wishbones use a tubular pocket mount that provides a 7/16-inch-thick mounting surface on the outside and a pocket on the inside of the framerail. This way no portion of the bearing pin or nut protrudes inside the chassis. The mounts are included with each set of wishbones.
After cutting the holes, the pocket mounts are tapped into place and tack welded, the location is checked once again and then final welded. The rear wishbone mounting pins are slipped through the hole and the nuts tightened on the inside. This basically completes the axle install with the new wishbones locating the axle square to the frame with 7 degrees of caster. A set of SO-CAL Speed Shop shock mounts and Bilstein shock absorbers complete the front suspension. Note that the shock mounts are installed at the same angle as the axle caster to prevent binding.
After a few minutes of admiring exactly how good looking those wishbones are, it was time to move to the rear installation. We were on hand for some of the prototype work as it involved using one of the new Winter's quick-change rear axle housings with the tapered tube axle housing. It also involved using a traditional Model A buggy spring out back and of course a matching set of wishbones from Perfection Hot Rod Parts by Alan Johnson. Join us in the next issue of STREET RODDER when we install the quick-change rearend and wishbones in Better 'Bones: Part II.