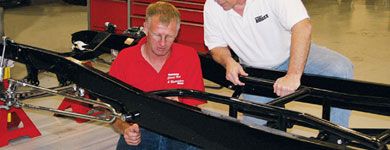
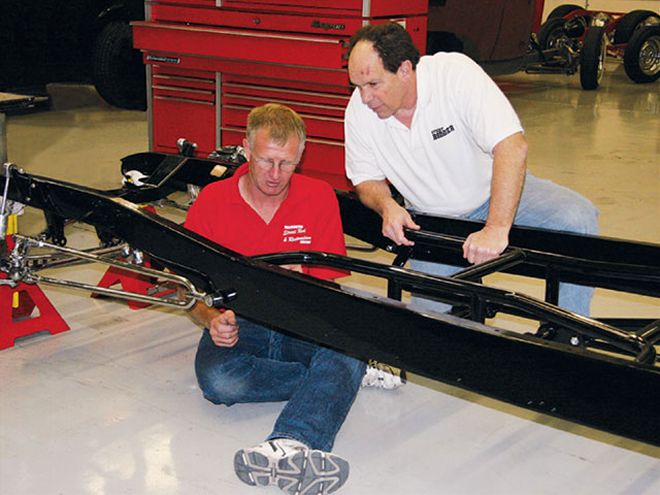
 Kelvin Waddington (left) and STREET RODDER's own Brian Brennan began assembling the Pete & Jake's chassis that would end up under one of Waddington's new, all-steel '34 phaeton bodies.
When street rodders discuss the relative merits of traditional versus high-tech chassis construction styles, the comparison inventively comes down to the type of suspension used. Generally, a solid front axle is considered to be an inherent part of a traditional hot rod, but many enthusiasts believe the choice to go "old school" means sacrificing a good ride quality and acceptable handling qualities. But, you can have it all: the cool traditional look of a dropped axle up front and a capable car with great road manners-a good ride, predictable handling, precise steering, and excellent brakes. It's simply a matter of selecting the appropriate parts and assembling them correctly.
We'll be traveling around the country for at least part of this year's rod run season in a new all-steel '34 phaeton from Kelvin Waddington's Australian Ute Company (see the May '08 issue of SRM for a full report). We decided to stick to the basics when it came to a foundation for the car, so we went with what we know works-a chassis from Pete & Jake's. The chassis we are assembling has no trick one-off parts; it's the same thing anyone can put together at home.
Our frame came fully boxed with a substantial tubular X-member and all necessary brackets and the engine mounts installed. In addition, all the body-mounting holes have nuts welded in place. Since there was nothing for us to do to it, the frame was on its way to Tony Correia at Speed Shop Custom Paint to be dressed in PPG's best black topcoat as soon as it was out of the delivery crate.
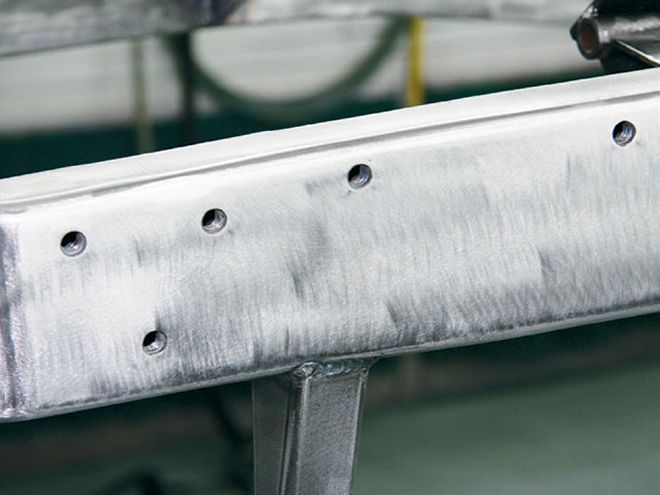 Some prep work will always be necessary, even when working with a new frame. Start by thoroughly wiping down the frame before sanding with the wax and grease remover recommended by the manufacturer of the paint being used. Bare metal should then be roughed up with 180- to 240-grit abrasive paper.
One of the common mistakes often made by homebuilders is ordering chassis components from a variety of suppliers. Often, parts are ordered separately due to budget constraints and that's certainly understandable, but it's best all the front suspension parts come from the same source to ensure compatibility. We relied on Pete & Jake's for the complete front suspension package for the '34, including the company's new dropped, drilled, and filled axles, spindles, hairpin radius rods, steering arms, a tie rod and draglink, and a Vega steering box and pitman arm. We chose the chrome option for everything to give it some added flash under the fenders. Not only is the plating first-class, but you'd be hard-pressed to have the individual parts dunked in the shiny stuff for any less dough.
While building a street rod is a formidable undertaking, it can be done a lot more effectively with chassis components like those shown here from Pete & Jake's. Take a look at the following steps to see how easy it would be for you to assemble one, too.
Tips From Pete & Jake'sWe asked Jerry and Jason Slover of Pete & Jake's for advice on traditional straight-axle front suspensions, something they know as much, if not more, about than anyone in the business. Here's what they had to say:
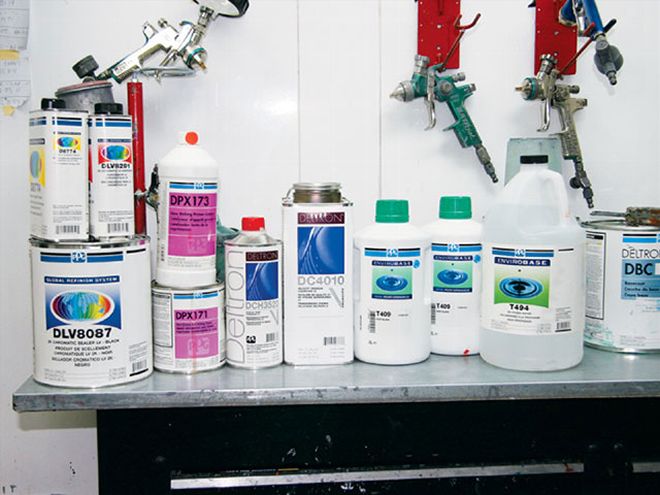 Thanks to Norm Gonzales, the PPG area rep, our tub is covered with the latest environmentally friendly finishes. Watch for an upcoming, complete story on Envirobase water-based paints. Don't confuse these with the water-born concoctions that the OEMs tried in the 1970s, most of which fell off shortly after the warranty period was over.
Selecting Steering Arms
Steering arms should have about a 1-1/2-inch drop for dropped axles with four-bars or hairpins, so the tie rod runs between the upper and lower bar.
Dropped axles with Model A through '34 Ford 'bones can be a problem due to the location that these wishbones attach to the axle. The standard-drop and deep-drop arms are not deep enough to go below the 'bones, so, you go above the 'bones, but this creates an issue if the chassis is sitting low down on the 'bones, as there will be very little space between the bottom of the frame and the top of the 'bones for the tie rod and draglink. Going below the 'bones typically puts the tie rod below "scrub."
With all this said, we recommend using our straight steering arms. They are USA forged and can be heated bent, as necessary. Often, the wishbones will have to be pie-cut to get proper caster when mounting the 'bones on the outside of the frame. Dropped axles and '35-48 Ford wishbones will require steering arms with a 3-inch drop to put them below the 'bones.
A Few Pointers On Chassis ConstructionTest-fit the components when determining motor-mount location; don't just go by engine and trans measurements. Every chassis we build gets the motor and trans set in the chassis for mock-up, and we recommend customers have the radiator (or a trusted measurement), the fan (or a measurement), and the engine/trans installed and the firewall or body on the chassis. These simple steps ensure there will be room for an adequate radiator and a fan, which means the engine will cool and there will be room for all the necessary components. Mock-up as many times as necessary-weld once.
Vega/cross-steer location: Once again, we mock-up the front end to figure the location of the Vega/cross-steer. We bolt everything together and set the front end under the chassis at ride height; taking the front spring apart and using just the main leaf and the leaf directly above it best accomplishes this. This allows just the weight of the chassis to compress the leaf and the approximated ride height, and helps us adjust and mock-up the four-bars or hairpins, Vega steering, Panhard bar, shocks, and the like.
Rear suspension:
Again, set the chassis at ride height (notice a theme here?) before anything is welded permanently. Depending on how you want the car to sit, we have some formulas we use that we share with customers. Most common, Model A to '48 Ford is typically 3 to 4 inches from the top of the rearend axle tube to the bottom of the framerail.
Proper Assembly Of A Pete & Jake's Chassis
For the front four-bar/hairpin, rear ladder bar/four-bar, and Panhard bars, take each bar and assemble them with four to five threads exposed outside the jam nut. This is how we mock-up our chassis, and this will save the customer a tremendous amount of time.
Solid axle alignment
specifications: Five degrees positive caster, 0 to plus or minus 1/2-degree camber, 1/8 toe-in for radial tires, and 3/16-inch for bias-plies.
Figuring bolt pattern: Measure from the center of one stud, skip a stud, then to the outside of the next stud. A common mistake is over-tightening the attachment bolts on four-bar/ladder-bar bushings, resulting in the suspension not being able to move when the pivot points are locked down. This is our purpose for using locking nuts rather than lock washers and nuts, since they don't have to be as tight to stay together.
Putting together kingpins: The order from top of the axle down is as follows: head of the kingpin, cup washer (unless you are using aluminum-top or SS-top kingpins with a lip to hold the felt), felt washer, top spindle boss, axle boss, bearing (writing on bearing facing up), lower spindle boss.