Part 1, Let's Tear Down
We hear this question all the time: how can I build my engine without spending a lot of money? The bottom line: It takes a lot of searching for parts and aiming your goals a little below that of a 700hp big-block to accomplish it.
Recently, we ran into an enthusiast who asked us that very question, and his story is not unlike that of just about every enthusiast. He had no "extra" money to spend, and the engine in his '66 Barracuda had passed needing to be rebuilt about 70,000 miles ago. At last count, it used three quarts of oil for a 70-mile trip-like we said, it needed rebuilt or replaced. The problem was, Darryl, the Young Gun who owns this car, uses it as his everyday car, and therefore, it could not be torn down for a long period of time.
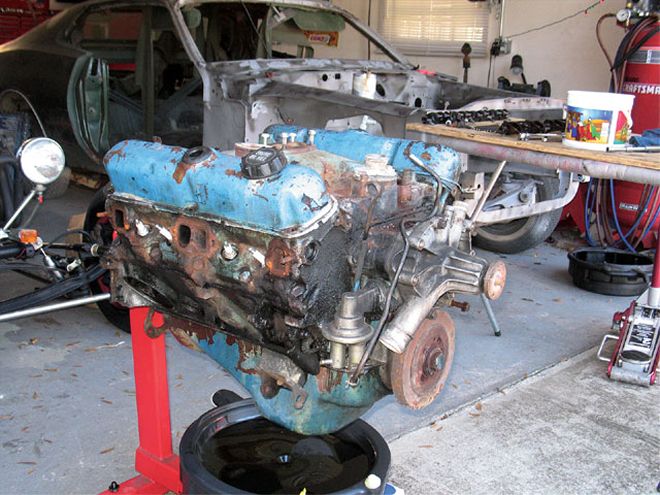
The base for our build was a '70 318 that was given to us some time ago. We found that it was in good, rebuildable shape as soon as we took it apart.
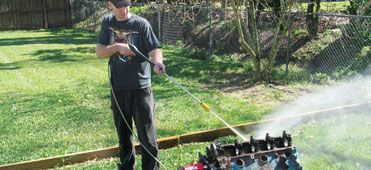
The easy fix? Get another engine to build, and then just swap them out later. Lucky for him, we just happened to have a 318 sitting in the corner of a warehouse that we could use. The replacement engine came out of a '70 Charger that a reader gave us a few years ago because he was putting a Magnum-headed crate engine in his car. Since the engine didn't cost us anything, it didn't cost Darryl anything. But we really didn't know what we would find during teardown. Would the engine be a basket case? Would it be rebuildable? The only way to answer these questions was to tear it apart and hope for the best.
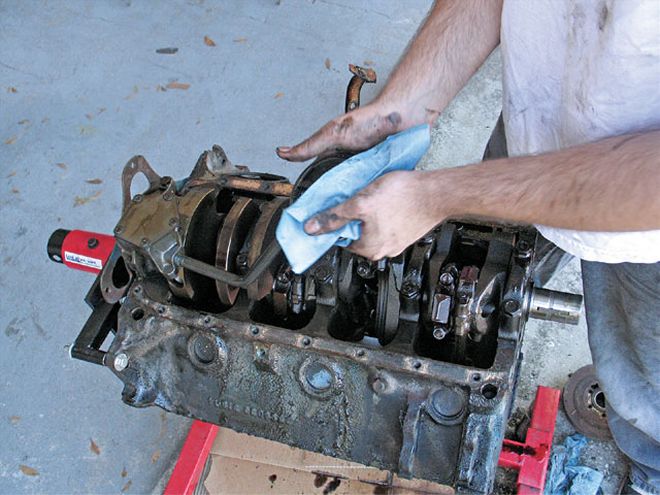
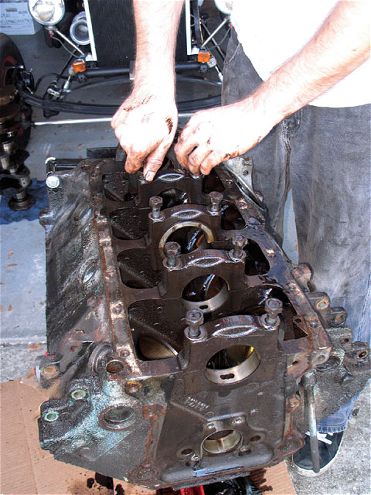
When the engine was completely disassembled, we were more than happy with what we found. It was apparent that either this engine had very few miles on it or it was well taken care of. Either way, we were in luck. After we removed the heads and intake, we dug into inspecting the bearings. The condition of the bearings is a telltale sign of what the rest of the engine probably looks like. For us, the copper underneath the "Babbitt" material was barely showing and "mic-ing" the crankshaft journals confirmed a standard-journal crankshaft.
More often than not, a rebuild will consist of a mild over-boring of the cylinders and the purchase of aftermarket pistons. With that being said and as proponents of making cylinders bigger to allow for more cubic inches and higher compression, we have to say there are a few times when you may not need to oversize the bores. In our case, after the rod and piston assemblies were removed, we hoped for the best and decided to "mic" the cylinder bores and see what the verdict was. From the factory, a 318 has a cylinder bore of 3.910 inches with an out-of-round allowance of .005. Keep in mind, there is no money for this build, so when the worst cylinder measured 3.912 inches with an out-of-round factor of .002, we knew we were in luck.
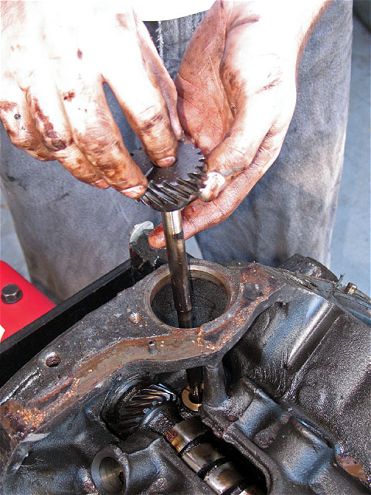 Before you remove the old cam shaft, the intermediate shaft that connects the oil pump to the camshaft and distributor has to come out. Sometimes this comes out easily, and sometimes some persuasion is needed.
After making sure the block was usable, we then focused on the heads. Now a 318-even during the "good" years-never came with a performance version of heads. By that we mean the valves are small. But how large a valve does a 318 actually need? The first thing we did to the heads was remove the valvesprings and do a basic check of the guides. From the factory, the valve-stem-to-guide clearance should measure between .002 and .004 inch. Let's just say that without even properly measuring, we had a lot more than that when checking the exhaust guides. So now we needed to replace the guides-there's one expense. Once you start figuring what certain machine work costs, you really need to sit down and decide if another alternative would be better. In our case, we planned to use the factory pistons and rotating assembly, so would our little 318 benefit from installing larger valves? Factory 318 heads came with a 1.780-inch intake valve and a 1.500-inch exhaust valve. We felt that increasing the intake valves to hi-performance 2.02 inches would be too much valve, and we would lose some velocity. But we did feel that installing a set of 1.88-inch intake valves and 1.60-inch exhaust valves would be beneficial. Again, figure what you'll pay for the required machine work and decide if you should just get aftermarket heads or rebuild what you have. Since looking up the cost of an aftermarket head is as easy as clicking your computer mouse, we decided to simply redo our cast heads to give you an idea of what rebuilding heads can cost. Replacing the valves cost us a total of $86.18. having the heads cleaned, eight new guides installed, and the seats opened up cost us $400. We did a little "home porting" of the runners, and installed the valves and spring ourselves, so that cost us nothing. If you want someone to do it for you, figure on a couple hundred bucks. if you have a shop do everything, you can figure on spending in the neighborhood of $700 or more for a set of "tweaked" cast-iron heads. What do aluminum heads cost where you shop?
 After spinning the engine upside down on the stand, we removed the oil pan and then the oil pump. Two bolts hold the pump to the block.
Now that we knew what parts we needed to order, we needed to come up with a plan. We wanted a reliable engine that would move the Barracuda down the road, sound like a performance engine at a cruise night, and actually stay together. this is a budget engine and we're re-using the rotating assembly, which means we are dealing with the factory compression ratio of 8.8:1. We can practically run water through the carburetor and it'll run fine. Since we decided to open the valves a little and do some home porting, we felt that adding a little lift and duration to the camshaft would be a benefit. Keeping in mind we have no budget for a camshaft, we simply went with a hydraulic flat-tappet piece from Comp. We chose a Comp PN K20-223-3, which comes in with a .477/.480-inch lift and a .224/.230-degrees of duration at .050. To ensure we had everything we needed, we ordered the complete kit from Summit at a cost of $385.
Finally, we needed an intake and carburetor. We could have just put the two-barrel intake back on and got a carburetor, but who are we kidding? But what budget-minded intake and carburetor could we order that would be beneficial to our little 318? A single plane was out of the question because this engine wasn't designed to utilize an intake like that. So we looked around and found that Professional Products makes what they call a Crosswind (PN 55026). The Crosswind intake is designed to fit 318, 340, and 360 engines-both LA-style and the late Magnum V-8s. The manifold features an air space under the plenum chamber, which allows air to pass through to help keep the incoming fuel/air charge cooler than is possible with a conventional design manifold. The manifold is designed to accept the standard length bolts that came with your original engine. Special finishing plugs are provided to cap off the unused bolt holes. The intake set us back $150. Topping off the intake is a Speed Demon 650 carburetor (PN 1282010). you can buy this carburetor at Summit Racing for $350.
Finishing off the major-parts list is the rebuild kit. As we said previously, the cylinders and pistons were all in really good shape, so we were able to save money on the rebuild kit by simply buying a basic rebuild kit that did not come with new pistons. When we ordered our kit from Summit Racing (PN FEM-205717M-000), we also ordered the Mahle/Clevite bearings, a Melling oil pump, and frost plugs. The total cost of the kit, bearings, oil pump, and frost plugs was $292. If you do need pistons, a kit with basic cast pistons will run you $360, and a kit with forged pistons will run you $607.
So there you have it, the basic cost of the parts required for this build came in at $1,577. You might be able to do it for less, or it might even cost you more. Remember, all prices are quoted from summitracing.com as correct at time of writing.