The November 2015 issue of Mustang Monthly had a relatively controversial story about how “correct” factory paint on Mustangs has orange peel, the result of a paint job that wasn’t color-sanded and buffed from the factory. To custom painters, orange peel is highly undesirable and the sign of a low-quality finish, but in the restoration world it is the correct outcome from a paint job and will earn the most points in a MCA-judged show.
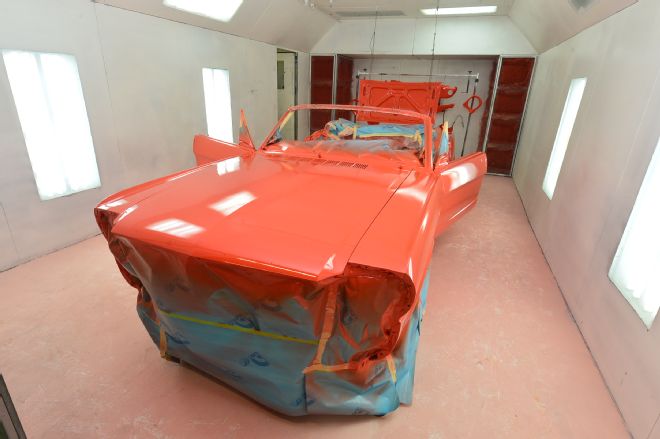
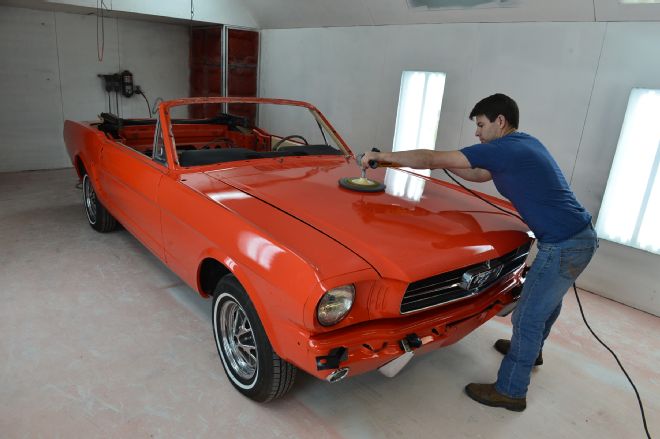
But how do you get a correct paint job with the right level of orange peel that still looks shiny and deep? That’s what this story is about. Jason White (Jason White Customs & Restorations) in Hereford, Texas, is no stranger to duplicating factory paint on 1964 1/2 to 1973 Mustangs, and some of his customers greatly prefer the original look with orange peel instead of a sanded-off, slick finish. To find out how he does it, we followed White as he applied sealer and a modern single-stage, acrylic urethane to a 1965 convertible that actually came from Ford’s San Jose assembly plant in the highly desirable Poppy Red. This Mustang is a real color code “3,” so having the factory look was important for this restoration, and he pulled it off perfectly.
Fixing Factory Paint Imperfections
Single-stage paint cannot be sanded between coats. The paint must completely dry after application of the final coat before repairs are made. Ford Assembly resprayed exterior panels that had highly visible embedded dirt, fisheyes, or runs, but the factory did leave small “drippies” and other minor imperfections on the underside of hoods and decklids, or on doorjambs, for example. In fact, some restorers, when repainting, either preserve these small imperfections (if they have some original paint left they are salvaging) or reproduce imperfections to try and bring back that factory look with an even higher expression of originality than factory orange peel.
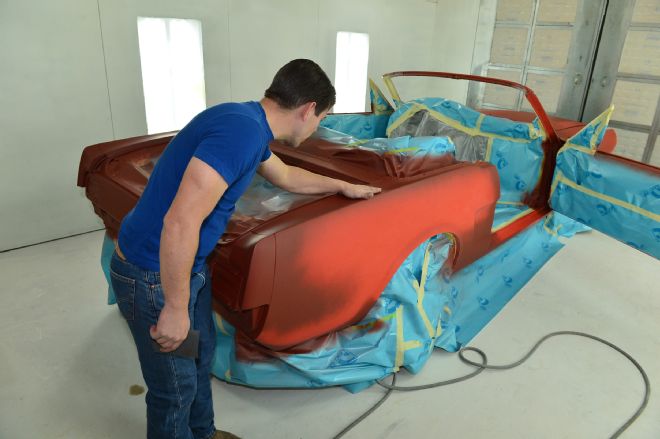
01. Our starting point was a 1965 Mustang. Jason White had already prepped the body for paint.
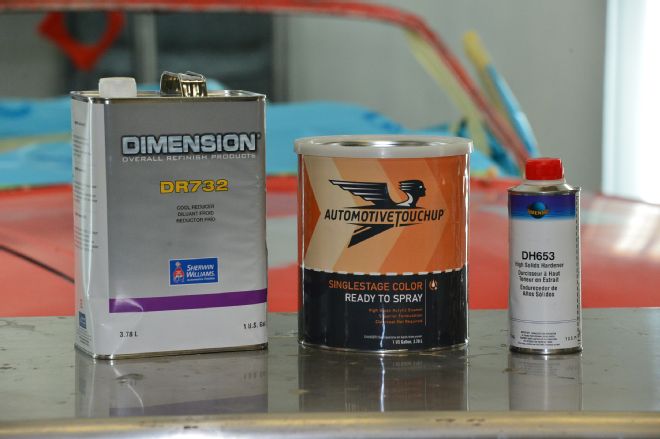
02. In 1965, Ford used acrylic enamel, which is no longer available, so duplicating the factory procedure requires single-stage paint. White used modern acrylic urethane and reducer from Automotive Touchup.
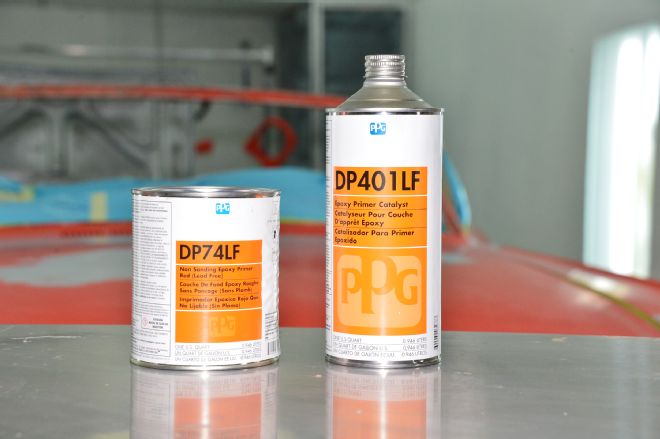
03. White used a “non-sanding” epoxy primer (DP74LF) on the bare metal portions of the body. This primer is red oxide in color, similar to the color Ford used in 1965. The DP74LF requires KP401LF catalyst.

04-05. White (right) and Connor began by cleaning the body with solvent-infused wipes from Automotive Touchup. These wipes remove body oil as well as traces of wax and other chemicals that would cause blemishes in the paint.

06-07. White (right) and Connor began by cleaning the body with solvent-infused wipes from Automotive Touchup. These wipes remove body oil as well as traces of wax and other chemicals that would cause blemishes in the paint.
08. Also make sure to clean any hanging parts with the wipes and tack rag.
09. Ground the Mustang from the frame to ground with a chain to prevent static electricity so your Mustang is not a dust magnet.
10. Our Mustang had been painted, but the paint had chipped and cracked, so White sanded the body, leaving bare metal in repaired areas.
11. Here we are mixing the red epoxy sealer with the hardener.
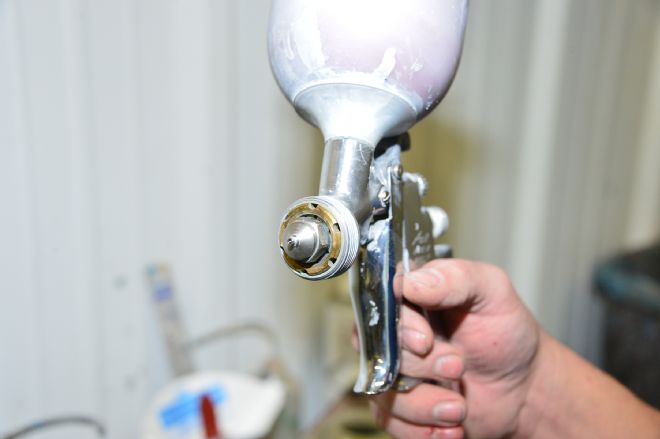
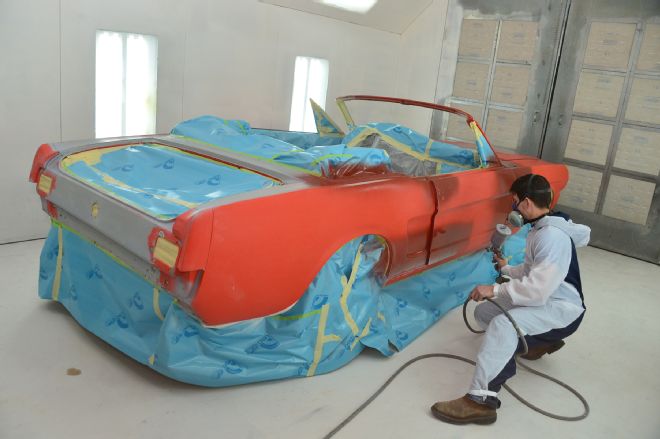
12. For his Iwata paint gun, White chose a 1.5mm tip to spray both the sealer and the single-stage paint. With basecoat/clearcoat, he would use a smaller 1.3 mm tip.
13. White sprayed the sealer on the bare metal portions of the body using an initial pressure setting of 8 psi. Of course, this sealer is “non-sanding,” because our body was pristine and did not need the extra filler of a primer/surfacer compound.
14. The decklid was bare metal, so White first sprayed it with sealer.
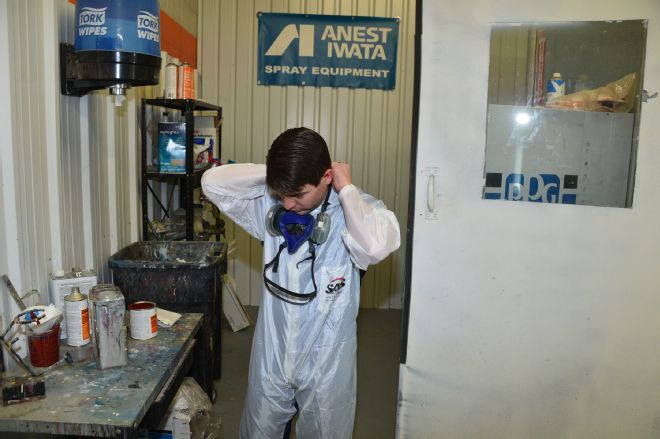
15. A paint suit eliminates dust and lint introduced by clothing.
16. Now would be the time to fix any dust specks in the body, but none could be found on this car.
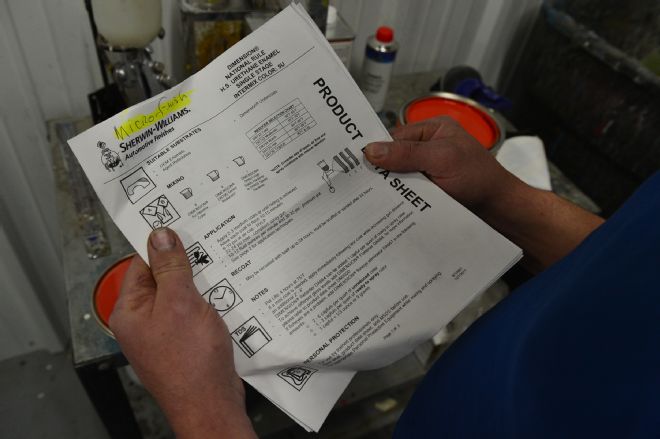
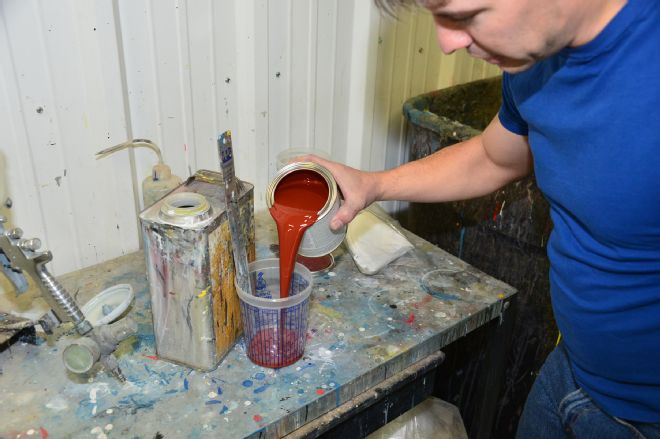
17. The paint manufacturer gives mixing instructions for the single-stage paint and hardener. Follow them to the letter for best results.

18. A graduated flask helps to mix paint, reducer, and hardener in the right proportions.
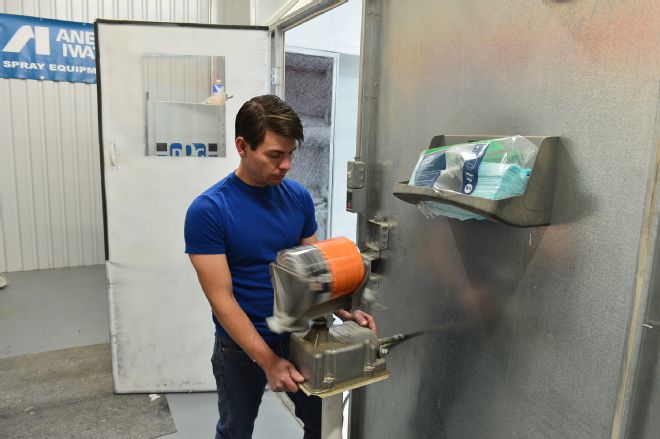
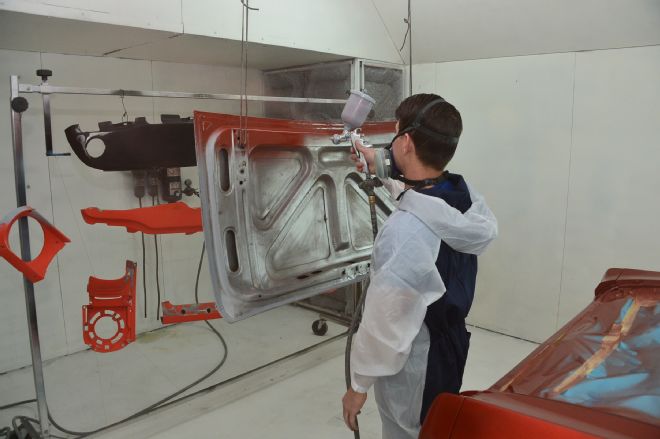
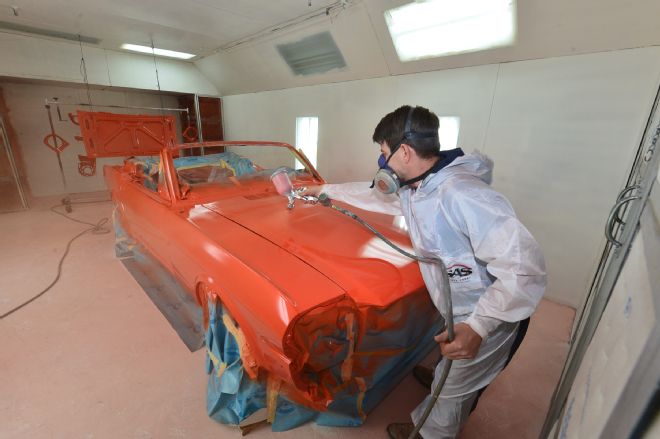
19. White shook up the gallon of Poppy Red single-stage paint with this pneumatic mixer.
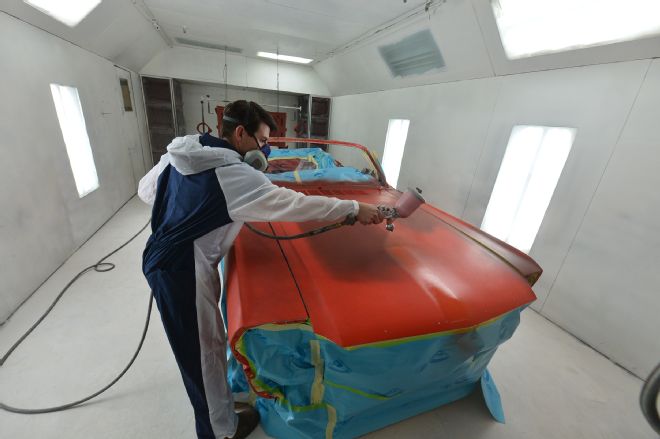
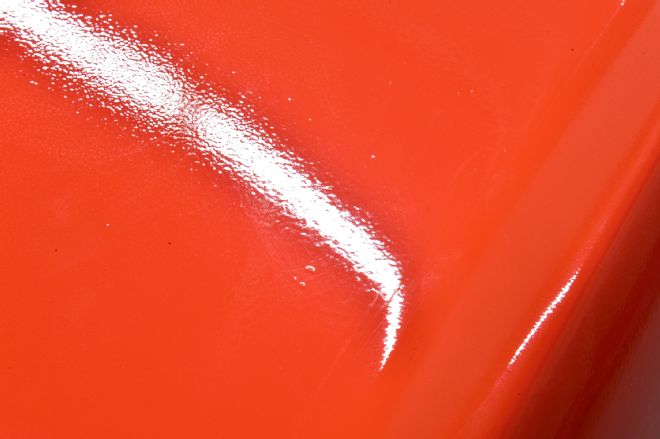
20. White sprayed on the paint lengthwise to the hood, overlaying each row by 50 percent. He painted the first coat with an air gun pressure of 9 psi.
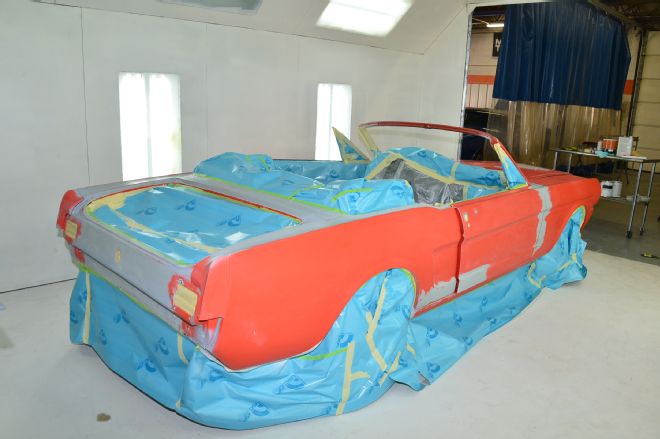
21. White describes the first color coat as a “fog.” The red oxide sealer still shines through the color, which doesn’t look Poppy Red yet. However, orange peel is easy to see.
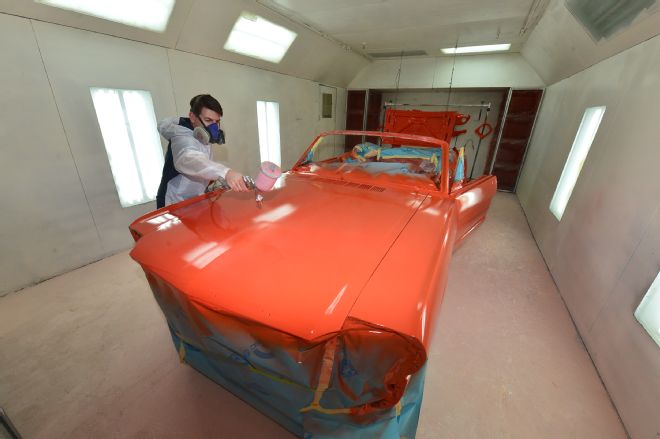
22. On the second coat, White lowered the paint gun pressure from 9 to 8 psi. Each coat shows less from orange peel and a slicker surface.

23. After the third coat the color looked brighter and more like Poppy Red.
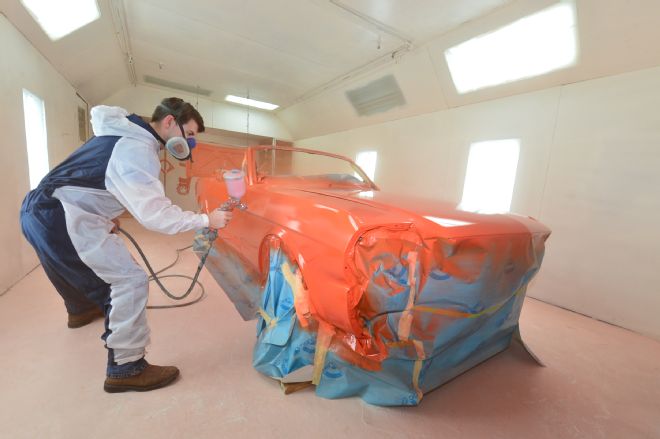
24. White applied the fourth coat with a gun pressure of 8 psi. With each new coat, orange peel becomes less visible and the color is a little shinier.
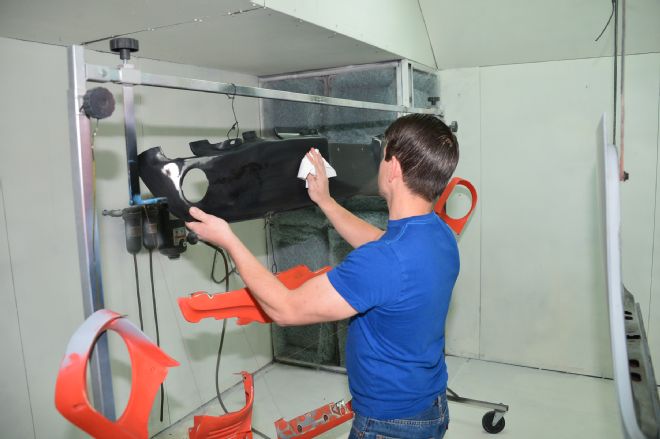
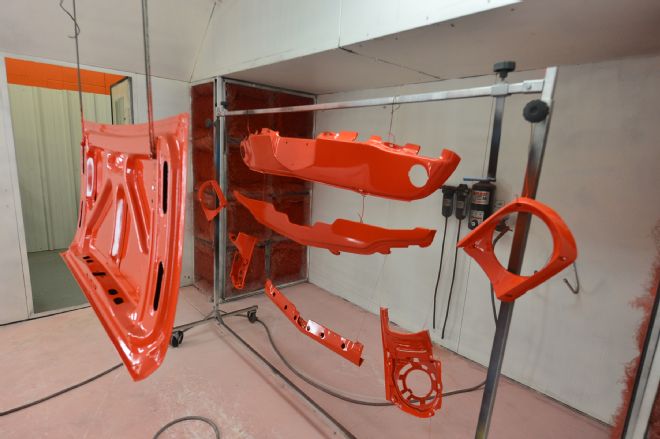
25. On the fourth coat, White sprayed the hood (and decklid) back and forth, instead of up and down with the length of the car.
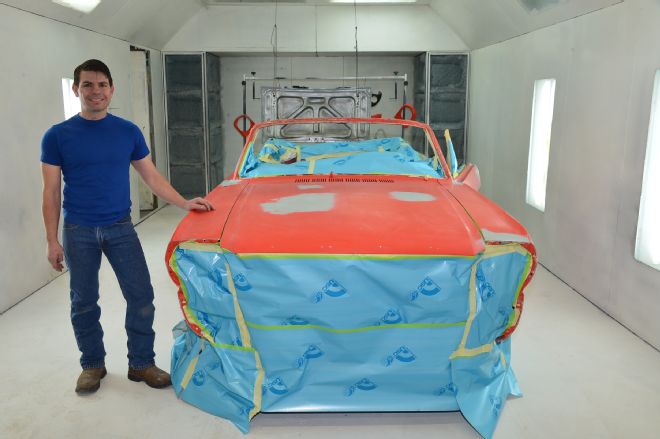
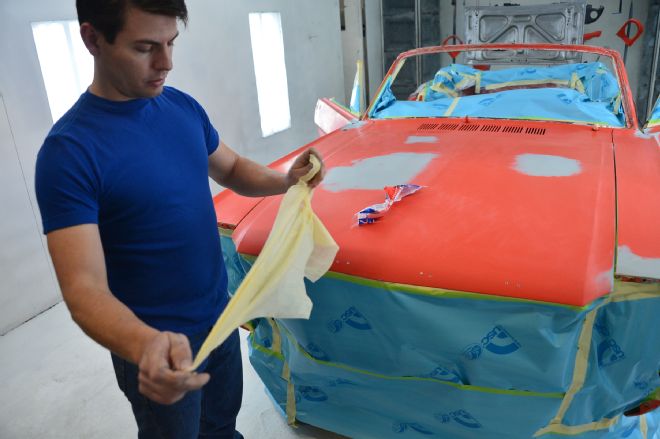
26. He also painted the decklid, valances, and headlight buckets with four coats.

27. He pulled the tape off of the original door date plate after the painting was done.
28. We waited for the fourth coat to dry before removing the paper and inspecting the body for imperfections from any dust or dirt.
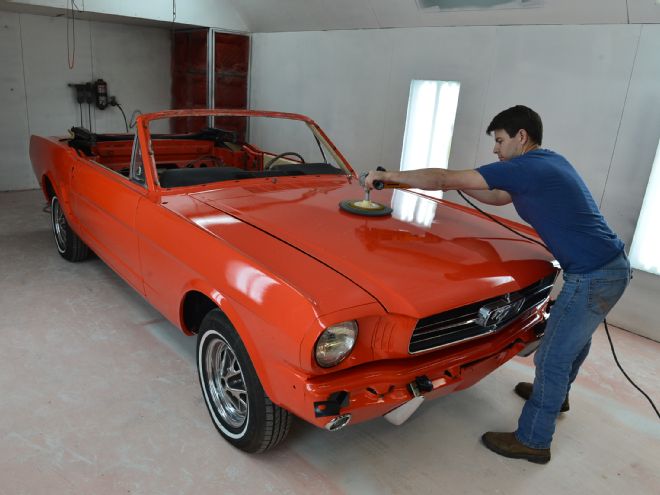
29. We found these three tiny specks of dirt in the top of the driver-side fender.
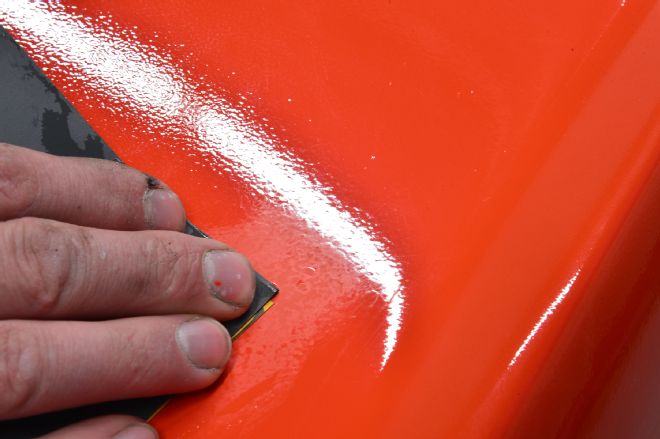
30. Small paint imperfections can be fixed without disturbing the integrity of the orange peel finish. First, knock off the tops of the specks by hand with 1,500-grit sandpaper.
31. With a dual-action sander (DA) and 3,000-grit paper, lightly sand the specks of dirt.
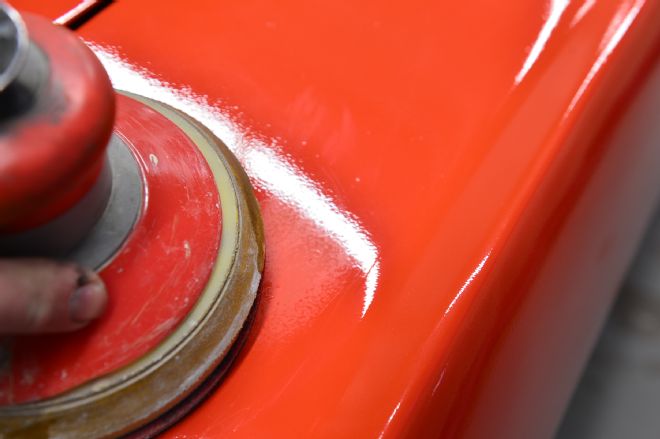
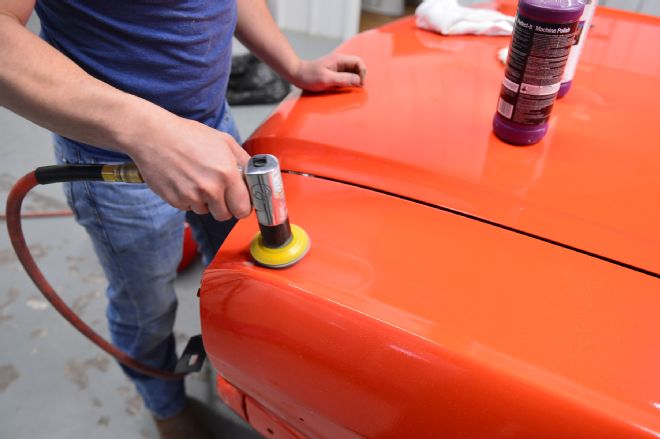
32. The dirt specks are gone and orange peel remains.
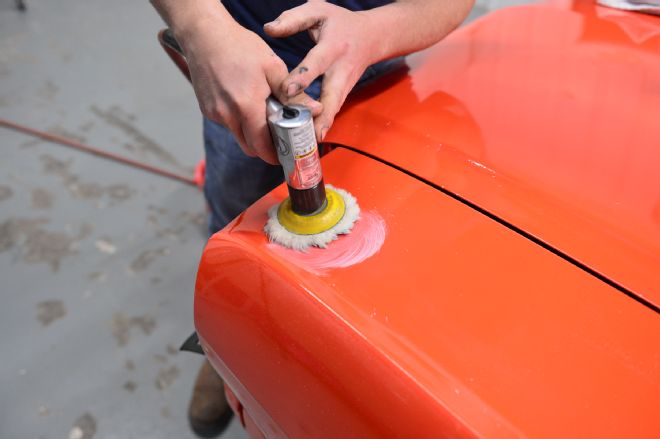
33. To remove dullness, first lay down rubbing compound and buff the area with a soft wool pad, being mindful not to spend too much time at panel edges, which could burn the paint.
34. Next, machine-polish the area and buff it again with a soft foam pad.
35. Our hood had the most specks of dirt—probably due to our camera work during painting. The decklid had just a few specks of dirt and the sides of the car appeared dirt free.
The New Normal?
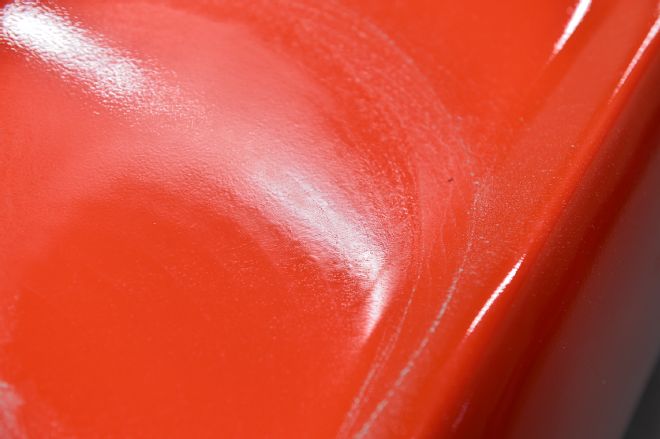
Will orange peel paint become de rigueur on classic Mustangs? Already, the lack of a factory orange-peel finish is a three-point deduction in Mustang Club of America concours classes. The orange peel is easy to confuse with an improper paint gun setting that lays paint on too dry and thus causes orange peel. The orange peel in a factory paint job is not too dry. Orange peel with single-stage acrylic paint is a result of the normal drying of the paint, creating a smooth, natural finish that shines but has more of a matte finish as compared to glossy.
AutomotiveTouchup will fulfill requests for single stage paint for classic Mustangs. However, single stage paint is only available by request. Special additives and hardeners like those used in this project are also only available by request.
Please call 1-888-710-5192 to request single stage paint, hardeners, and anything else you need for your project.
Our thanks to AutomotiveTouchup for their willingness to help out classic Mustang owners with a product that will provide the original appearance of the acrylic enamel Ford used on first generation Mustangs.