Unless you are keen on the idea of retaining a gas tank behind the seat inside the cab, installing a new tank in a pickup can be somewhat of a packaging nightmare. The only place is under the bed floor, yet space can be at a premium under there. We had the advantage of having raised the floor in our F-100 to clear the C-notched chassis, but the intended tailpipe system still took up a lot of space.
We found the perfect solution in a universal pickup fuel tank from Tanks Inc. The 16-gallon tank would fit perfectly in our intended location (in fact it will fit an F-100 without removing the stock rear crossmember) and allow routing of the exhaust past the tank and over the rearend. It also features a central filler tube, something we were having a hard time finding, as we wanted the filler to be perfectly central in the bed floor.
Tanks Inc. supplies stainless mounting straps with the tank, and have numerous options when it comes to in-tank pumps, gauge senders, and filler tubes. The tank itself is available in stainless steel or alloy coated steel. Once we'd settled on a location, all we had to do was come up with a way to mount the tank. Our only proviso was that it be neat and the tank be removable from below. Here's how we did it, though it's by no means the only way.
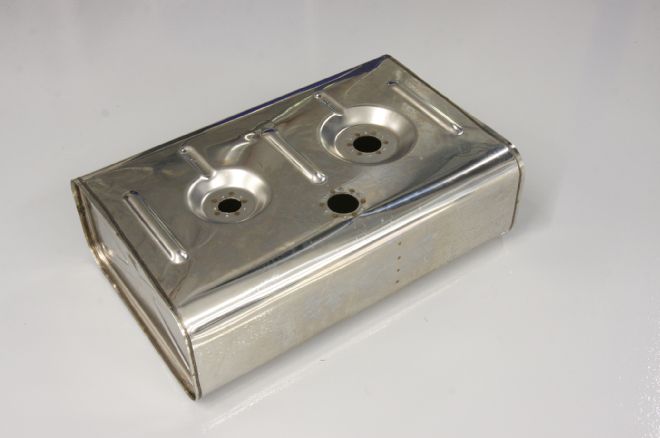
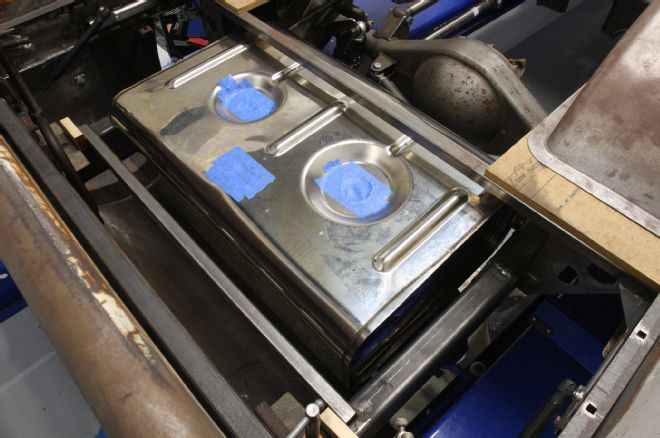
1 Available in alloy-coated steel or stainless, Tanks Inc.'s universal pickup tank has a 16-gallon capacity, and measures 27¾ x 17¾ x 8½ inches. Various sending units, filler necks, and fuel pumps are available, depending on your needs.
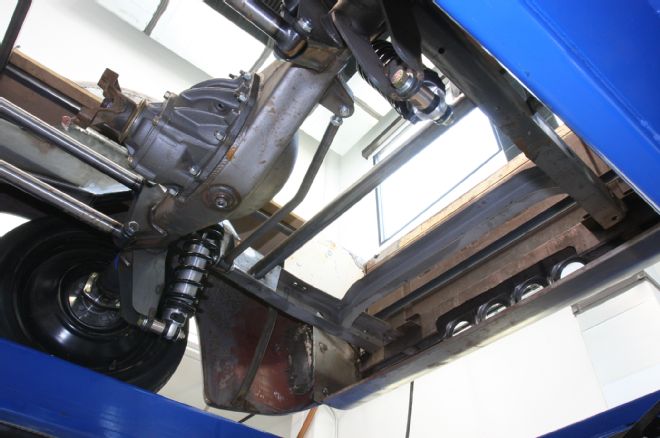
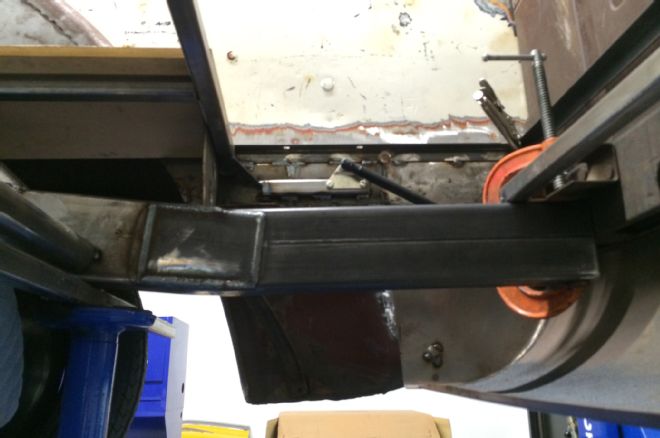
2 Looking up from below our F-100, we see the stock rear crossmember and a temporary tube crossmember installed when the AME rear suspension went in. Removing this would allow the new tank to fit, but wouldn't allow enough room to route the exhaust in our application.
3 As the rear of the framerails hadn't been boxed, had numerous holes, and the ends had been trimmed off at some point, we elected to simply remove the entire rear section of the frame and fabricate new 2x4-inch rear rails.
4 The 2x4-inch box section is slightly narrower than the stock frame, so we extended the boxing plate onto the new sections rather than butt weld it all the way around.
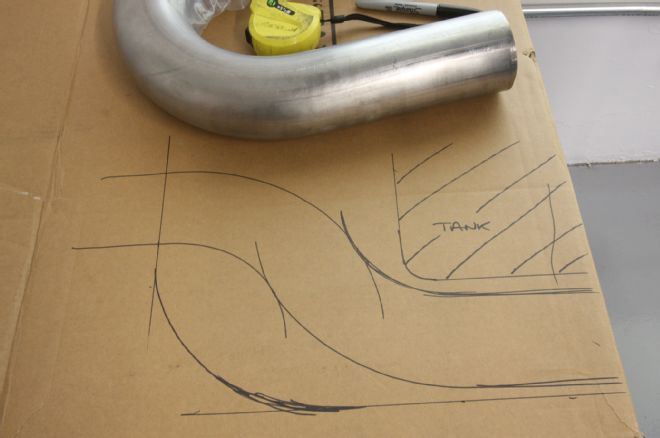
5 Before mounting the tank, we wanted to ensure we'd have enough room for the exhaust to pass under and up through the rear pan. A quick measure and even quicker sketch proved there's ample room. The tank will actually mount farther forward than this, and there's a heat sink between the tank and pipes.
6 As the truck was on a four-post lift in our tech center, we used the built-in jack to support the tank while we mocked it in place.
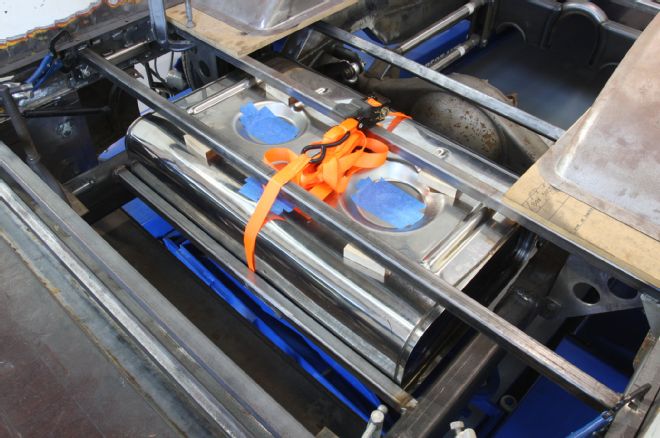
7 A second temporary crossmember was clamped in place and the tank strapped to them while lengths of 1-inch-thick wall box section were welded in place forward and aft of the tank. Blocks of wood were used to space the tank from the crossemembers, allowing space for the supply and return lines under the bed floor.
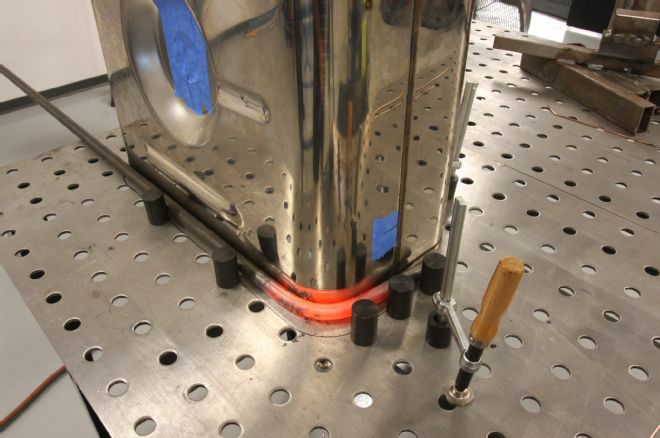
8 We planned on using the stainless straps supplied with the tank to support it, but needed some form of upper location. Using an Eastwood Fixturepoint welding table, we heated and bent two lengths of thick wall 5/8-inch steel tube to suit. We wouldn't recommend doing this with a used tank!
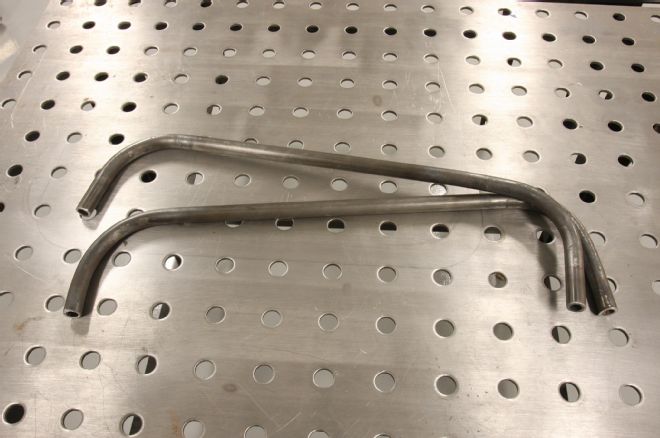
9 Once cooled, the resulting brackets were trimmed to length.
10 The brackets were then welded in place. With no need for the temporary crossmember now, it was removed.
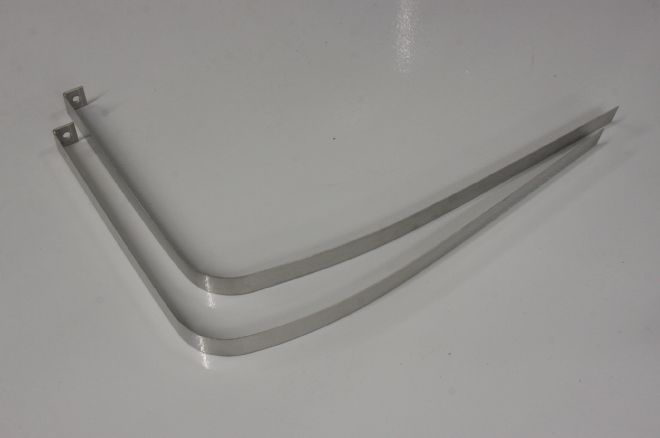
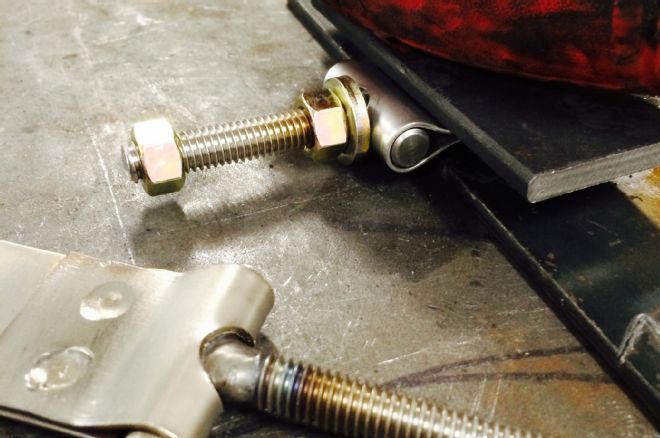
11 Tanks Inc. supplied these stainless steel straps with the tank. One end is bent, with a mounting hole, the other is left untrimmed, allowing it to be modified to suit the application.
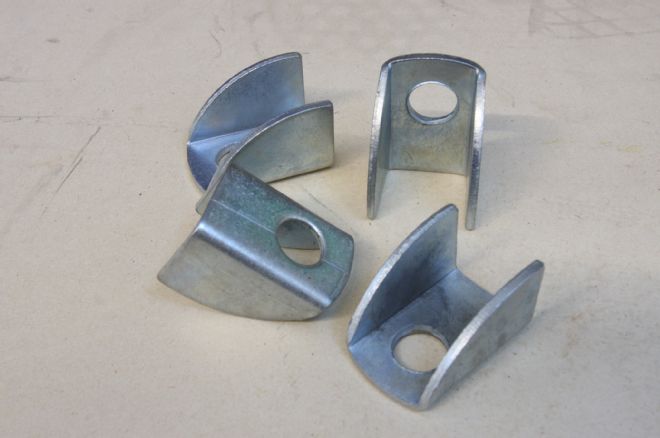
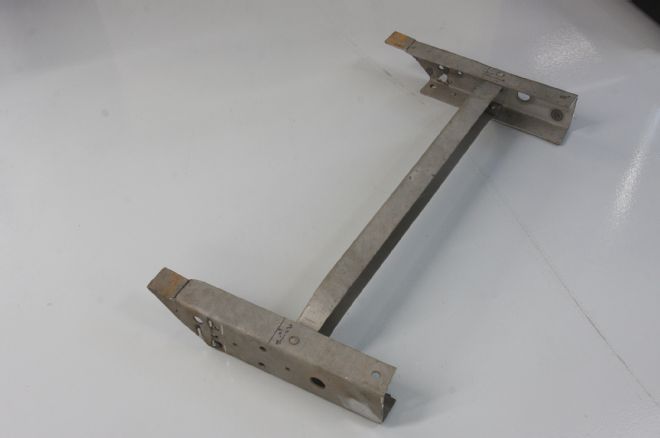
12 The small brackets, intended as part of a gate hinge, were sourced from a local industrial metal supply house. They'll be used to mount the forward end of the mounting straps.
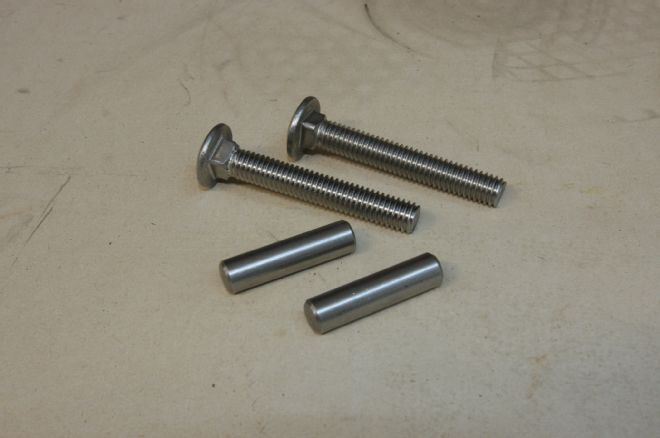
13 Not able to source stainless T-bolts quickly, we bought a couple of stainless 3/3-inch dowel pins and a couple of 3/8-inch coachbolts from which to make our own.
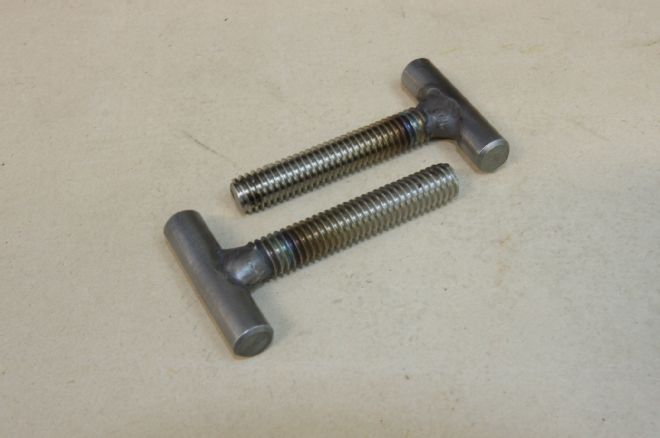
14 With the bolt heads removed, and welded to the pics, we had a pair of stainless T-bolts the right width and length for our straps.
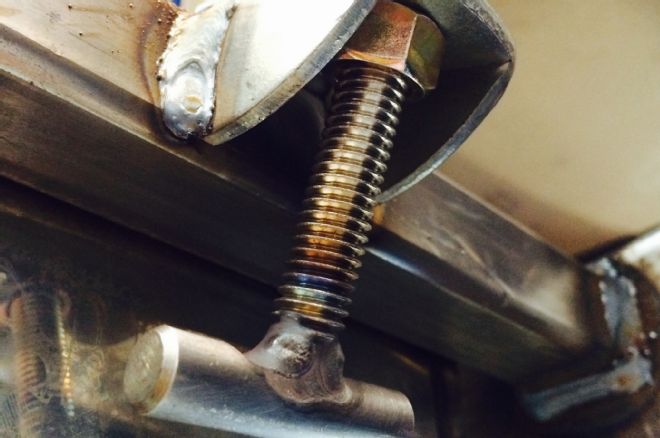
15 With the brackets cut at an angle and welded to the forward-most gas tank crossmember, this is how the T-bolts will mount.
16 Once the length had been determined, the straps were trimmed, and a ½-inch holes drilled in the center for the T-bolts to pass through. The straps were then folded over and plug welded. Our solution to folding the straps around the dowel pins once we'd folded them over by hand was to place ¼-inch steel plate above and below the area to be folded, and hit the upper plate with a hammer. Crude but effective!
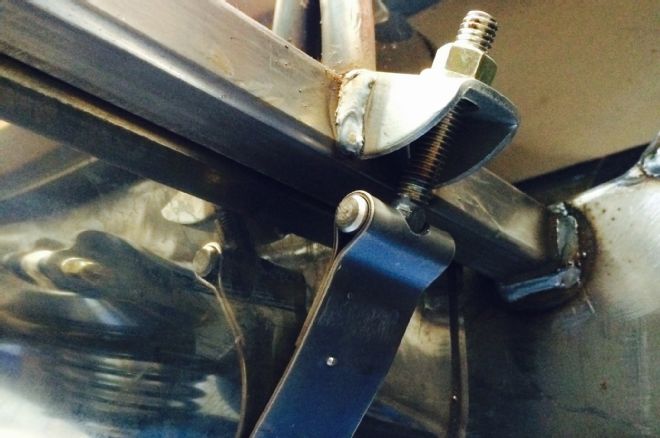
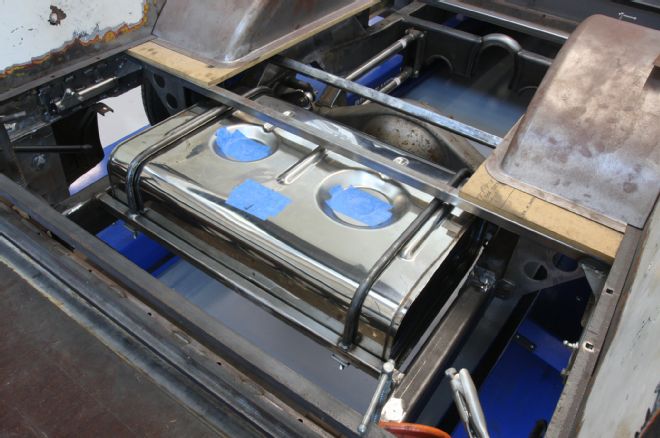
17 With the straps bolted to the rear crossmember, the T-bolts were tightened to secure the tank.
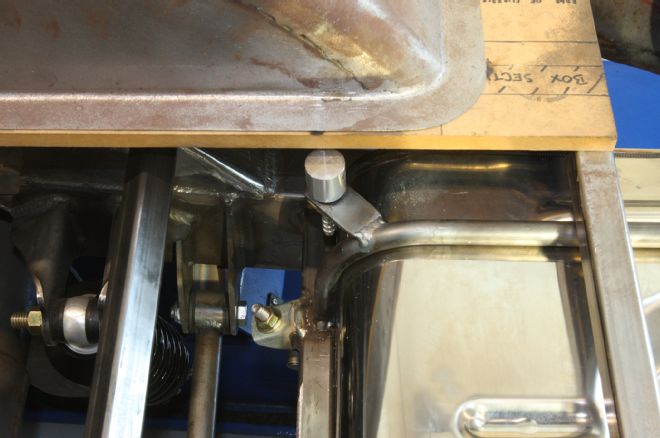
18 Here's how the installation looks from underneath.
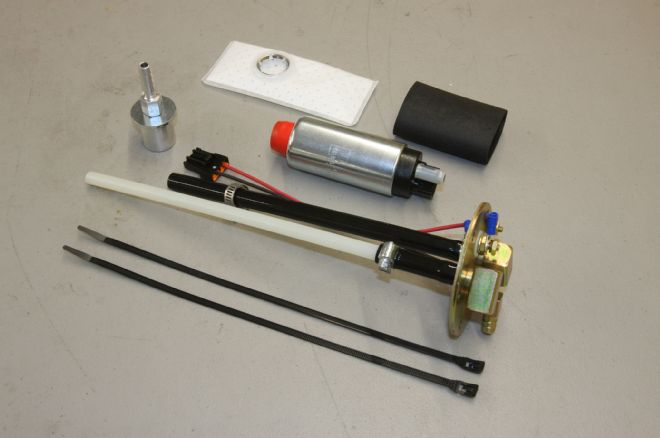
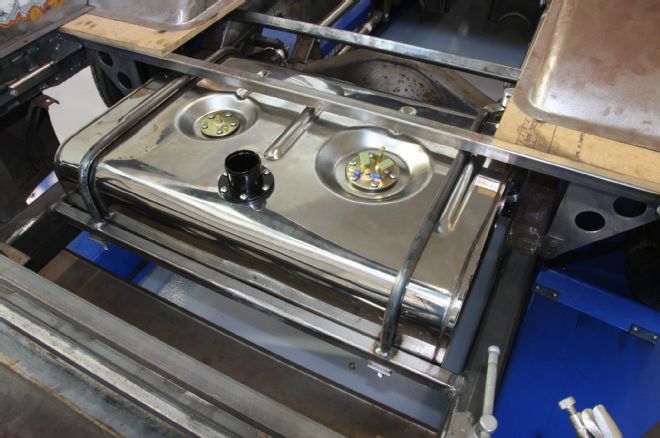
19 The fuel pickup and return lines, as well as a vent, are both part of this assembly, which also mounts the in-tank pump. The tubes have to be trimmed to suit the tank's depth.
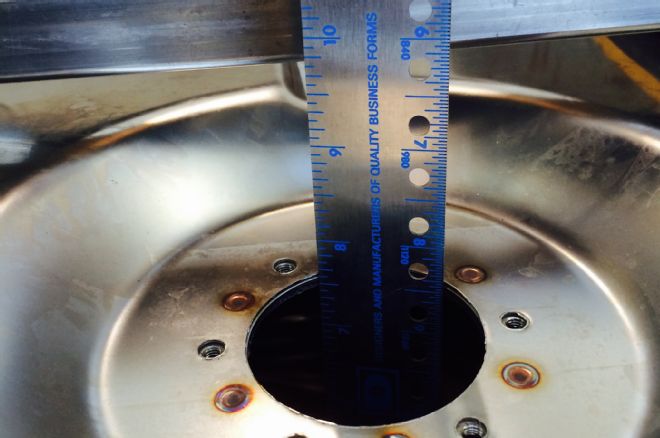
20 Full instructions are included, but to determine the length of the fuel pump/pickup assembly, first measure the depth of the tank. Ours was 7½ inches from the mounting face.
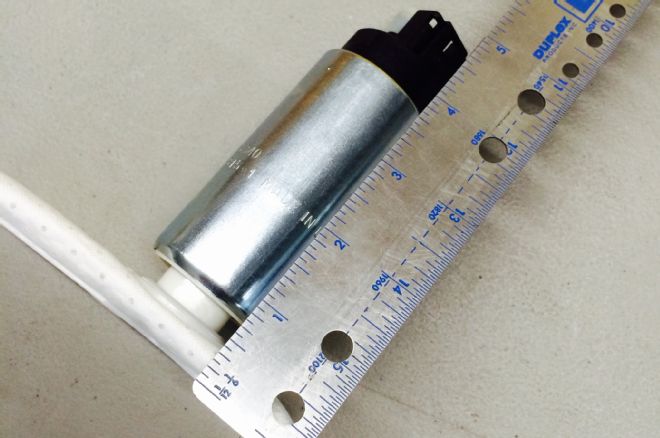
21 Next, measure the length of the pump (4½ inches for the GPA-4 pump) then deduct this from the tank depth. With this giving a measurememnt of 3 inches; we cut the supply tube to 3 inches in length, and trimmed the return tube as per the instructions to 6½ inches (7 ½ -1)
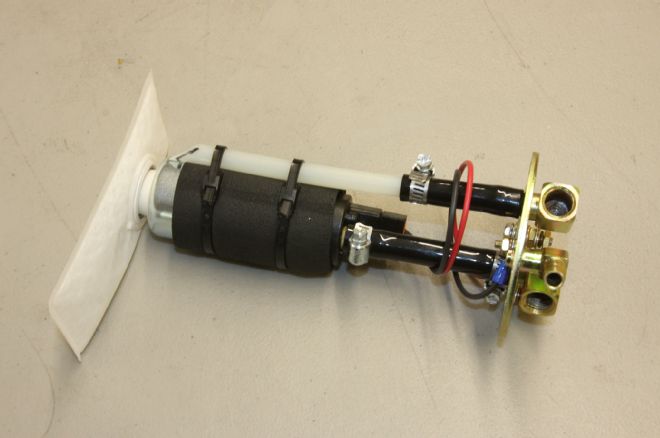
22 The completed assembly, shortened to length and ready for installation. That's a filter sock on the bottom of the pump. Rubber gaskets and mounting screws are supplied for this, the sender and the fill tube.
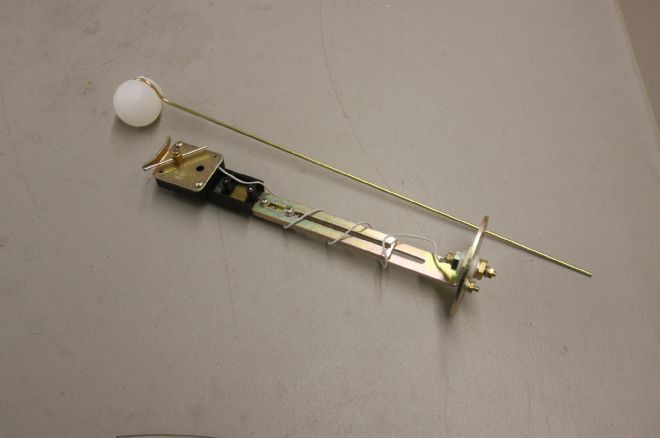
23 As supplied, the gauge sender unit is over-long, but again adjustable for various applications. When ordering ensure you select a sender with the correct ohm rating for your gauges.
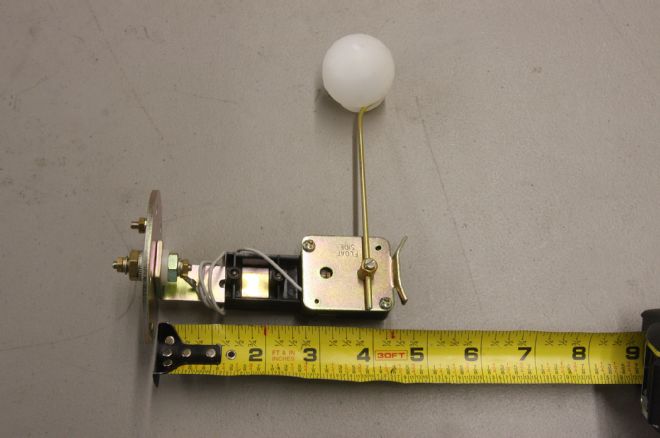
24 Again, instructions are included, explaining how to shorten the sender. That stop on the right (the bottom of the sender) stops the float at the upper and lower limits.
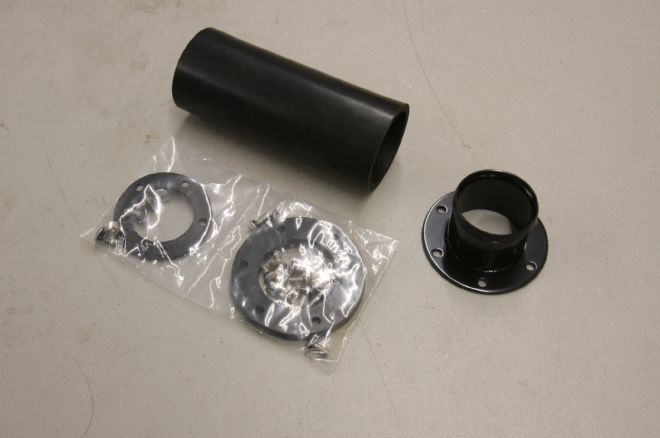
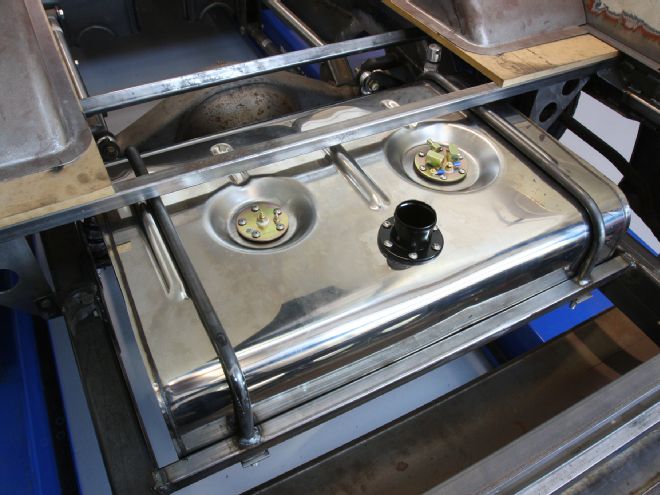
25 The filler tube, hose to connect it to the filler cap, and gaskets are all supplied.
26 A ball valve vent is also supplied, and should be mounted higher than the filler neck. Not exactly easy on a pickup that has the tank close to the floor, but we mounted it as near to the underside of the floor as possible, which puts it above the top of the tank, if not the filler. We mounted it here to place it as far from the exhaust as possible.
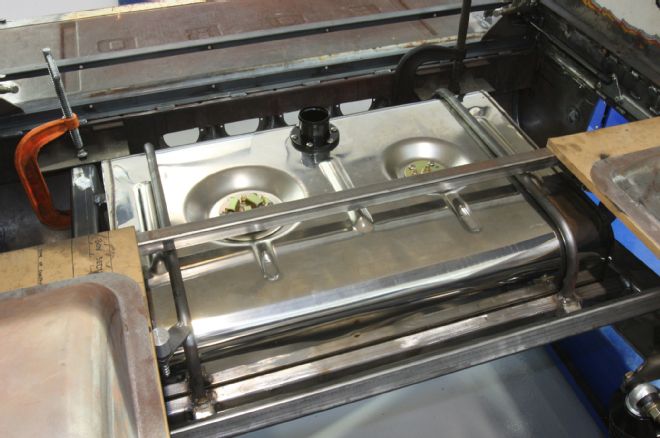
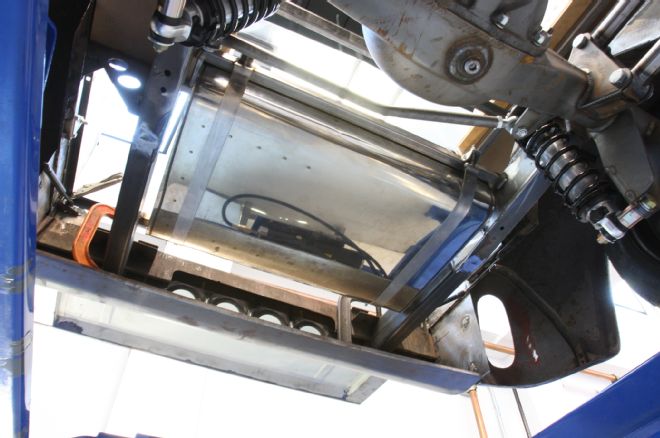
27 The mounted tank, looking toward the rear of the truck.
28 Looking forward, you can see the universal tank fits perfectly between the chassis 'rails.