It’s those iconic images of the blown gassers built during the late ’50 through the late ’60s that seem to represent the good ol’ days of drag racing. With fenderwell headers intently dominating the scene from behind the front wheels and the nose- high, short-wheelbase sedans reaching for the sky, there was just nothing cooler in drag racing at the time. Although not the best recipe for aerodynamic purposes, and certainly not designed to turn in any direction, there was a definite method to the madness. During that time period in drag racing, the tires consisted of a harder rubber compound and super-stiff sidewalls – not a great combination for killer 60-foot times (did they even measure 60-foot times back then?). So, the front end of the car was raised up to enable quicker weight transfer to the rear of the car, thus promoting improved traction to the rear tires. The tactic worked and got the cars out of the hole and down the quarter-mile quicker than before.
Although improved technology in tire compounds may have contributed to the demise of the gasser, their near extinction was solidified when the NHRA did away with the Gas Supercharged classes following the 1974 season. Many of the gasser class drag racers faded away, but there were a few who reluctantly built modern-style cars in order to keep up with the competition.
Nowadays, with the popularity of everything old-school, the gasser look is once again gaining traction at vintage car shows and nostalgia drag racing events, so it’s no wonder they are drawing huge crowds wherever they show up.
Roland Paciulli decided that this revival was a great excuse to dive into his 1962 Nova project. This car was perfect for a straight-axle since somebody had already radius-cut the rear quarters, he had an old-school small-block sitting in the corner of his garage, and the car was in serious need of a new front subframe.
Back in the day, a lot of fabrication would have been necessary to give this boxy Chevy the gasser-style flair. But today, companies like Speedway Motors makes it easy to go old-school cool with their ’62- ’67 Nova Gasser Straight Axle Kit.
To see what’s involved, we headed over to Roland’s shop and followed along with the install process.
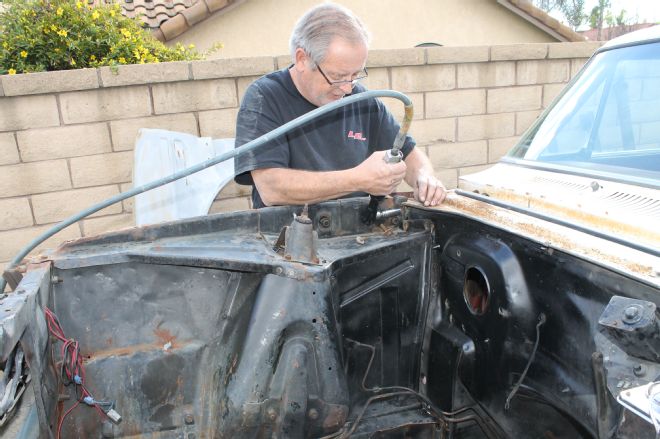
01. Our old 1962 Nova was beat to hell, and since the rear quarter-panel wheel openings had already been radius-cut for old-school rear rollers, it was the perfect candidate for the gasser treatment. The first step in getting there was pulling off the factory front end, starting with the fenders.
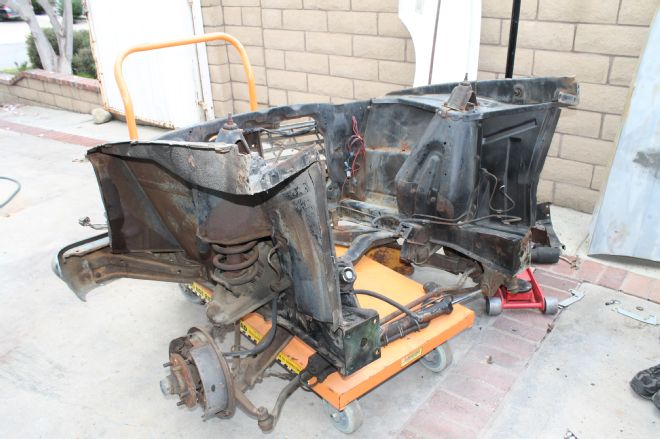
02. Without boring you with all the gory details, this is what we removed from the Nova. The whole deal was sold off to a guy doing a Nova restoration. See, we’re a green hobby that recycles.
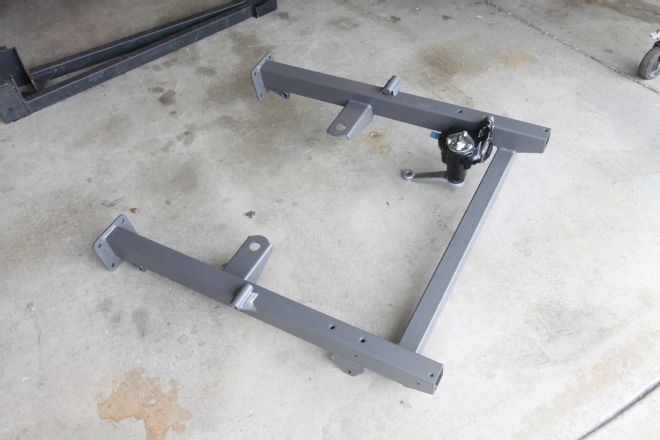
03. The main player in the Speedway 1962 - ’67 Chevy II Nova Front End Bolt-On Gasser Axle Suspension Kit (PN 91662067) was the subframe. The unit appeared to be well-made and the welds were very clean. This is certainly nicer than what racers would have cobbled together back in the day. Before starting, we bolted on the Vega manual steering box and pitman arm that came in the kit. The subframe and all of the steering components came to us in bare metal so we had them powdercoated at Eddie Motorsports in Rancho Cucamonga, California, prior to assembly.
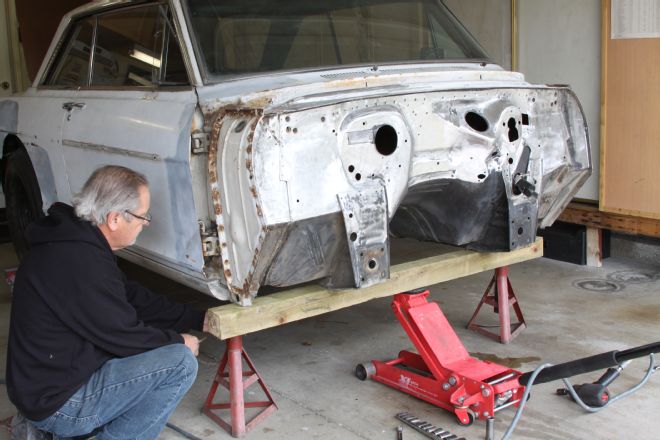
04. Before adding any of the new parts to this project, we cleaned up the firewall a bit. The car’s owner, Roland Paciulli, started by getting the Nova up onto jackstands.
05. This part was much easier with two people. We simply lifted up the subframe and bolted it to the factory attachment points using the new hardware supplied by Speedway. For right now they were left a bit loose, but later we torqued them to 80 ft-lb.
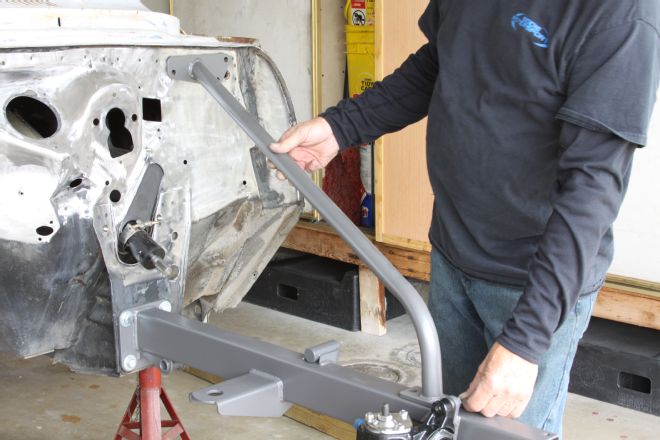
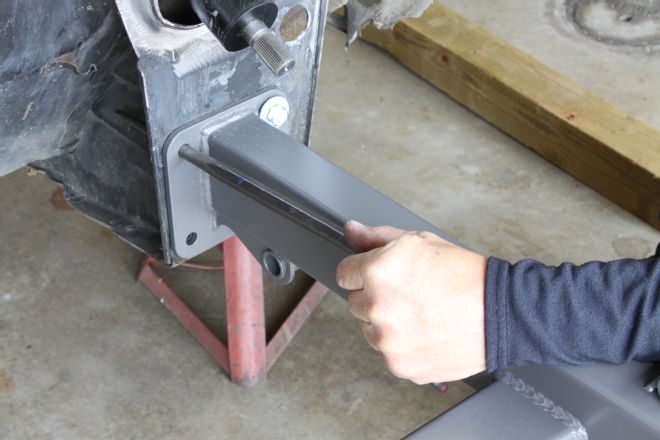
06. We then installed the firewall support tubes. They were held in place with 7/16x1-inch bolts and lock washers. These bars tie the subframe to the firewall and add strength to the chassis.
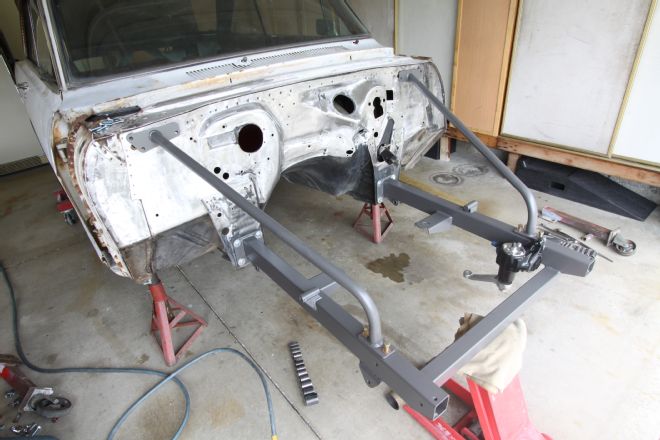
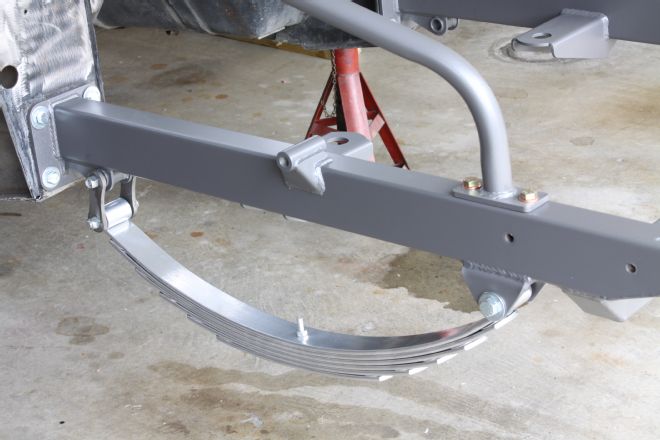
07. This gives a good idea of what the subframe and support tubes look like installed.
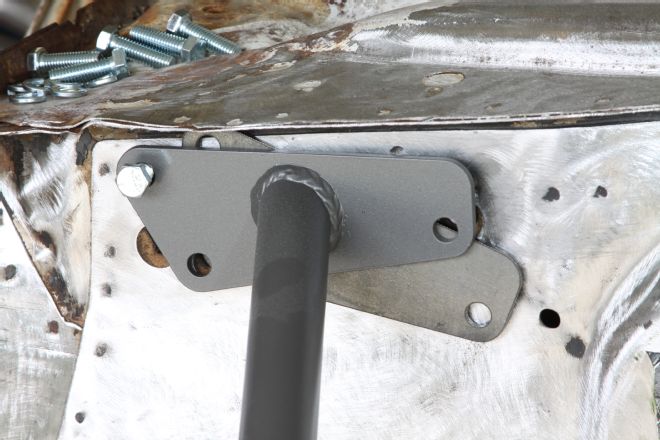
08. In case there’s a gap between the support tube plate and the firewall, Speedway includes a stack of 10- and 16-gauge shims. For our Nova we needed one 10-gauge shim on the passenger side and no shim on the driver side. This might change when we put the fenders back on.
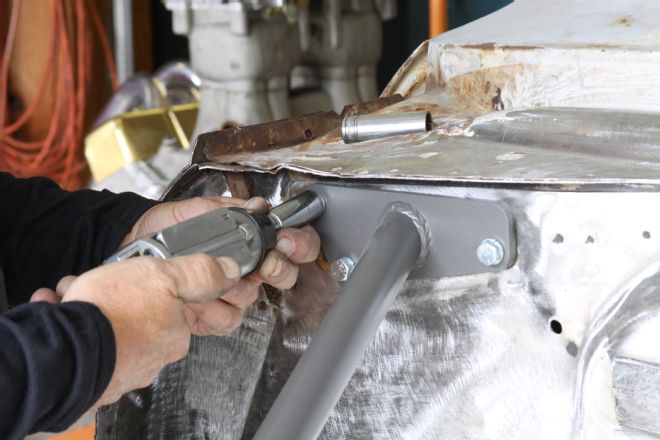
09. No torque spec for these bolts was specified, so we just made sure they were nice and tight. With both bars installed, we went back and torqued all the subframe bolts to spec.
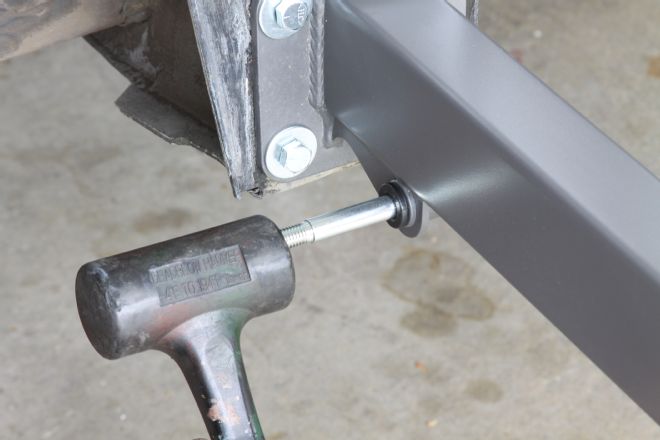
10. We then installed the leaf spring bushings into the subframe. For the rear bushings we also installed the cross pin (threaded on both ends). A bit of lubrication and a dead blow hammer helped get it into place.
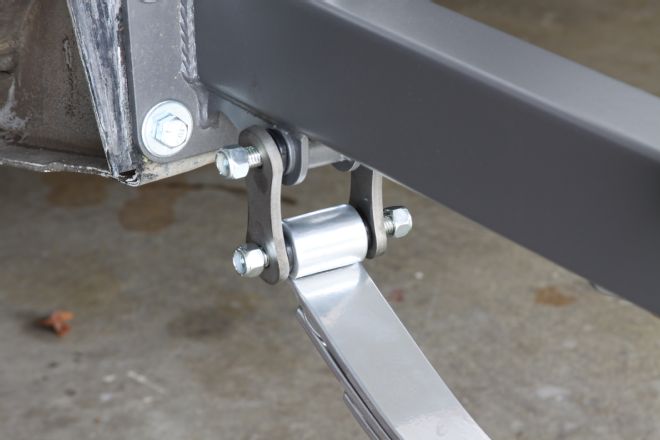
11. And here’s how the rear pivot shackle looked when we were done. For now we left all the nylon locking nuts loose.
12. The supplied leaf springs came with five leafs. The bottom two leafs can be removed if the suspension ends up being too stiff. With all the weight on the front axle, the shackles should be at 45-degrees.
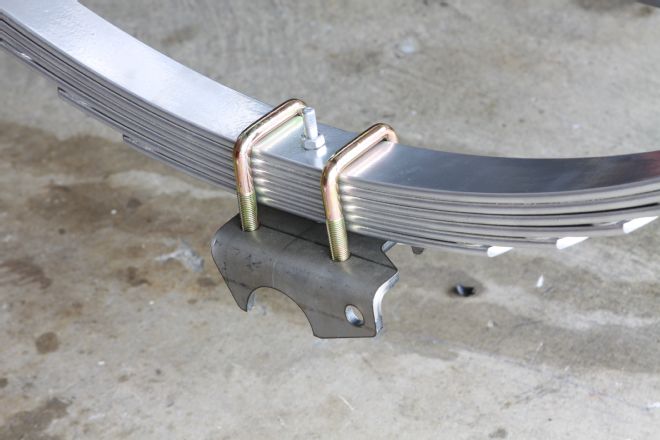
13. The lower shock and axle mount plate attached to the leaf spring with two U-bolts and more nylon locking nuts. There is a right and left, so make sure the shock hole is forward and to the outside, as shown.
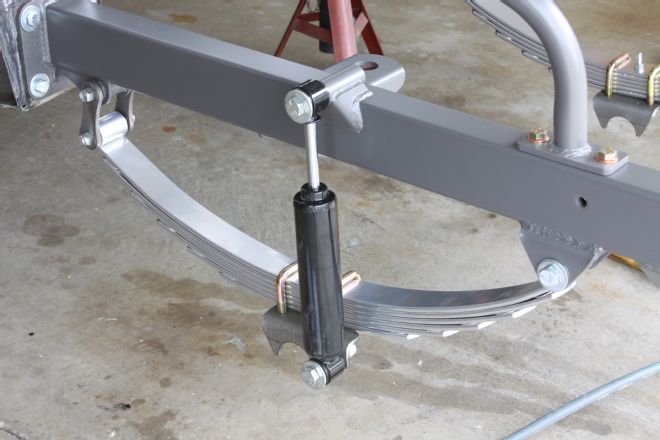
14. After installing the steel bushing sleeves into the shocks, we bolted them in place using 1/2x3.50-inch bolts, nylocks, and washers.
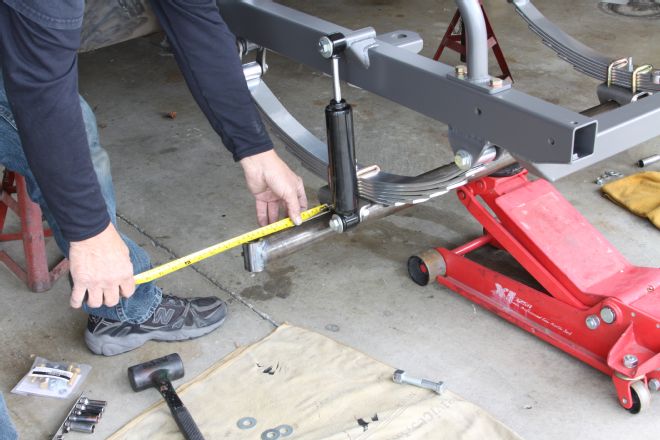
15. We used a hydraulic jack to raise the axle up and into the axle pads. A tape measure ensured we had it centered properly. There is a top and bottom to the axle, so we made sure the kingpin bosses were tilted in at the top. This is also when you would set positive caster (5-6 degrees) by angling back the kingpin boss.

16. For now, we just tack-welded the axle in place. To fully weld, it’s best to remove the axle from the car since it can warp if welded with the weight of the car on it.
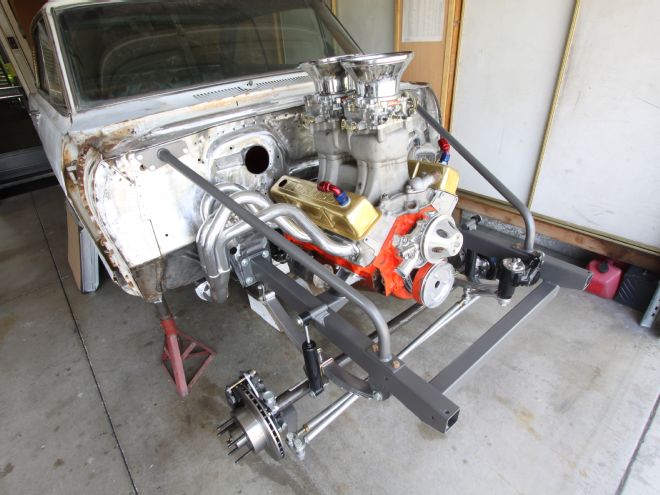
17. At this point we decided to set our mock-up small-block into place to test header fitment and motor mount locations. It made us happy when the motor mounts lined up perfectly.
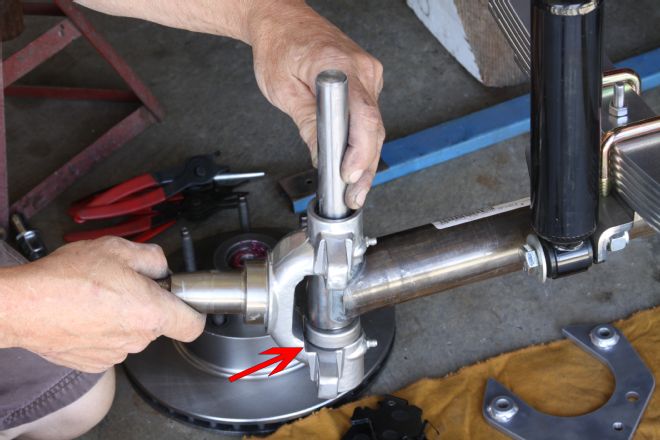
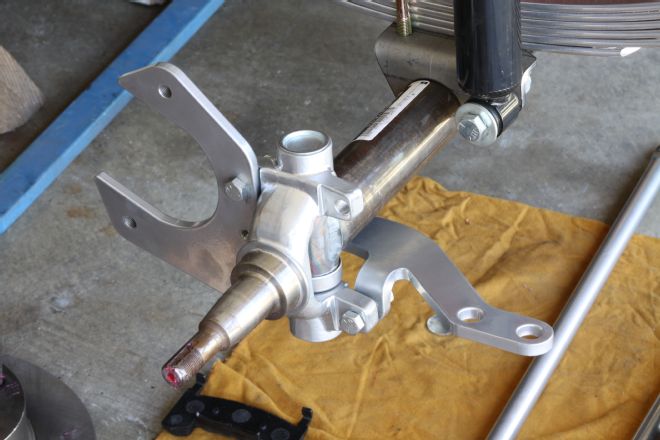
18. It was then onto the spindles, which are held in place by large kingpins. There’s an up and a down to the spindles, so take note. In this picture we actually have it upside down since the larger step on the inside area (red arrow) should be on the top. Also note that the thrust washer (spacer) mounts below the axle.
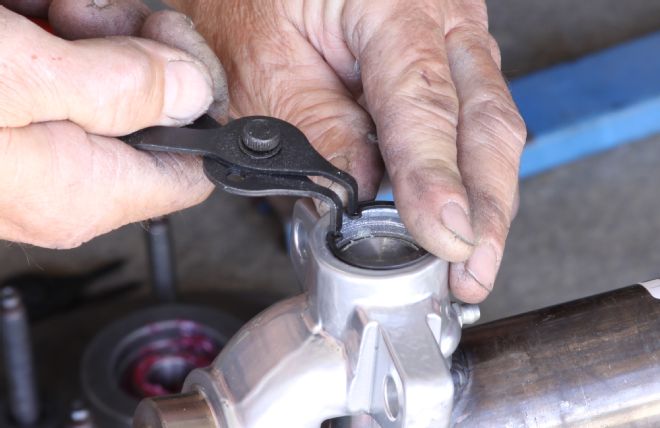
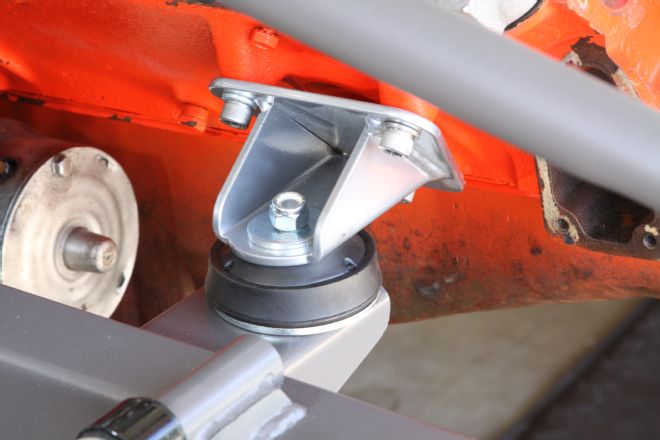
19. The kingpin is held in place by a dust cap and large split ring. The upper and lower pivot points have Zerk fittings that will need grease before hitting the road.
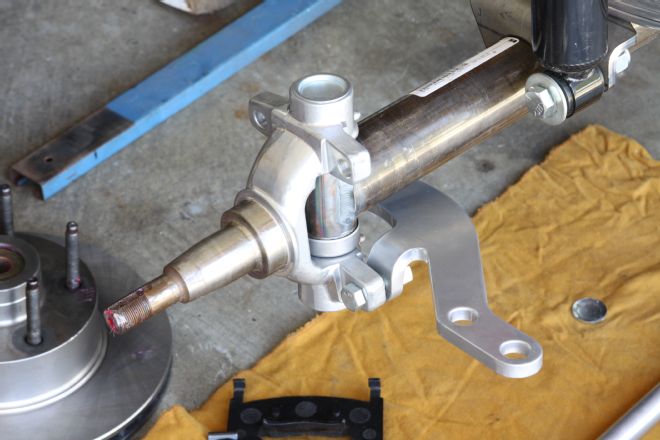
20. And here’s the fully installed spindle (larger step to the top) with the passenger side steering arm bolted in place.
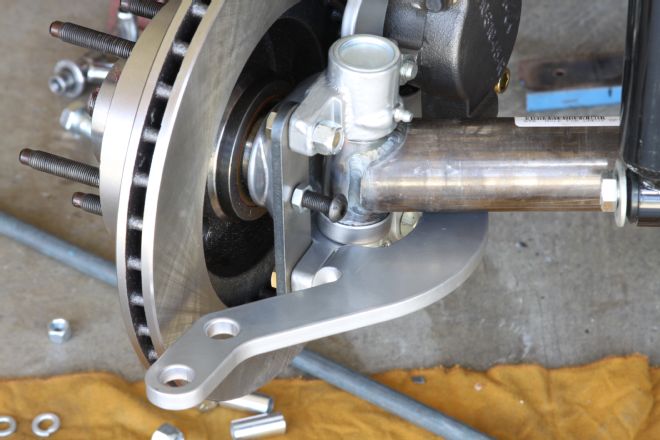
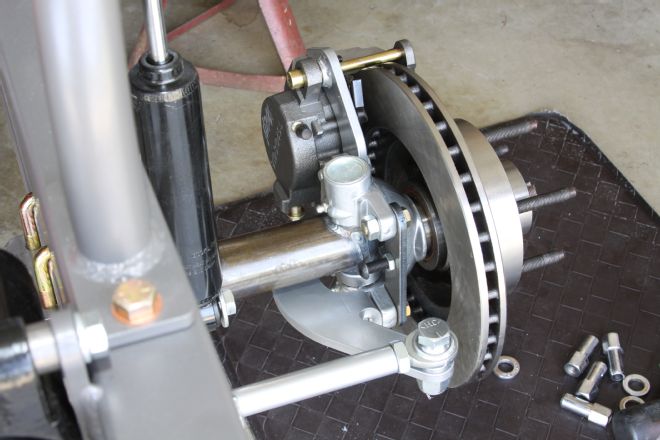
21. Next, we installed the caliper mounting bracket as shown. Like the frame, all of these parts came in bare steel so we had them powdercoated prior to installation.
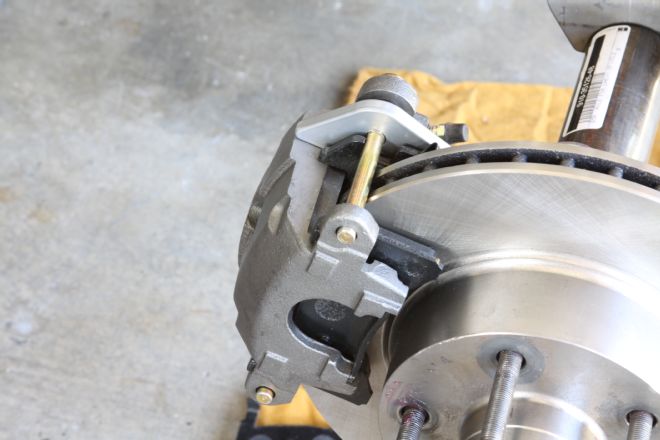
22. The disc brakes are the same type found in tons of front kits. After greasing and installing the bearings, we slid the iron rotors onto the new spindles and bolted on the new single-piston floating calipers.
23. The adjustable steering stops are critical and must be installed and adjusted before driving the car. They bolt to the front bosses on the spindles and the 7/16-inch bolts were torqued to 55 ft-lb. We’ll adjust these once the car is on the ground with wheels and fenders in place.
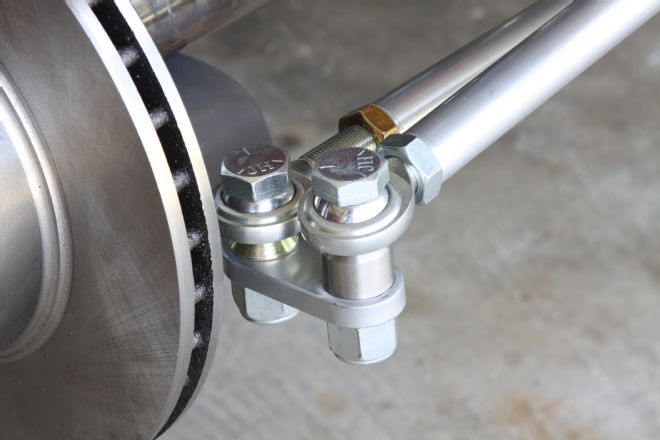
24. The steering system is pretty simple. It consists of a drag link (connecting the pitman arm to the passenger steering arm) and a tie rod (connecting the passenger steering arm to the driver steering arm). The drag link was bolted to the forward hole of the steering arm using a 5/8x3-inch bolt, a nylock, and a 3/4-inch cone spacer (with the smaller end toward Heim joint). The tie rod mounted to the rear hole using a 5/8x2 1/4-inch bolt, a nylock, and one of the smaller cone spacers.
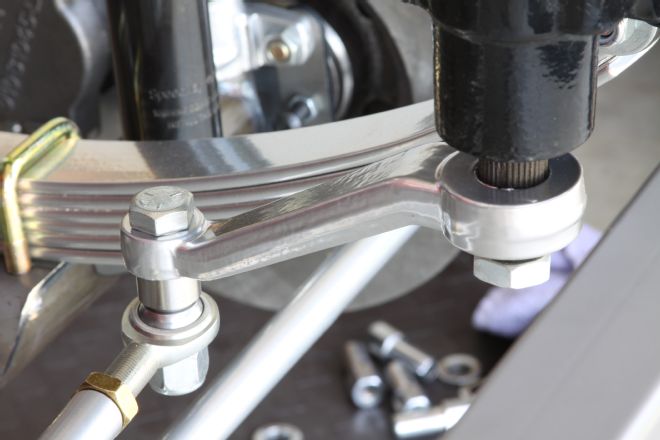
25. Before installing the pitman arm we made sure the box was centered lock to lock. The splines on the pitman arm are tapered, so it will only go on one way. The drag link mounted below the pitman arm and used the other 3/4-inch cone spacer. The torque spec called for both drag link bolts to be torqued to 180 ft-lb.
26. Lastly, we bolted the other end of the tie rod to the driver-side steering arm using another 5/8-inch bolt and the last small cone spacer. Once on the ground and under full load, we’ll set the toe to 1/8-inch.
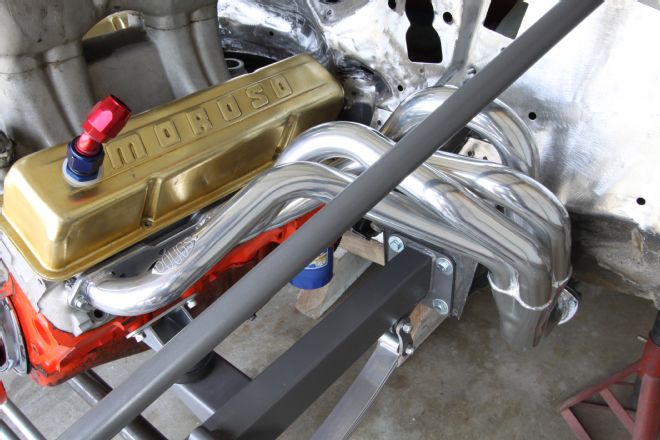
27. The gasser headers from Doug’s Headers fit perfectly and had plenty of clearance to the firewall on both the passenger and driver side of the Nova.
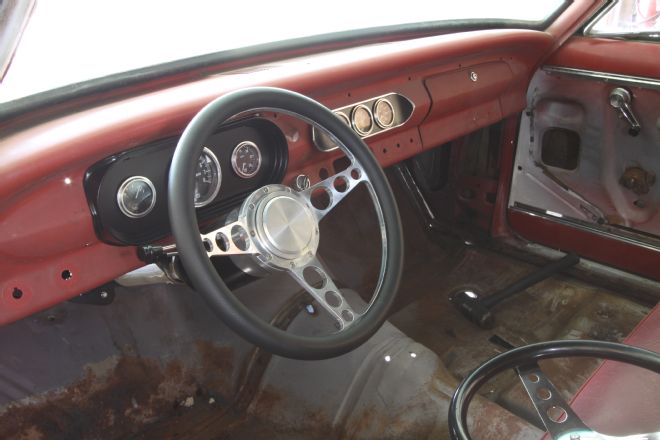
28. Since the old steering column was junk, we opted for a new tilt version from ididit and some billet widgets (gauge panels, steering wheel) from Eddie Motorsports.
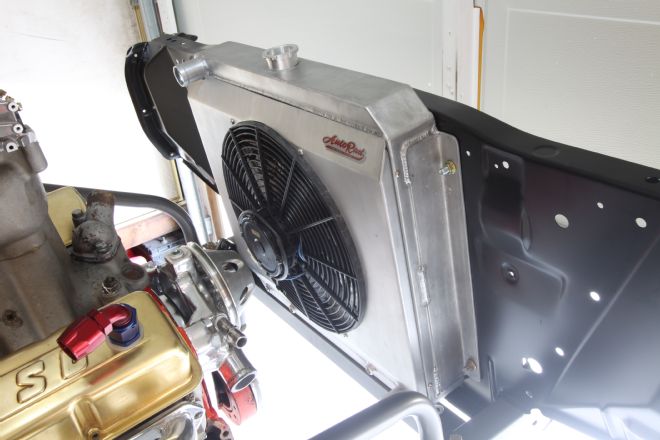
29. We want the look of the car to be old-school gasser but with reliable, modern parts. So, after installing the new core support from Ground Up (PN RS-32062), we bolted in an aluminum, high-capacity AutoRad radiator and electric fan.