You're building the truck of your dreams, complete with an updated chassis and killer paintwork. You admit you went a little too far when building the engine, but the horsepower in your eyes kept you signing the checks. Big horsepower, big carburetor, big cam, all the goodies. You get the truck together and back out of the garage for your first drive. As you apply the brakes to slow, you notice the pedal is up, but it's a bit hard to push. Once on the street and attaining some speed, another check of the brakes has you wondering why there doesn't seem to be any power assist. The brakes work and stop the truck, but where is the assist? My whole brake system is new!
Normally the assist is there. Sometimes the problem is the engine you couldn't quit building. Big cams with big lift can cause real low vacuum situations at idle and low rpm, especially with Ford engines. That doesn't bother you because the lope sounds killer. Then you hit the brakes. The lack of power assist is probably from the fact that there isn't enough vacuum being created by the engine to be used by the booster. Before you re-bleed the brakes again, or start to change calipers and such, check out this simple solution.
Classic Performance Products has one solution that works great and is pretty simple to install. This compact vacuum pump is rubber-isolated mounted, easily plumbed into the booster vacuum, and produces enough vacuum to operate the brakes properly. You could even go one step further and add a small reservoir between the pump and booster if you wish.
We had a situation where the brakes felt good for the first or second pump, and then the pedal got harder to push. Adding this neat vacuum pump solved that problem, in our case. Now the pedal has assist every time you push it.
There are a couple of things I should mention about properly set-up brake systems, too. With all the brake kits available now, you should already have the proper parts within your braking system. But here's a quick rundown on what you need within the system.
First of all, what type of brakes are you running? Disc/drum or disc/disc? It matters to your brake vacuum booster. If you are running disc/drum all you need is the single diaphragm booster that comes with most kits. If you are running a disc/disc setup, you really should have the longer and slightly bigger, dual diaphragm booster. You will never get the proper power assist with a single diaphragm booster and four-wheel discs.
You need inline residual check valves in the front and rear brake lines too – 2-pound for discs and 10-pound for drums. These little guys keep a little bit of pressure on the brake pads and shoes and help decrease the pedal travel needed to apply the brakes. Don't have these installed? That's probably why you have a lower-than-normal pedal upon application of the brakes. Classic Performance Products sells master cylinder booster kits with a metering block plumbed to the master cylinder. It just meters the flow of brake fluid to the front and rear. You will still need inline residual check valves when using these setups.
The hard lines for the brake system should all be 3⁄16-inch. Rubber or stainless flex hoses that connect the calipers to the brake lines should be kept to a minimum length. Front lines are usually in the 12- to 14-inch range and rears for rear disc run 10 to 12 inches. If they get too long, the braking pressure can cause them to expand and you'll lose some line pressure. I saw a guy one time plumb the whole brake system on his 1934 Ford chassis with stainless flex line – must have cost a small fortune. He said he didn't know how to bend hardline and this was easier. Well, he could never build enough line pressure to get the brakes to work. So after the car is completed and running, but not stopping, he had to have the brake system plumbed in hardline. You can always do a better job at this when the chassis is going together. Not after the vehicle is complete.
So now that you know what you really need for a properly operating brake system, if yours is a properly operating system with not enough or any power assist, then I would highly recommend adding this neat little vacuum pump that'll hopefully solve your problem. Follow along to see just how easy it is to mount, plumb, and enjoy your newfound power assisted brakes.
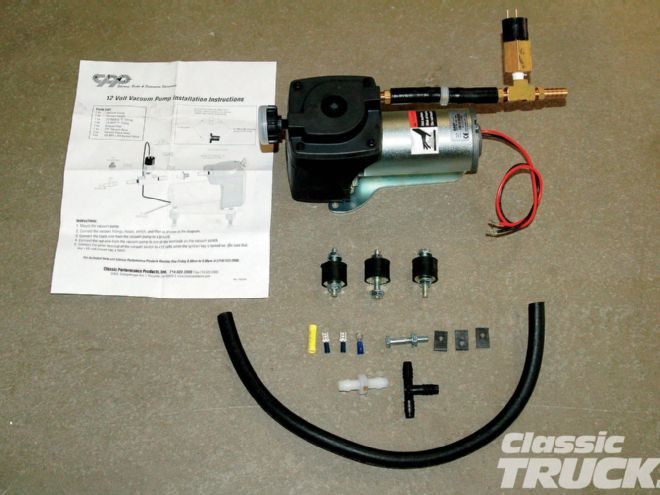
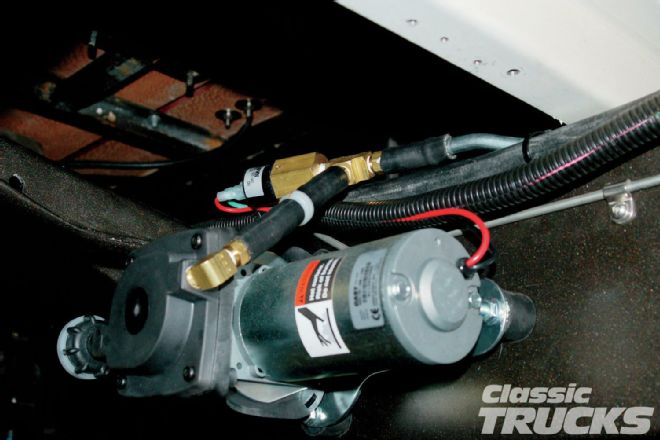
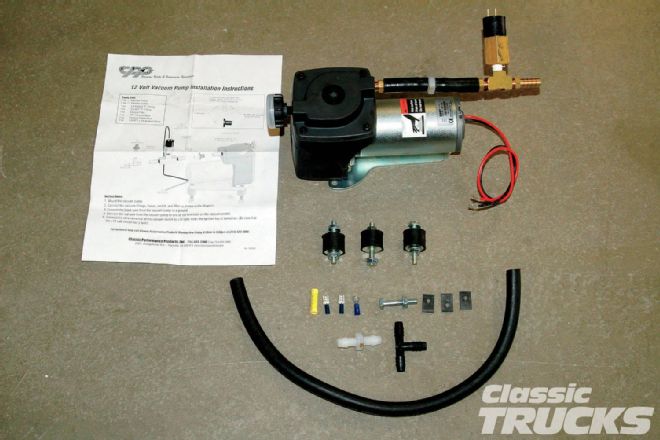 1. Here is Classic Performance Products auxiliary vacuum pump kit. It includes everything you need to install it. The hose coming off the pump has a check valve and the kit includes another for the hose from the engine. A simple ignition hot is needed to power the pump and the inline pressure switch shuts off the pump when vacuum is achieved.
 2. I'm going to mount the pump off the inside of the framerail under the front of the bed. Since I mount quite a few of these, I made a template of the needed holes. I marked them on the frame and drilled with a #7 to tap 1⁄4-inchx20.
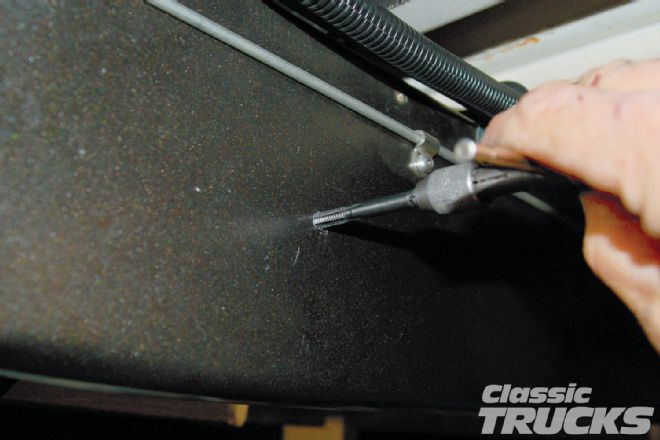 3. I tapped the three holes I drilled.
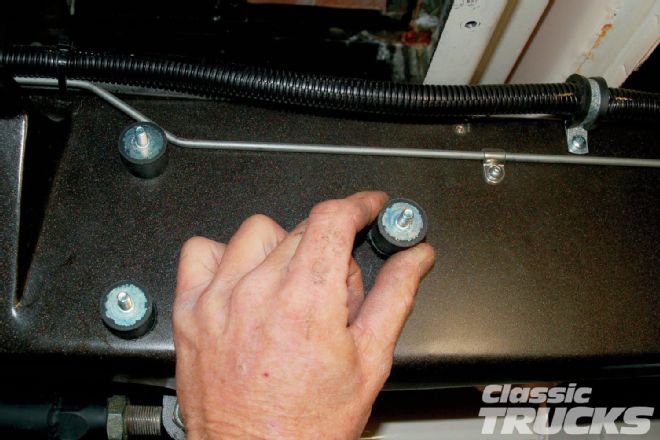 4. Then I screwed the longer side of studs into the framerail. The rubber isolators that come in the kit to mount the pump have 1/4-inchx20 studs on each side.
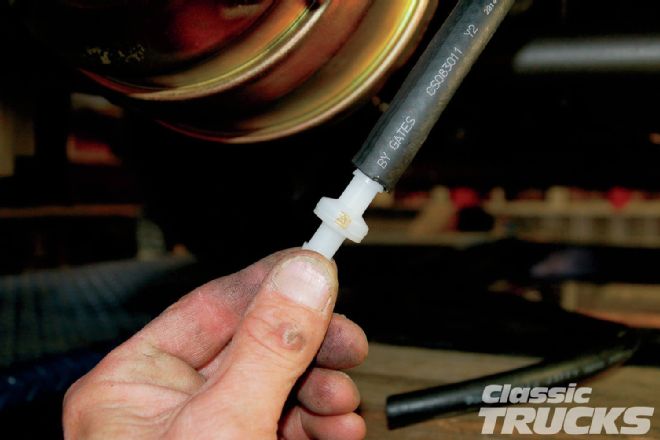 5. I got the pump mounted and installed the check valve into the hose coming from the engine. The small arrow on this valve goes toward the vacuum source, or the engine. If your kit had a valve that is black and white, then the black side goes toward the vacuum source. The side of the valve I'm holding will connect to a tee, then the booster and the pump.
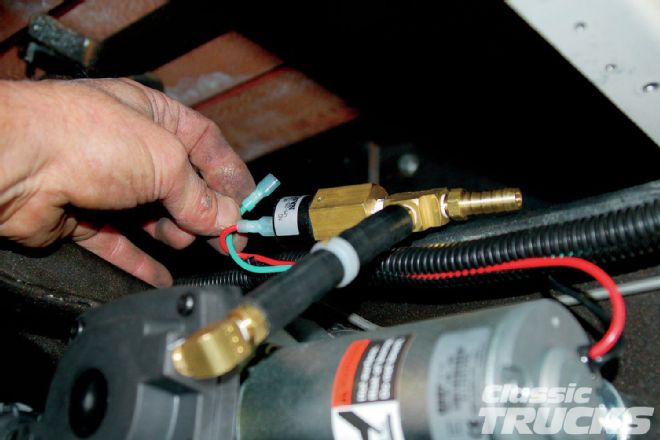 6. I ran a fused ignition hot to the pump's pressure switch. The pump connects to the other spade and obviously the black is going to ground. The barbed end will connect to a short piece of tubing I'm going to install.
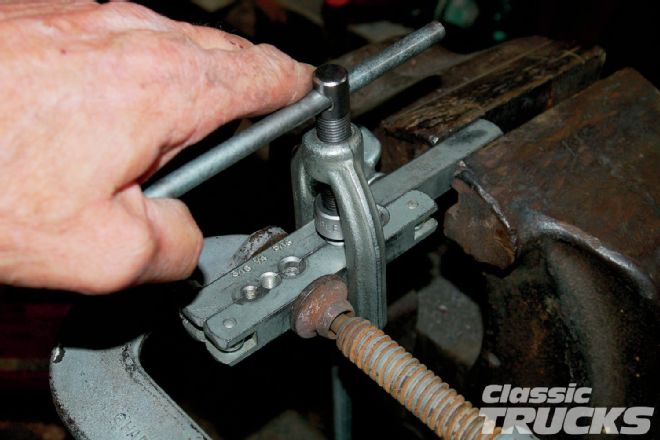 7. Since the pump is mounted under the front of the bed and there are a couple of feet to the booster, I flared a short piece of 3⁄8-inch steel tube. I am going to connect the pump to the booster with the minimal amount of rubber hose needed. Rubber hose can get sucked closed sometimes when used in length in a vacuum system. With the flare on the end of the tube, the hose will fit real tight and not leak.
 8. After bending the line to fit and flaring the ends, I installed it on the framerail with a couple of Adell clamps. I drilled the holes with a #21 and tapped 10⁄32.
 9. These are barbed ends on these fittings so they are not supposed to leak. I came back and installed small hose clamps just to be sure. After time, the hoses could dry up or swell up, depending on what they are exposed to, so clamping them now will prevent any possible leak later.
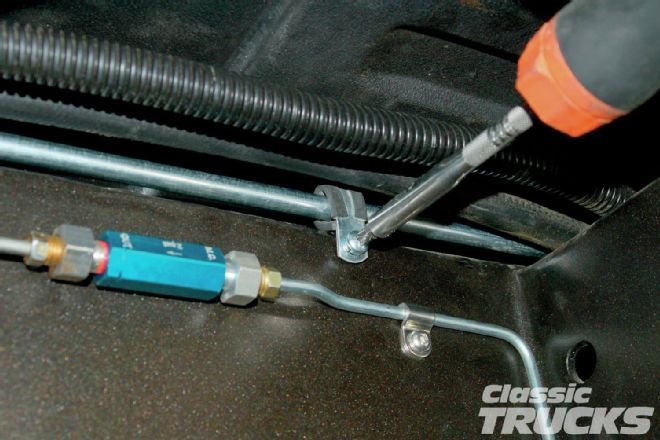
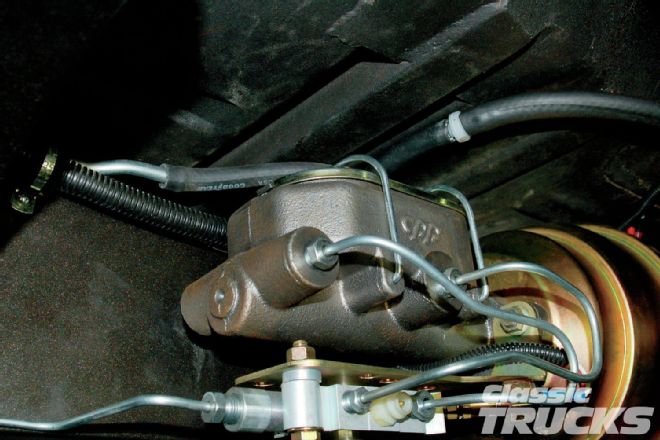 10. The tee connection is just above the master cylinder. The hardline comes from the pump and the hose with the check valve in it goes up to the intake manifold. Simple and a real help for engines that don't produce enough vacuum. Now time for the best part, the test drive!