Looking down into the empty engine bay of a 1969 Dodge Charger, most people would think "good grief, you've got a ton of room in there." After all, it is cavernous and we've seen Viper V-10s and even a Cummins shoehorned into a B-Body engine bay. So fitting the new 6.4 Hemi crate motor from our friends at Roseville Moparts should be a piece of cake. Our motor will sit on an Alterktion front coilover suspension from Reilly Motorsports, which gives the engine a real nice setback. And while there is enough clearance between the stock firewall and the back of the motor, it does come close. In that snugness we saw an opportunity.
As a bit of a refresher, remember that our project Charger was originally a 318 car with an automatic transmission and A/C—that much we deciphered from the VIN. We're not real clear on the history of the car other than it was saved from a crusher in Plant City, Florida, about 15 years ago and sat idle in a guy's shop for a good chunk of time before being bought by our friend Matt Koops. Koops was in the middle of multiple Mopar restorations so we did him the favor of liberating the car. When we bought the thing, all we got was a shell with a dashboard, the glass, and a clean title. We were pretty much starting from scratch and since this was not a numbers-matching car and we didn't have any of the original suspension, motor, or trans, we decided to get a little creative with the build, especially the metal fabrication work.
Enter the guys at The Finer Details, the Mopar-centric restoration shop owned by Ken Mosier in Danville, Indiana. You met Ken's guy Scott Dowdy in a recent story when he went to work on forming the transmission tunnel for our six-speed Tremec. Well Scott is back and he's set to smooth out our firewall—at least that was the original idea. An analysis of the firewall before the car ever made its trip north to Ken's shop showed two areas where it had been altered from the stock configuration. These were defects that were already on the car when Koops originally acquired it. At the time, the decision was made to smooth the firewall for a clean look. We would also attempt to carry that smooth look around much of the rest of the engine bay. We weren't going to go completely smooth everywhere, but wanted a nice seamless look. Once Ken and his guys got a hold of our Charger they made the recommendation that we cut the firewall out and replace it with all new sheetmetal. This approach would be far less time consuming, and it would look just as good as the alternative without comprising the structural integrity of the vehicle. In our case, this is especially true since the car has a complete '66-70 B-Body Total Chassis Stiffening Pack from US Car Tool. That kit includes CNC machine cut frame connectors, a complete set of front and rear torque boxes, inner fender braces, and a lower core support frame brace.
We agreed with Mosier's assessment and Dowdy proceeded to cut the original firewall out using a heavy-duty cutoff tool. He then welded a sheet of 18-gauge sheet steel in its place. The metal came from AED Motorsport Products, a metals distributor located in Indianapolis. Once the new firewall was securely in place, Dowdy smoothed it out using a combination of three different fillers. This is a critical step in the whole painting process, more of which you'll see in the future.
Dowdy starts the process by using Evercoat's Everglass to fill the high spots and large imperfections; it's a short-strand, fiberglass-reinforced body filler. It is high strength, high build, and waterproof, which makes it an excellent first step in the process. Next comes USC's Feather-Rite lightweight body repair filler. Designed to be easy to apply and sand, the smooth, creamy formula is virtually pinhole-free, making it perfect for blending areas together. Finally he wraps it up with Evercoat's Metal Glaze for the finish work to leave a perfectly smooth surface. With the firewall and engine bay smoothed out, the next step is to align the body panels before beginning the process of the priming and sanding.
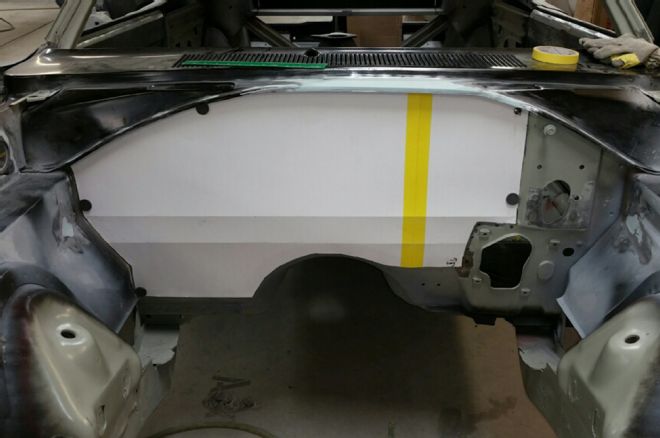
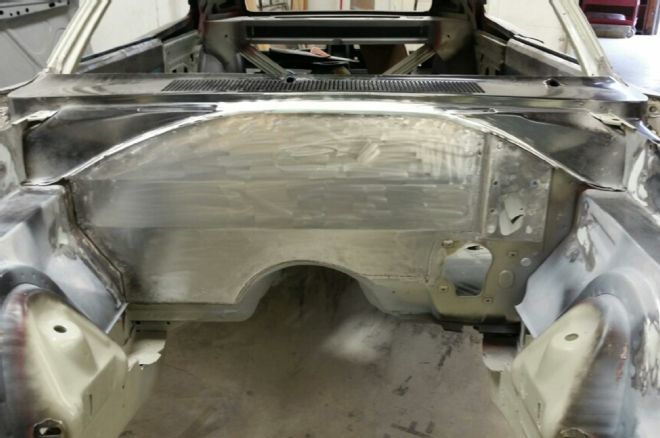
01 This is a view of the original firewall as our Charger car sat in a warehouse.
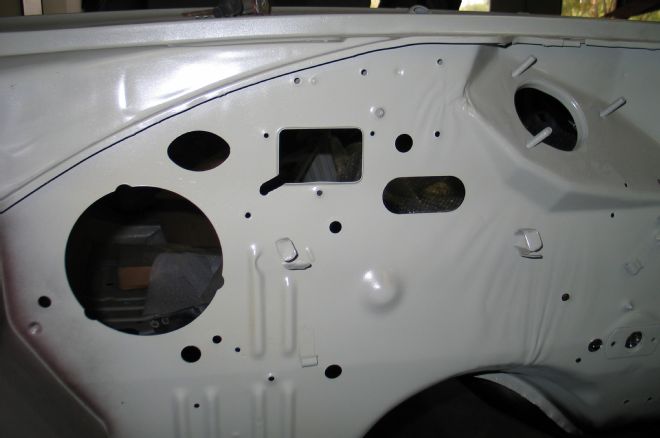
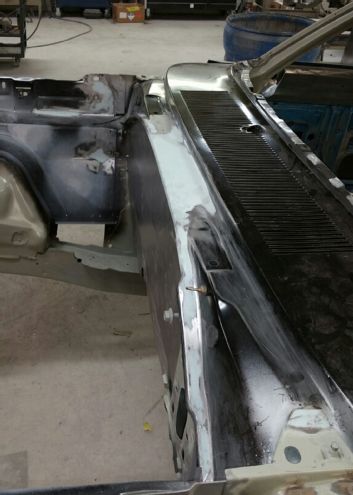
02 The square cut out in the center has had a 2 ½-inch slice made through the firewall off of one of the corners. We're not sure why it was there but it looked goofy and was reason enough to fix the firewall.
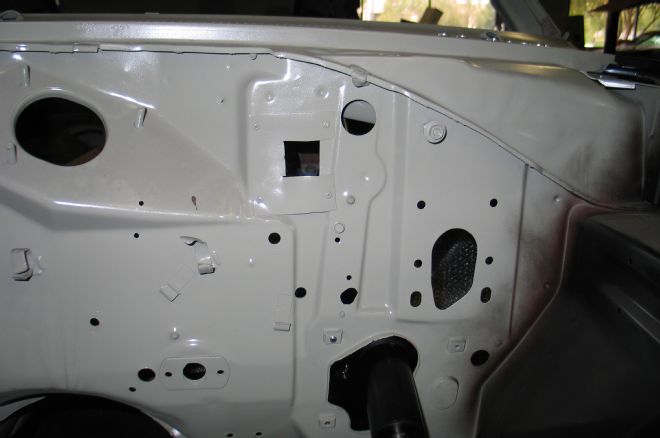
03 Then there's this: in the center of the shot you can see what looks like a patch with a square hole cut out of it in a rudimentary fashion.
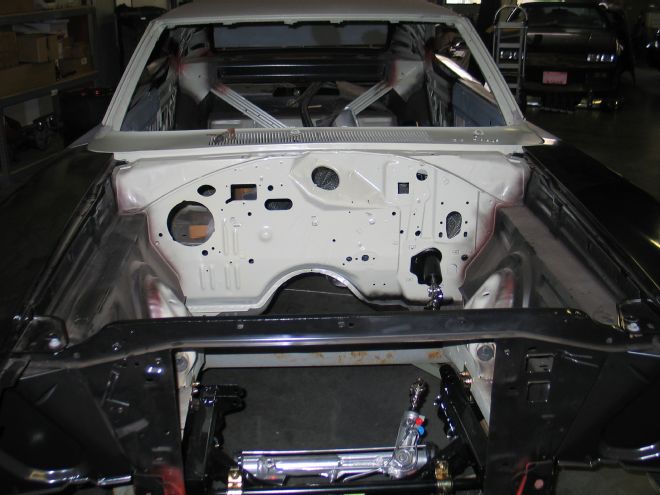
04 With the motor in the car, you can see how tight the fit is against the back of the intake to the firewall. One item that is problematic is the wiper motor. We decided to take some liberties and hide the wiper motor, but that will happen later.
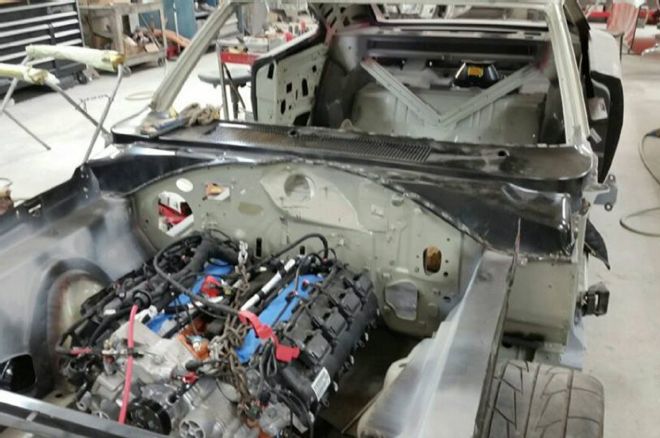
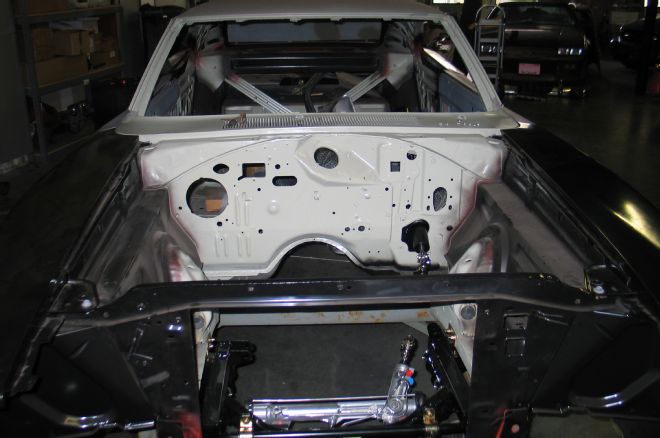
05 With the intake removed you can get a better view of exactly how close the motor is to the firewall.
06 As part of the firewall restoration the decision was made to replace the original cowl. It had a whole series of ripples running across it and using body filler to fix the problem wasn't the best approach, so Dowdy cut out the old metal.
07 He replaced it with all new steel, thanks in part to our friends at Auto Metal Direct who hooked us up with a new cowl.
08 Dowdy cut out the old firewall using a one-two punch of a heavy duty cut-off tool with a 3x3/32 cutoff wheel and an air saw with a metal cutting blade. In this picture you'll also see 1x1 square tubing welded in place to give the car some rigidity during transport.
09 Dowdy created a cardboard template to ensure that he had a perfect fit for the new firewall. The bends in the template will get transferred to the steel sheet.
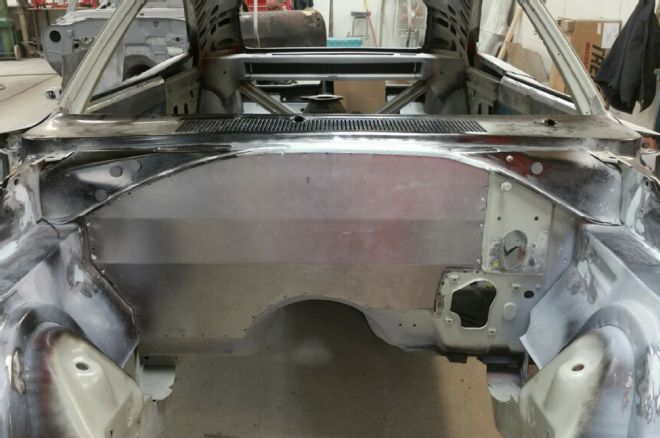
10 Test-fitting the cutout sheet steel is a key step before securing into place. Dowdy used rivets to temporarily hold it in place. This is when you should make any last-minute trims and cuts to ensure a perfect fit.
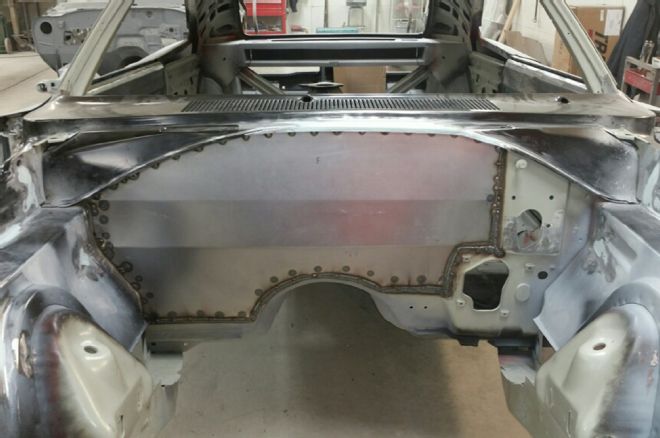
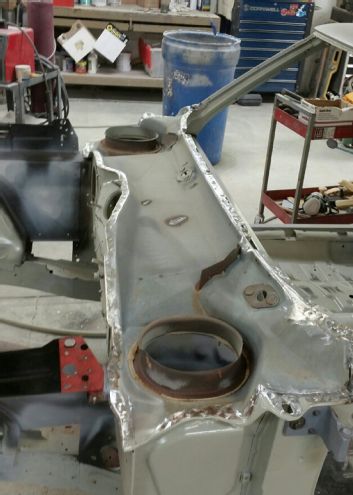
11 With the welding done, the firewall is ready to be scuffed, filled, and sanded to a smooth finish. They follow two lines on the inner fenders, the top bend follows the ledge on the inner fender while the bottom bend follows another line in the inner fender.
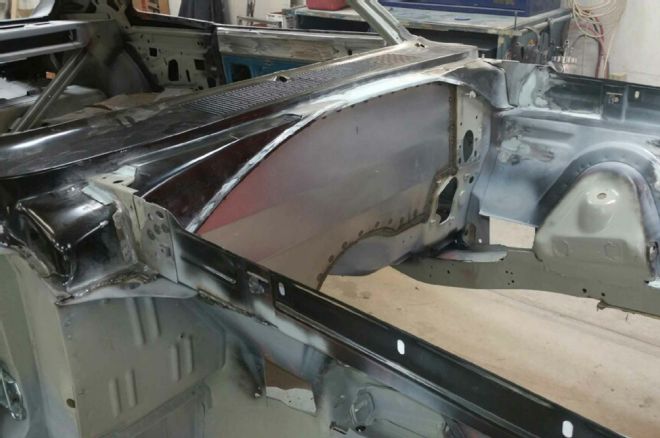
12 In this shot, you can see the bottom bend's line a little better.
13 Dowdy scuffed the raw sheet metal using sandpaper to promote good adhesion for the next step.
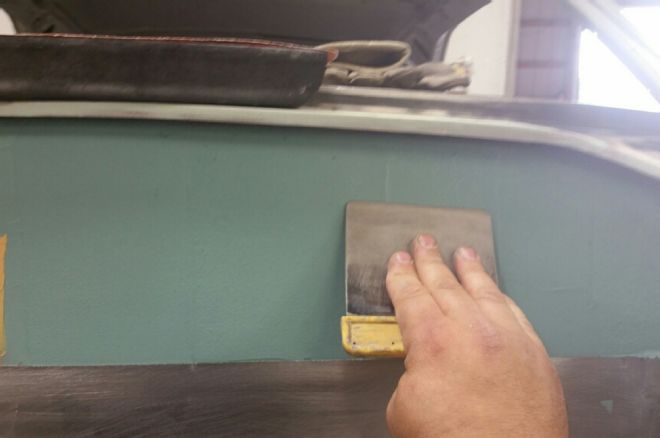
14 Dowdy's first step is to fill the low spots with Evercoat's Everglass. Next comes USC's Feather-Rite lightweight body repair filler. The smooth, creamy formula is easy to apply and sand, plus it is tack-free, clog-free, and virtually pinhole-free, making it perfect for blending areas together. Finally, he wraps it up with Evercoat's Metal Glaze (shown) for the finish work to leave a perfectly smooth surface.
15 As you might guess, there is a lot of sanding involved in a process such as this, even though we started with brand new bare sheet metal. Dowdy starts sanding the body filler with 40-grit paper on a round hand sander.
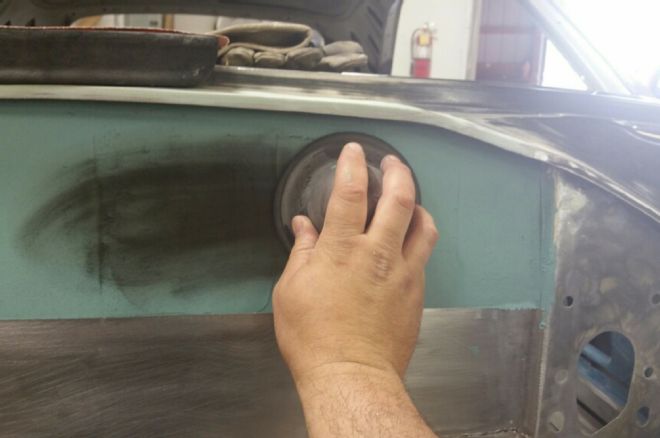
16 He then moves to a sanding block with 80-grit paper.
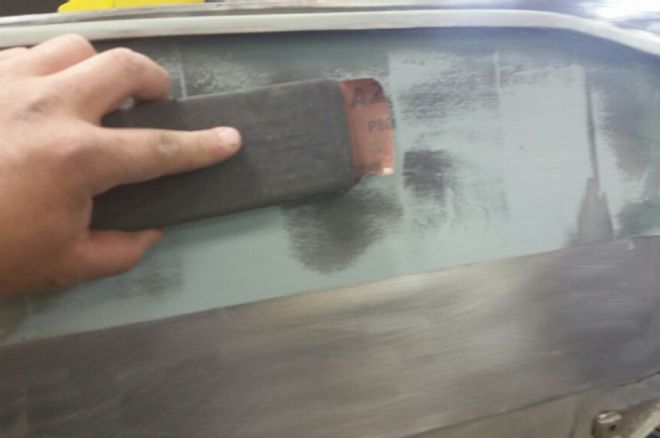
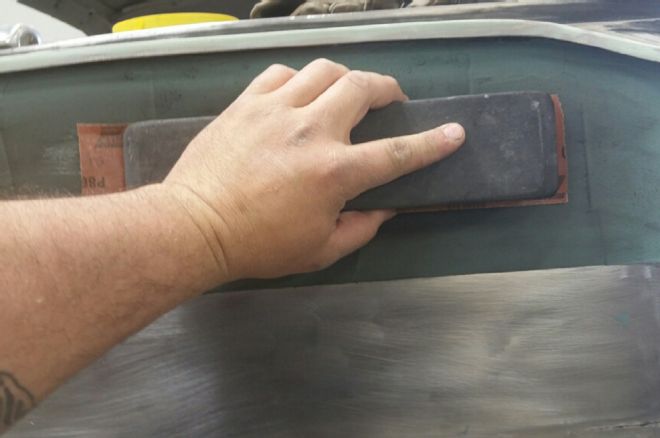
17 And finally he finishes it off with 150-grit, also with a sanding block.
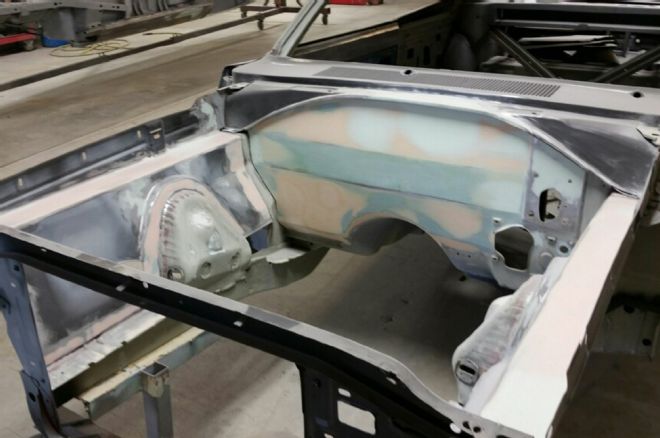
18 Dowdy also took the time to hide all of the spot welds in the engine bay, which will make a seamless and smooth finish.
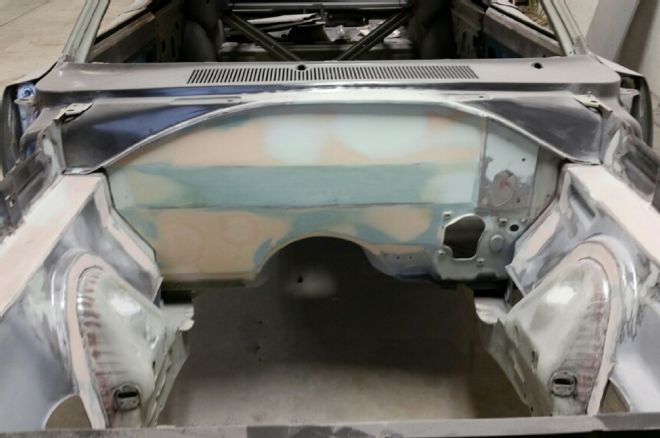
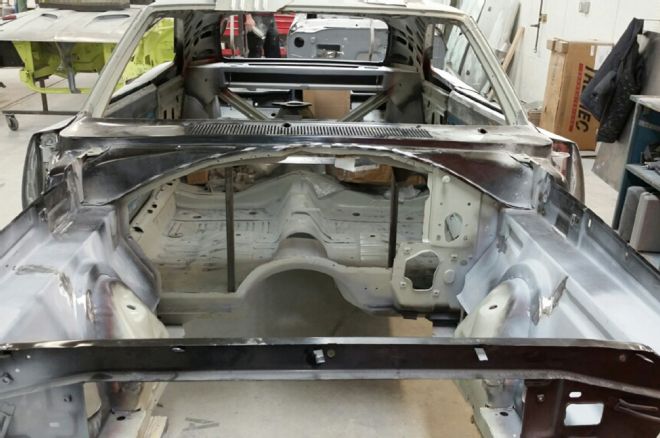
19 Just about as smooth as a sheet of ice, at this stage our new firewall is nearly ready for primer.