The owner of our project 1956 Ford F-100 had always been keen on the idea of four exhaust pipes exiting through the rear pan, but the actual design was never pinned down until he spied concept pictures of the new Corvette. With a quartet of tightly grouped pipes exiting through raised sections, each with their own bezel, it was something he was keen to emulate. Now it was down to us to make it a reality! While searching for something else, we stumbled upon a '50 Pontiac taillight bezel, which switched on a light bulb in our head. Hmm, what's the diameter of the "hole?" Turns out it was 3 1/8-inch, meaning a 3-inch tailpipe would pass through it with 1/16-inch to spare around the circumference. Perfect! Now, how to form the raised sections to mount them to?
This was made doubly difficult owing to the fact the exhausts were to exit through the roll pan on the curved section. We toyed with the idea of machining dies to press the panels, but ruled it out owing to the complexity of the machining. Just as we'd almost resigned ourselves to fabbing them from scratch, we happened to shoot a feature car for sister-title Street Rodder Magazine, and noticed it had '50 Pontiac taillights frenched into the rear panel. Now if we could make them protrude, rather than be recessed, we'd have what we needed. We then remembered seeing such panels somewhere, and a little Internet research revealed that Hot Rods & Custom Stuff manufacture them. Perfect! We ordered four, and simply turned them back to front.
Of course, to make them fit the curved pan we had to modify them, but they saved a whole heap of fabrication time, and provided the radiused edge to the bezel mounting flange we desired. Sure, it was a lot of work, but we're pretty confident it'll be the only Effie out there with 'em!
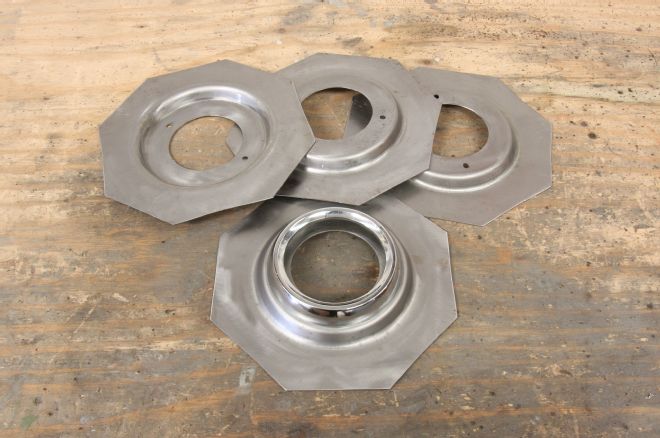
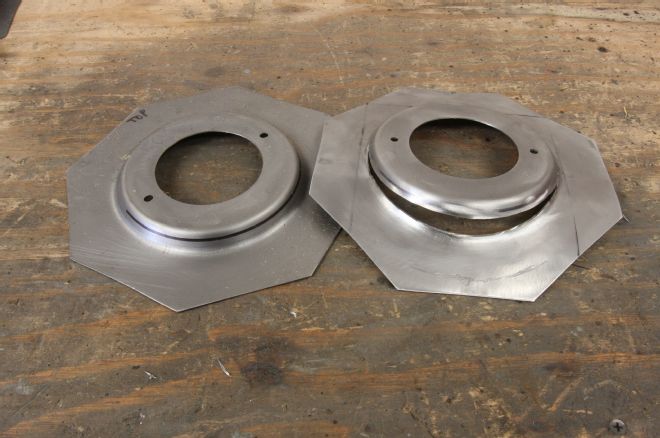
1 Hot Rods & Custom Stuff sell these panels intended to french 1950 Pontiac taillights into a flat or gently curved panel. We'll modify them to fit our roll pan and flip them round so they protrude rather than be recessed.
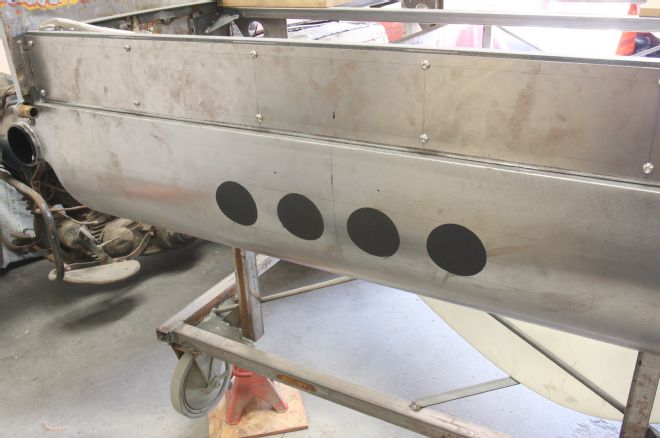
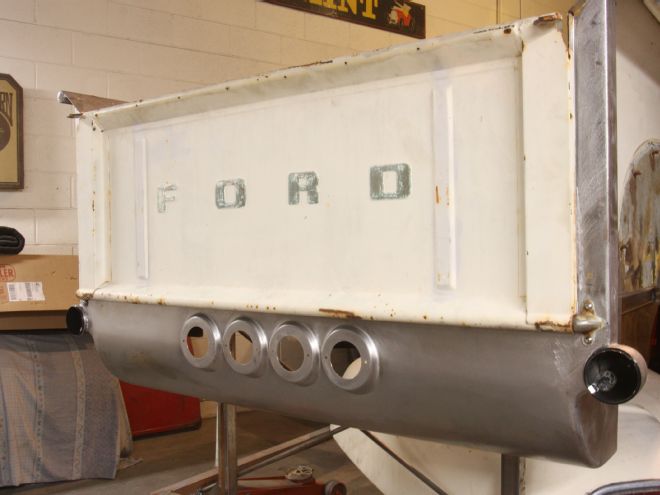
2 We'd previously sprayed a quartet of circles on the pan to get an idea of what the exhausts might look like. The final layout will actually be slightly wider and higher, owing to the increased diameter of the panels we'll be modifying.
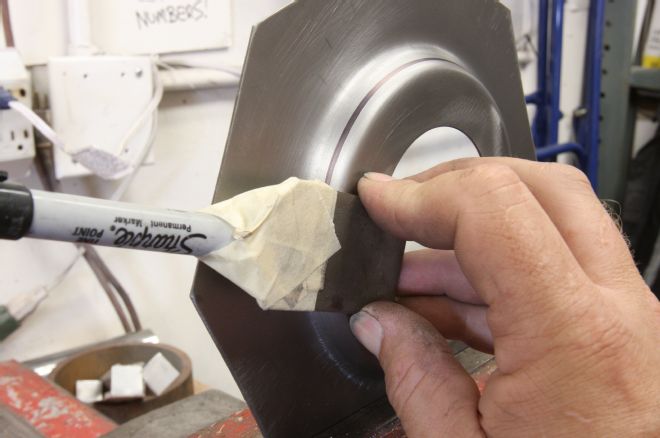
3 While the top halves of the panels will mate to the vertical upper portion of our pan, the lower halves will require a gentle curve to match the rollpan. As the mounting flanges need to remain flat, we needed to cut the steel just below the flange on the bottom halves. A Sharpie taped to a piece of flat steel served as a guide.
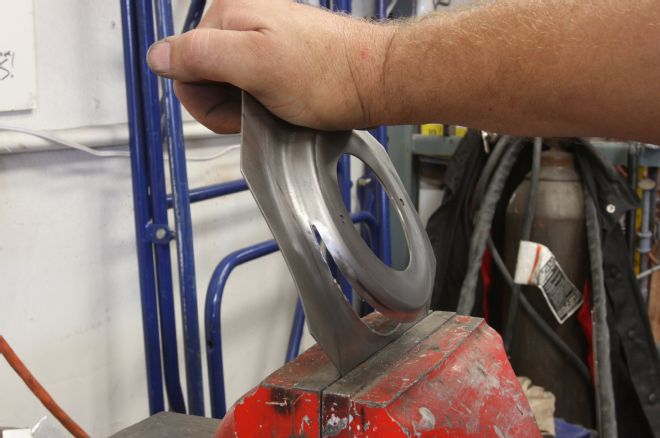
4 Once the panels were cut, we used nothing more exotic than a vise to gently bend the lower section of each panel.
5 Before and after. This illustrates just how much the roll pan curves.
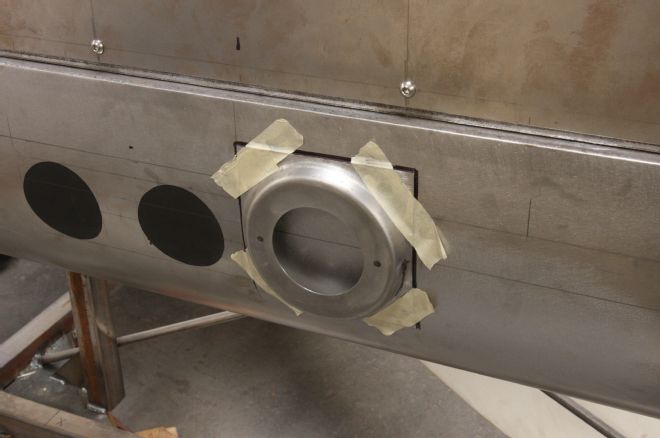
6 Working from the center outwards, we taped the first panel in place on the marked centerline, and marked the pan to be cut.
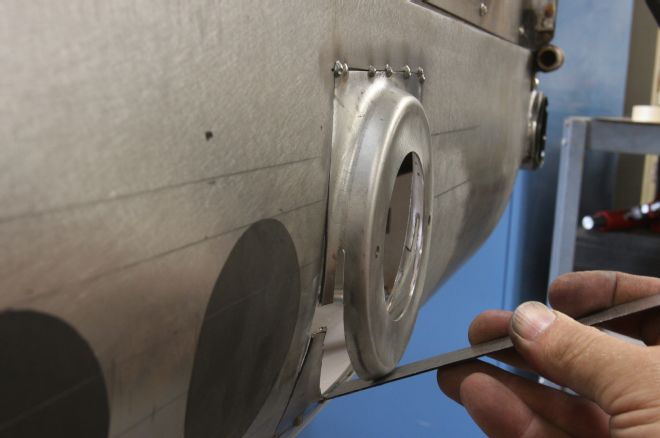
7 With the pan cut to allow the new panel to fit flush, and the top tacked in place, we cut the lower section away and moved it down the curve of the pan until the taper matched that at the top (as illustrated by the steel rule).
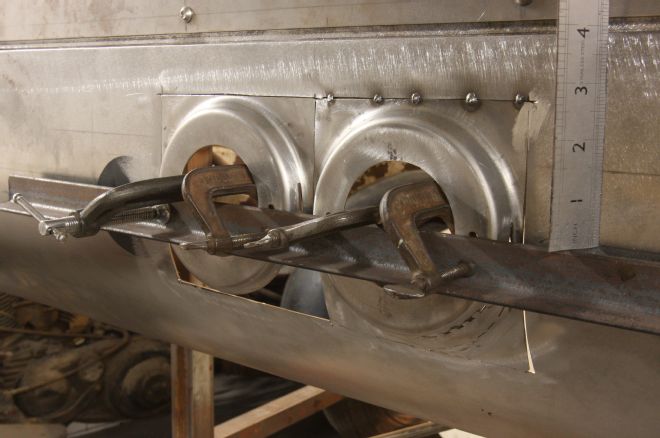
8 The resulting gap was filled with steel shaped to fit, then the second panel was installed in a similar manner. We used a length of angle to ensure the bezel mounting flanges aligned.
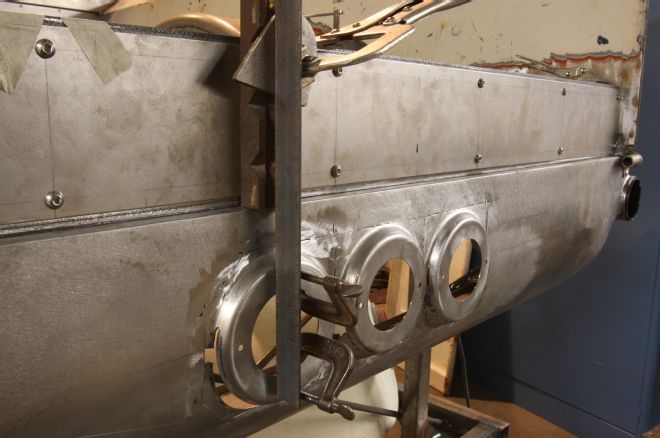
9 The third section was installed in the same way. Each section was clamped as shown to ensure they were vertical as well as aligned horizontally.
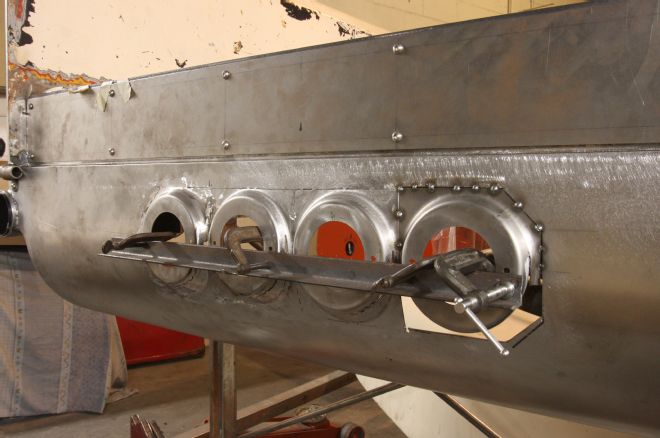
10 The last section going into place. All are just tacked in place here, with the tack welds ground down as each panel was installed.

11 This illustrates the curved section fabbed to "fill in" the gap at the bottom of each section. Card templates make these simple to form, before rolling them to shape in a slip roll.
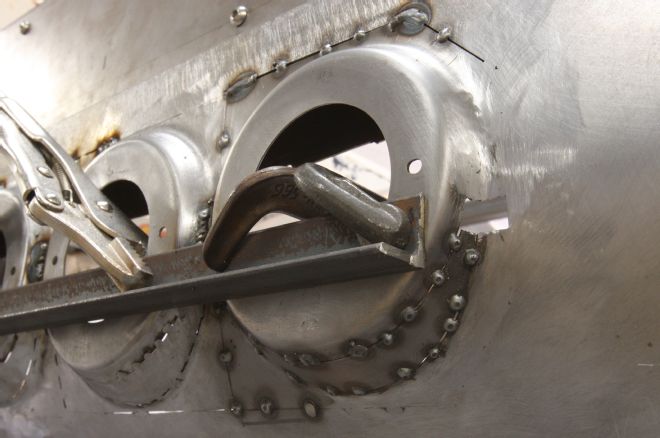
12 Once everything was tacked in place, we started finish welding, in short sections at a time to minimize warping.
13 Almost there, just the small sections where the lower halves were dropped to fill in now.
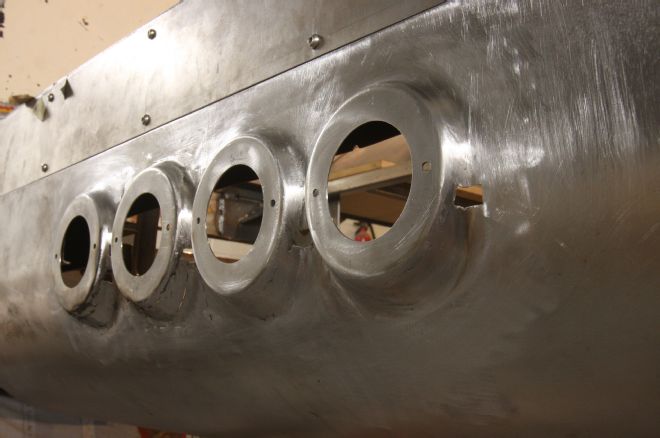
14 Finish welded and sanded smooth, there's very little body filler required, ideal in an area that will likely see more heat than most painted parts of the truck.
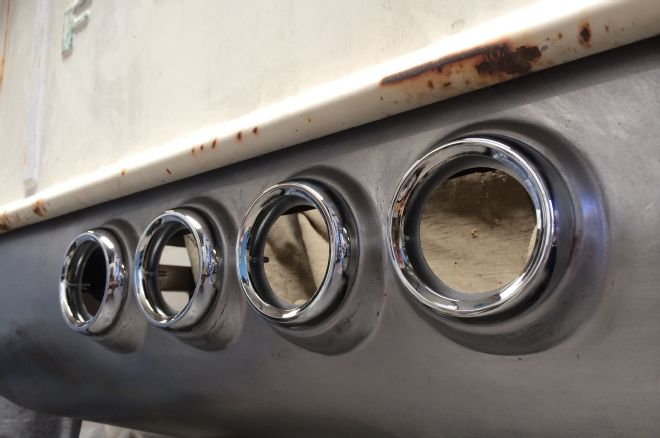
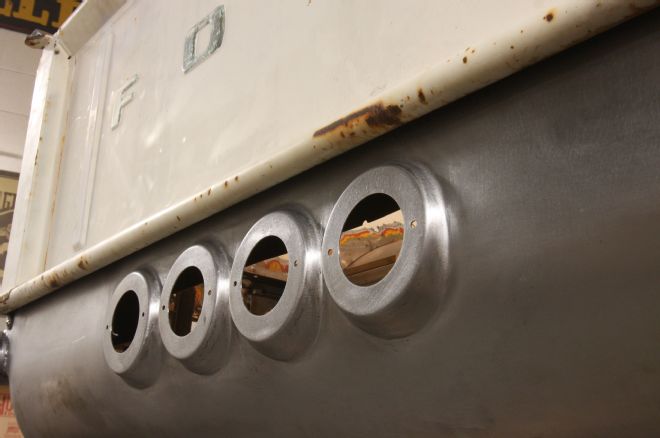
15 Here's an idea of what the finished exhaust outlets will look like, with the pipes exiting through the chrome bezels.