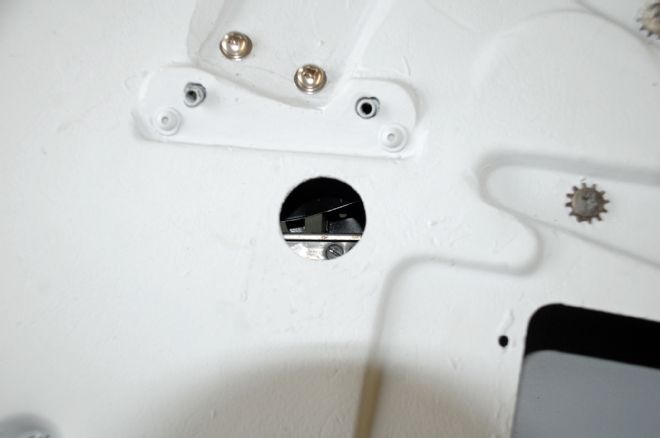
Whenever we tackle a full, frame-off build on a car the one thing that always amazes us is the number of parts in a car, and our 1960 Corvette is no exception. What once fit nicely in one bay of your garage now fills two bays along with shelves upon shelves and boxes filled with parts, and parts of parts. After removing the doors we removed every piece from inside the door.
It can be a bit overwhelming, but the key to completing a big build is to focus on subassemblies. Prior to doing the bodywork on our doors we removed everything from the inside of the doors. The windows of our “basket case” Vette were broken and had fallen inside the door, and it was obvious that virtually every moving piece inside the door was ready for replacement or a complete rehab. After the bodywork was complete, but prior to the finished paint, we decided it was time to fill the doors with working windows once again.
We began by removing the old broken glass from the stainless steel window frames. After removing the four small screws from the lower corners of the window we used a small piece of steel angle iron and a hammer to carefully drive the frame off the glass. It should be noted that our window frames were deeply scratched and in need of a complete sanding and buffing, so we were not concerned with an additional scratch or two. If your frames are in good condition, a piece of hard nylon or wood would be a better choice.
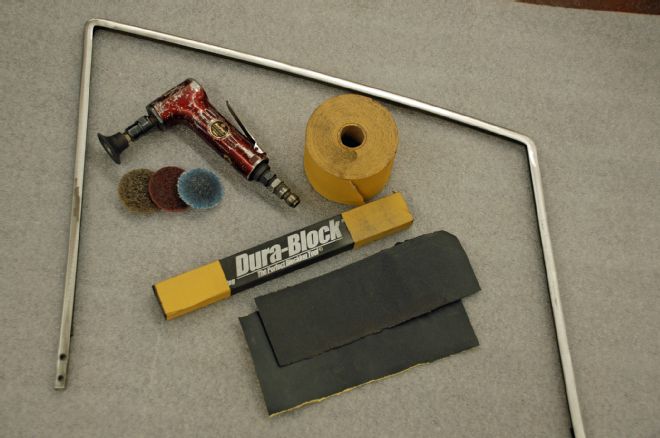
With the old glass out of the frame, we began by sanding the very deep scratches out, beginning with a 60-grit disc on a small grinder. From there it was a progression of metal finishing pads followed by hand sanding with a block all the way down with 180-, 220-, 400-, 600-, and finally 1,200-grit. With the base metal finished to this fine grit, our buffing time with the Eastwood buffer and compounds were minimal and the frames look better than new.
We took the old window glass down to our local auto glass shop and had a new pair of windows cut in green tint, which set us back $120 for the pair. While we were there we asked about glass set tape and we were pleased to find thin tape that made installing the glass a breeze. Some window glass set tape is too thick to fit the original frames properly.
Armed with new glass and the thinner set tape we cut the proper reliefs in the corners of the tape, then attached the set tape to the glass and pushed it into the freshly polished window frames. You may have to do some tapping with a rubber mallet to completely seat the window in the frame.
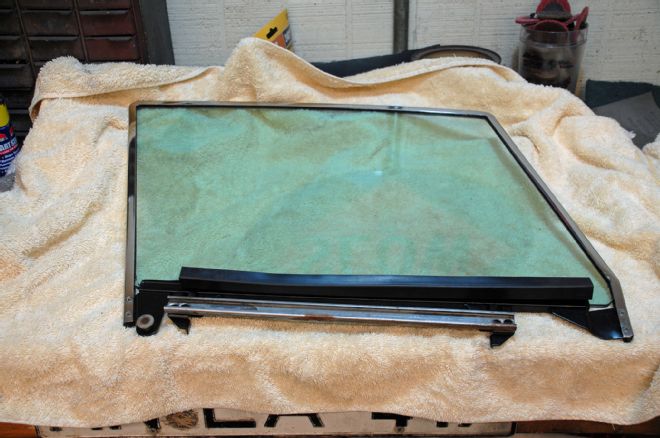
We spent some time cleaning and painting the lower channel before installing the new Corvette Central rubber in the channel. This piece requires a small bit of trimming above the guide wheel as shown in the photos. We found that by installing one screw into the frame first, then using an awl in the other screw holes were able to align all the holes and have a completed window frame with new glass.
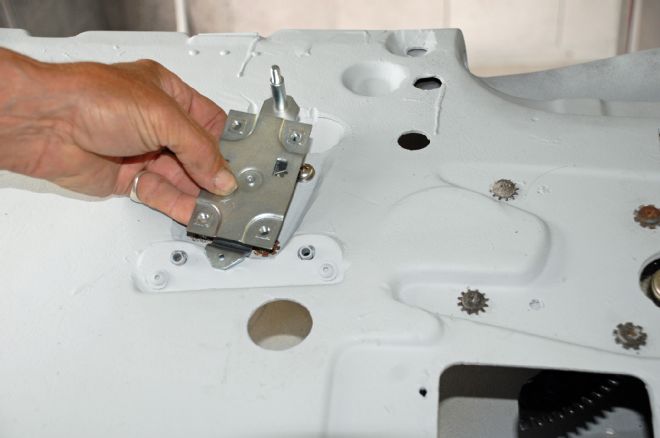
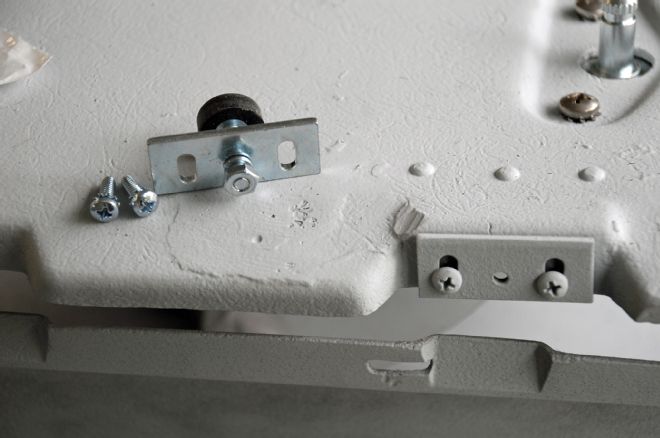
During the examination of the inner door we discovered the lower window stop was badly rusted, so we removed the rivets holding the lower stop and fabricated new stops from stainless steel. We transferred the rubber block from the old stop to our new piece and bolted the bracket back in the door with two 10-24 stainless steel button head bolts.
We had already assessed the condition of our 55-year-old window regulators and it was clear they had seen better days. Sometime during the car’s colorful past the arms had been bent and tweaked. Trying to straighten these arms and get back to the proper geometry seemed like a long shot so we simply ordered two new window regulators from Corvette Central. The replacement pieces were perfect, well-built, and powdercoated for a long life. Note, there is a left and a right regulator and they are marked on the gear.
The new regulators were slipped into place through the large access hole in the door and the four screws held them in place. Next, we bolted in brand-new door latches and door locks, also sourced through Corvette Central.
After carefully cleaning the old, curved track piece we slipped it in through the top of the door over the wheel on the shortest arm on the new regulator. After it was on the wheel we aligned the two bolt holes with the holes in the door and secured it with the two original screws.
It was now time to install the actual window. The track that mounts to the bottom of the glass must be removed (four screws) and that track is installed inside the door onto the rollers of the two long arms on the regulator.
With this track installed on the regulator, crank the regulator down until the track is almost to the bottom of the large access hole. Now slip the glass carefully into the window tracks and push it down until the holes in the lower window rail align with the holes in the aforementioned track. Install the two screws but don’t tighten them yet. Now move the regulator until the forward rail holes are showing in the round hole just below the armrest mounts. Using a magnetic screwdriver carefully install the two screws and tighten them, then move to the rear and tighten the two rear screws.
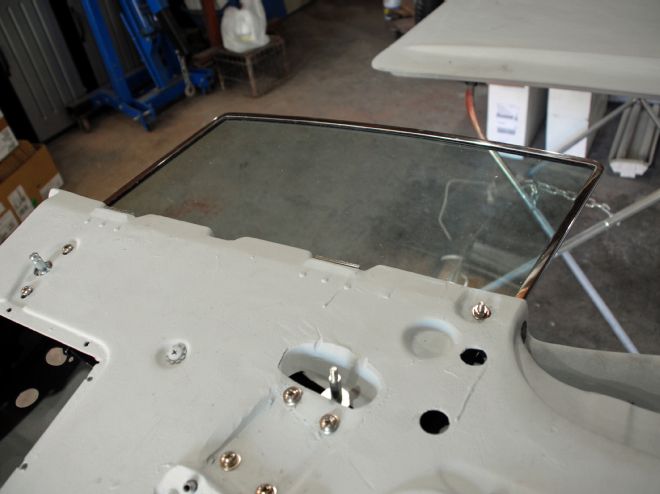
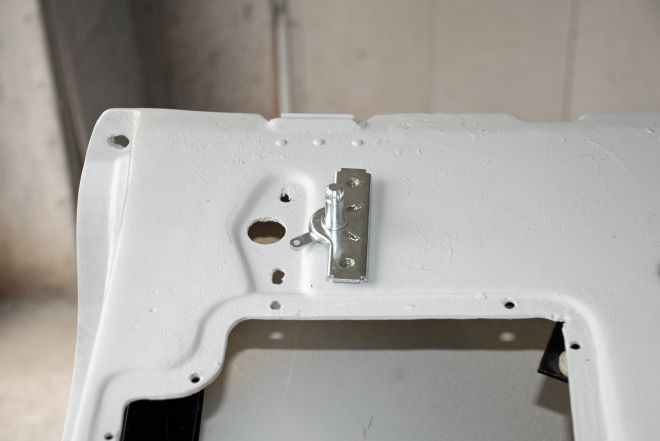
The final step was installing two new upper window stops on the top side of the door to finish our total renewal of the door glass and associated tracks and regulators. What first looked like a daunting task actually went quite smoothly and we are glad to say the windows now glide up and down in the new tracks.
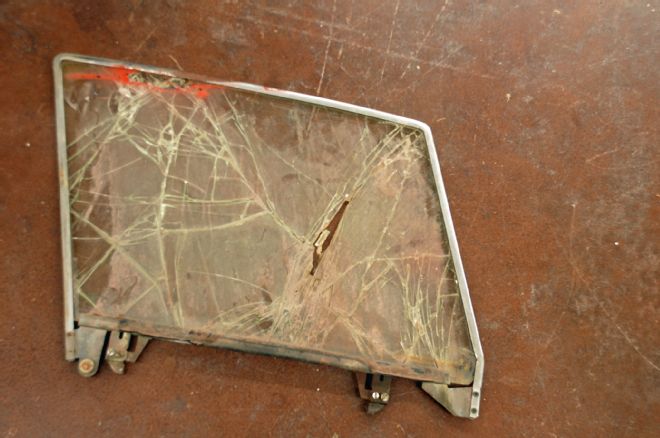
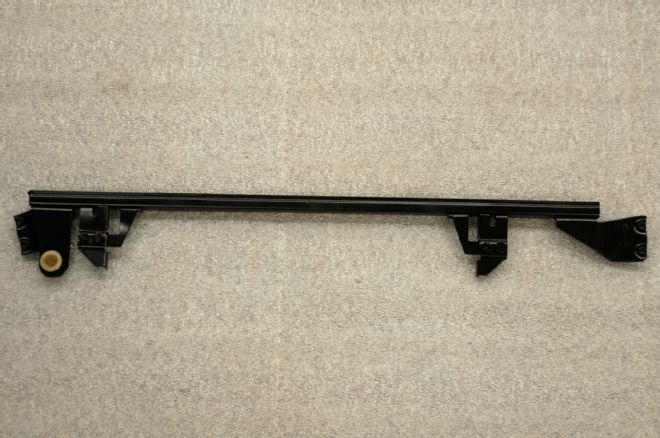
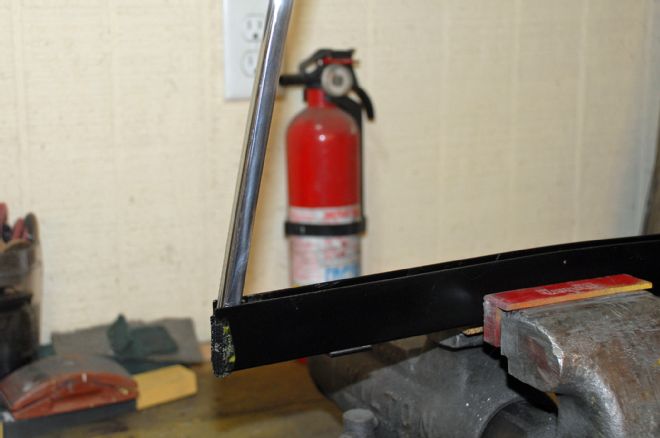
01. It is obvious our windows were in need of repair, and while they may look rough, after a few days of work we had everything looking and working like new.
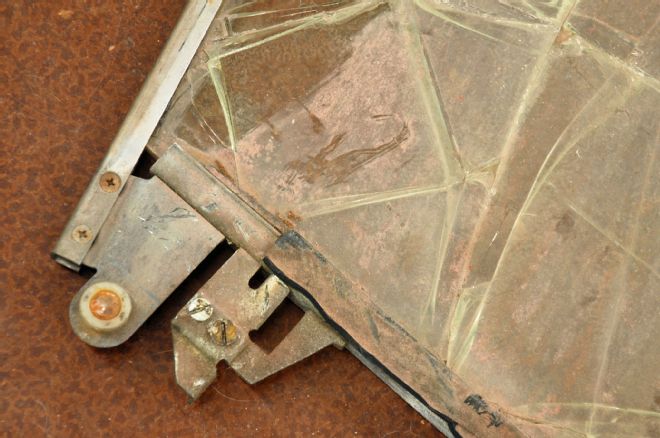
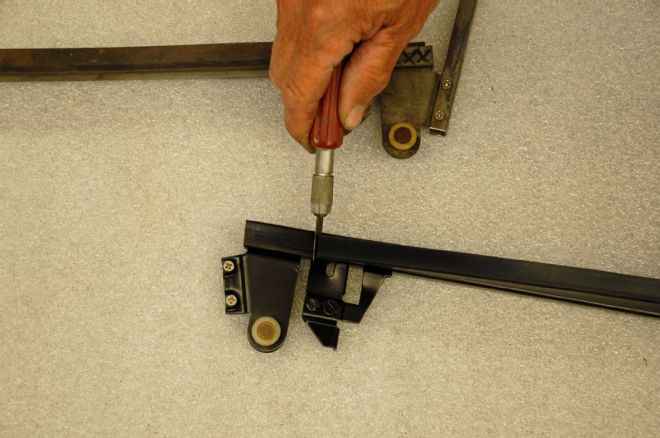
02. The lower window track is connected to the stainless steel glass frame by two small screws on each end. We removed those screws and gently tapped the lower track off the glass.
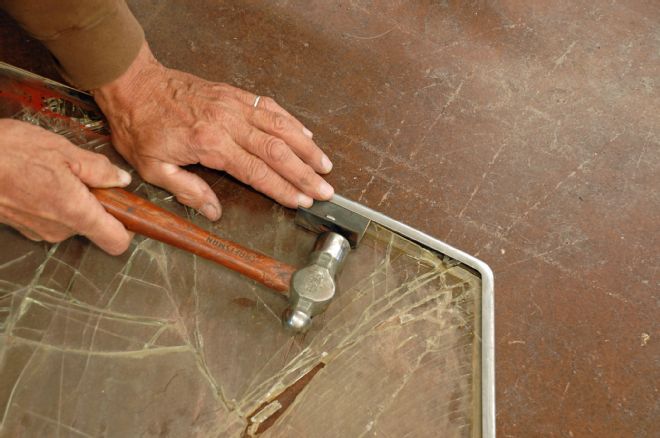
03. Separating the stainless frame from the glass is a matter of carefully driving the frame off the glass. We used a small piece of angle iron to mate up to the lip of the frame. Our windows were so rough there was no need to be too careful.
04. After a run through the sandblasting cabinet we gave the lower track a coat of primer followed by some semi-gloss Eastwood Chassis Black. The track looks like new.
05. We had deep gouges in the stainless frame, but by sanding them out and polishing the frames we were able to totally restore them to better-than-new condition.
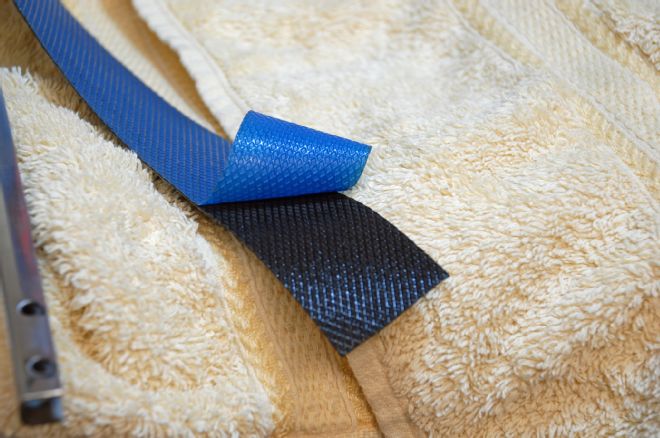
06. The glass is held in place with this glass setting tape that we found at our local automotive glass supplier. This thin tape is a perfect fit, and the sticky side goes on the glass.
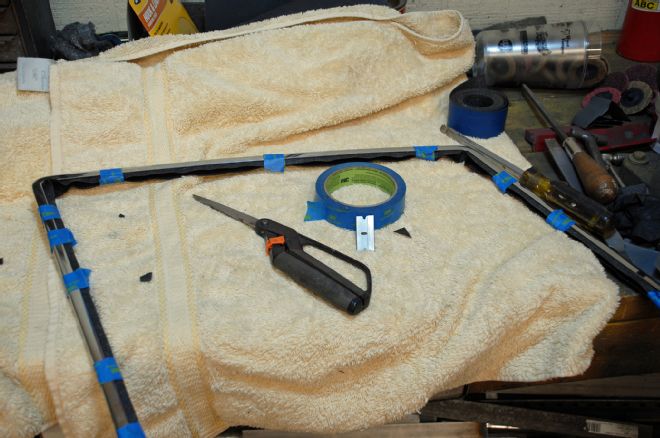
07. We first fit the setting tape to the window frame, making a V-cut in the corners. The blue painters tape holds it in position for the fitting.
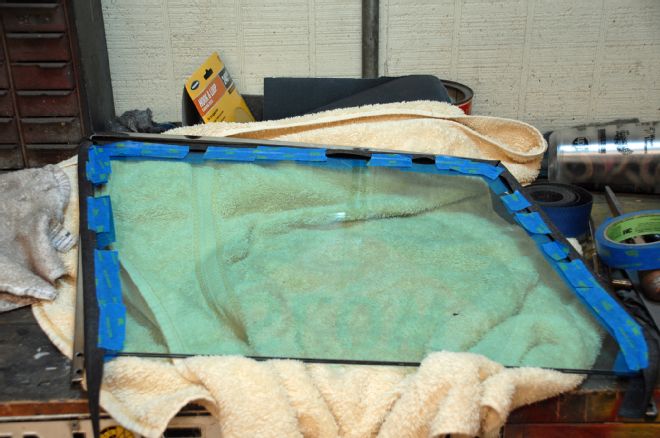
08. Next, we taped the glass setting tape to the actual window and pushed it into the now polished window frame. A rubber mallet was used to tap the frame onto the glass, while the soft towel protects the frame and glass.
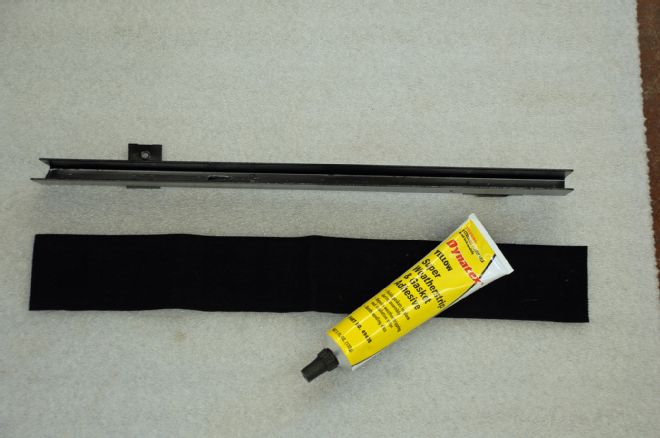
09. We installed the new Corvette Central rubber channel in the lower window track. A small notch in the rubber is required to clear the window regulator channel. Here we are cutting that notch.
10. Attaching the lower track to the window involved installing one screw in the front end, then, using an awl, we pried the other end into alignment and installed a second screw followed by the final two screws.
11. The rear window guide channel is deep and lined with window felt. It took some effort to remove the old felt and completely clean the channel prior to gluing the new felt in place.
12. With the new felt glue still wet we pushed the window frame down into the new felt to ensure the felt took the exact shape of the frame. Note the ends of the felt are notched and glued over the ends of the steel channel.
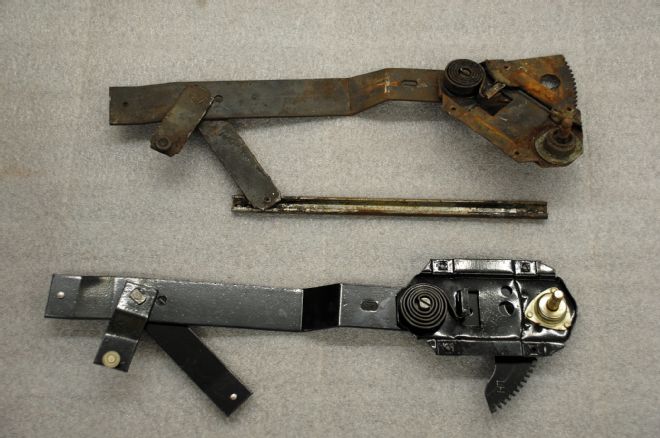
13. Our old window regulators were stiff and the bent arms caused the windows to bind. We opted for brand-new, powdercoated regulators from Corvette Central.
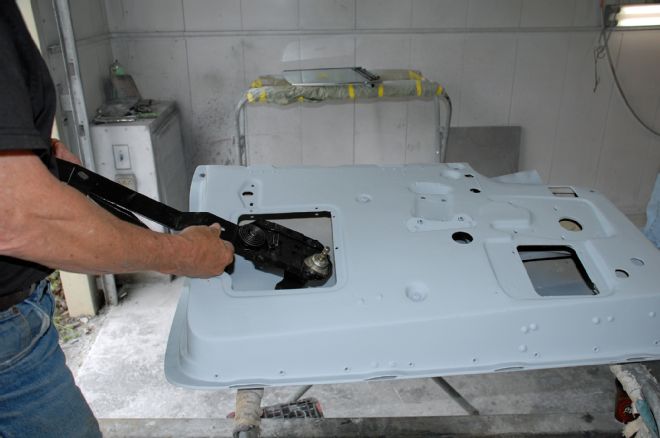
14. The new regulator slips in through the large access panel on the inside of the door. We opted to install the glass prior to spraying the final finish as we didn’t want to be working on freshly painted doors.
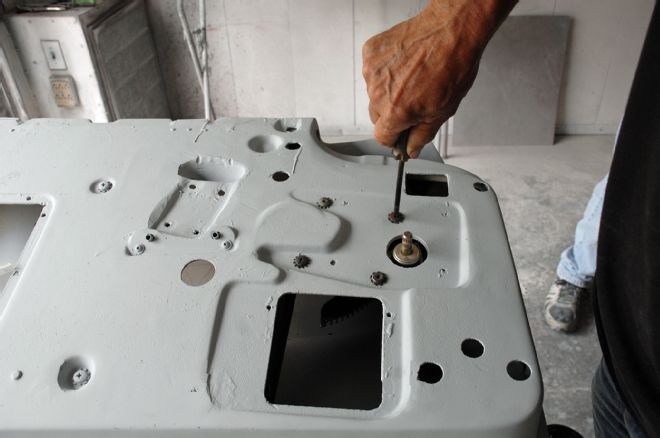
15. Once the new regulator is inside the door it is a simple matter of aligning the holes and installing the four screws.
16. We also installed brand-new door openers in the doors; these were also sourced from Corvette Central. We ordered all new parts for inside the doors to ensure trouble-free operation in the future.
17. The new door locks fit in the rear holes above the large access panel, two screws and the job is done. It is easier to do this before the glass is installed.
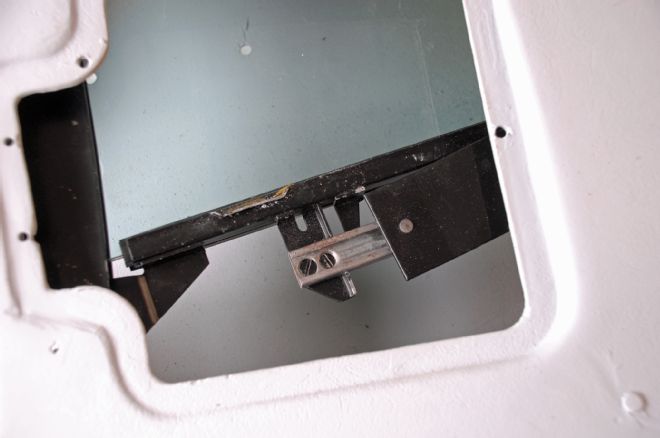
18. The curved window track guides the wheel on the short arm on the window regulator. We were able to push the track through the window slot in the top of the door, over the regulator wheel and then align the bolts to hold the track in place.
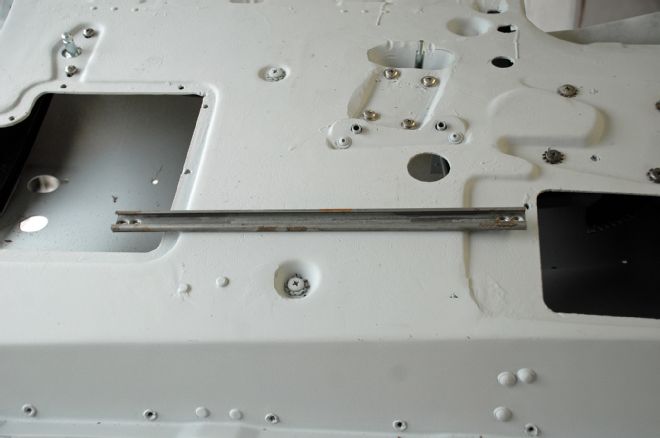
19. The lower regulator track was removed from the bottom glass track, and then it was slipped over the wheels on the window regulator. This must be done before the glass is installed.
20. Next, we slipped the new window into the new felt-lined track and pushed it down until it aligned with track on the window regulator. The window regulator must be cranked down until it is in the lower part of the large access panel.
21. There is a small hole under the armrest mounts in the door panel that allows installation of the front two screws into the window track. Carefully move the regulator until the screw holes come into view.
22. With the window installed we bolted in the new upper window stops complete with new rubber bumpers.
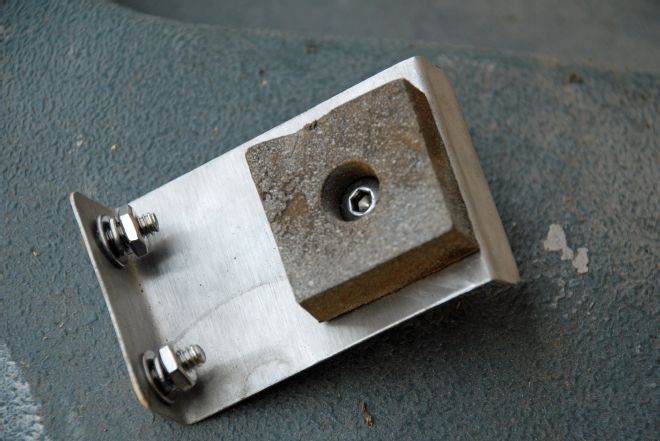
23. The lower window stop is riveted to the bottom of the door and ours were very rusty. We fabricated duplicate brackets from stainless steel and bolted the original rubber block to the new bracket. They are held in place with 10-24 button head stainless steel bolts. This completes the window installation.
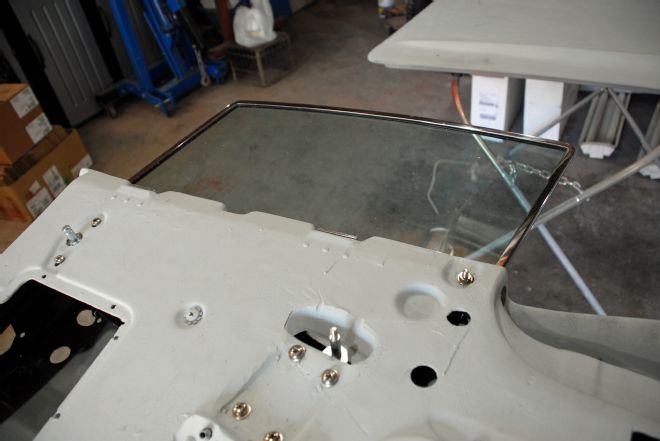
24. Perfect tinted glass in a polished frame and it all glides up and down thanks to new window regulators and refurbished guides. This proves working on your Corvette needn’t be a pain in the glass.