Right from the very start when C. Hopkins Rod & Custom, also known as the AMD Installation Center, in Cleveland, Georgia, undertook the complete body restoration of this 1969 Camaro, the key to getting it right was following GM’s correct order of assembly.
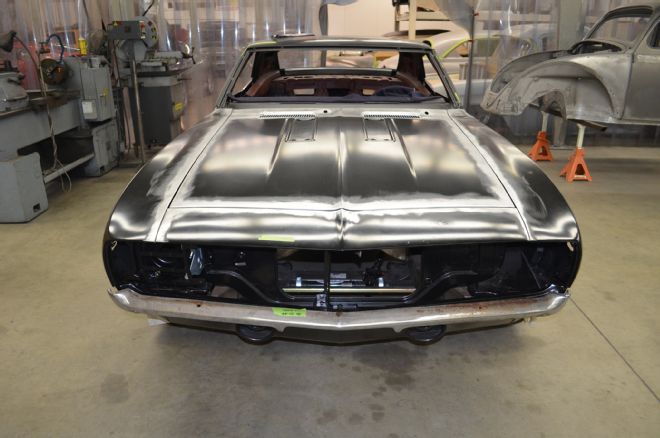
This time around we’re taking an in-depth look at how Hot Rods & Hobbies in Signal Hill, California, painted the ’69 Camaro, adhering to the “in the right order” principle. The first step was to assemble the Camaro and ensure that all of the gaps were correct. This meant how the hood fit to the fenders and up against the cowl. From the gap at the rear of the front fenders to the front of the doors, the fit was checked, and then the gap from the rear door edges to the rear quarter-panels.
After making sure all the body lines (gaps) were right on the money, it was OK to disassemble the car and move onto priming and painting the car. A total advancement in technology from how cars were primered in the ’60s, Axalta Cromax LE3004S was laid down followed with Chroma Seal LE 3070S dark gray sealer. Just saying priming and painting makes it sound simple, but there’s a lot of steps to priming a car and getting the body straight before Hot Rods & Hobbies could move onto paint. Especially since the Camaro is going into black—the hardest color to prepare for paint since it reveals even the tiniest imperfection.
In keeping with a state-of-the-art approach in place of the Camaro’s factory original single stage Tuxedo Black Magic Mirror acrylic lacquer topcoat, Hot Rod’s & Hobbies finished with a deeper, glossier, two-stage Axalta Cromax Pro basecoat with an Axalta Premier Clear LE 8700S topcoat. The results are a totally custom finish that far exceeds what the factory turned out in the 20th century.
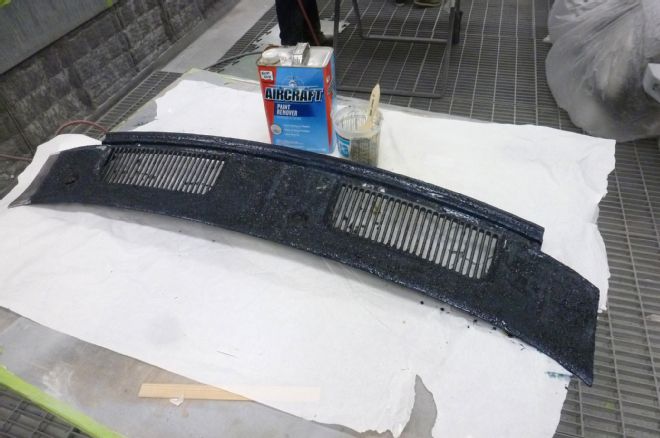
01. After using aircraft paint stripper to remove old paint, it is absolutely essential to neutralize the leftover film. Otherwise acidic bubbles will form under the new paintjob and eventually rise to the top as unsightly blemishes.
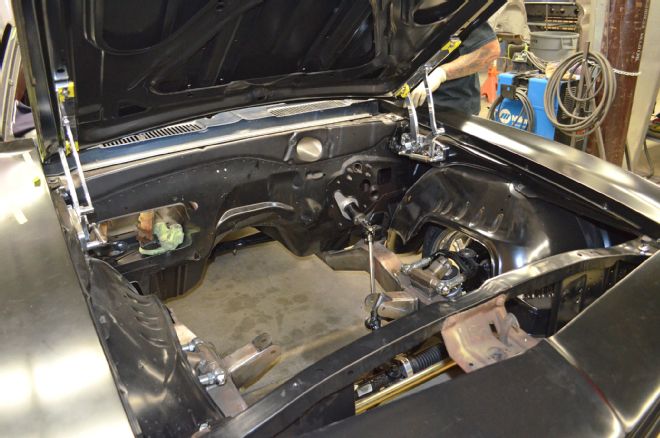
02. In addition to creating a high-end custom look, installing Eddie Motorsports CNC-machined billet hood hinges provided increased adjustability and simplified establishing the hood gaps.
03. Notice that after the hood has been properly adjusted, with the gaps corrected, the hood sits perfectly flat, and thanks to precision hinges will continue to fit properly even after many openings.
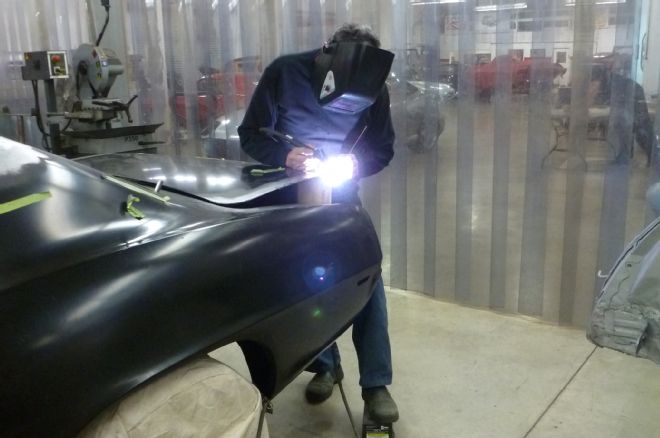
04. To establish the gaps, sometimes metal has to be ground down while other times TIG welding has to be done in order to build an area up.
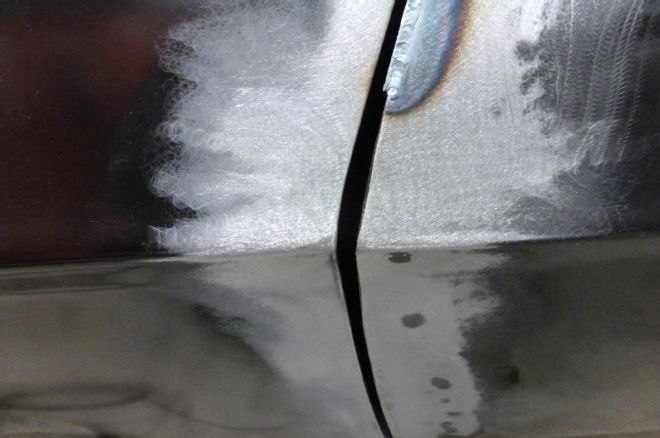
05. This close-up view reveals how TIG welding a thin metal strip helps to form a tighter, more consistent gap between the front fender and driver-side door.
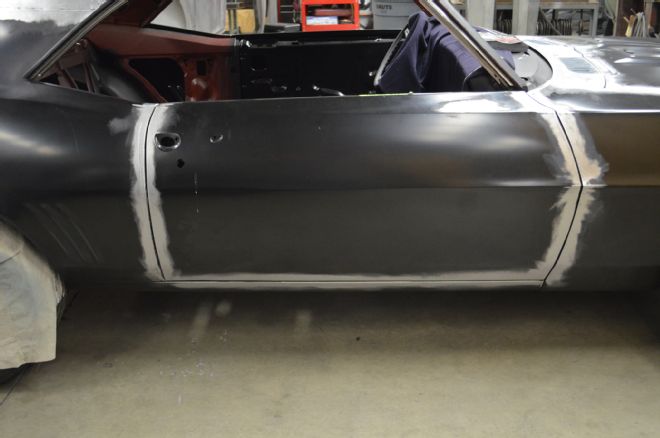
06. This overall view of the passenger-side door after the gaps have been corrected through TIG welding and grinding illustrates how much nicer intense attention to detail makes the car appear.
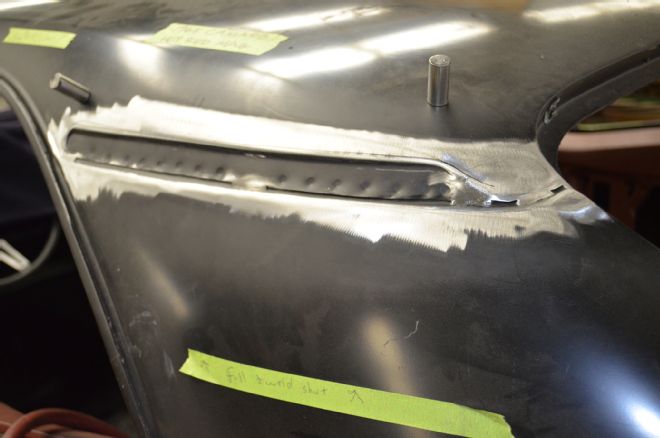
07. The OEM or a garden-variety body shop solution to filling the roof seams would be to use lead or polyester filler respectively.
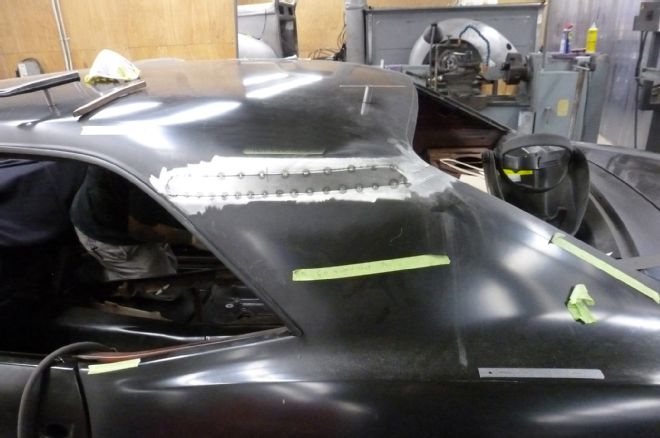
08. Custom shops such as Hot Rods & Hobbies build to higher coach craft standards, so they TIG-welded in fabricated metal filler strips in place of lead or thick polyester filler.
09. A very thin skim coat of polyester filler is often used to perfectly flatten the steel body panels.
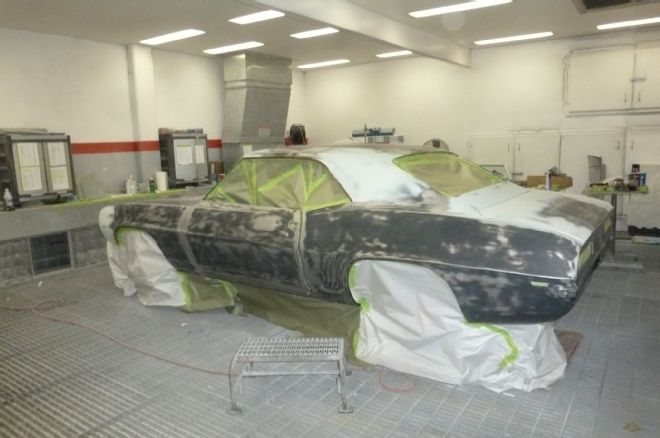
10. With the bare steel properly treated, the entire body was sprayed with Cromax LE3004S a two-component 2K primer surfacer designed to provide high build and then easy to sand.
11. Notice that after a few passes with a long sanding block the black mist known as a guidecoat continues to remain only where the low areas are. This indicates where more blocking is needed. Repeatedly, the entire car was primed, guidecoated, and blocked until the low spots were eliminated.
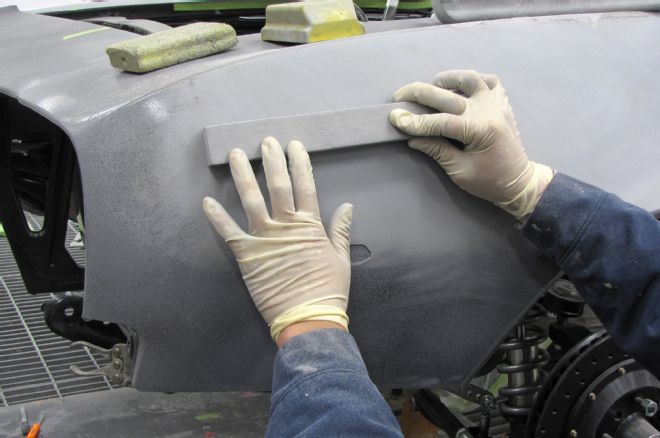
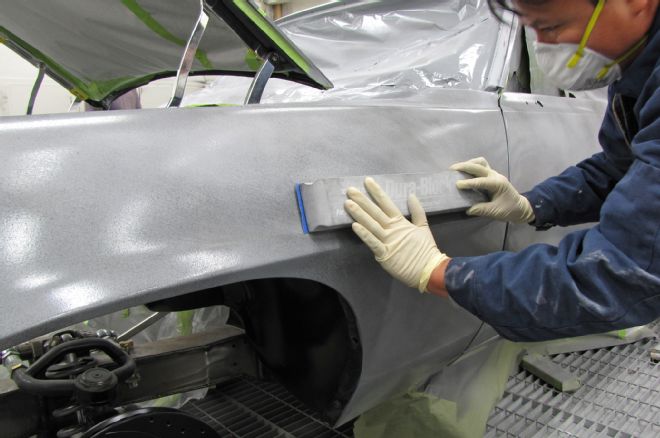
12. A perfectly flat stick wrapped with sandpaper is used by the more exacting body shops to ensure the area is absolutely wave free (low spots).
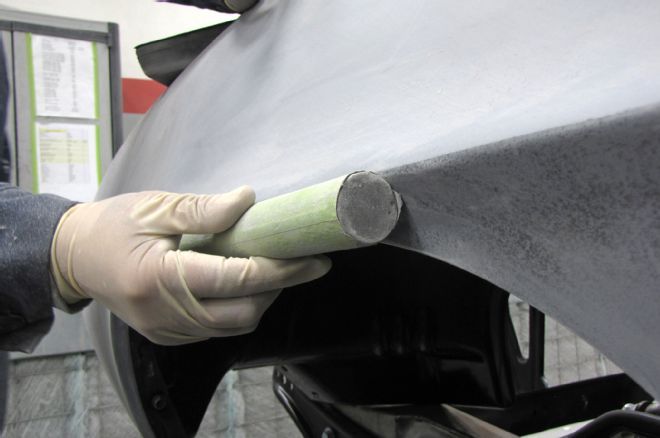
13. A cylindrical hard-foam sanding block wrapped with sandpaper works great to sand areas that need to be shaped to a perfectly rounded configuration.
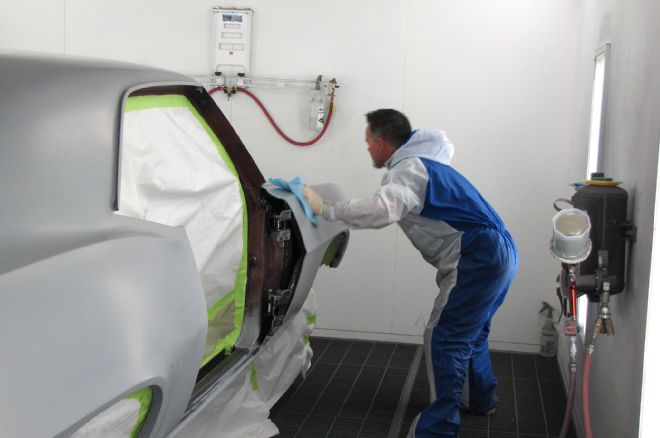
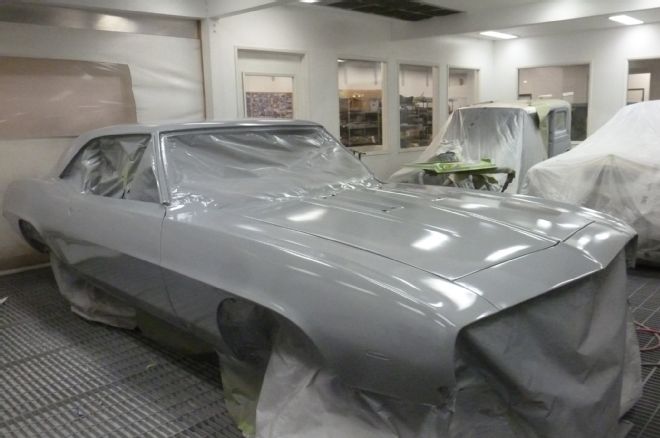
14. Now completely blocked smooth, the body is ready for paint. A tack rag along with compressed air was used to ensure the surface was free from dust and dirt that would produce blemishes trapped in the paint.
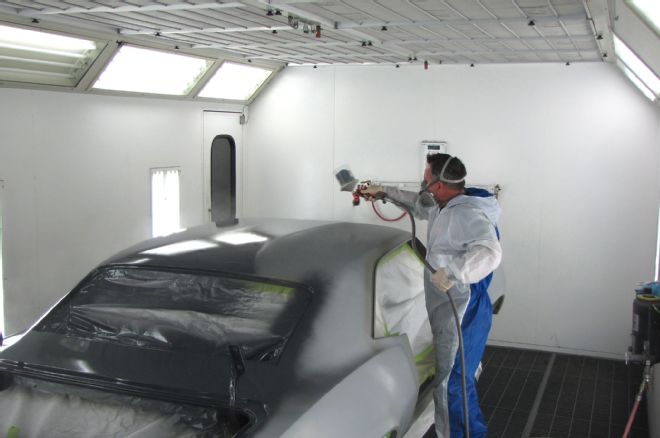
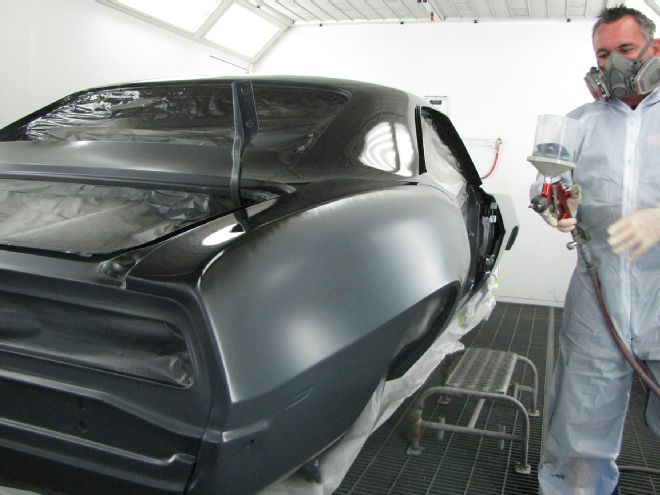
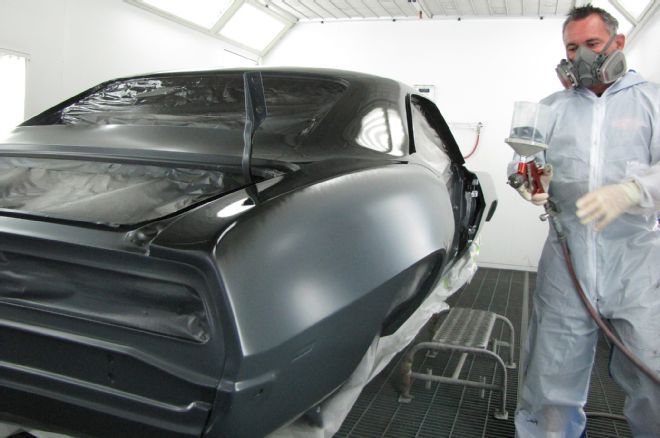
15. To ensure good coverage around the window frames, under the rocker panels, and inside the doorjambs and wheelwells those areas were sprayed with black Axalta Cromax Pro basecoat first. Then, the overall starting point was at the roof.
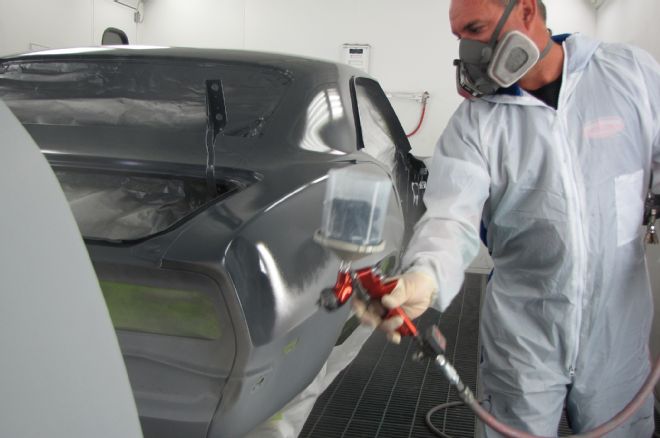
16. After completing the roof, the next move was to the top side of the trunk area and then the quarter-panels. The main idea is start at the top and then work down. This lessens the possibility of getting dirt in the paint.
17. Applying the second stage, Axalta Premier Clear LE8700S clearcoat must be done within a certain window of time. Any nubs in the basecoat can be removed by lightly scuffing them with a Scotchbrite pad. Blown and tacked once again, it’s time to hose on the clear.
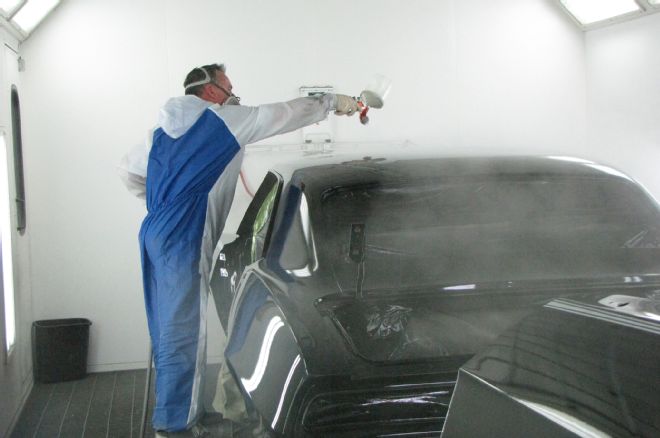
18. Slicking clear is a process that requires a good eye to watch it hit, and the arms of a robot to move at a consistent, semi-rapid pace. This car probably came out incredible right from the gun, but it was color-sanded and rubbed to make it perfect.