Somehow, I’d gone my whole life without seeing the picture of my uncle’s Number 78 record-holding altered. The first car I ever saw him race was a Top Alcohol Dragster back in 1978 at Great Lakes Drag-o-way in Union Grove, Wisconsin. Four years ago, I saw the black and white photo we’ve been running with this series, and I fell for the car. It’s everything I love about the hobby: the era, the style of the race cars, an iconic engine, the Moon tank, the 12- and 5-spoke mags, pie crusts. Had it been anyone’s car, I’d have been just as struck with it. That it was my uncle’s, the guy who is responsible (or is it “to blame?”) for me being a car guy, just made it cooler.
Because I’m a pack-ratting car guy, I tend to pick up cool parts when I come across them—and running the NE Georgia Swap Meet makes that more of a problem than a benefit. However, in this case, it worked out, because without knowing it, I’d already stashed a 390 FE, some gauges, a steering wheel, Corvair steering box, five-spoke Americans, and a bunch more. In the back of my mind, I thought, “Boy, if I only had a body, I’d be on my way!”
Not long ago, Chad Blotske at RollFast Custom (who did the Merc four-door-to-two-door conversion story in our May ’13 issue) said he was bringing a fiberglass ’27 T body to the swap meet and asked if I knew anyone who might want it. That Saturday morning, we moved it from the bed of his truck to the back of my ’61 Suburban, and I was off and running.
It was an old Anderson Industries (AI) fiberglass street body that had never been mounted, with separate doors, inner door panels, and trunk lid. The original Number 78 car was a one-piece body with fixed doors and molded-in decklid. We don’t know who built the original car’s body, but it was a pretty good piece, early in the fiberglass body market with the car having been built in ’61. From the “It’s a Small World Department,” Rich Venza and I have become friends in the last few years through the swap meet. Rich owned AI Fiberglass for 20 years, and the body I picked up at the swap meet is one of his.
Visually, there are two main cues on the race car’s body: the fixed doors and the notches behind them for the tires. Never having worked with fiberglass, I found John Grobie, a “boat guy” who has been working fiberglass for 20 years, and we went to work turning the new(ish) old stock street body into the old race car’s body.
Unlike the original car, I’m planning on running a radiator, but it’d be sacrilege to do anything but leave that front grille shell empty. Putting the radiator in the trunk and feeding it with an electric water pump is going to be easy enough, but having a solid trunk lid over it wasn’t a great idea. I’m not planning on a trunk floor, so there will be plenty of air circulation for the radiator, especially with the electric fan we’re going to run, but that leads to a concern of air coming in and lifting the underside of the decklid, which could unload the rear tires.
Talking with George about it, he said, “I’m sure it was lifting, but we never thought about it back then. Knowing what I do now, I’d have put a full belly pan under it.” A good idea, but then there would be a circulation problem for the radiator. I decided on a deviation from the original and opted to make a steel decklid and punch it full of louvers. I like louvers, and George liked the idea, so there ya go.
 We didn’t notice right away, but in studying the photo of the original, we noticed it didn’t have the tail panel below the bottom of the body, so out came the cut-off wheel.
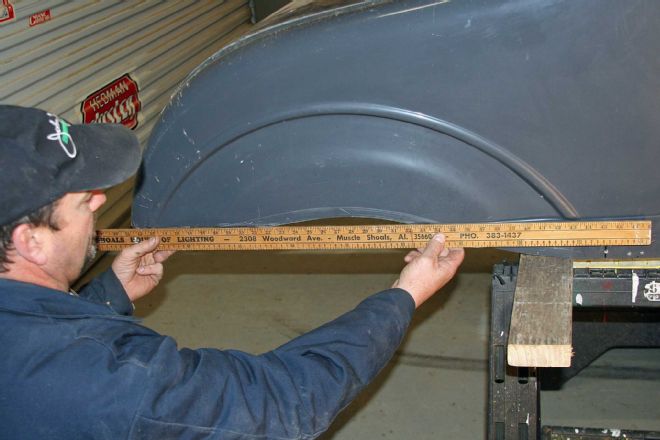
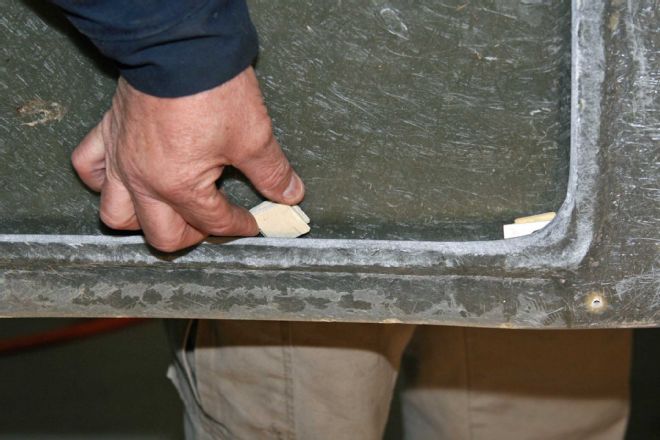
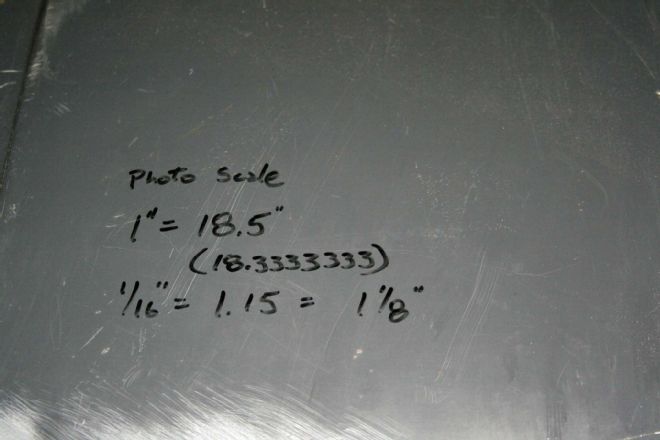 We figured out the scale of the vintage photo to determine lengths and distances on our recreation. The key here is to write down that kind of stuff where it won’t get lost. In this case, we wrote it right on the body, which was helpful since the notes stayed with the car when it was at the chassis shop, our own shop, and the fiberglass guy’s place—all places the numbers were critically needed.
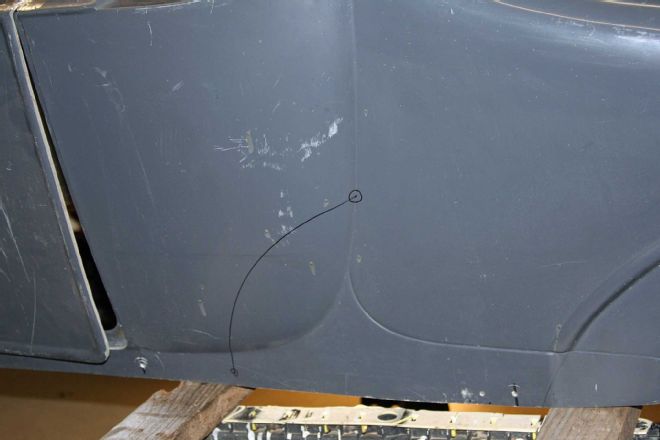
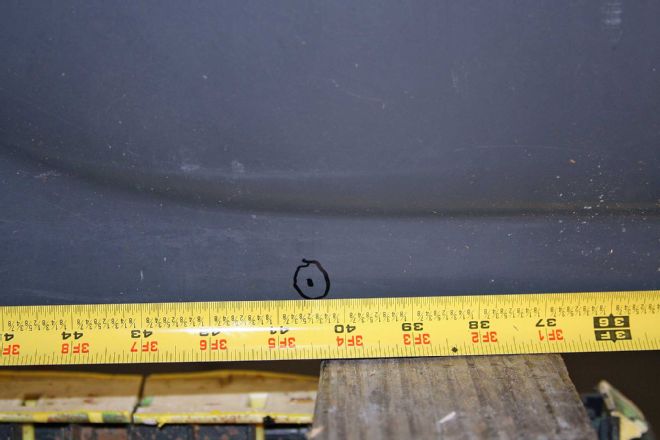 Through the photo and the measurements we had, we determined the leading edge and the top of the half-moon notch on the body tub.
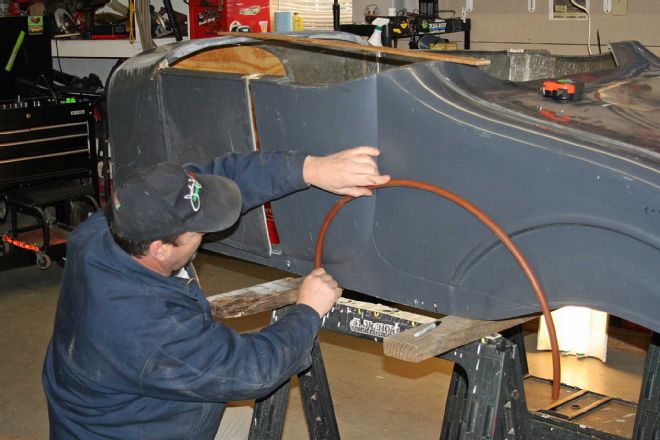 A curved piece of plastic tubing had about the right curvature to connect our top and bottom points on the notch.
 It took us a few times to get the curvature right, and we double-checked the height and leading edge location several times.
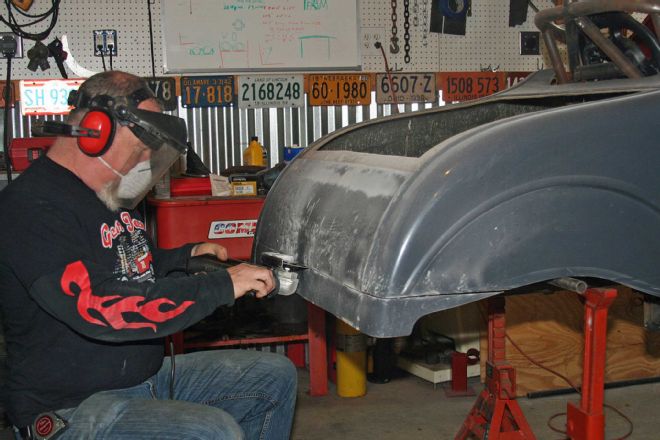
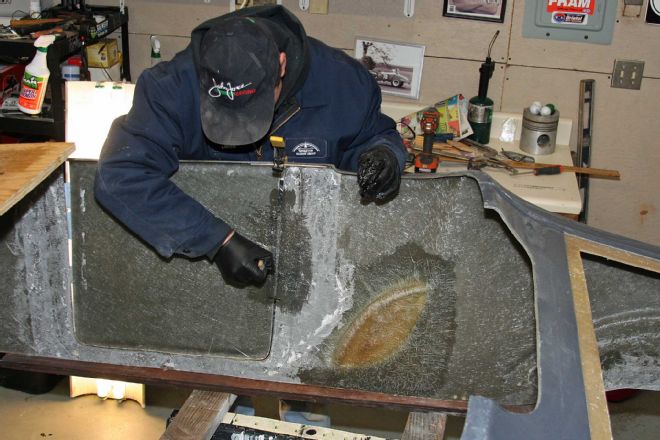
 Once we were satisfied with the line, John busted out the cutting equipment. Take the time to move the body outside when cutting fiberglass. Dust settles on everything when you cut fiberglass. John is a boat guy—this is all he does—so his shop was neat and clean.
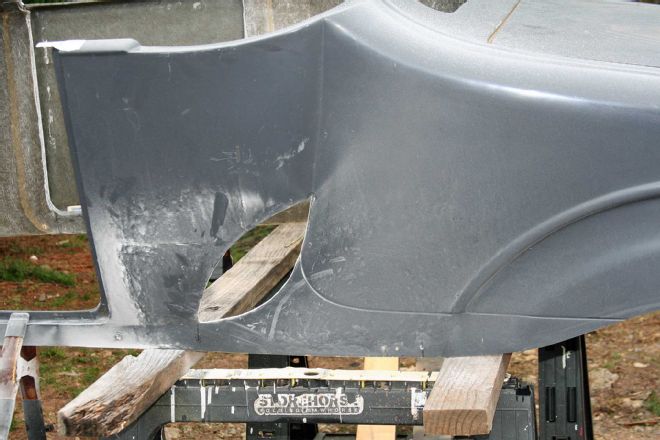 The cut ended up looking like a football. Here is where you usually say, “The point of no return,” or “There’s no going back.” But it’s fiberglass; you can always go back.
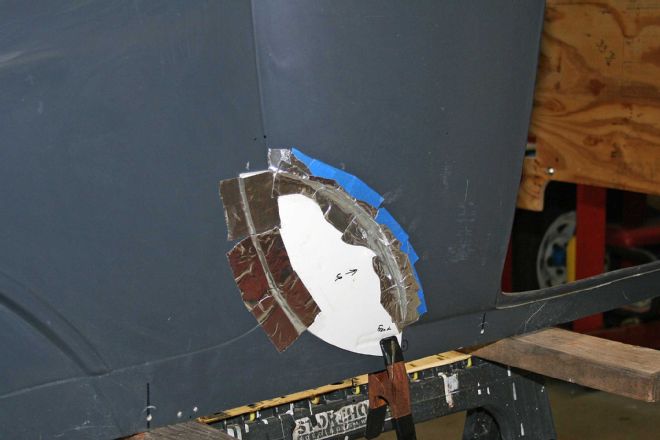 John made a simple form with foam core project board and HVAC tape to hold it in place. The board is available at most grocery stores. It’s easy to cut, but thick enough to hold a shape.
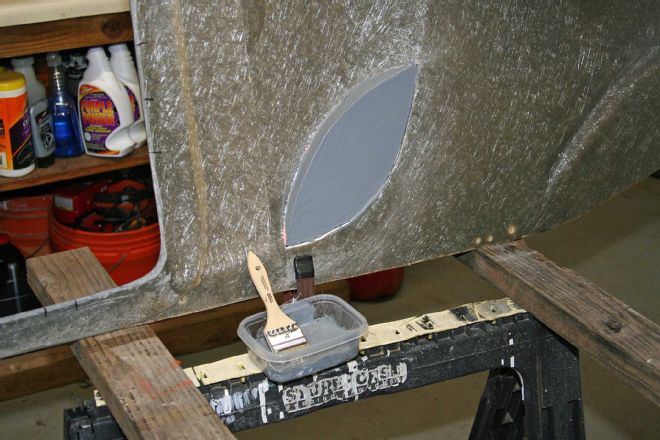 You have to think backwards when working with fiberglass construction. The backside of the form is the face of the body. John spread gel coat on the back of the form and let it set up.
 After the gel coat set up, he mixed a batch of resin. Work in small batches, on small sections. Do one area, finish it, then mix the next batch and move on to the next area. You aren’t going to do everything in one whack.
 John coated the “plug” with the resin, working it in tight to the corners with a gloved hand, rather than the paintbrush he used to coat the broad, flat areas.
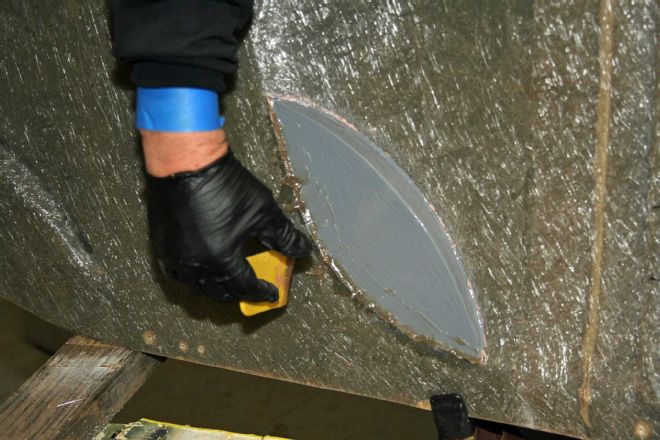
 “Gorilla hair,” or mat, was cut to fit over the plug, and several layers were laid on. It was extended into the body tub several inches in all directions, and one of John’s tricks is to leave a ragged edge around the perimeter of the layers so it feathers and blends in with the existing fiberglass, rather than a having a distinct line where new material is laid in.
 At the wheel opening, we noticed it had a little raised area, while the original car was straight across here.
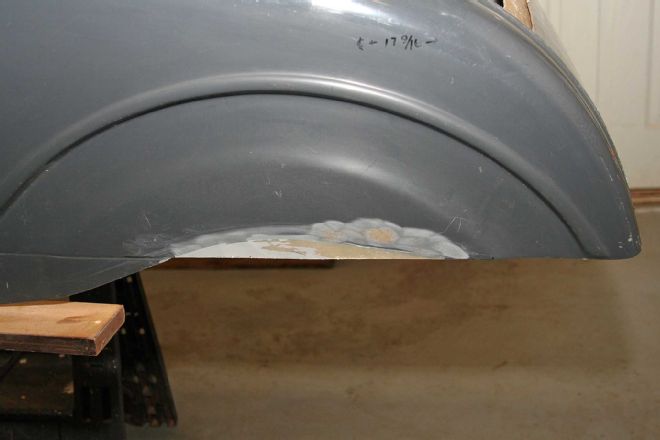 Same deal as before: A plug was made and filled in from the back.
 For the doors, we left the molded-in doorjambs in place, figuring it would give us some place to set the depth of the doors. John made spacers to set everything around the perimeter, and worked with it for two days trying to line everything up.
 We finally decided that getting rid of the doorjamb was a better way to go. Originally, it was a separate piece bonded in after the body was pulled from the mold. John basically separated it from the tub and pulled it out as one piece.
 With the inner jamb gone, the door would be a little trickier to set into the body opening, but it made for a much cleaner installation.
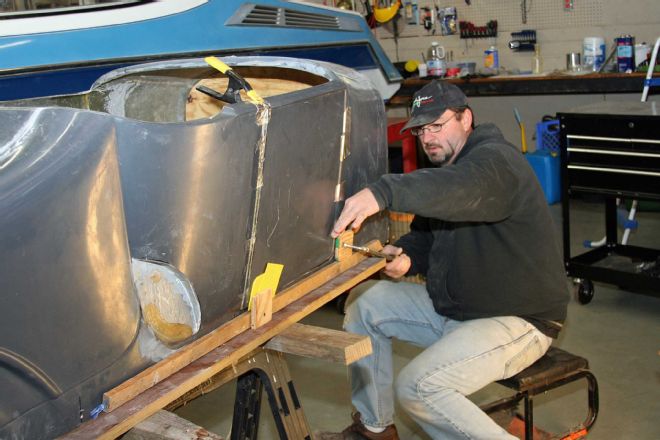 John screwed a board to the bottom of each rocker to keep the body square while the doors were held in with HVAC tape and clamps.
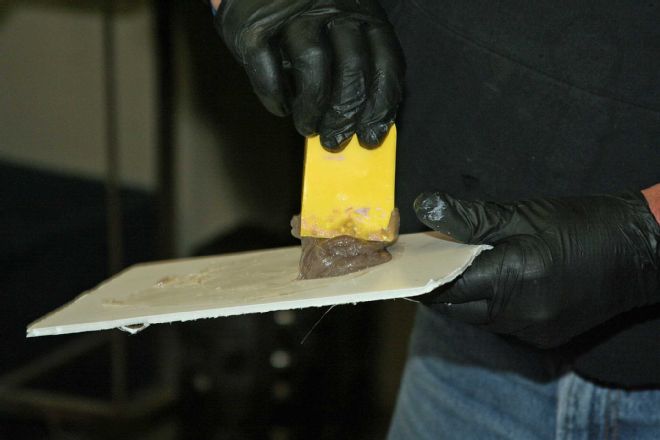
 With the door clamped in place, the perimeter of the door and door jamb area was covered with resin and several layers of mat, while the gap around the door jamb was filled with a mixture of finely cut mat and resin, forming a thick paste that filled the seam like caulk.
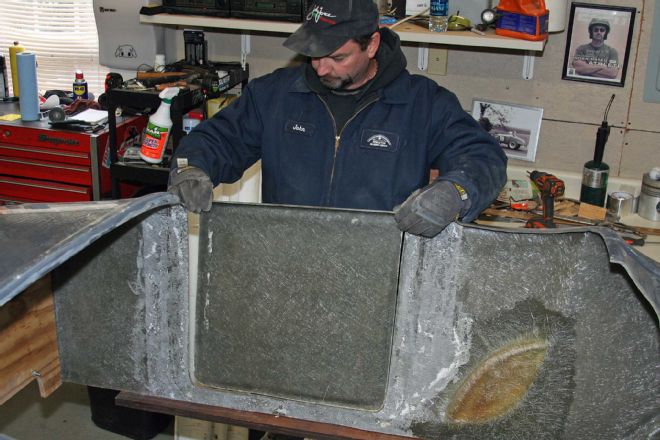
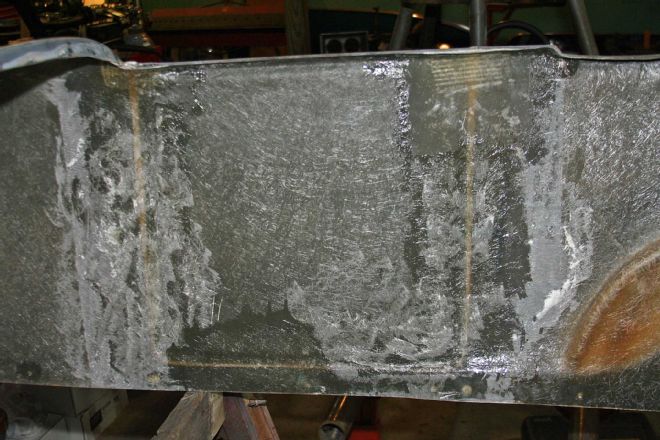 From the backside, with some final mat and resin laid in, the modification looks nearly invisible.
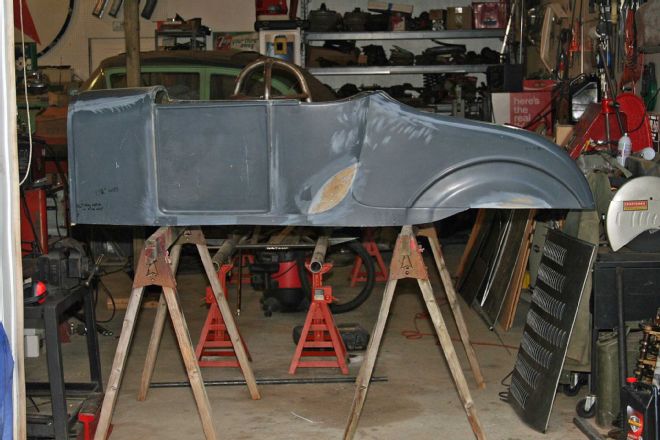 Back home at our shop, the now one-piece body with notches, squared-off wheel opening bottom, and bobbed tail panel is just about ready for its first trip to the paint shop for primer. Visually and mentally, the tubs and the molded-in doors really changed it from “a body” to “a race car.”
 The body came with a fiberglass decklid, but we wanted to do something different, so we laid the ’glass decklid in the opening and covered it with poster board to make a pattern. None of the sides or corners is square, which didn’t make things any easier.
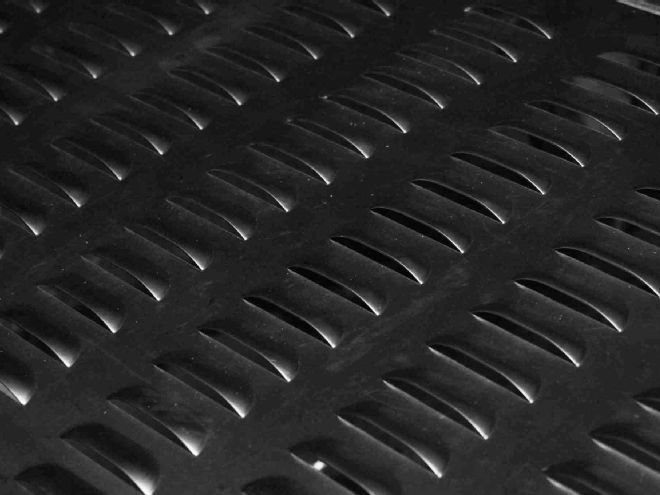
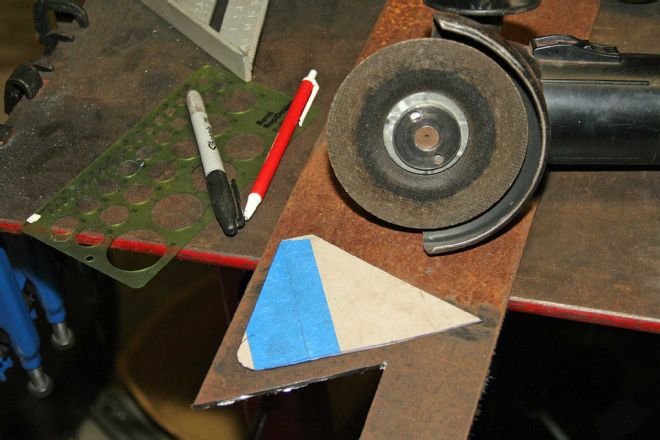
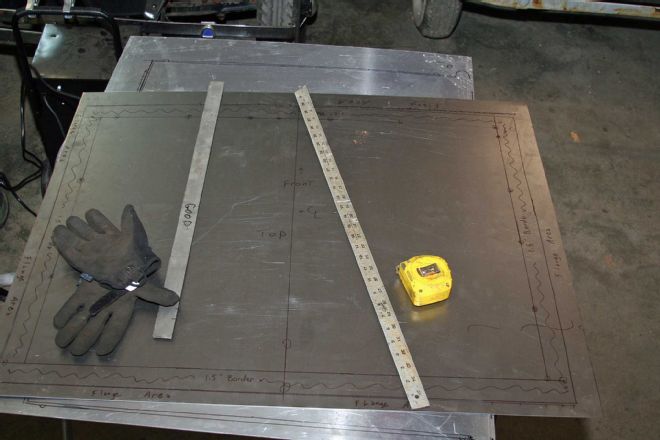 With the pattern in hand, we cut an oversized blank out of 20-gauge sheetmetal and took it down to our buddy John Sizemore at Bright Star Hot Rods in Douglasville, Georgia, to punch it full of louvers.
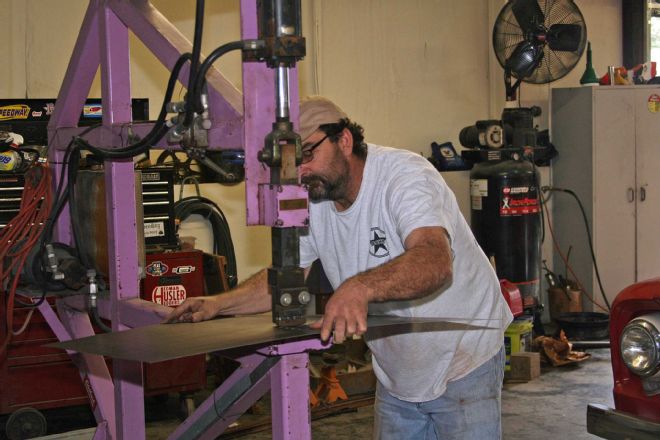 John laid out the louver pattern and started punching the middle row of louvers. After we watched the first three go in, he said, “OK, if you need anything, call me,” and let me punch the rest! At this point, it’s simply a piece of flat sheetmetal. A hood or something with some contours takes some practice, and an assistant to hold and help balance the panel is a real asset. The most important louver is the first one in each row; after that, they fall into place. By the 109th louver, I felt like a pro!
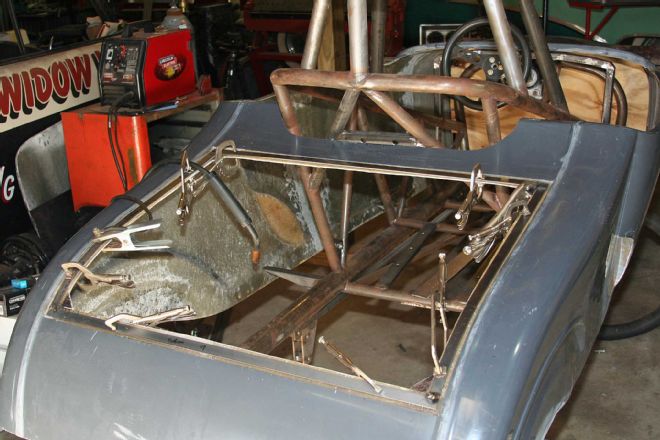 Back at the shop, we needed to mate the stamped panel to the body’s contours. We began by fitting straps of 3/4-inch-wide, 1/8-inch-thick steel strap to the inside of the trunk lid’s opening lip. We then welded the corners together (while clamped to the body opening’s lip) so we had a perimeter frame.
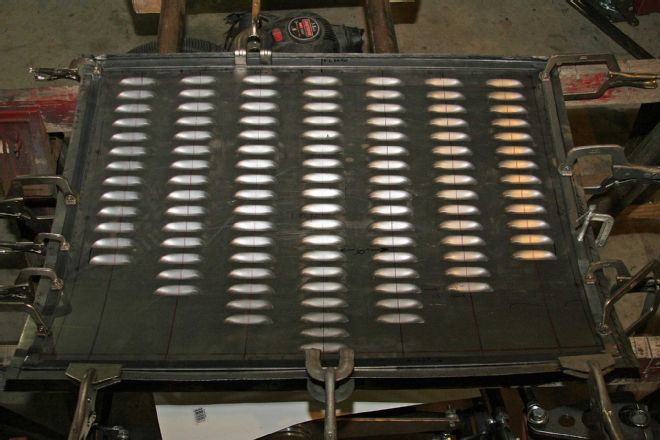 With the perimeter frame formed, we clamped it to the underside of our louvered panel, drew a 1-inch border around the whole thing, trimmed it and clamped the skin to the frame. Rather than run all seven rows of louvers all the way to the end of the panel like we did with the center row, we decided to shorten each row by two louvers. There’s no reason other than we liked the look.
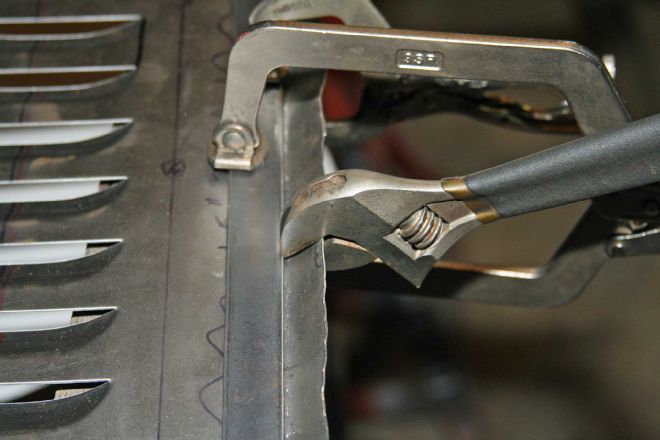 With the skin clamped to the perimeter, we started folding it over onto the frame. At the top and bottom edge of the panel, it’s easy—just bend a 90-degree flange—but down the sides it’s tricky because the panel isn’t flat. There’s a slight convex radius at the top, and a deeper concave radius at the bottom. When bending a flange along a convex (outside) radius, you have to stretch the metal, and you have to shrink it on a concave (inside) radius. A shrinker/stretcher makes this easy, while skilled metal workers can shrink the metal with tucking tools and skill. We have none of the above, but we do have adjustable wrenches! Taking small bites, working from the center out to the ends, will put a 90-degree flange along inside and outside radii without having puckers in the flange.
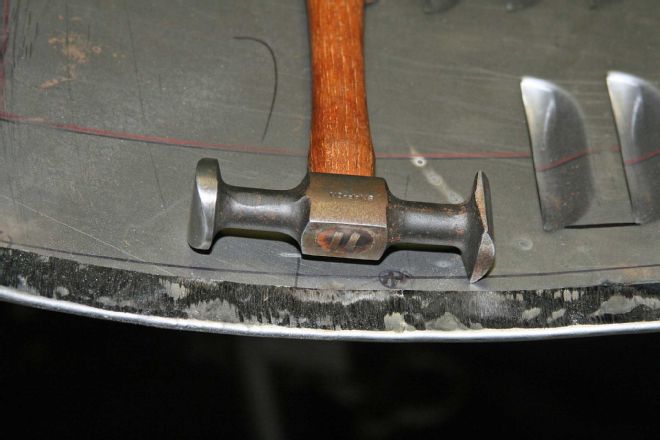 Once the 90-degree flange was made around the perimeter, we folded it over onto the frame. One of our most useful body hammers is this Snap-on radius-faced hammer specifically designed to work an inside radius. The two faces are offset, so you can work with the handle parallel to the curve (sitting next to a quarter-panel and working the fender lip with it in front of you, for instance), or perpendicular to it, with the handle parallel to the curve.
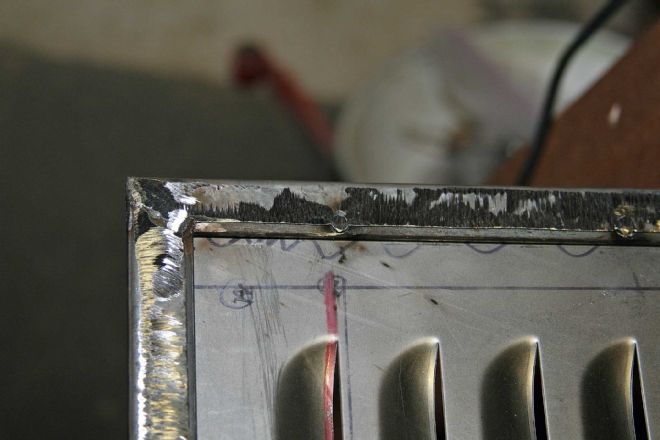 Once the flange was flattened along the whole perimeter of the frame, we trimmed the corners and welded them together, and tack welded the skin to the frame every several inches to secure everything.
 Instead of a lift-off decklid, we added simple NASCAR-style hinges in the upper corners. We made a template out of an old cereal box, then cut it out of 1/16-inch steel we had on hand. We wanted the hinges to be rugged and sturdy so the decklid won’t deflect when it’s opened or being opened.
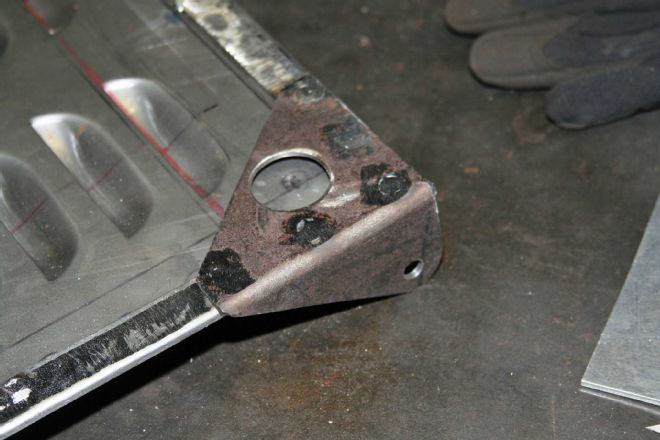 We plug-welded the hinge corners to the decklid. This design reinforces the whole corner, tying the sides in to the top edge. There’s no reason for the hole in the center of the plate, other than we thought it looked cool.
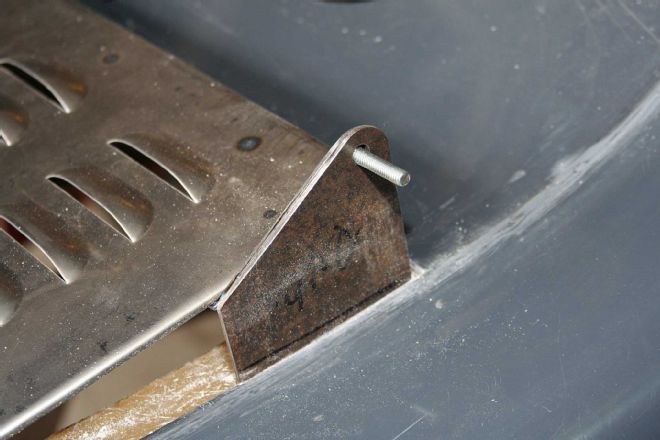 The other half of the hinge mechanism inserts into a slot we cut in the trunk opening’s flange. Once we get it fitted and everything dialed in, we will put a 90-degree bend into the lower section, and epoxy that flange to the underside of the body.
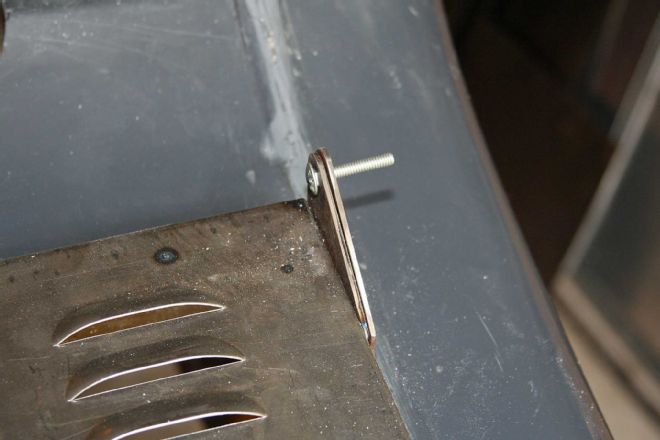 Here’s how the two halves will work once the body’s portion is permanently installed. We’ll use thin nylon washers between the halves to protect paint and keep things from binding. We don’t have the washers at this point, so we couldn’t do the final fitment.
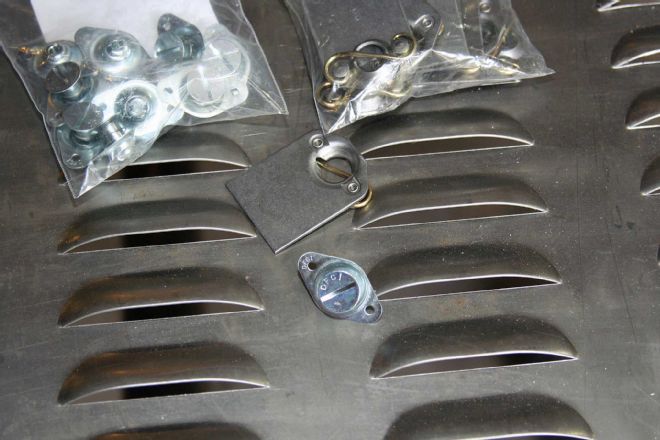 The bottom edge will use dzus fasteners. I talked to Uncle George about that, and he said dzus fasteners were common on race cars after the war, even in the Midwest, so it’ll maintain the traditional look we want.
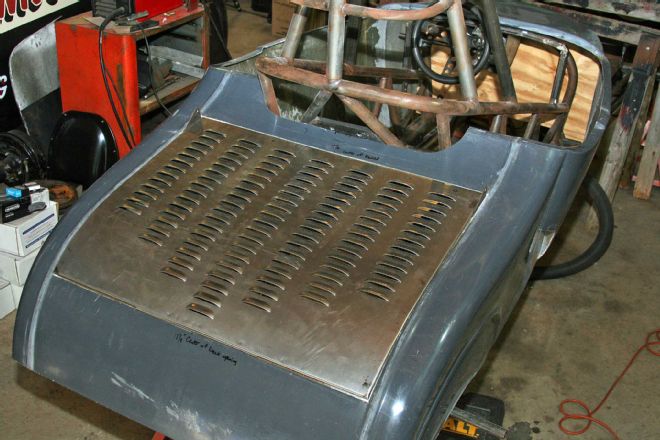
The finished decklid on the body. There are some dimples along the bottom edge, caused by an unseen welding booger on the pad of one of my Vise Grip welding clamps. I moved the clamps several times during the flanging process, and put a dimple in what was the down-side of the panel while I was working on it. By the time I realized it, the flange was folded over and there was no way to get it out without undoing a whole lot of work, and possible fatiguing the flange area and cracking it. Other than that, we’re very happy with the way it turned out.
The bottom edge will use dzus fasteners. I talked to Uncle George about that, and he said dzus fasteners were common on race cars after the war, even in the Midwest, so it’ll maintain the traditional look we want.
The finished decklid on the body. There are some dimples along the bottom edge, caused by an unseen welding booger on the pad of one of my Vise Grip welding clamps. I moved the clamps several times during the flanging process, and put a dimple in what was the down-side of the panel while I was working on it. By the time I realized it, the flange was folded over and there was no way to get it out without undoing a whole lot of work, and possible fatiguing the flange area and cracking it. Other than that, we’re very happy with the way it turned out.
Source:
Bright Star Hot Rods
(404) 304-3215