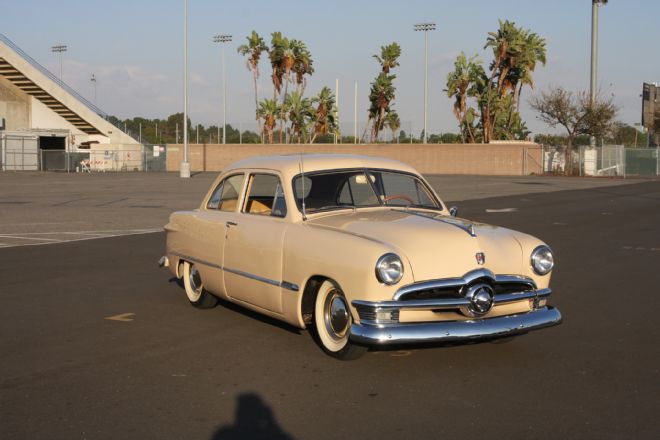
With the suspension sorted on our buddy Buck Lyons' 1950 Ford custom sedan, it was time to move on from the form to the function part of the rebuild. We successfully dropped the Shoebox a respectful amount so now it was time to ensure the old Ford can stop and steer as well as it can pose.
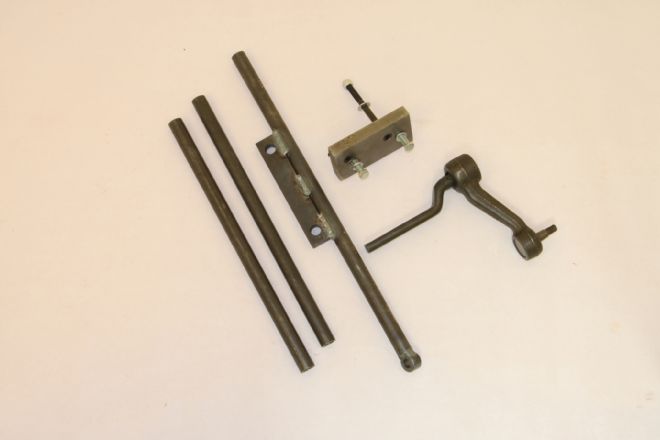
To handle the steering requirements, we again turned to Fatman Fabrications. New dropped steering arms were necessary to locate the tie rod ends back in their original location relative to the suspension now that the dropped uprights are in place. Additional steering complements will also be made to upgrade the weak center tie rod assembly as well as the stock idler arm, which tends to need a rebuild every 10,000 miles or so. Without a good steering box upgrade option for these cars, that's about as good as it gets. Which, as it turns out, is pretty good once it's all said and done!
Braking duties will be handled thanks to a full Engineered Components Inc. (ECI) kit that not only replaces the drum assembly up front with a disc setup, but will also replace the single outlet stock master cylinder with an updated dual outlet Ford Mustang unit. This will ensure that the Ford can retain its braking capabilities should it suffer from front or rear brake line failure. Speaking of the master cylinder assembly, the '49-53 Fords had a rather interesting setup when it comes to not only the master cylinder location but also the incorporation of the clutch linkage in manual trans applications. This makes a simple master cylinder swap a bit more complex due to its proximity to the transmission crossmember and the manner in which the brake/clutch pedal linkage shares the same real estate as the stock master cylinder. ECI has made the swap straightforward however, by relocating the new master cylinder behind the crossmember using a handful of brackets, spacers, and hardware. The result is a braking system that meets 21st century expectations, all the while packaged in a vintage vehicle.
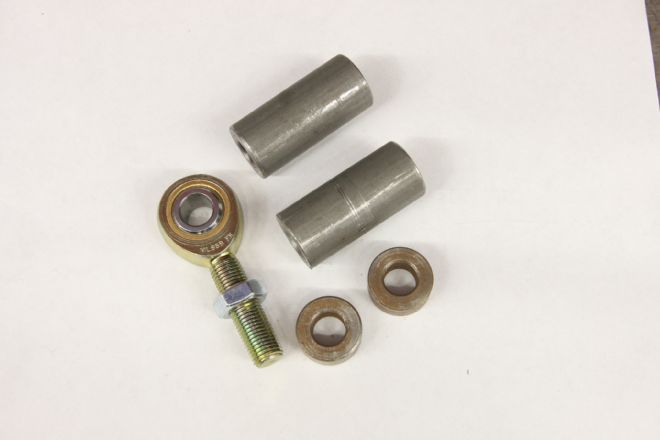
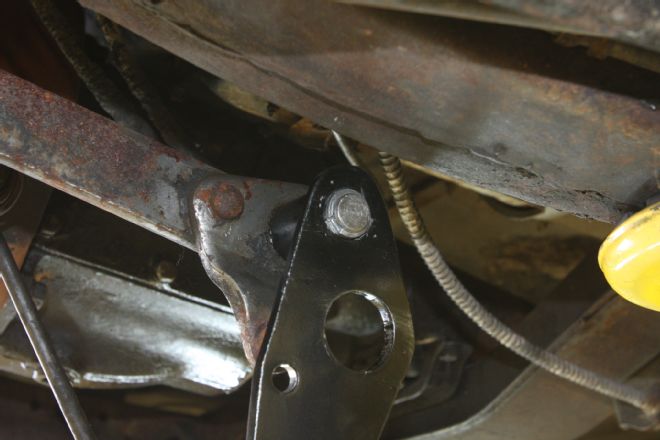
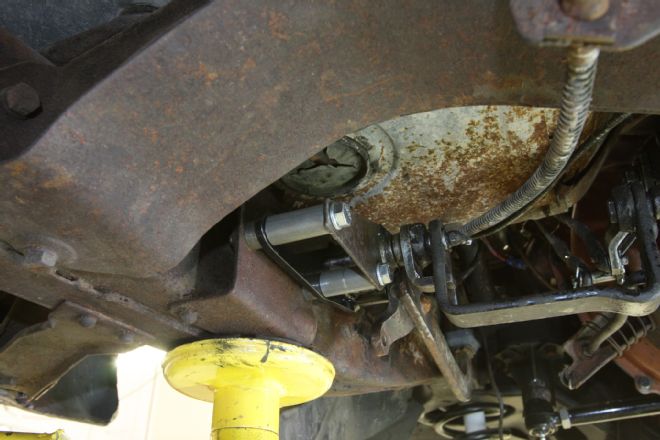
To solve the tie rod issue that plague these old Fords, Fatman recommends their fabricated tie rod assembly, along with a new idler arm (from a '77-88 AMC Concord). The idler arm bolts in the stock location, thanks to Fatman's idler arm adapter.
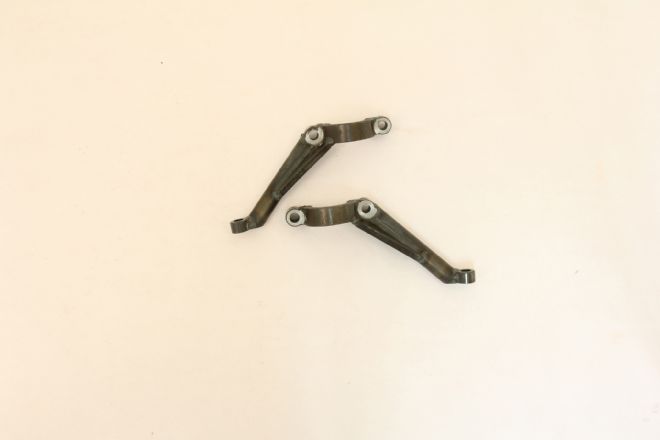
Dropped steering arms are necessary when using Fatman's dropped uprights to maintain proper steering geometry.
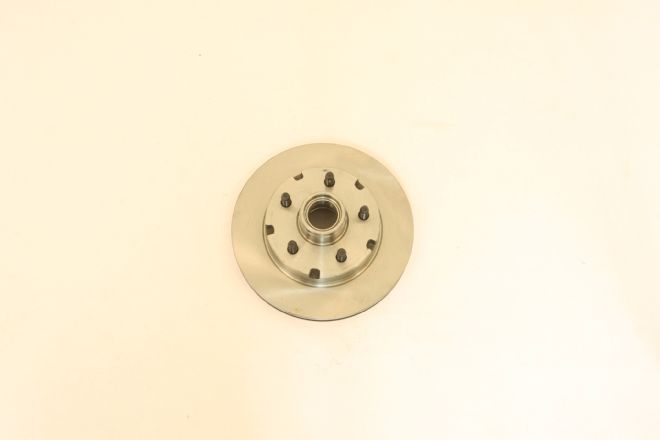
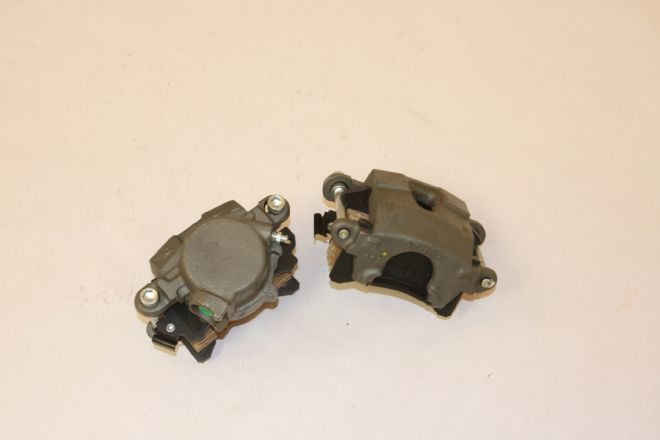
To get the old Shoebox to a quick and reliable stop in short order, we'll be using a kit from ECI. The kit (PN EC-721FCK) uses a pair of 11-inch rotors, coupled with big-piston GM calipers, and features a 5x4.5 bolt pattern, which will allow us to utilize the stock Ford wheels.
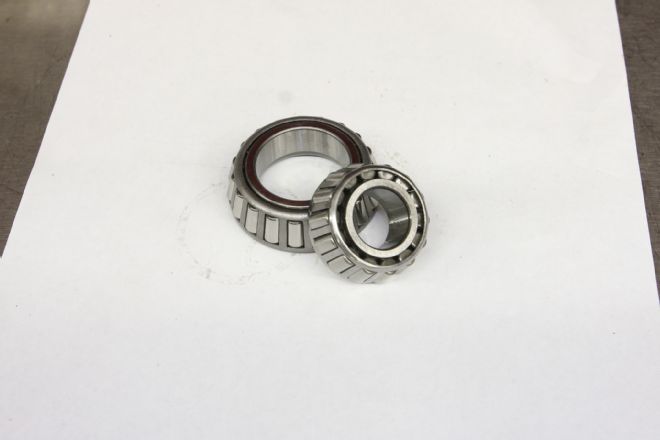
Inner and outer bearings, seals, and races are also part of the brake package ECI provides.
ECI provides a set of brackets and spacers that use the existing mounting holes on the stock spindles to mate them with the GM calipers. All necessary hardware is also included in the kit.
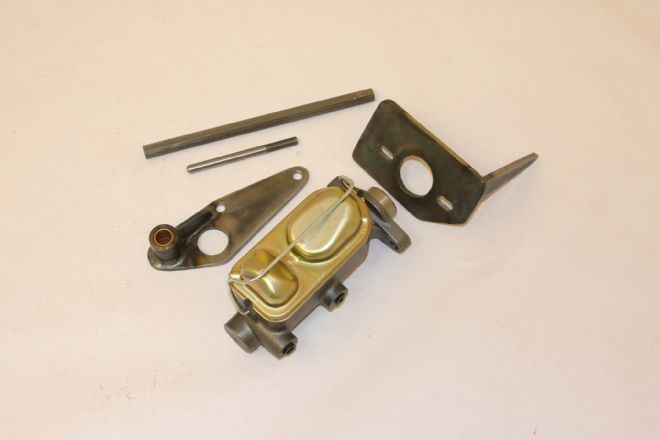
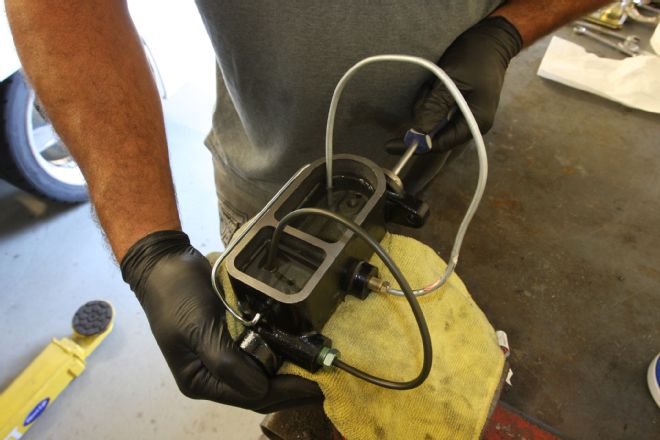
Adapting a modern dual master cylinder presents a challenge in these cars due to the transmission crossmember being directly behind the stock master cylinder; there simply isn't enough room. To solve this problem, ECI has assembled a kit (PN EC-450) that relocates the master behind the crossmember and utilizes the existing pedal assembly. Shown is the pushrod, extension shaft, rod end, brake pedal bracket and spacers, EC-445 Mustang master cylinder, and master cylinder relocation bracket.
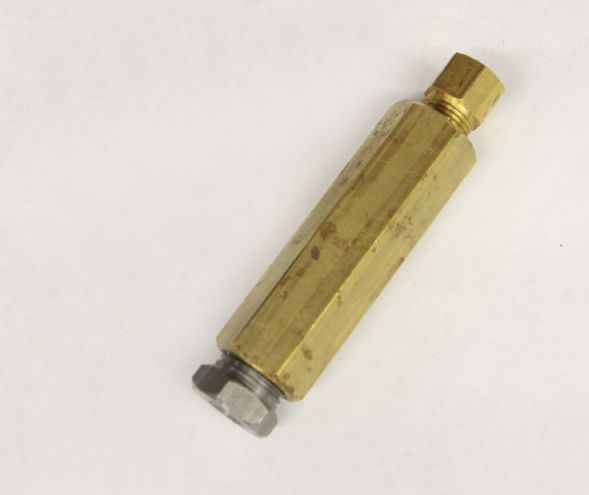
Since the master cylinder is mounted under the floor and doesn't feature a built-in internal residual valve for the front circuit, a 2-psi residual pressure valve must be installed as close to the master cylinder as possible in the circuit of the front brake line. This prevents the brake fluid from siphoning back into the master cylinder when the pressure is relieved. The Mustang master features a built-in valve for the rear drum brakes.
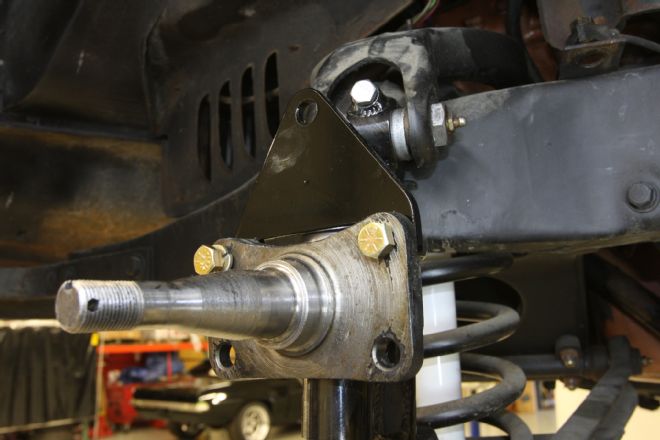
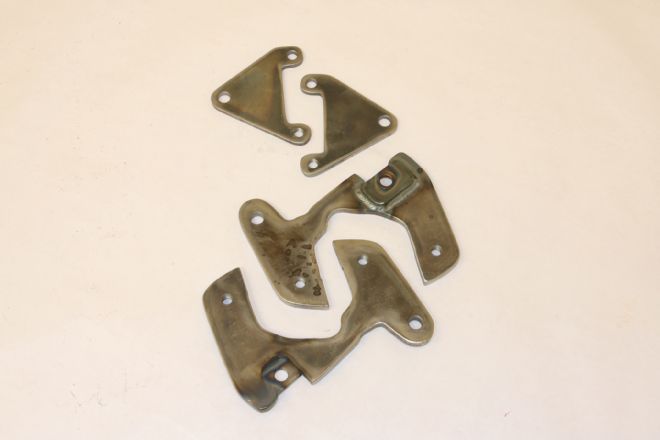
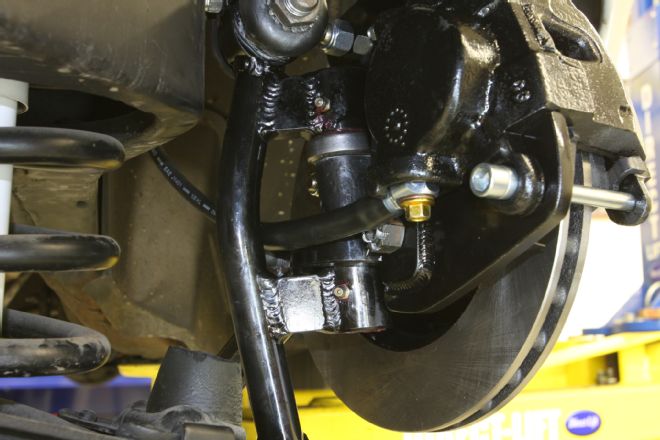
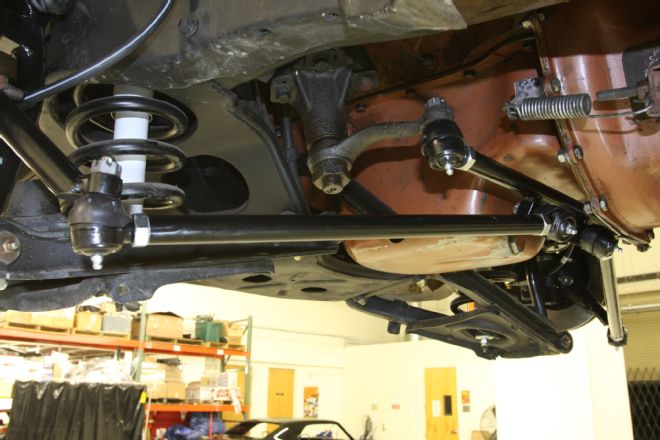
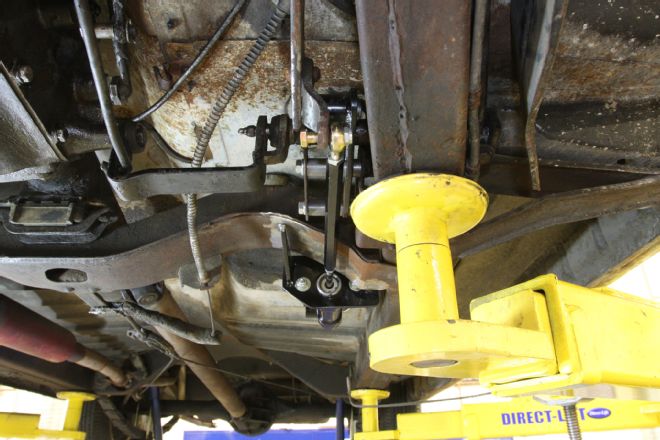
Here's where we left of last time, with the spindles in place, ready to begin bolting on our brake and suspension components. You can see the first part of this already in place, the triangular upper brake bracket from ECI. This attaches to the upper bolt holes on the stock spindle with the tapped hole of the bracket at the front.
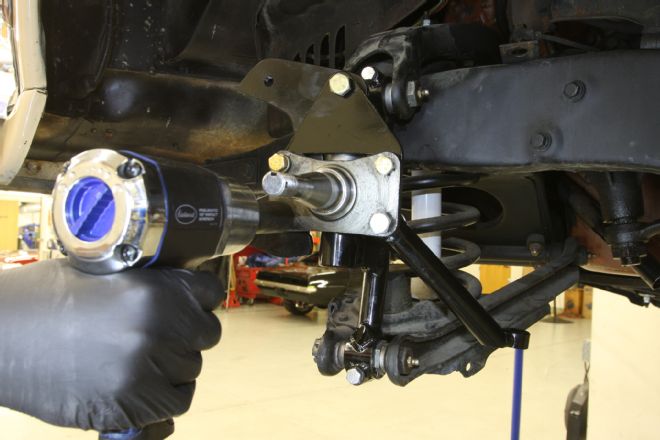
At this point, the dropped steering arms are installed as well using the lower bolt holes on the stock spindle. The steering arm is held in place using the rear bolt hole temporarily as the caliper bracket is installed. This is fastened in place using the provided tubing spacer via the upper bolt hole in the triangular bracket and the front spindle hole, affixing the steering arm in the process.
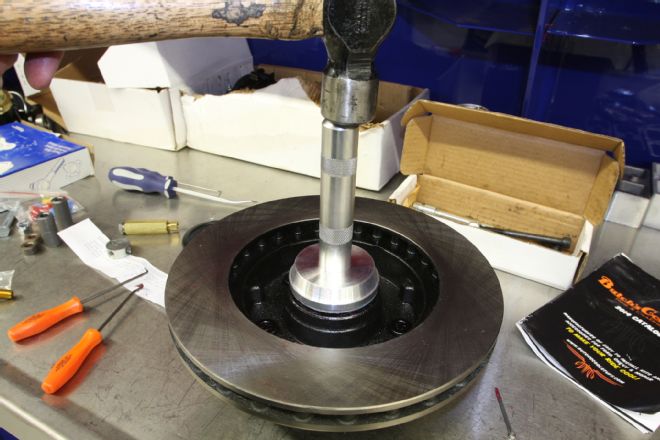
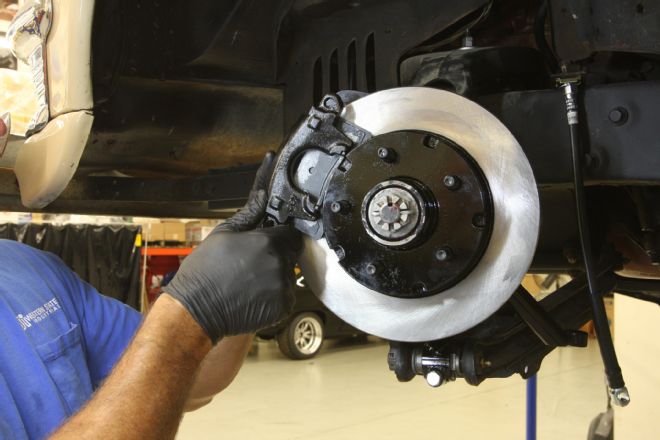
Next, the rotor is ready to be installed, but first the inner bearings are packed with high-temp disc brake bearing grease, inserted into the rotor, and then the inner grease seal is installed using a seal driver.
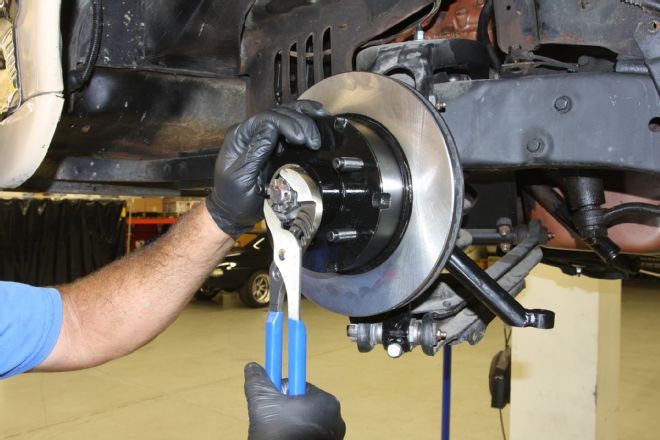
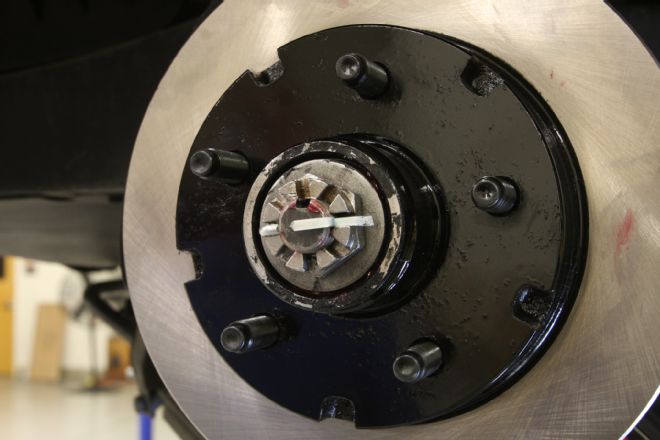
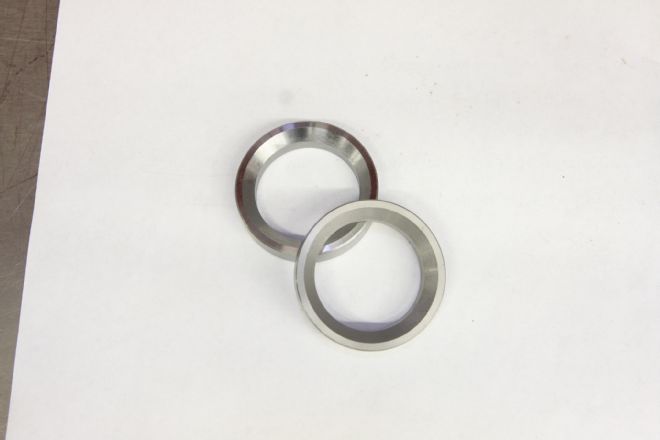
The rotor is then slipped onto the spindle following the installation of the larger diameter spacer provided in the ECI kit. The outer bearing follows, packed with the same high-temp bearing grease, as does the smaller diameter spacer, stock Ford washer, spindle nut, and cotter key.
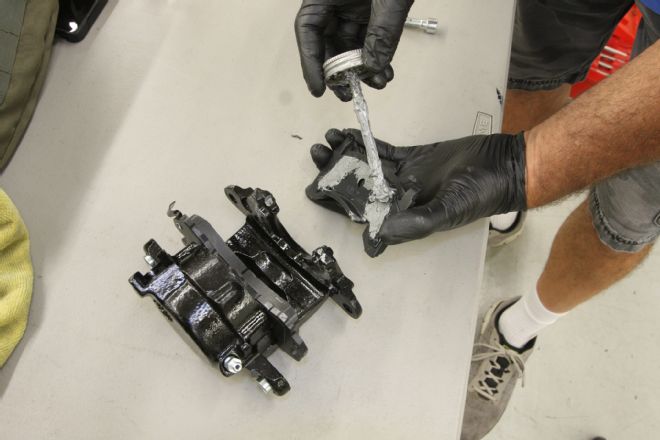
Before installing any disc brake caliper, I like to apply a thin layer of antiseize to the backside of the brake pads to prevent that dreadful disc brake squeal that can result from the pad and caliper piston vibrating against one another.
The loaded brake caliper is then slid into place and bolted to the ECI caliper bracket.
The provided brake hoses will clear all moving suspension parts throughout their travel is properly routed.
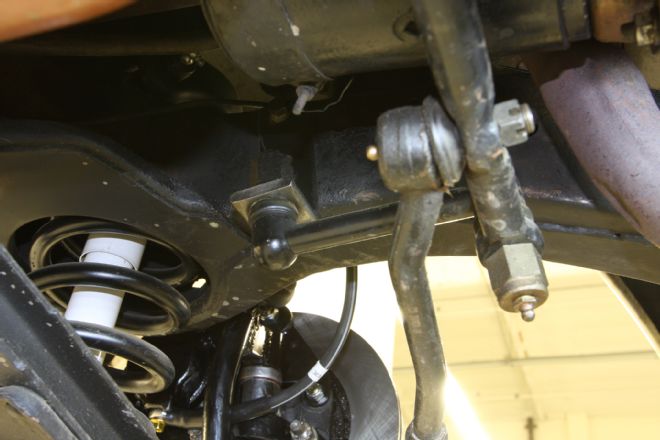
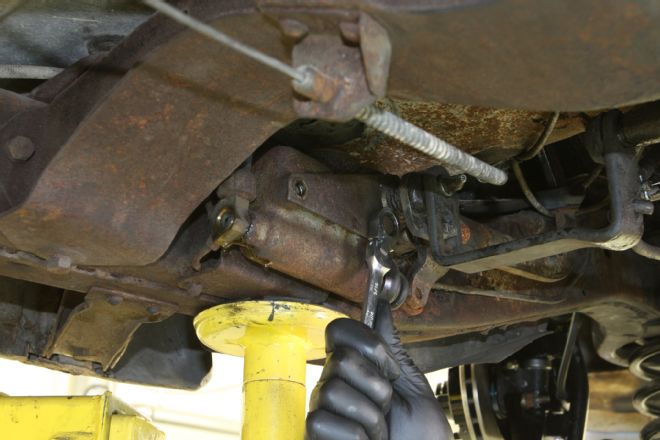
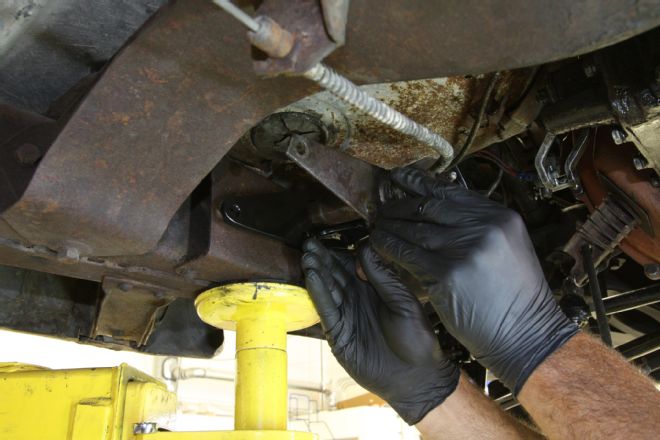
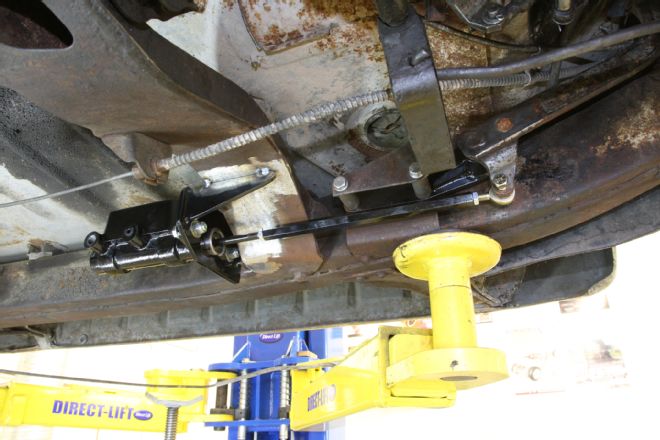
At some point in the old Ford's past, someone rebuilt the frontend and added an upgraded idler arm of sorts.
We're going to replace it with Fatman's AMC-based unit. First, the provided Fatman adapter is installed in the stock idler arm location, followed by the new, stronger AMC item.
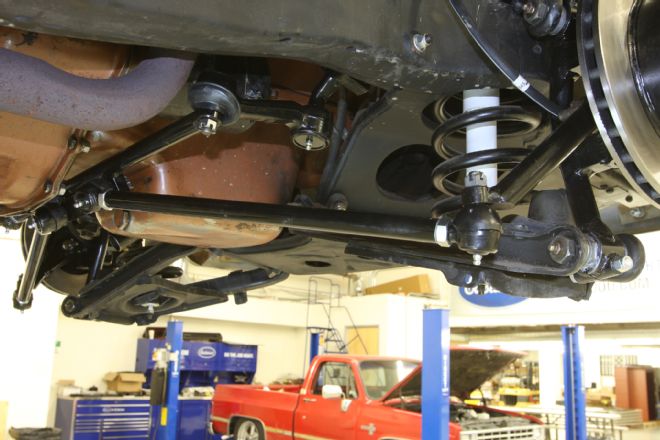
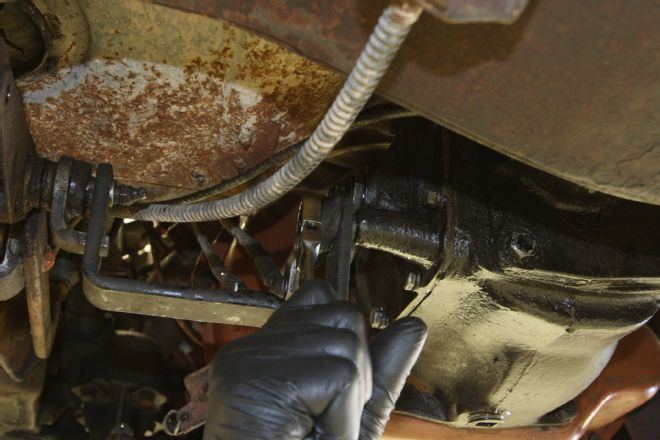
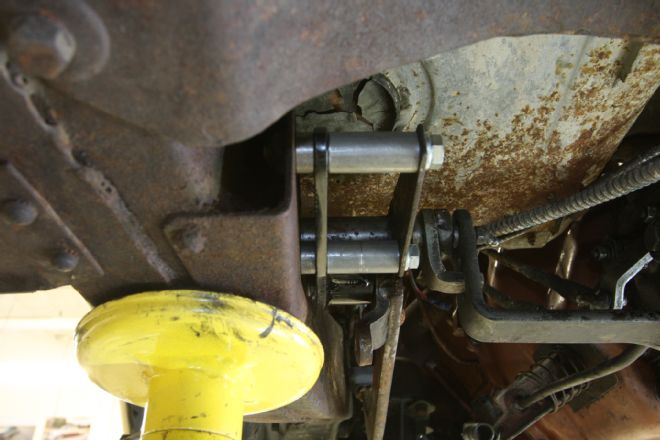
Next, the upgraded Fatman center link is bolted into place. Note the relation of the center block; it should face down toward the front of the car. The outer tie rod links can then be attached. All the tie rod ends are Moog '35-64 Ford parts (PNs ES416R and ES416L), which makes finding replacements when that old Ford racks up a couple hundred thousand miles as simple as a trip to the local auto parts store.
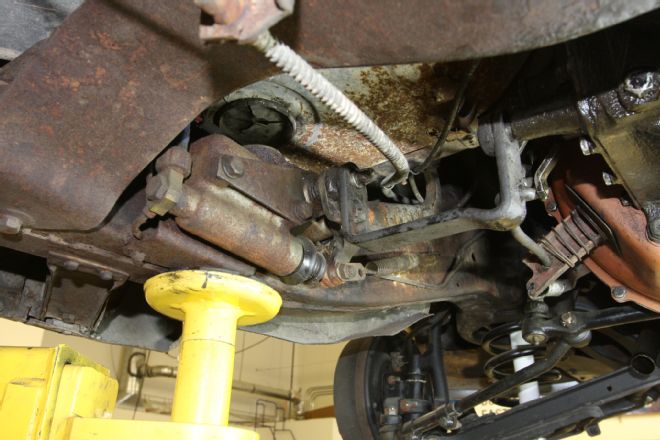
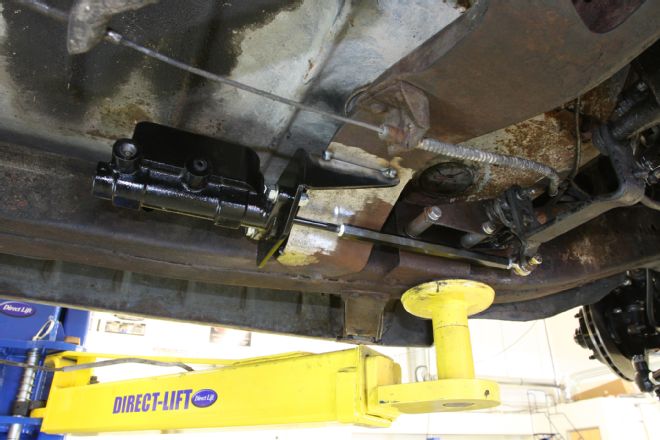
We're going to replace the single outlet master cylinder with a new dual unit from ECI. This will truly round off our reliable brake upgrade. Note the rather complex stock brake pedal setup.
The first step is to disconnect the brake line and remove the master cylinder. The brake pedal pushrod, pivot bolt, and return spring tab should be removed as well. The tab will be retained as it will be reused.
Removing the stock master cylinder requires the removal of a number of other semi-related components, including the clutch linkage assembly. The brake pedal pivot shaft incorporates a bolt of sorts that mates on one end to the clutch pedal (on the opposite side of the framerail as the brake pedal) and the clutch cross shaft on the other. The clutch linkage pivots off a boss on the side of the transmission, which we're disassembling here. Before the brake pedal pivot shaft, and therefore the master cylinder, can be removed, the clutch linkage needs to come out.

With the clutch assembly out of the way, the "C" clip and washer can be removed from the brake pedal pivot shaft and the master cylinder can be removed.
With the stock master cylinder out of the way, the brake pedal pivot shaft is thoroughly cleaned before reinstallation begins.
With the stock components cleaned up, the ECI brake pedal bracket is installed on the pivot shaft using the stock "C" clip and washer.
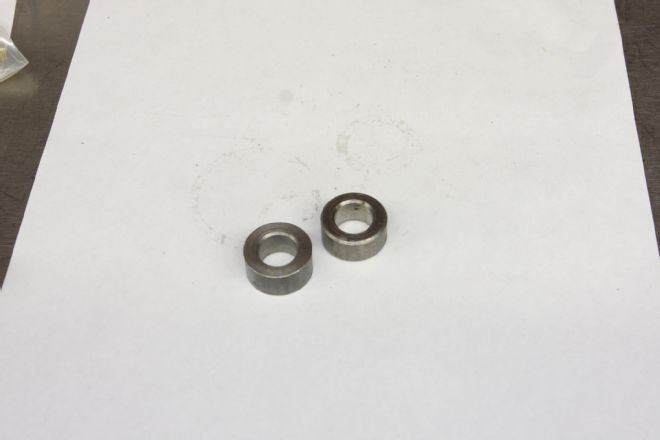
Manual trans applications use the two 3/8-inch spacers provided in the ECI kit between the framerail and the ECI pedal bracket, and the 1-5/8-inch spacers between the bracket and the stock Ford clutch cross shaft support bracket.
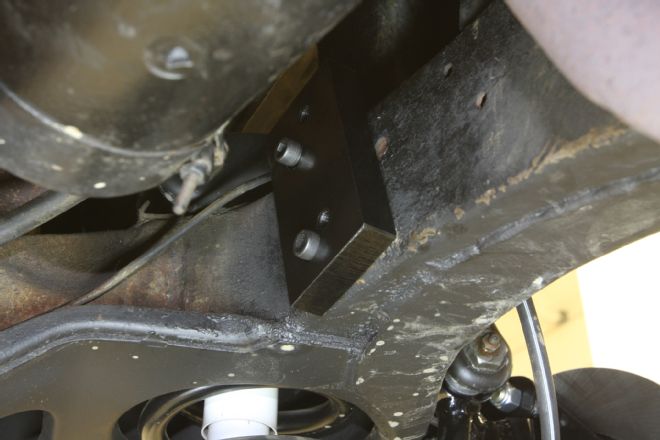
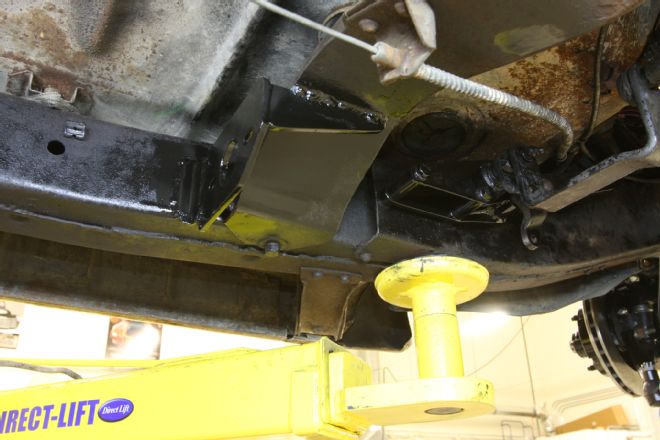
Next, the master cylinder mounting bracket is tack welded into place.
Note the position of the bracket in relation to the framerail as well as the crossmember.
We installed the pushrod assembly at this point to ensure that the bracket is perpendicular to the centerline of the vehicle.
Once everything checks out, the bracket is finish welded and the whole assembly is hit with a couple coats of Eastwood Chassis Black paint.
Before the master cylinder is reinstalled, it's bench bled thoroughly to ensure the system is free of air bubbles once it's installed.
The existing rear brake line was spliced to mate to the new master cylinder location, while the front brake lines were totally replaced. The inline residual pressure valve for the front brakes is shown, mounted near the master cylinder.
At the end of the day, Buck's old Ford is looking more like a street rod and less like a restoration. And if the photos don't speak for themselves, the numbers don't lie; a full 3-inch drop was gained out back and a good 2-1/2 inches were trimmed from the car's altitude up front. Not bad for a day's work.