Buying someone else’s partially finished project car can be a great way to start your own build, since you’re getting the parts and sweat equity that they invested in the car before they lost interest in finishing it. That’s often a good thing, but on occasion the dream might be different than reality, and that’s true in the case of our Project ’68 convertible.
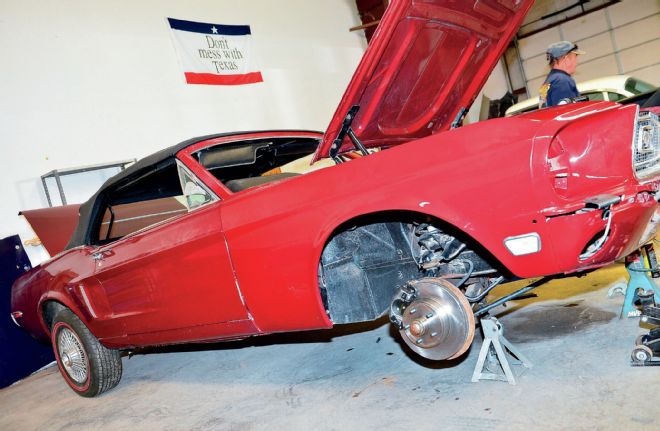
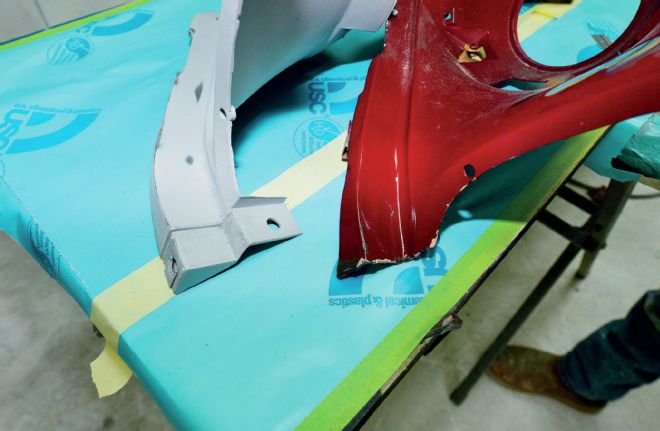
I bought Project ’68 in pieces, so there were no guarantees that everything was as good as it looked on first inspection, but my ace in the hole was that the car had a complete and beautiful paintjob, or so I thought. The front sheetmetal looked to be painted the same color as the body, but it wasn’t installed when I got the car. The thought was that if I could bolt this thing together I would have a restored Mustang for a heck of a deal. That was the dream, but after Tom Anderson bolted on the front fenders, grille, headlight buckets, valance, and bumper, our jaws literally dropped. How could paint not match from doors to fenders to headlight buckets? “It looks like two people painted this car,” Tom said out loud while I was saying the same thing in my head.
So far, I had been assembling Project Mustang with limited professional help. A bunch of friends helped me drop the engine into the chassis one afternoon and that was fun, especially when the 289 fired up and the car ran. But when Anderson bolted on the fenders and saw my heart sink, he consoled me by saying, “Jerry, you’re a friend. You don’t owe me a thing.” My ’68 Mustang was starting to look like a car and I was dreaming of driving this baby real soon, but now I had to paint the body? The light at the end of the tunnel turned darker than my B-code Royal Maroon paint.
The color mismatch became painfully obvious when we bolted the fenders to the chassis. The doors were a dark maroon and the fenders were light maroon—it made me laugh and I contemplated selling the car, but nobody was interested. The color mismatch made the ’68 look like a beast. Then I remembered meeting Jason White at a Mustang car show. White had a restoration shop (Jason White Customs & Restorations in Hereford, Texas), and he was into ’68 Mustangs, building a Highland Green ’68 Bullitt for himself while also owning a couple more ’68s, so I consulted with him on my convertible. Good painters see the world through a different set of eyes. White looked at Project ’68 and noticed more than a color mismatch; he noticed some panels were clearcoated while others were done with a single stage (no clear). More bad news was that the Royal Maroon paintjob had picked up scratches and chips over the past year, moving the car from shop to shop as I farmed out jobs. These areas required repairs and complete removal of the paint. “We’d best repaint the whole car,” White said.
I decided to go ahead with the paintjob when White gave me the good news that the body panels were straight, so a repaint would be pretty straightforward with no necessary bodywork. Our plan was to spray basecoat/clearcoat using Matrix paint from Crazy Colors in Lubbock, Texas. White pointed out the added durability of basecoat/clearcoat, along with modern UV protection—older urethane-based enamel paint would fade much sooner. “You might get four to five years out of an enamel paintjob, compared to 20 years out of a basecoat/clearcoat,” he said. So, Project ’68 has a fresh paintjob, which wasn’t expected, but turned out great and has put my mind at ease with the car.
01. JA bad color mismatch and a few chips cried out like a baby for a professional painter to fix.
02. Jason White solved our painting problems in his shop, Jason White Customs & Restorations in Hereford, Texas.

03. White began wet sanding with 600-grit, scuffing the entire surface until there were no shiny spots. The body was straight, so no bodywork was necessary, and I was really encouraged when White said he could sand a classic Mustang by hand in three hours.
04. Wet-sanding clear creates a white film, as seen here. This panel is one that had been painted with basecoat/clearcoat.
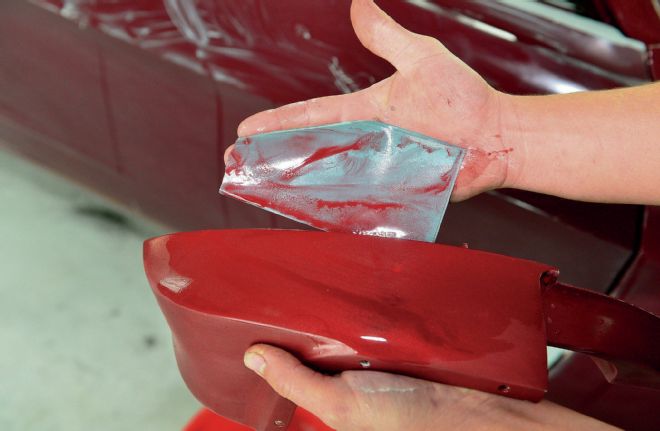
05. Wet-sanding paint without clear—like this headlight bucket—leaves body color residue.
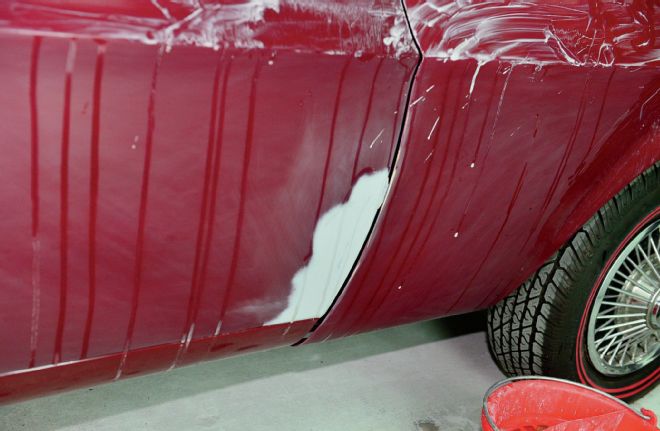
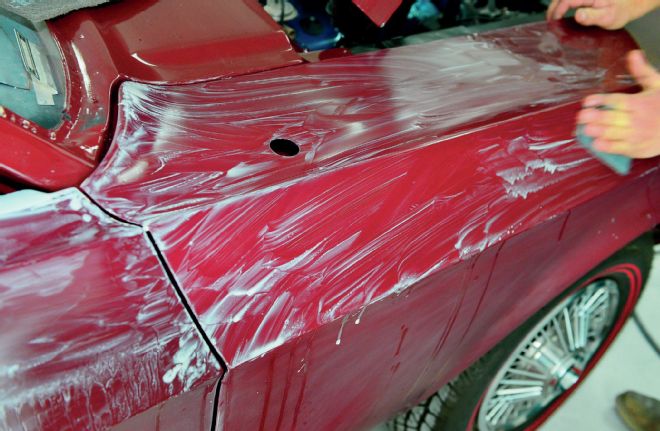
06. White repaired all the chips in the paint, including this long chip on the front edge of the passenger door. No bodywork was required, just sanding, feathering, and primer.
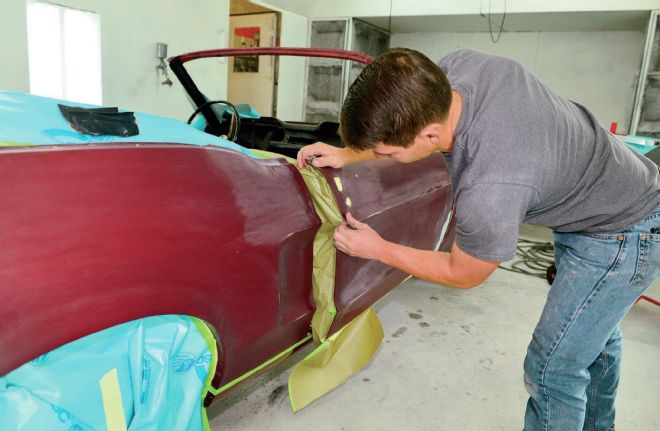
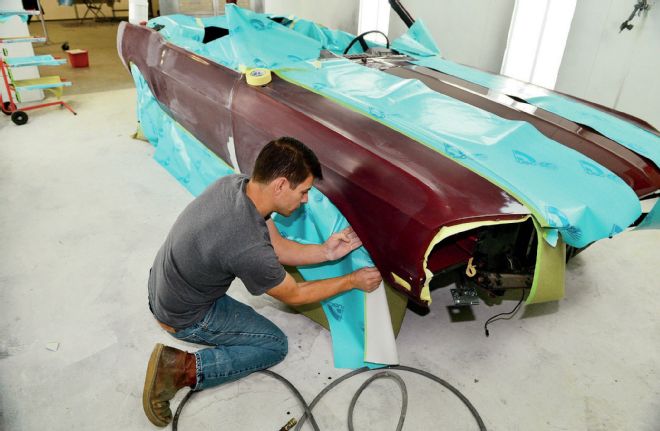
07. White taped off the whole car for the repaint, including the doorjambs.
08. Tape door and lock cylinder holes to prevent paint from blowing inside the door and stirring up dust that will get on the paint.
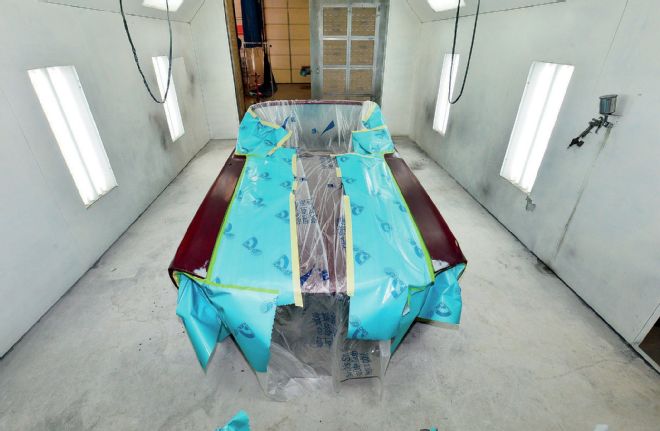
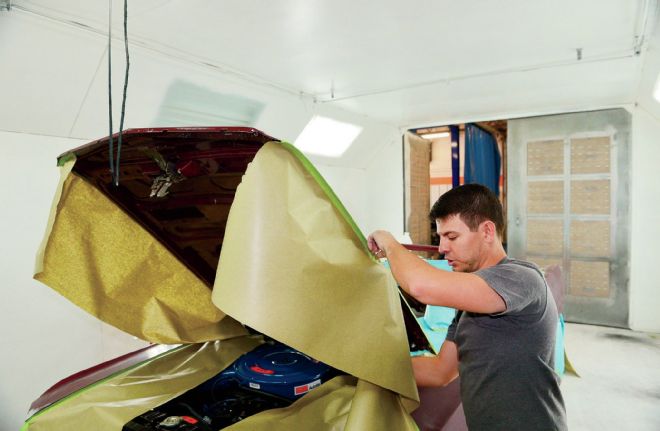
09. Because we’re spraying a clearcoat and clear penetrates masking paper, White used plastic to tape off the hood, which was painted off the car while it sat on sawhorses.
10. This rear view shows how the car was taped off, including the trunklid that had already been painted with the hood.
11. White made sure to tape off the previously detailed engine bay to keep it safe from any overspray.
12. Cleaning and taping wheelwells is vitally important since there’s a lot of dirt buildup in these areas. A paint gun is guaranteed to blow it all loose and get it in the wet paint.
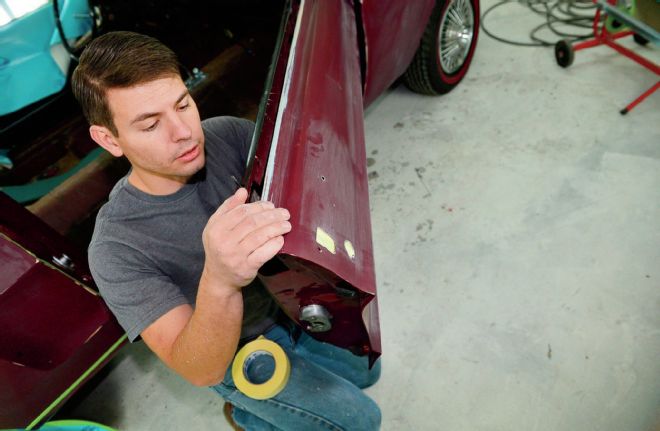
13. The end of one of the headlight buckets was cracked. The metal is cast so welding it is usually an exercise in futility, and even though Anderson gave it the good old college try, we had to get another one.
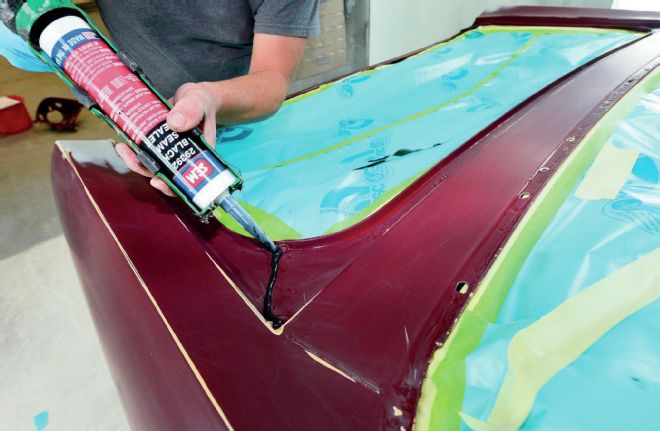
14. White squeezed seam sealer over the interior trunk welds and then spread the sealer over the welds with his fingers, the same as the factory did in 1968.
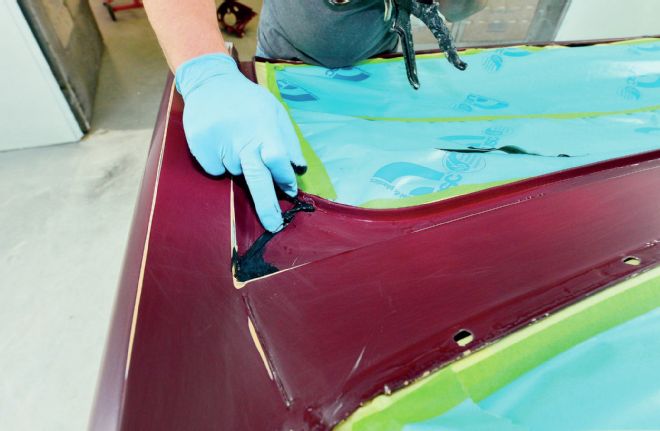
15. White squeezed seam sealer over the interior trunk welds and then spread the sealer over the welds with his fingers, the same as the factory did in 1968.
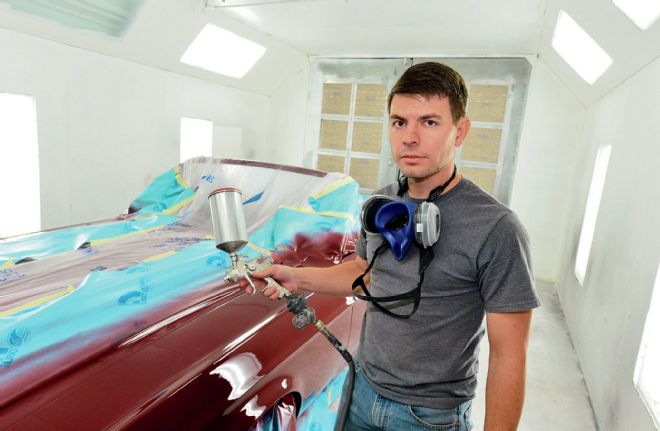
16. The few chipped sections of the paint, such as the leading edge of the passenger door seen here, required sanding and then a coat of primer, but no filler or putty was necessary.
17. Many areas of the body needed primer.
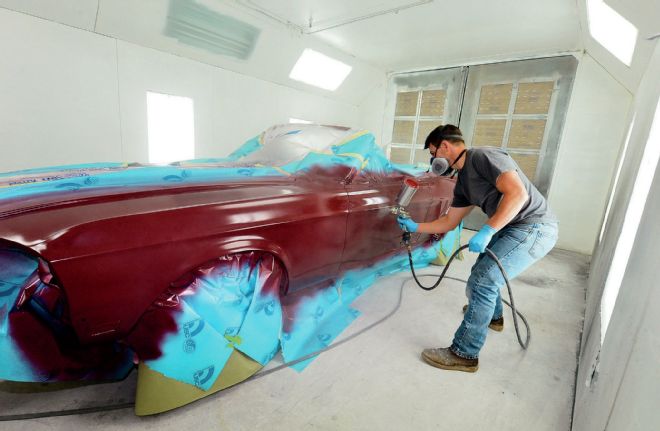
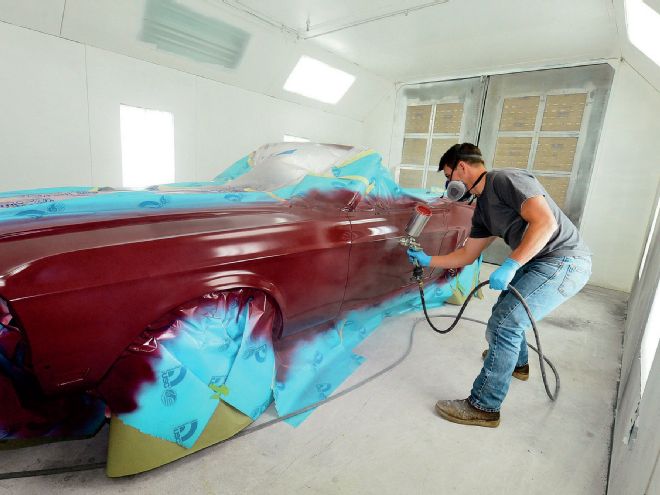
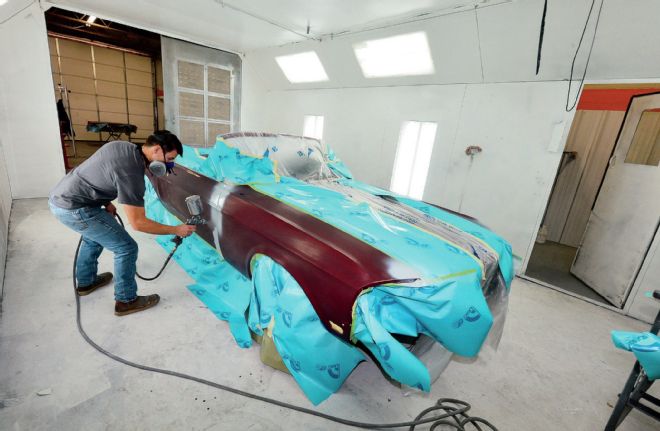
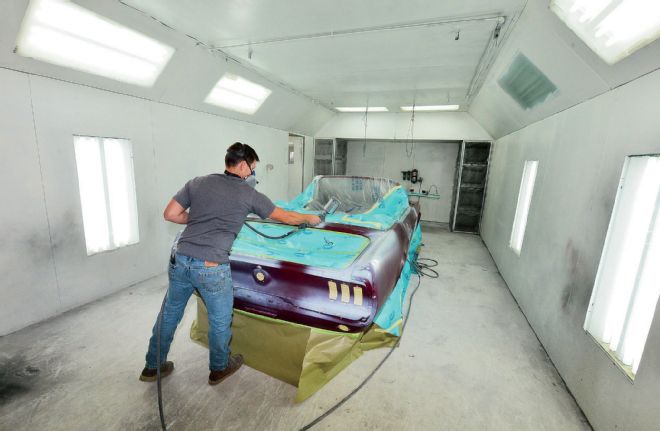
18. White shot two coats of Royal Maroon basecoat over the body, which featured both primer and scuffed up paint.
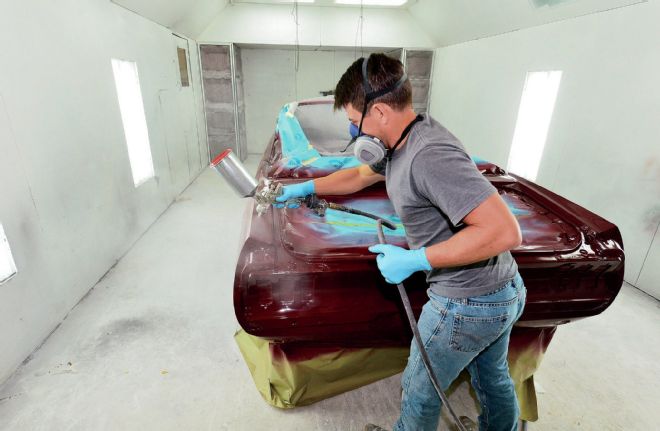
19. Finally, on went the clear.

20. I felt a great sense of relief and wonder to see Project ’68 professionally painted in White’s paint booth. The dream is one step closer to reality.