When restoring any area of a classic Mopar, it's always the details that separate the just OK jobs from the really nice ones. When thinking about an interior resto, naturally the seat covers, door panels, and carpet come to mind as they take most of the abuse over the years.
...they tend to hold up fairly well over the decades. That is until you put them right next to a fresh set of seats.
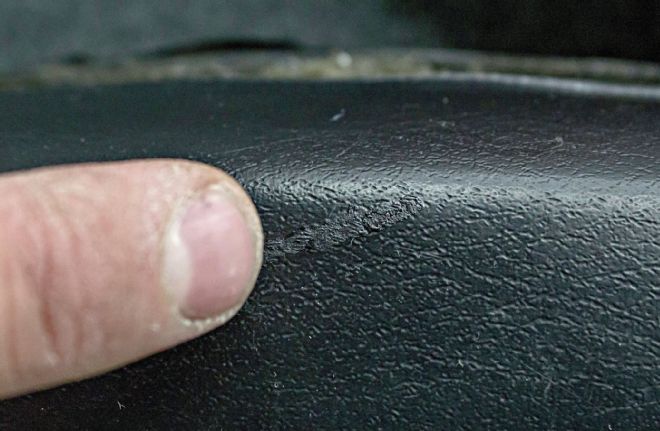
Headrests, on the other hand, are mostly (and literally) above the mistreatment that the rest of the interior has to endure. No one puts muddy shoes on them. No one sits on them and, in fact, relatively seldom does anyone ever really rest their head on them. In other words, they tend to hold up fairly well over the decades. That is until you put them right next to a fresh set of seats. That's when the effects of greasy hairstyles, cigarette smoke, and the accumulation of any number of vinyl care products can be clearly seen.
Of course, reproduction units are available, but unless yours have some major damage, you will likely be able to keep your original parts in the car and save yourself more than just pocket change in the process. What's different about restoring headrests is that while they look like the seats, they are really built more like the dashpad. Instead of a slip-on vinyl cover, their vinyl is bonded to a fairly hard foam core and it's not supple like a seat cover, but much stiffer—almost approaching a feel that's more like plastic.
What that means is that the vinyl cannot simply be replaced. It has to be repaired and refinished. Fortunately, the guys at Muscle Car Restorations have been restoring these for decades and have sorted through all the different products and processes to figure out what works the best.
Instead of a slip-on vinyl cover, their vinyl is bonded to a fairly hard foam core...
The headrest on the left is not a new one, but rather the restored mate to the one on the right. Hundreds of dollars can be saved with a little effort and some tips from professionals. That's where Muscle Car Restorations comes in ...
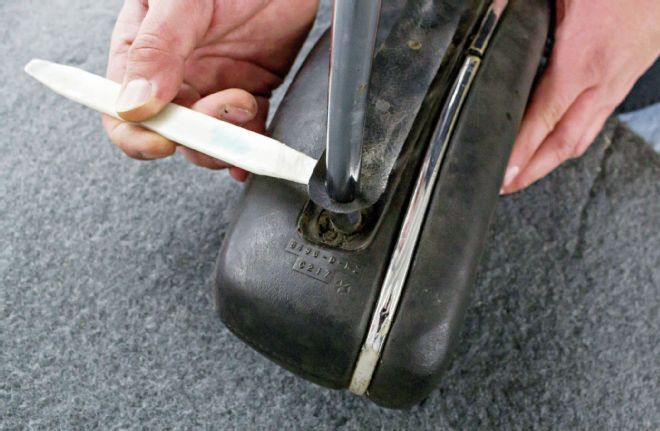
Start by using a non-pointed nonmetal soft tool to lift off the small vinyl cover on the bottom side of the headrest. These are often not salvageable, but you'll want to get it off in one piece if you can so it can be used as a template to cut a new one.
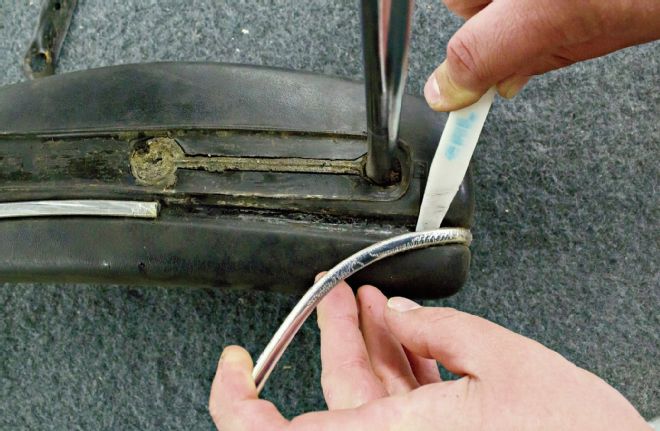
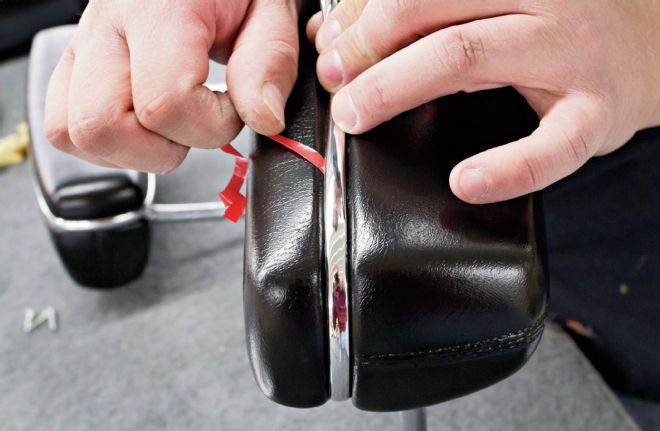
The chrome trim generally comes off with little effort but do be careful not to tear the underlying vinyl.
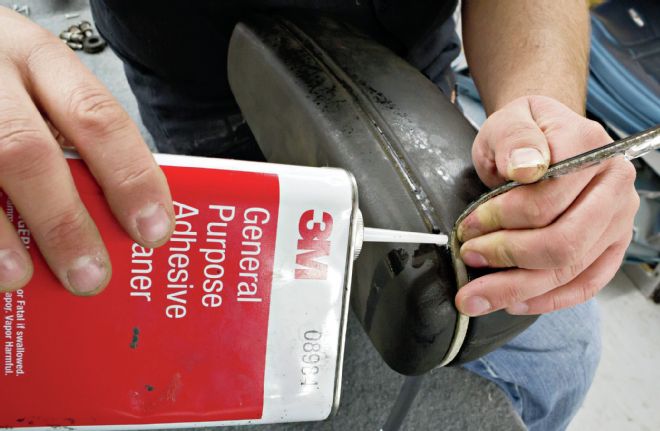
If a tough spot is encountered, a small amount of an adhesive remover will soften the glue enough to finish removing the trim. Don't rush and risk tearing the vinyl in the channel. Also, do not apply heat to try to loosen the glue as that could cause the vinyl to release from the mold and totally ruin the part.
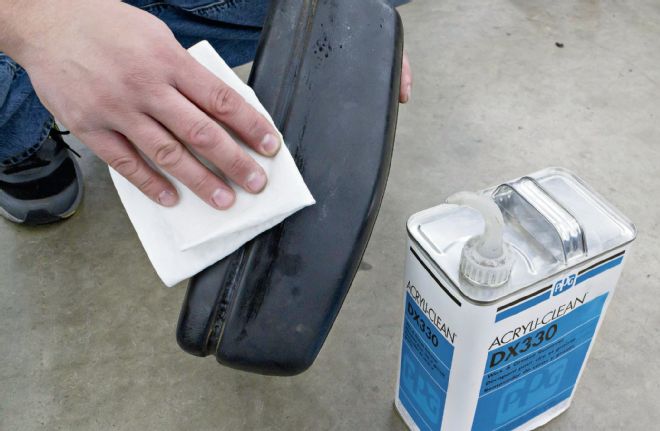
Muscle Car Restorations starts with PPG DX 330 Acryli-Clean to remove any grease, oil, pot smoke residue, or whatever other vinyl care products may have been applied over the years.
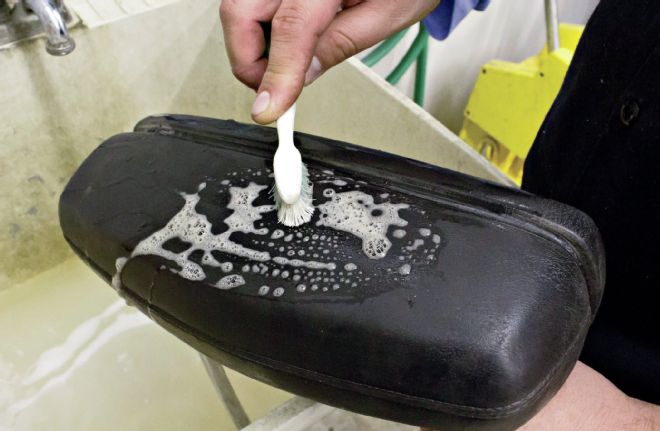
Step two in the cleaning process is to use some Dawn Dish Soap and water, and a small soft bristled brush. Scrub gently but thoroughly, then wipe off with a soft cloth and repeat until the suds wipe off clean. Do not soak the headrest. A larger majority of owners smoked in their cars back then, so you may be surprised at how much dirt will come off. The goal of course is to get it as clean as possible so the vinyl paint can properly adhere.
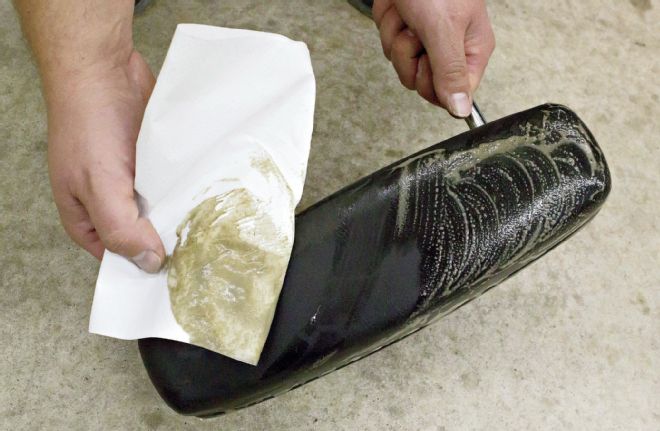
One might think that the Acryli-Clean would have been enough, but check out what the first pass of Dawn loosened up from the surface. If the vinyl paint doesn't stick like you'd expect, this could be why.
...it's not supple like a seat cover, but much stiffer—almost approaching a feel that's more like plastic.
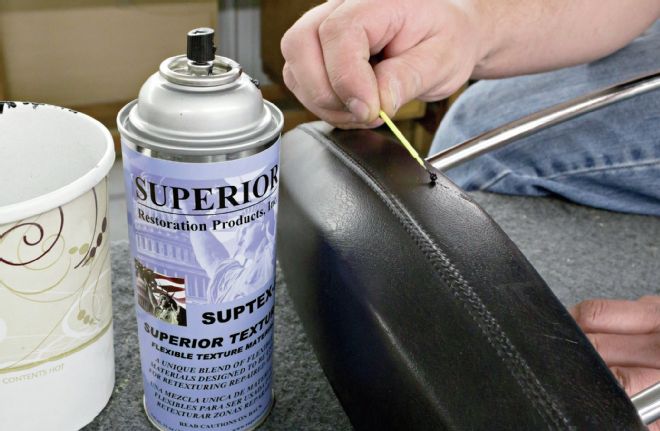
Small scratches are repaired by dabbing in a small amount of Superior Restoration Products Suptex-A into the scratch. It's not necessary to fill the scratch completely as you are trying to match the surrounding texture.
After about 20-30 seconds, press the Suptex into the crack with a finger. This will push it deeper into the scratch and help it to be more uniform to the rest of the surface. Don't try to overly smooth out the repair as, again, it also needs to match the surrounding texture.
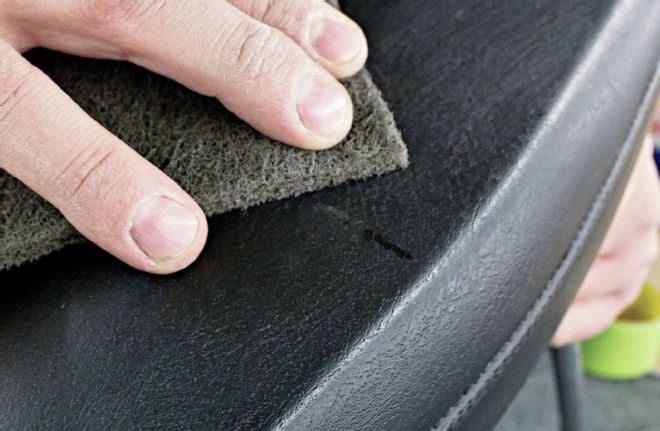
Once dry, the repair can be finished by scuffing the area with a gray Scotch-Brite pad. If necessary, the repair can also be gently wet sanded with some 1,000-grit paper.
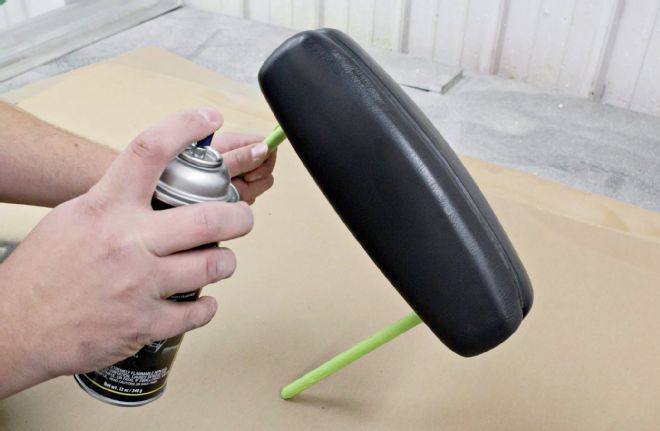
After running a gray Scotch-Brite over the entire headrest, a light to medium coat of interior paint is applied, such as Herb's Parts Interior Paint or SEM Color Coat. It is a flexible elastomeric coating designed for vinyl and plastic. Once dry and scuffed with the Scotch-Brite pad again, the final medium coat is applied.
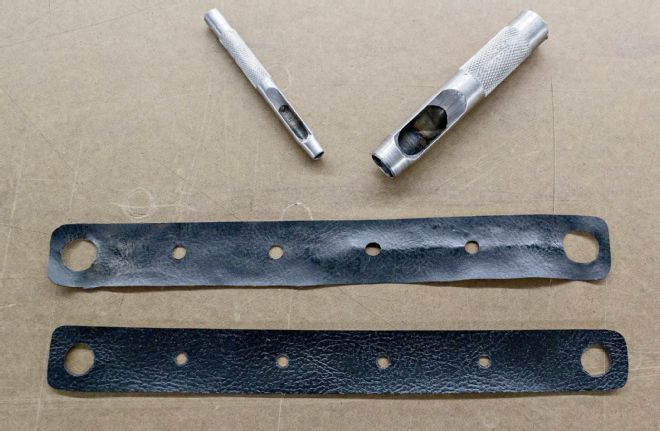
The original bottom piece is used as a template to make a new one from a scrap piece of vinyl. Gasket hole punches are used to make the holes. It can be glued in place with some upholstery adhesive or similar contact type product.
The chrome trim is actually available at many auto parts stores. It is Cowles Custom Chrome Molding in the 1/4-inch size. It uses a 3M tape so just peel and stick and be sure to leave the seam at the bottom.
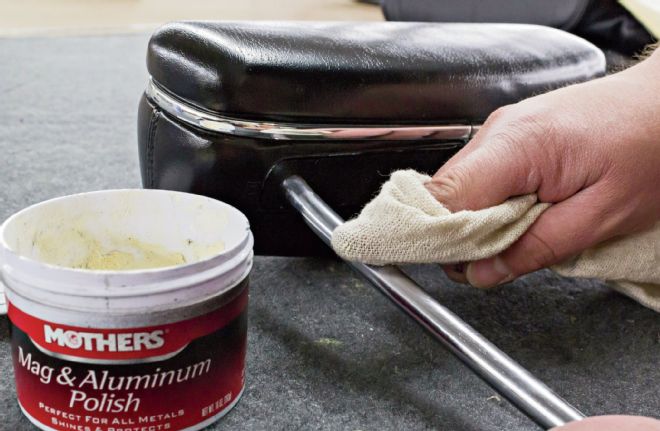
The final step is cleaning up the posts with your favorite chrome polish—we prefer Mothers Mag &: Aluminum Polish