Alan Johnson has studied the 1932 Ford Deuce and in the process he has mastered the fine art of subtle modifications. Many of the changes Johnson makes to a Deuce go unnoticed to the untrained eye, and even those steeped in Deuce knowledge often miss some of the details. The end result is a '32 Ford that "just looks better than it should."
Because the unique framerail on the '32 Ford is also an exterior body panel, the chassis follows the outer line of the car very closely, and the contours of the body are repeated in the shape of the framerails. While this makes for a great looking car it also poses some problems, not the least of which is the rear framerail limits the width of the rear tire.
Of course the solution here is to step the framerail inboard to provide ample room for a good size rear tire. We're not talking pro-street, just an aggressive size rear tire to harness all that hot rod horsepower.
The typical approach to such a problem would involve moving the framerail inward where it passes through the wheelwell, then back out to align with the rear body mounts and the all-important Deuce gas tank, basically a double-step approach. But, once again the Professor of Deuces discovered a much more subtle way to achieve the desired effect.
When Johnson steps the rear frame of a '32 Ford it involves only one step in front of the rear tire. He discovered a way to move that portion of the framerail inboard without a second step behind the tire and the stock gas tank still bolts in place. It's really very simple once you see how it is done, but then most really good ideas look simple after the thinking has been done. It seems that the stock frame actually travels inward as the rail moves rearward toward the gas tank. By removing this gentle arc out of the rear portion of the frame you are able to move the framerail in the width of the framerail and still have the stock gas tank mounting points at the rear of the frame.
Johnson's Rod Shop has a frame jig so making cuts and keeping the frame perfectly square is no problem and the frame jig also has precise locators for the rear framehorns. If you are doing this modification at home be certain to tack weld crossbracing in front of the cut to ensure the frame does not move in the process and you will also have to build a fixture to precisely locate the rear framehorns in relation to the main chassis.
 Work begins with a stock dimension ’32 chassis in the Johnson’s Hot Rod Shop frame jig. The chassis has been boxed and the center crossmembers are in place.
The location of the forward cut is approximately 8 inches forward of the axle center, while the rear cut is 1 inch in front of the forward gas tank bolt hole. After scribing lines on the frame, a cutoff wheel is used to make a perfectly square cut, removing the rear portion of the frame in the process. After the rear portion is removed it is time to de-arc the piece. Two cuts are made with the cutoff wheel through three sides (inside, top, bottom) of the boxed piece. Then using a flat surface and large C-clamps the frame section is clamped down until it is perfectly straight. Once the piece is perfectly straight the cuts are tack welded. Certain they are in proper alignment the two cuts are TIG welded and ground smooth.
Now it is time to reattach the modified rear frame section to the chassis. Since a 1/4-inch steel plate will be used to join the two pieces, the framerail is shortened 1/4-inch using a cutoff wheel. With both pieces in the frame fixture, the 1/4-inch plate slips between the two framerail ends and is tack welded in place. Since the rear of the frame is bolted to the frame fixture alignment is assured, but in a homebuilt fixture it still pays to take measurements before final welding.
With the frame stepped and joined by the 1/4-inch plate a transition piece is cut to form the angle between the front and rear frame pieces. Rather than simply use this piece to connect and contour the two frames together, Johnson's Rod Shop prefers to cut three triangular gussets and TIG weld them on both sides of the splice area. This makes that joint exceptionally strong. After the gussets are welded in place the outer pieces are welded in place on both sides of the step. After grinding the welds smooth, the frame looks like one piece again and with the internal bracing there are never any worries about structural integrity.
After both sides are complete the tubular rear shock absorber crossmember is cut to fit the new framerail width and welded in place. The frame stepping process is now complete and you'll find an additional 2 inches for your tires, along with a stock gas tank and a frame that doesn't look "cut up." Of course to utilize this additional rubber room you will have to build wheelhouses on your body that move the wheelwell inward 2 inches.
The real reward to this job is when the car is complete. With the wheelwells moved inboard, aggressively sized tires fit perfectly under the fenders. This is just one of many modifications that enables Alan Johnson to produce amazing '32 Fords that make any real Deuce lover take pause, and of course it is an option should you be ordering a Johnson's Hot Rod Shop chassis.
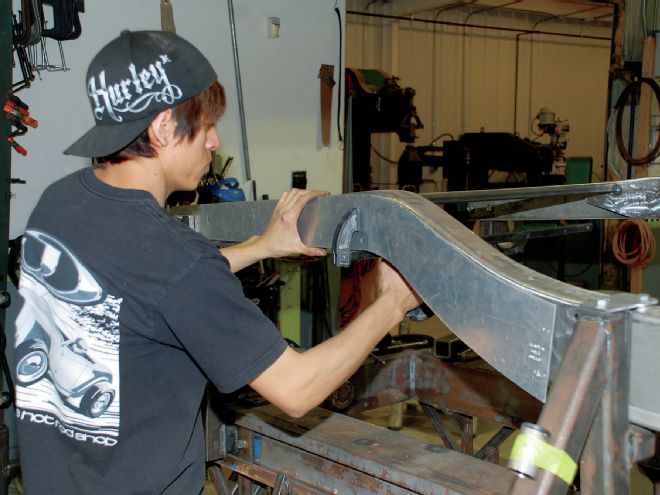
1. This template is used to locate the fender holes for drilling on the frame. The rear of the frame will be cut approximately 1-inch behind the boltholes.
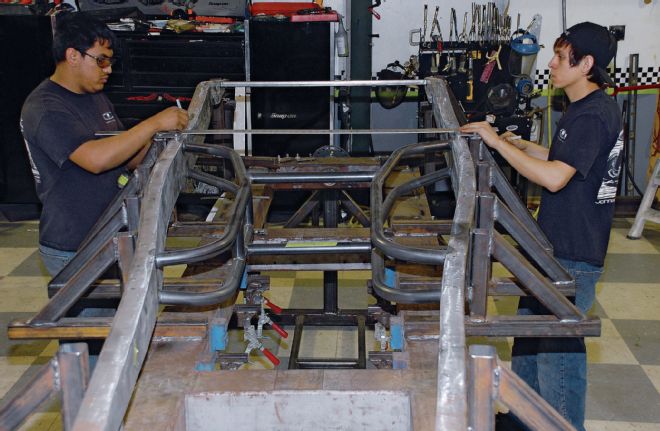
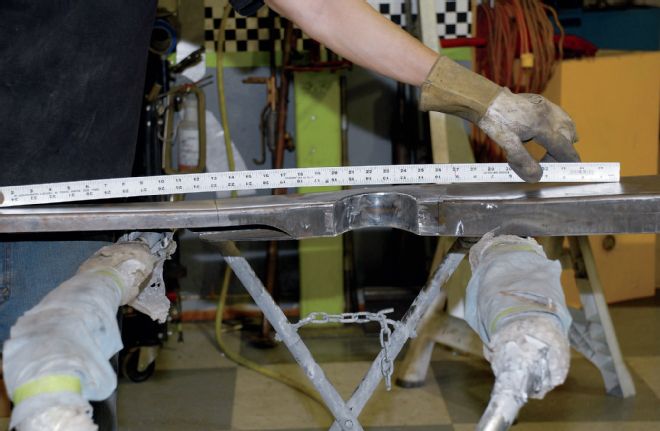
2. After marking both sides of the framerail a long straightedge is used to be certain the marks are equal on both sides of the framerail.
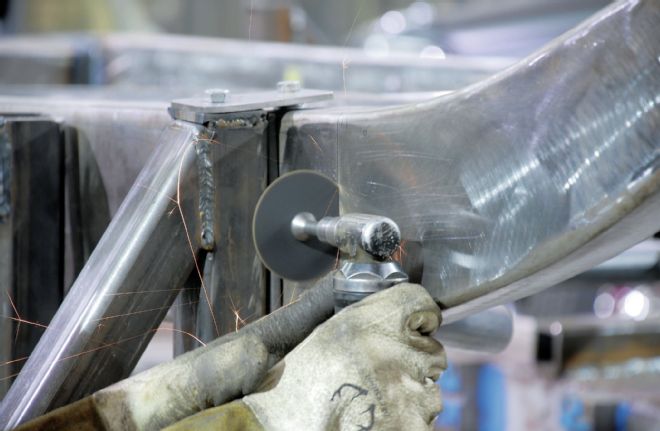
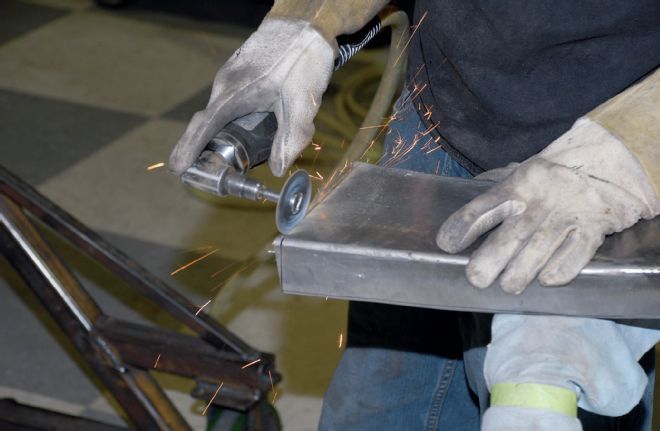
3. Before cutting the framerails remove any crossmembers behind the cut. An angle air grinder makes quick work of the process.
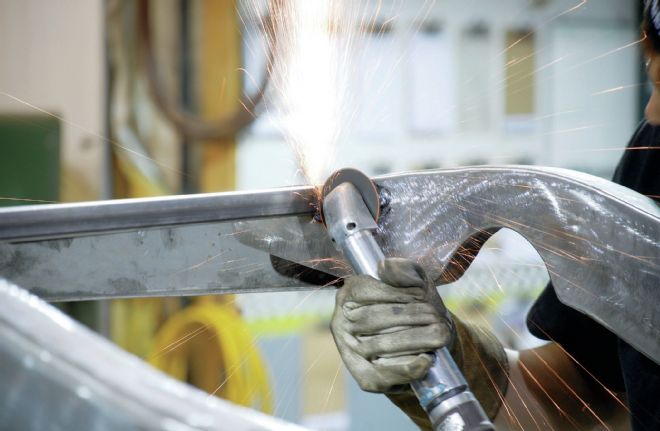
4. Before cutting the framerails be certain the location of the rear framehorns has been established. The cut is made with a cut-off wheel, using a thin wheel makes a more accurate cut.
5. With the framerail removed two square lines are scribed approximately 8 inches on either side of the axle center line.
6. Two relief cuts are made on the inside of the framerail and through the top and bottom of the 'rail.
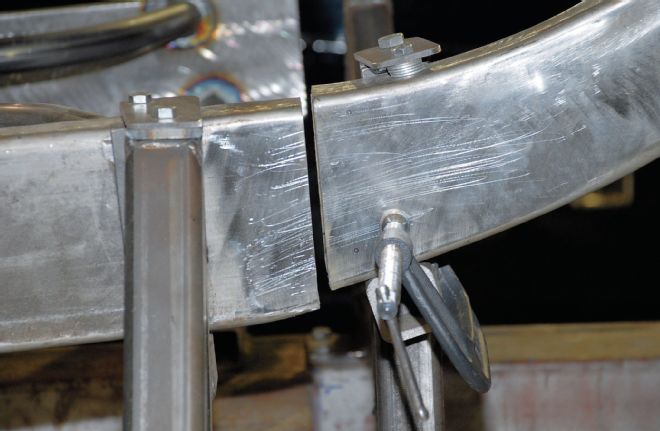
7. The stock Deuce frame curves inward to the gas tank; we will straighten that curve and eliminate the need for a second step in the rear of the framerail.
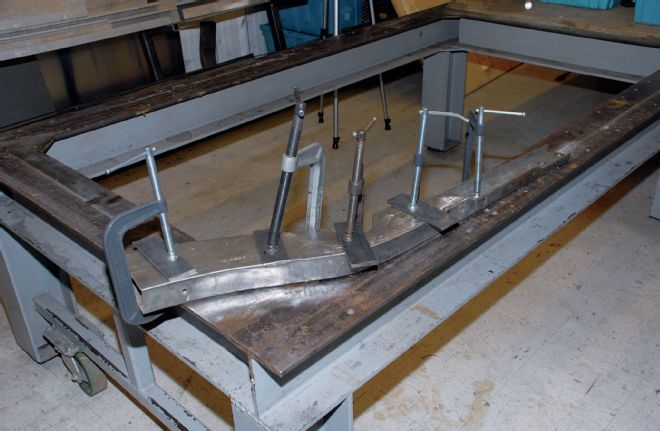
8. Using a perfectly flat surface and a half-dozen large C-clamps the rear portion of the framerail is de-arched to a straight 'rail.
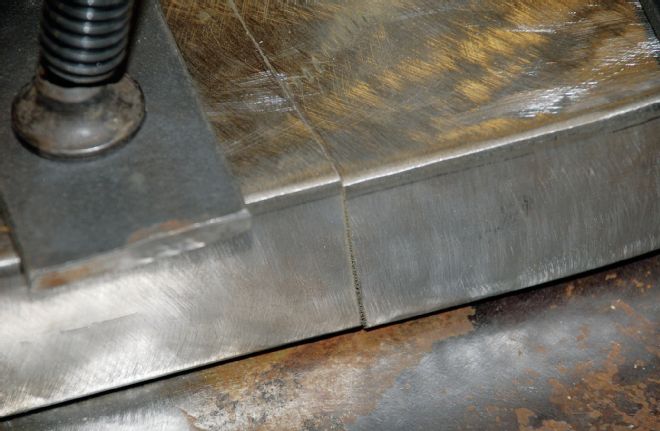
9. When the framerail is straight you will see a slight overlap on the inside, this can easily be filled during the welding process.
10. The framerail remains clamped down straight during the welding process. Johnson's Hot Rod Shop prefers to TIG weld the chassis joints.
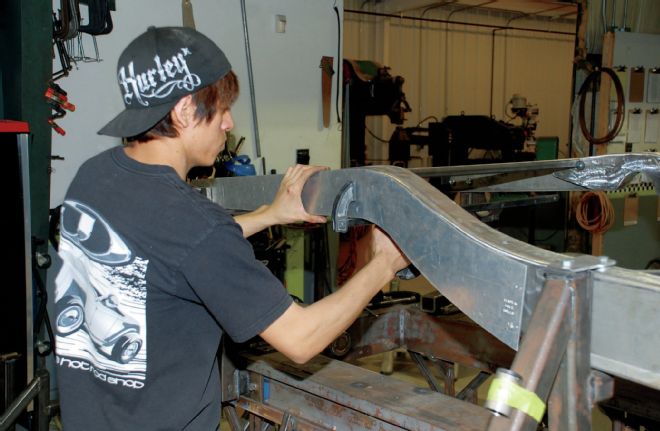
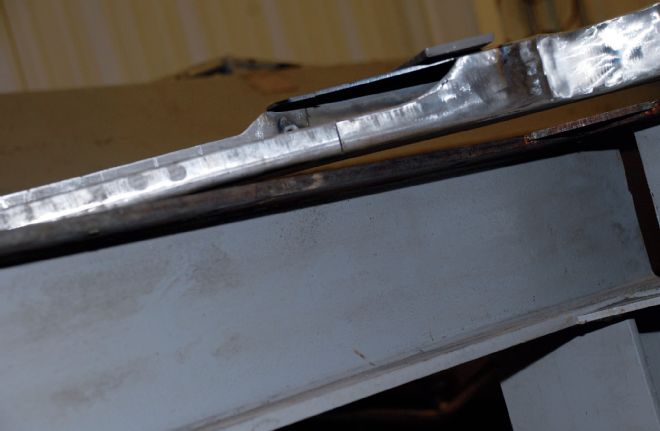
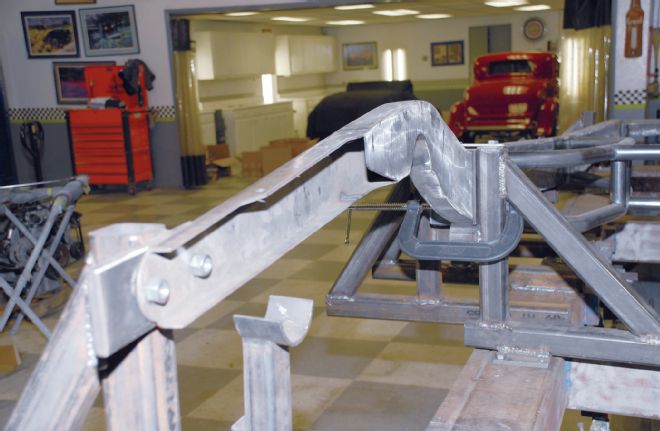
11. The framerail is now welded and perfectly straight. The piece held above the framerail is bent to the contour of an original Deuce frame to illustrate the difference.
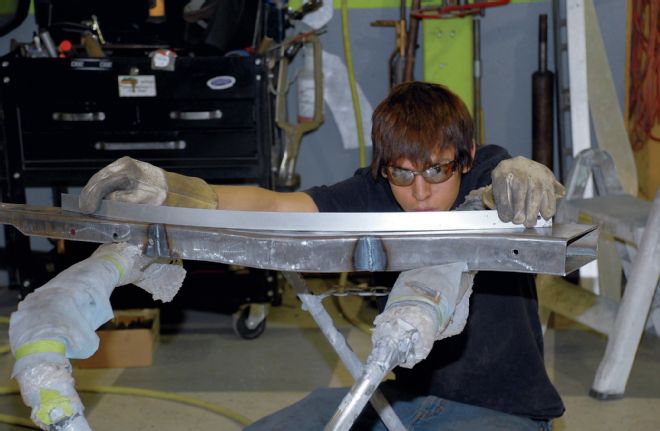
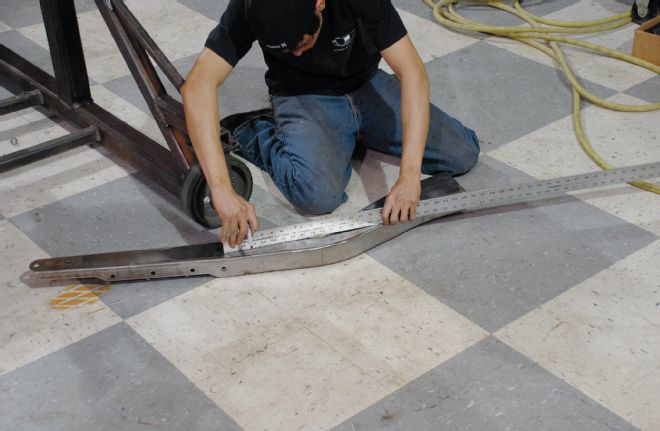
12. After grinding the welds smooth a straightedge is used to ensure each framerail is perfectly straight.
13. Since we will be adding a piece of 1/4-inch plate to splice the step the frame must be trimmed 1/4-inch to maintain the proper rear framehorn's location.
14. With the pieces trimmed we are ready to form the 2-inch step in the rear framerail. Having a frame jig sure helps, but this modification can be done at home with careful frame bracing prior to cutting.
15. The rear section of the frame is moved inboard the width of the framerail, which is 2 inches. The fixture on the frame jig holds it in place perfectly square to the main chassis.
16. The rear framehorn is located in the frame jig; this ensures the gas tank and bumper irons will be located properly.
17. We cut two plates 4 inches long and as tall as the framerail at the cut point. This plate will splice the pieces together.
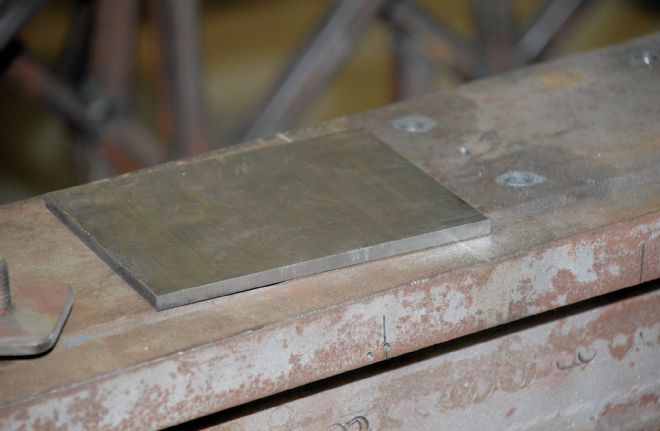
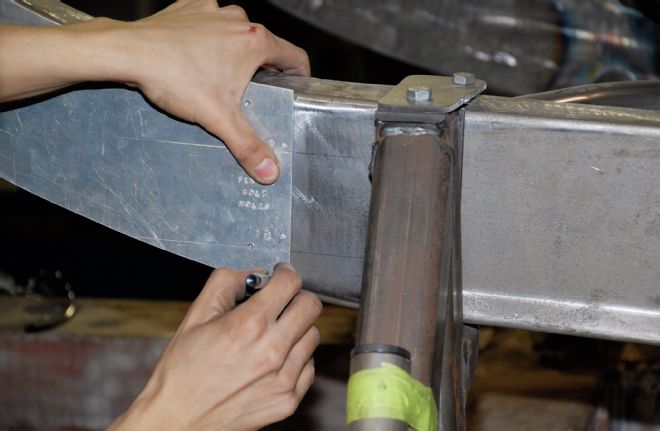
18. This piece of 1/4-inch plate was cut to perfectly fill the gap between the front and rear frame rail sections.
19. The splicer plate is slipped into place and trimmed to fit perfectly and all measurements are double-checked.
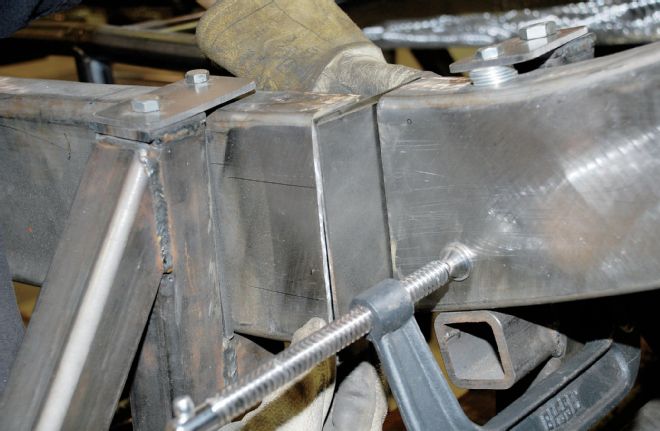
20. The 1/4-inch plate is tack welded in place and we are well on our way to providing an additional 2 inches of rubber room.
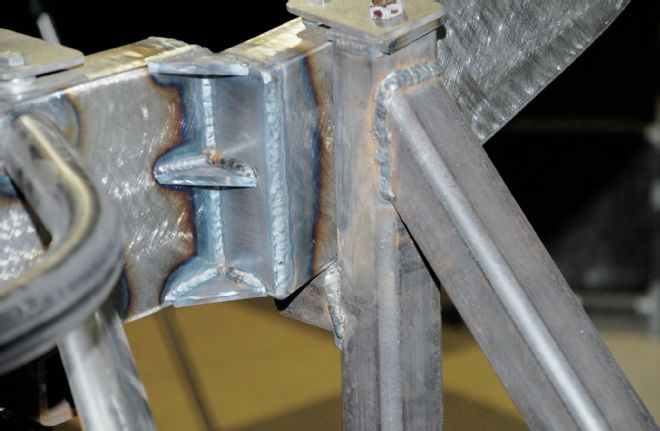
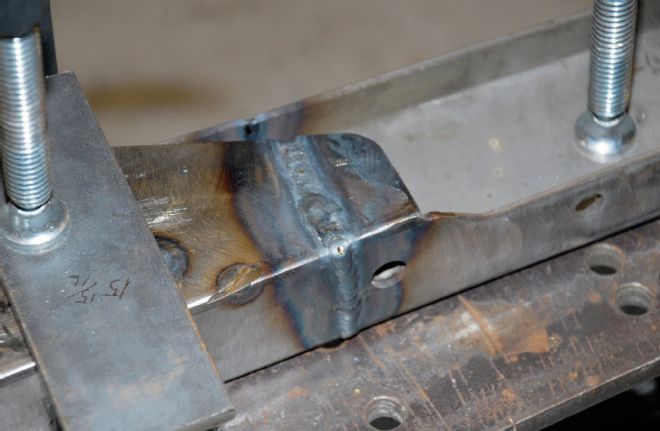
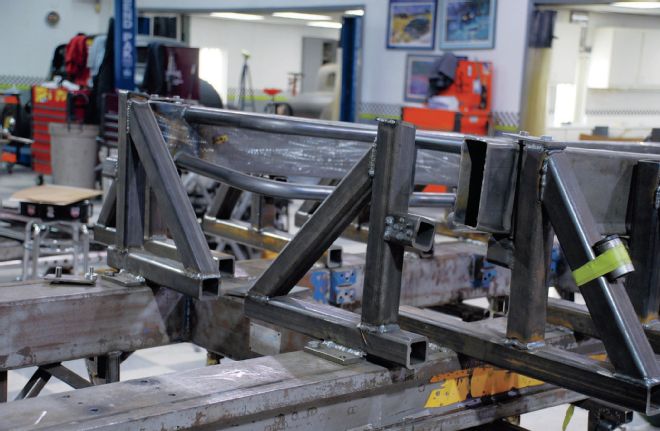
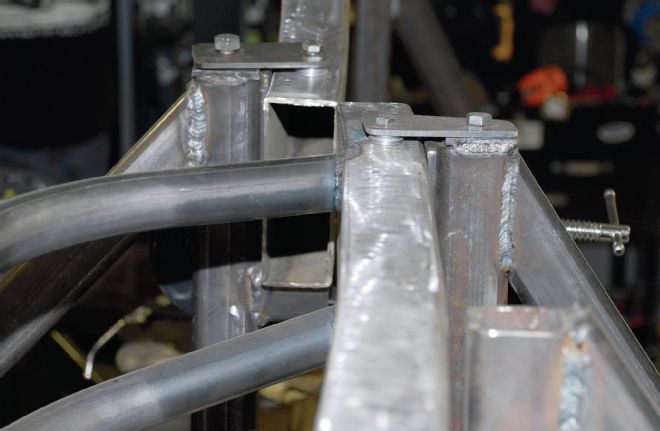
21. The splicer plate is completely TIG welded and then three gussets are added to either side of the framerail for additional strength.
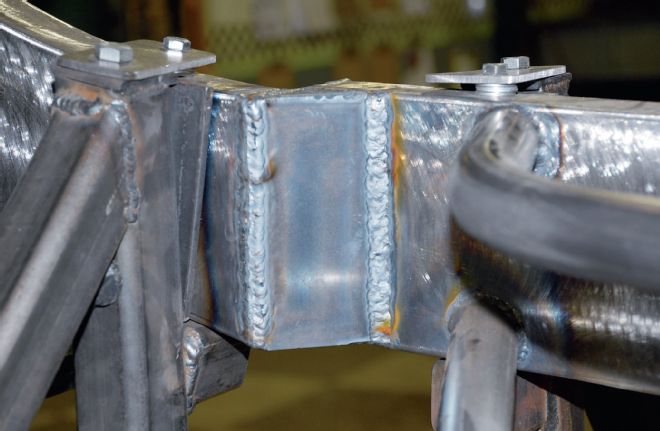
22. Two 1/4-inch-thick faceplates are then welded over the gusseted joints. Remember to stagger your welds from side to side to minimize any chance of pulling the frame out of alignment.
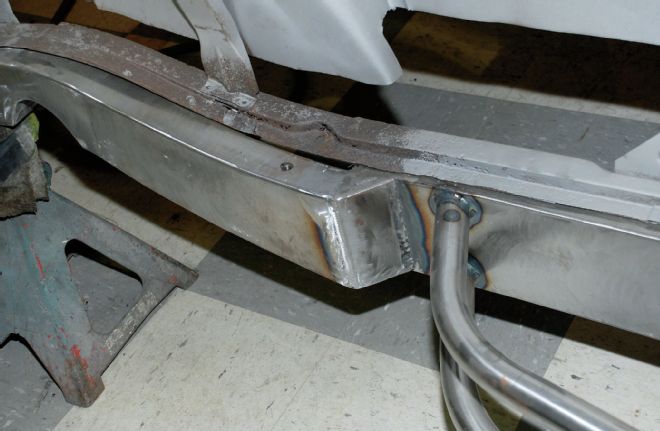
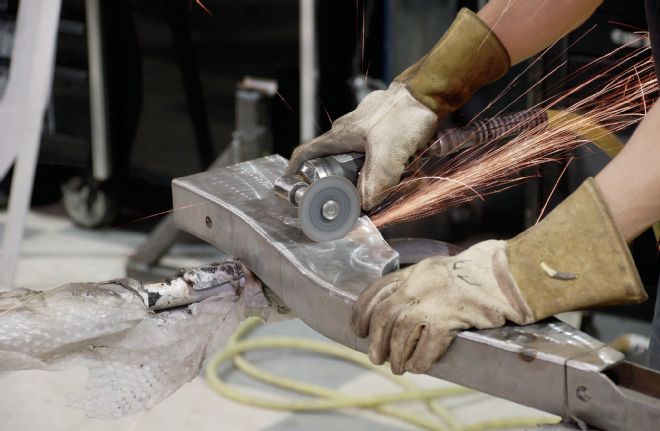
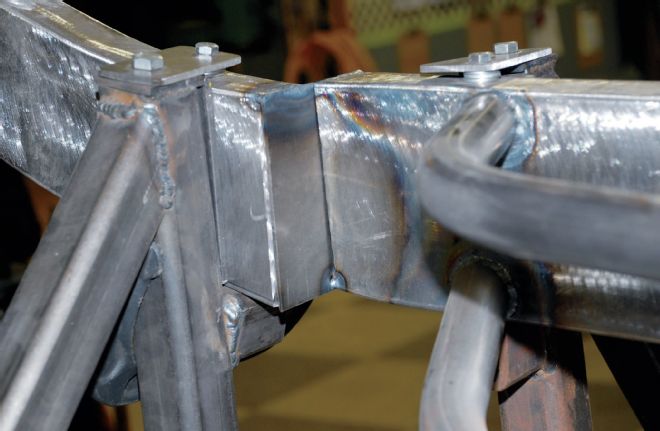
23. After a bit of grinding on the welds the framerail is looking like a one-piece rail again. Before preparing the frame for paint the welds will receive a light finishing with a fine-grit grinder.
24. With the framerails successfully stepped in a full 2 inches it is time to build new wheelhouses that move the wheelwells in the same 2 inches.
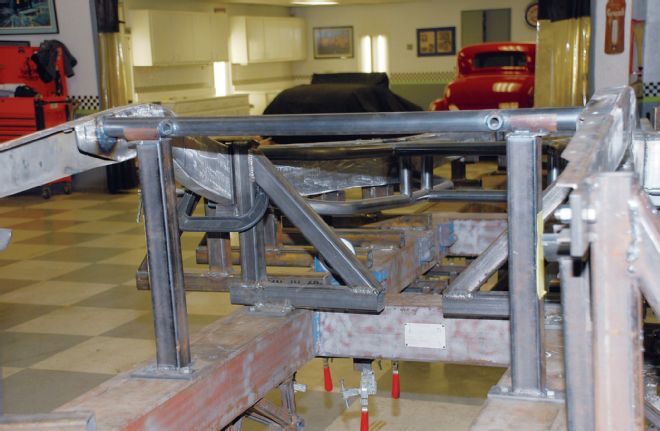
25. This particular car will receive coilover suspension so the rear shock absorber crossmember is trimmed, fitted, and welded in place while the frame is still in the fixture.

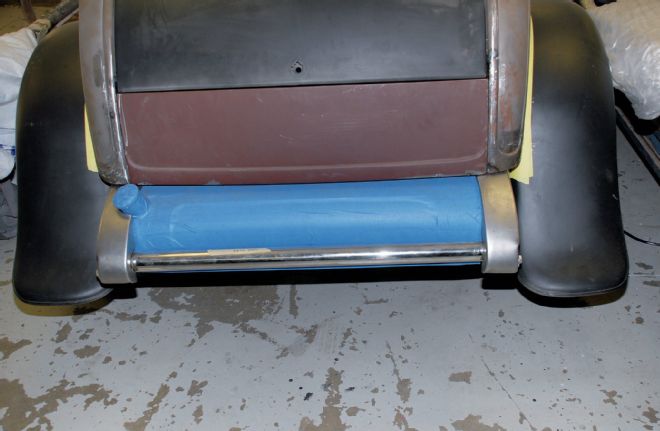
26. As you can see the framehorns protrude from the body in the proper location and you would never guess the frame has been stepped in 2 inches.
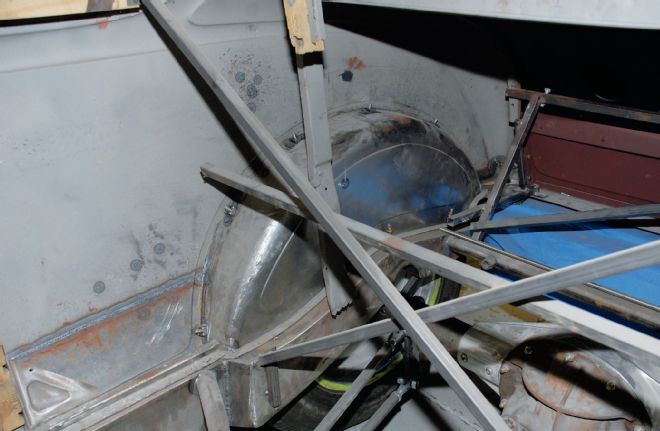
27. A test-fit of the sheetmetal shows that everything is in order, and even looking in the wheelwell the framerail appears to be stock, making this a neat modification.
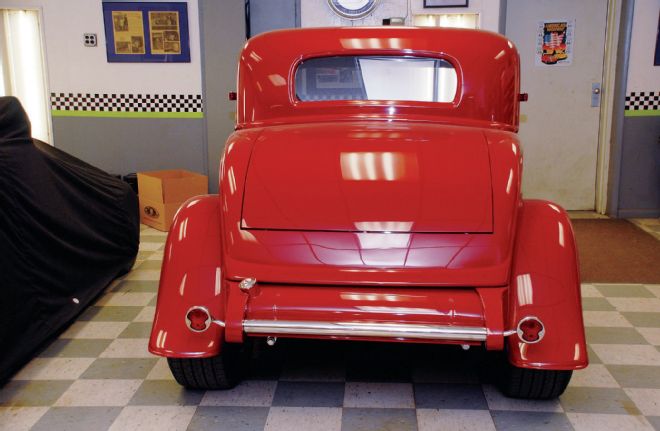
28. After stepping the framerails inboard 2 inches you can fit an aggressive set of tires on the car and keep them well inside the rear fenders.