
How many times has this happened? You're admiring a sweet ride built to the max with a fresh paintjob and a big-block heart with all the go-fast goodies, a car that some poor guy just evacuated his bank account to finish, and there are still pitted pot metal pieces on the flanks of the near-perfect car. For years this has been an issue with the car collecting hobby. How do you repair rare, non-reproduction pot metal pieces?
First, what exactly is pot metal? Basically it's an alloy of relatively cheap, low-melting-point metals used to make inexpensive castings of nonperformance parts. Since pot metal has such a low melting point, no expensive foundry equipment is needed to cast these parts. As you can imagine, major car companies loved it as a way to cut corners when making metal trinkets and trim for their ever-expanding fleets.
Because pot metal is made cheaply, and since air bubbles sometimes get trapped as newly cast pieces cool, pot metal has a tendency to chip, crack, pit, and break over time from exposure to the elements. Most trim and aesthetic parts on our vintage rides were made from this cheap metal, so the problem of pitting is common.
A company called Muggy Weld has come up with a favorable solution for the backyard restorer and professional alike. Muggy Weld developed Super Alloy 1, a welding rod that will do the trick not only on pot metal but also stainless steel, aluminum, copper, and brass. The key to repairing or joining pot metal with the Muggy Weld kit is in the low melting point of its welding rods: 350 degrees F, nearly half the melting point of the base pot metal. So these rods easily repair these troublesome pieces without getting close to the host metal's melting point—a point at which you could damage your prized piece.
After getting some supplies from Muggy Weld, I headed to the backyard for my first shot at repairing some of the battered pieces from my lowly 1965 Plymouth Barracuda. I grabbed my torch and a few clamps and proceeded to get myself ready to do battle with my pesky pot pieces.
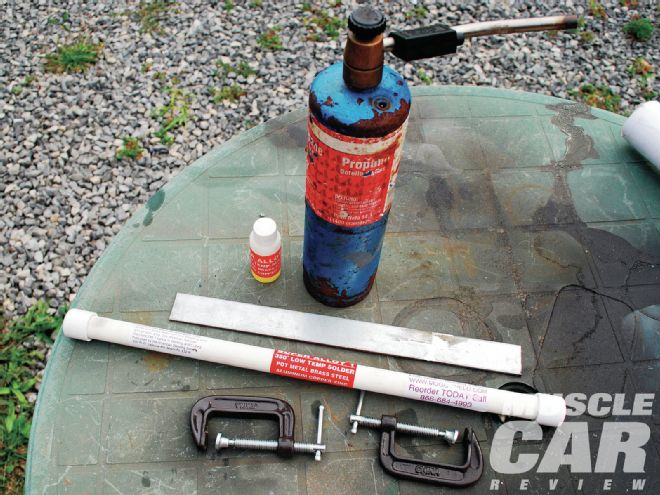
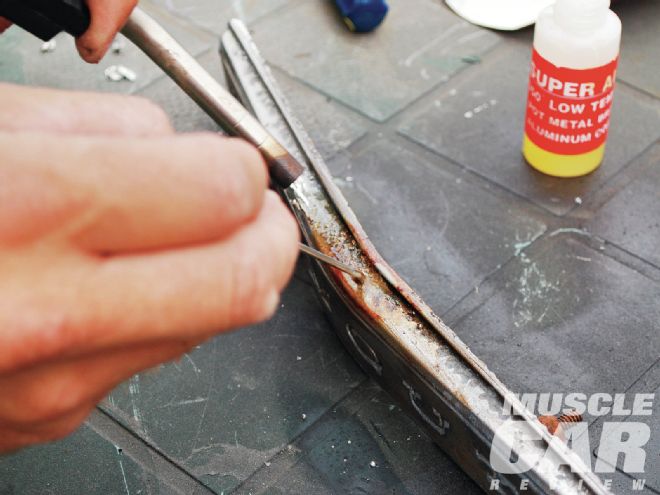
1 The Muggy Weld kit consists of a batch of Super Alloy 1 welding rods and a small bottle of honey flux. I got out my propane torch, some C-clamps, and a piece of straight metal, and was ready to weld.
2 The first repair subject was the Plymouth hood emblem from my '65 Barracuda. The years had not been kind to this piece, as the upper brim of the pot metal had pitted badly. Once the Muggy Weld rods fill these pits, the piece will be rechromed.
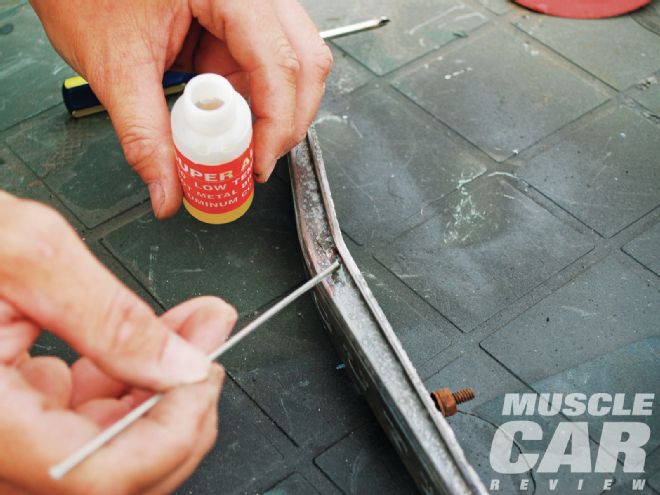
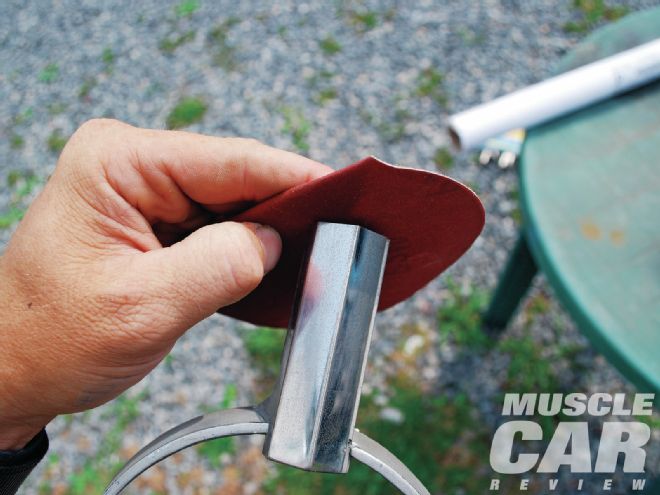
3 First, sand the problem area with 150-grit sandpaper to help clean the pits of oxidation and remove any high spots. Then use a welding rod to apply some flux to the area to be filled.
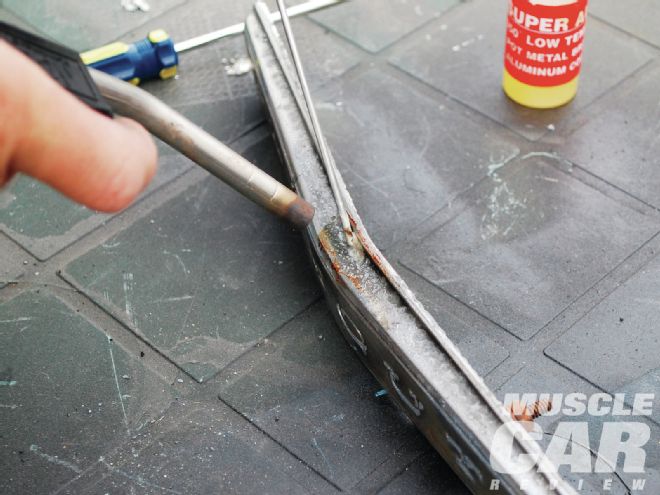
4 Apply a light flame to the piece. Once the flux turns brownish, the metal is hot enough to apply the rod. Do this by lightly swirling the rod over the pits. The rod will break down and flow into the low spots.
5 Constant flame is needed to keep the piece at the right temperature. Any blackening of the flux means that the piece has gotten too hot. Continue to swirl the rod lightly into the pitted areas until they are fully coated.
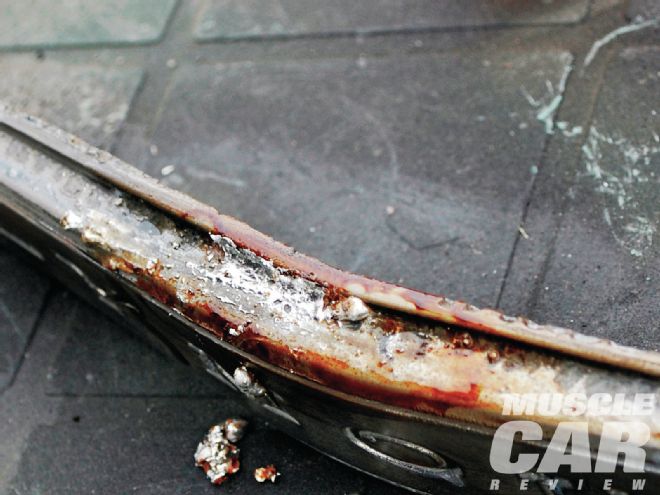
6 Here is a completed section. Notice how the welding rod has filled many of the pits. This process will probably have to be repeated a few times if your piece is badly pitted.
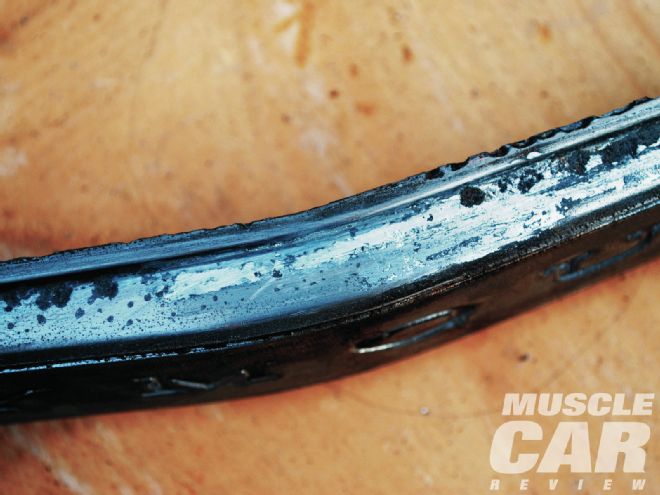
7 An abrasive disc cut down the high spots after the first run through, and the job was a success! The Muggy Weld penetrated the low areas, filling the pits in the pot metal nicely.
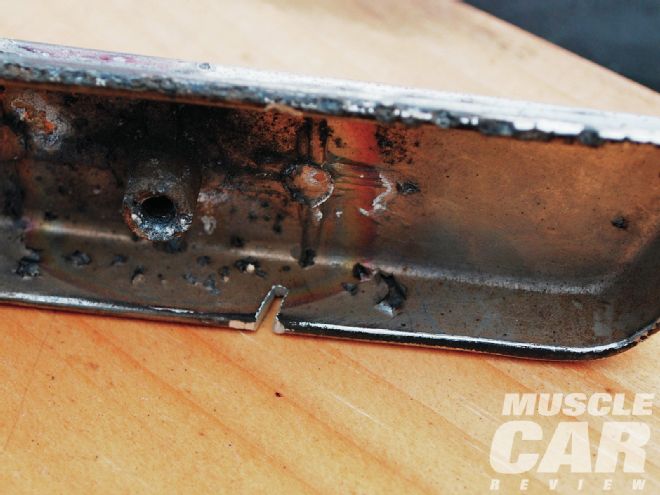
8 Here's our next predicament. A cutting disc accidently cut a section of the lower half of this emblem. Muggy Weld should fill this gap easily. Start by cleaning the edges of the cut with a little sandpaper to remove any oxidation.
9 Next, lay the emblem flat on a piece of wood and add a small amount of flux to the area to be fixed. Strike up the torch and heat as before with a small flame, warming the piece until you see the brownish caramel color.

10 Lay the rod on the crack, still adding heat when needed. The rod should flow right into the crack if the pot metal is at the right temperature.
11 Do the job right and the rod will fill the crack with one pass.
12 Turning it over, we see that the metal penetrated nicely into the crack. Repeat if needed, then cut it down with an abrasive pad. Another piece ready for some new chrome skin!
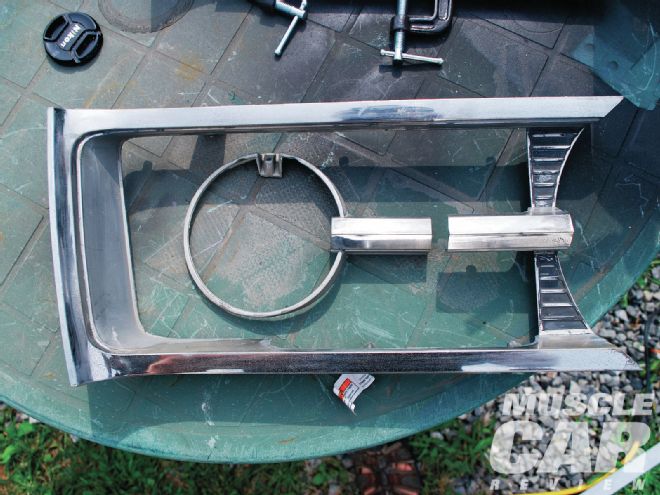
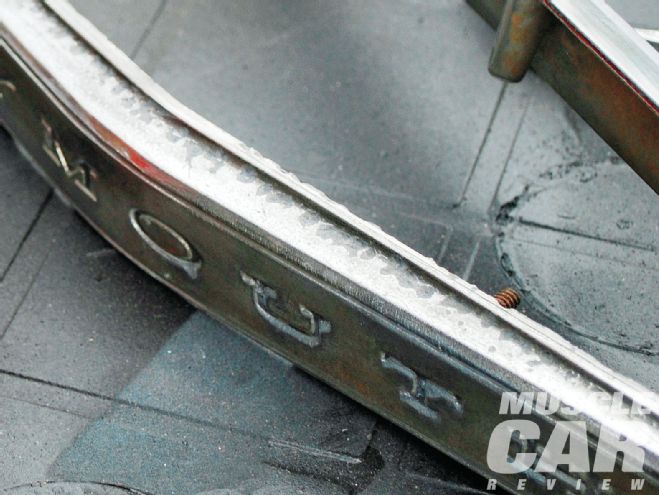
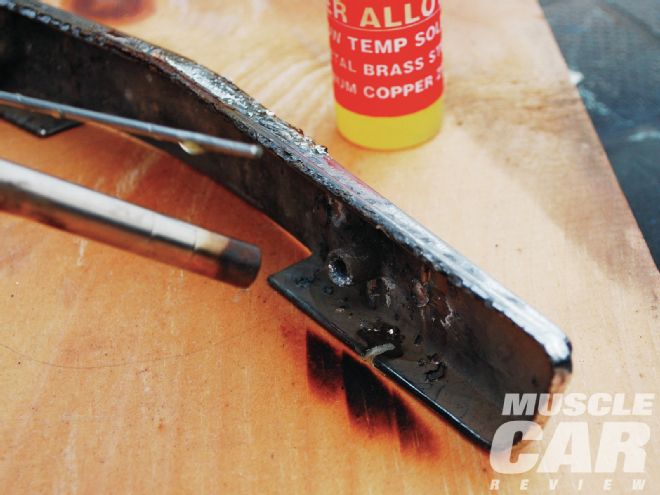
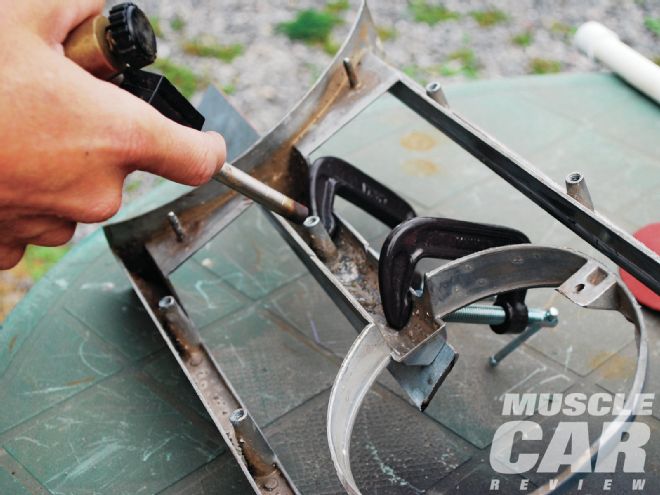
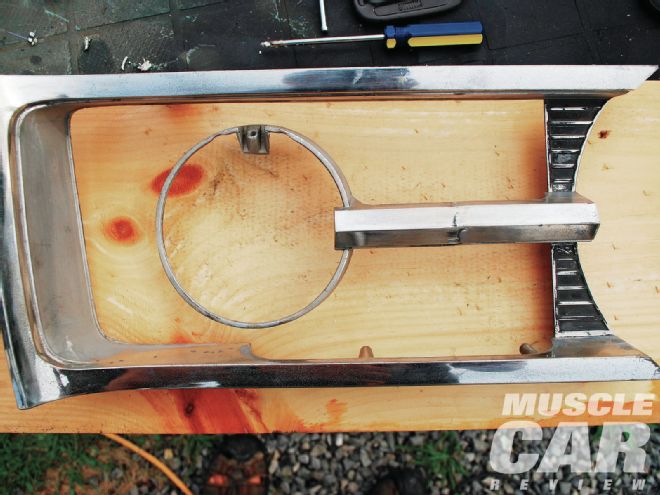
13 Now for a challenge. I'm customizing the Barracuda's grille, which involves cutting 2 inches out of the pot metal stem between the headlights and running lights. Now I need to match them up the best I can (they are slightly tapered) and weld them together with the Super Alloy 1 rods.
14 First, make sure there is no oxidation on the ends of the pieces. Oxidation forms rather quickly on pot metal, so always sand the edges before welding.
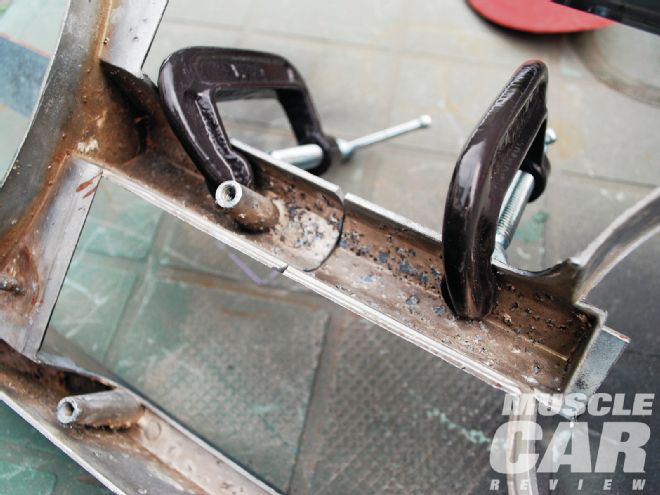
15 Next use a couple of C-clamps and a straight piece of metal to line the pieces up properly. Butt them next to each other, making sure they are laser straight.
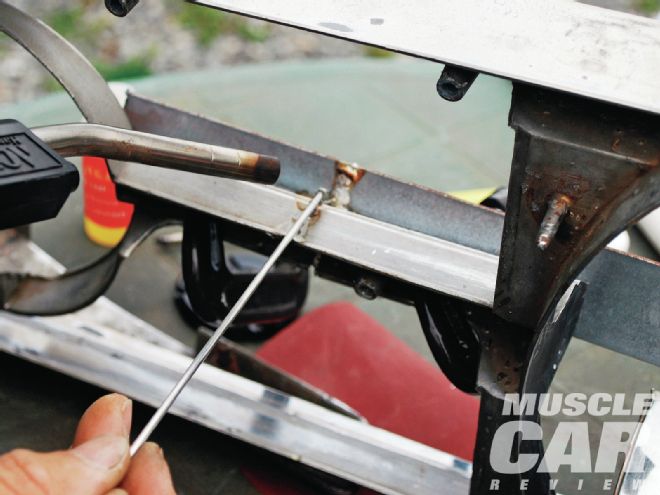
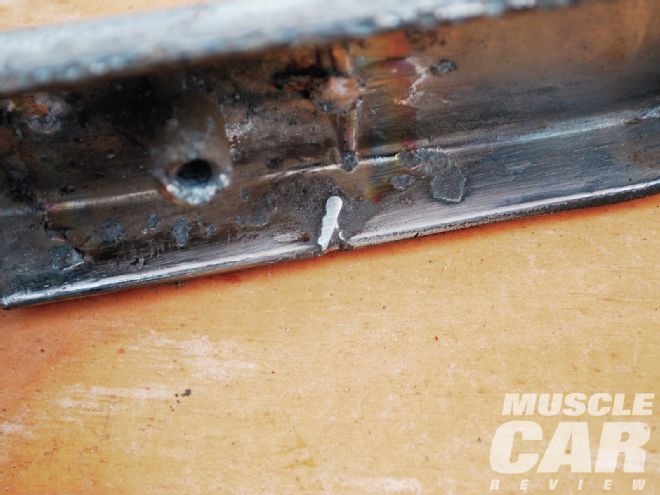
16 Apply the flux to the area to be welded, then preheat the metal until you see the caramel color. Lay the welding rod on the seam.
17 The rod penetrates the joint, filling it nicely. Later, the excess will be ground off.
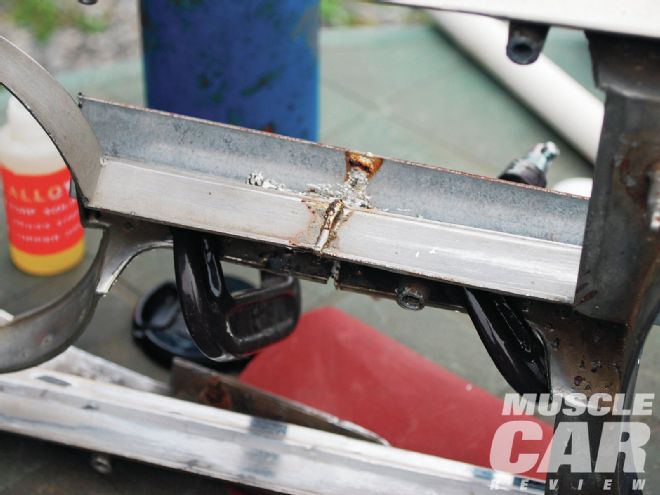
18 After doing the front of the grille, I put a little bit more on the back for extra stability.
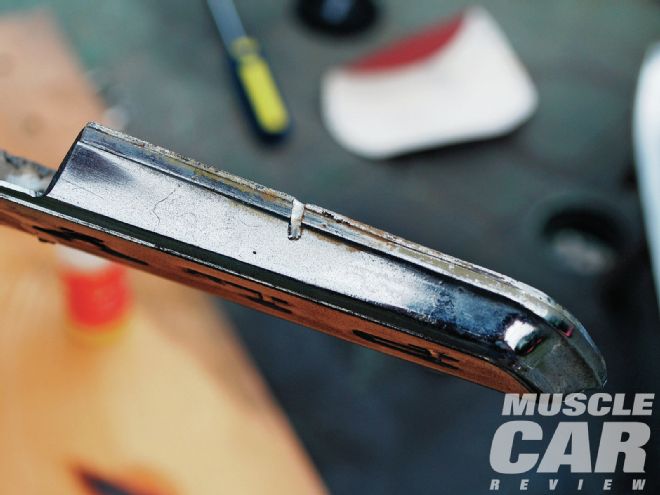
19 Here's the finished joint, and my totally customized grille thanks to Muggy Weld.
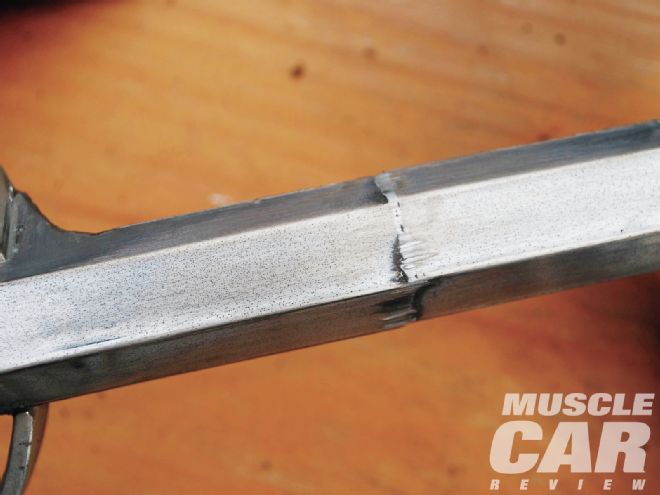
20 Up close you can see how the welding rod blends in with the pot metal. A little more grinding will smooth any rough spots. MCR