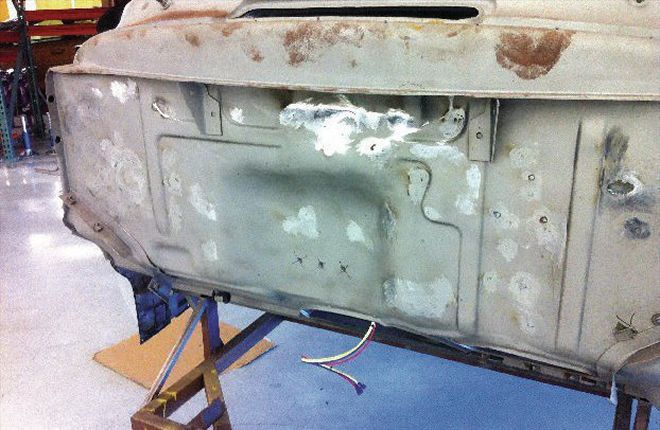
While the F-100 you've seen us restoring these past few months will have a relatively stock body (though we've got some surprises in store with the front fenders), we wanted to smooth it out a little and clean up the lines somewhat. Also, it has to be remembered that not only are mid-20th century trucks going on 75 years old, but fit and finish from the factory was nowhere near what it is today, especially on commercial vehicles. Panel gaps varied hugely throughout a single vehicle, something we were keen to address on "our" truck.
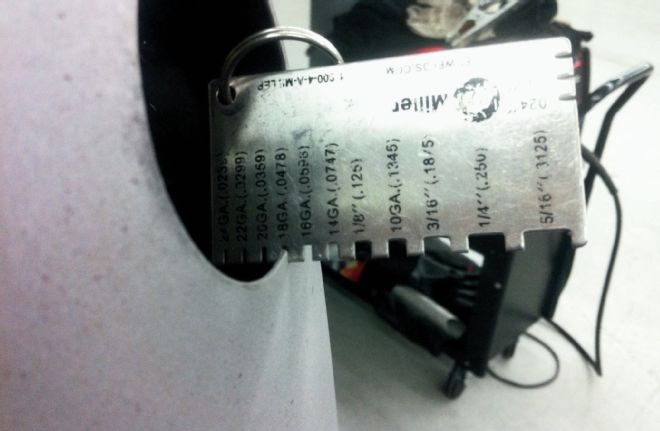
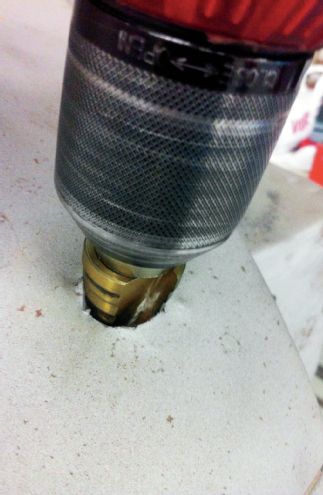
01 Miller Electric has these great gauges to measure the thickness of metal. Using it determined the F-100 sheetmetal was 18-gauge. Our filler piece would be the same gauge.
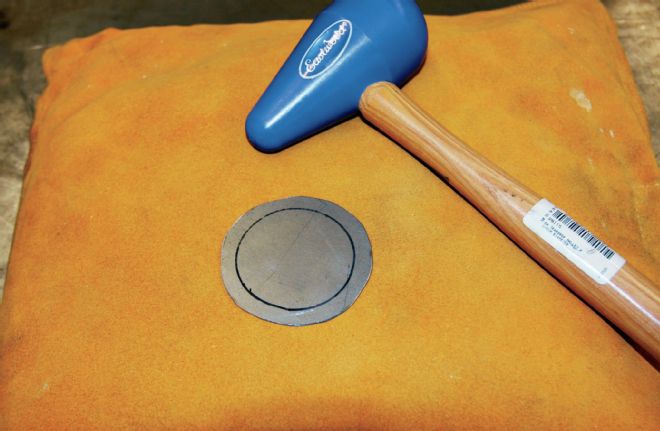
02 Cutting a disc of 18-gauge steel oversize, we used an Eastwood mallet and sandbag to put a crown in the disc.
03 Using a straight edge, the crown in our disc can clearly be seen.
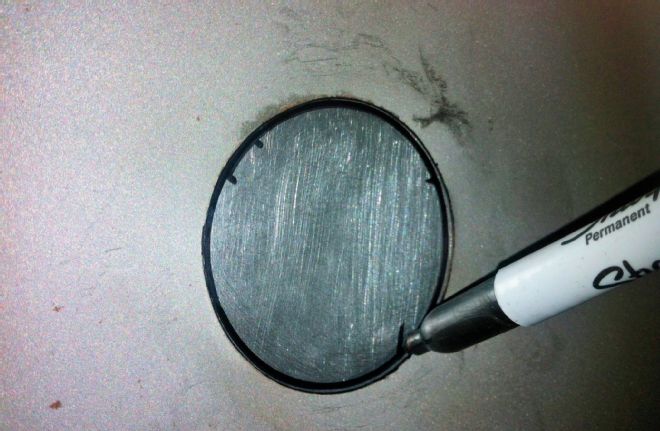
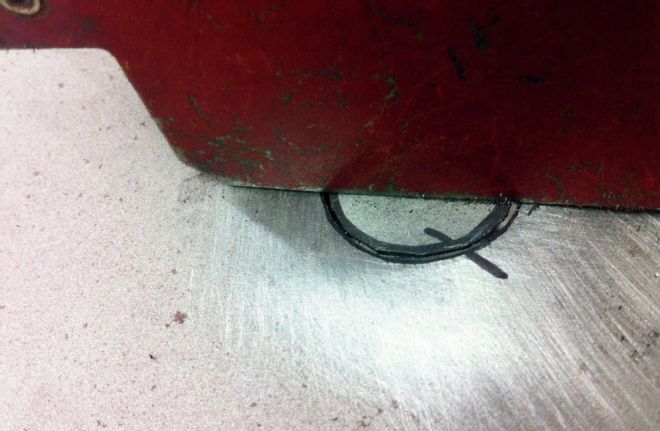
04 Placing the disc behind the hole left by the gas filler, we used a Sharpie to mark the circumference.

05 Tacked in place…
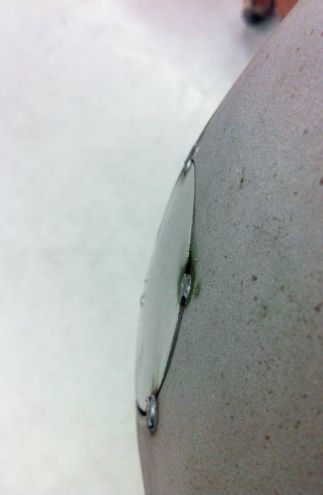
06 …we checked the crown for a consistent curvature that matched the existing panel.
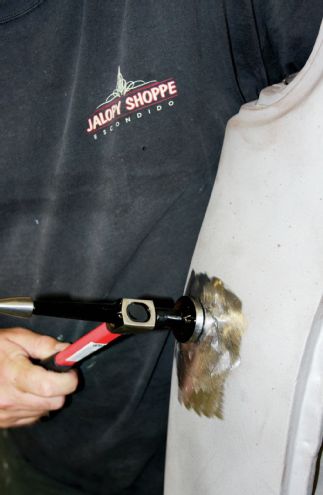
07 Finish welded, a little hammer and dolly work was required.
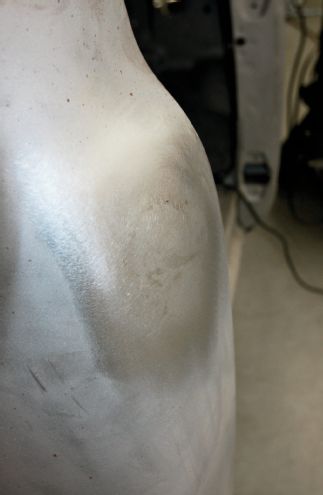
08 After grinding and sanding, the filler piece is barely noticeable.
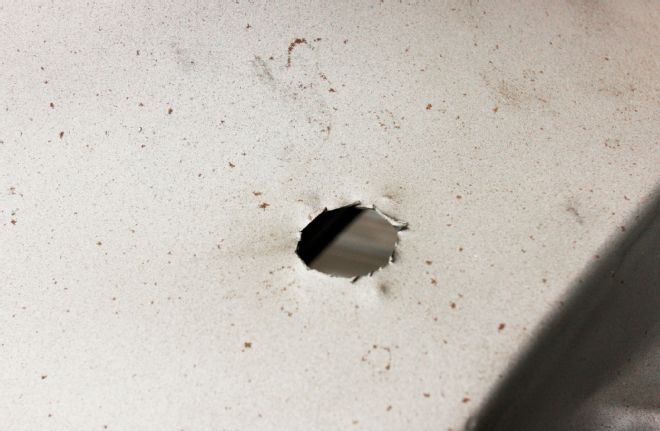
09 How's this for a neatly cut antenna hole? In addition to the jagged edge, the tinsnips had also warped the surrounding sheetmetal.
10 After a little hammer and dolly work to straighten the metal, we used a step drill to enlarge the hole until it was a perfect circle.
11 With a disc trimmed from 18-gauge steel, we used a magnet to hold it in place while it was tack welded.
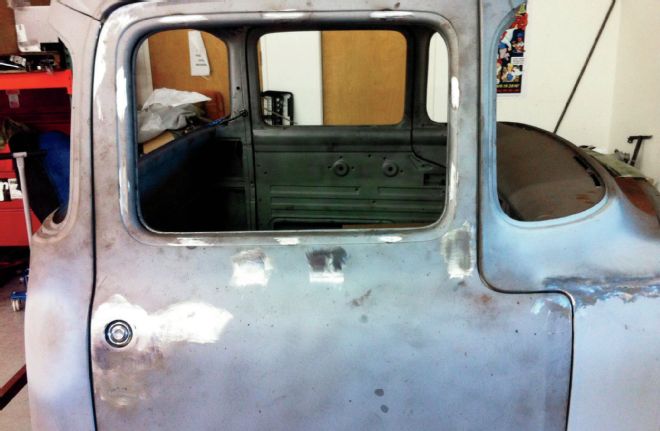
So, with the doors fitting perfectly in their apertures, some fettling of the gaps was required, notably the top rear corner of the passenger door, where we had to remove material from the edge of the door, as well as modify the inner door shell, to attain a consistent door gap, and allow the door to close without rubbing on the body.
12 Hole no more! Ground and sanded, you'd never know there had been an antenna. We also cut out and repaired some rust pinholes on the edge of the windshield aperture.
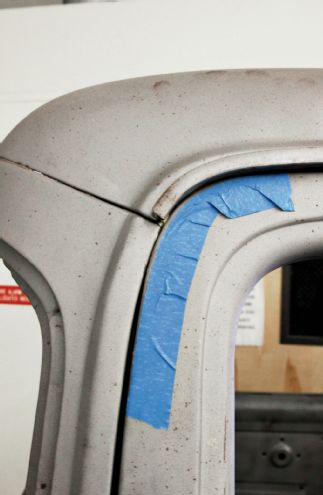
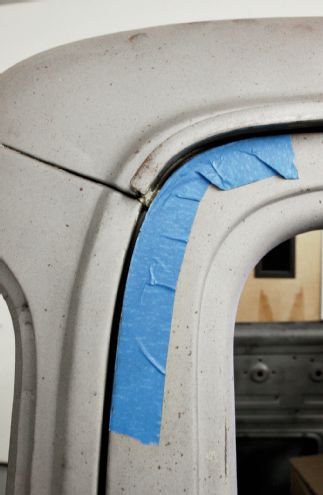
13 Prior to repairing the rusted A-pillars and installing fresh lower doorskins, we'd adjusted and tweaked the doors so they fit the cab as best as we were able. This resulted in this tight gap at the top rear corner of the passenger door. The edge of the masking tape shows where we'd ideally like the door edge to be.
14 A softpad on a 4-inch grinder made light work of trimming the door edge. Now the inner and outer skins need welding and dressing.

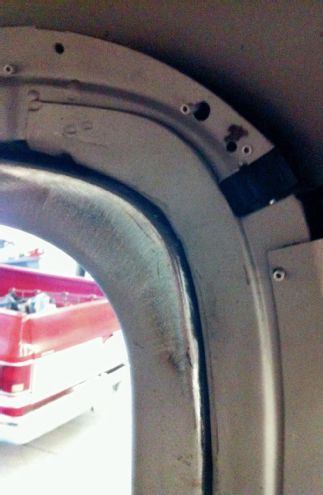
15 The inner door structure now also touched the cab with the door closed. The solution was to cut along the edge of the frame, as well as a relief cut toward the outside, hammer the frame down to close the gap, and re-weld. You can clearly see the inner and outer skins that still need welding at top right.
16 With the welds dressed, the door now closes as it should…
17 …and with the welds along the edge of the skin dressed, the gap is now much better.
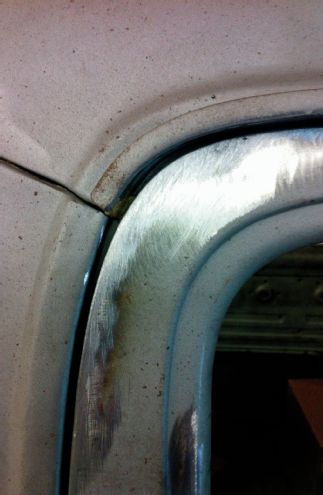
18 As the cab took shape and became smoother, we decided to radius the corners of the doors at the cowl, and fill the cowl seam.
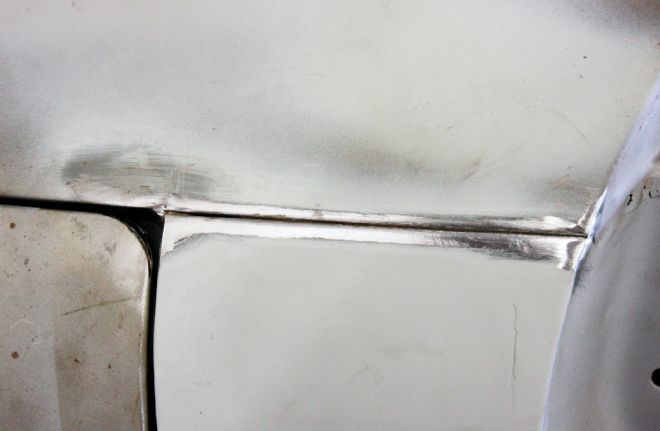
19 Various radii were tried before we settled on one we felt worked best. The seam was also cleaned with a wire brush in a drill, in preparation for welding.
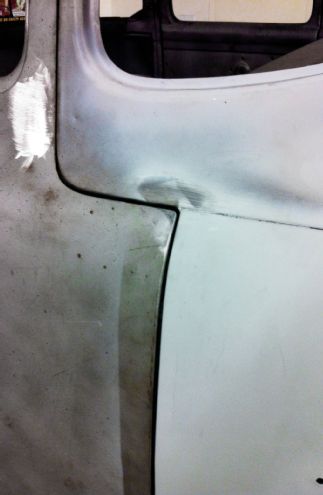
20 With the seam welded, we cut a short section of 18-gauge steel and formed it to follow the radius on the door corner, then welded it in place, dressing the welds with a drum sander.
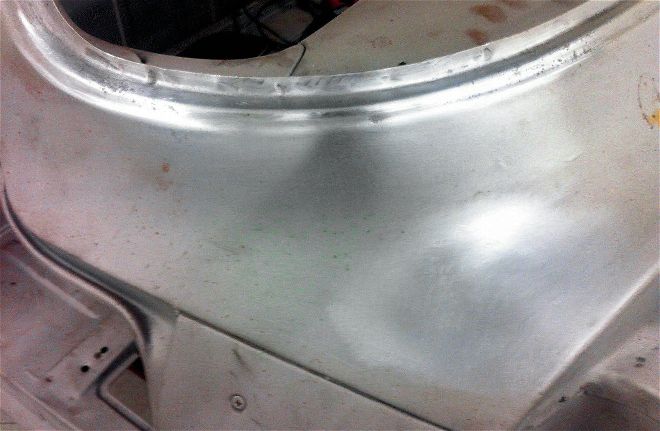
21 With the door corner welded and dressed, here's the result.
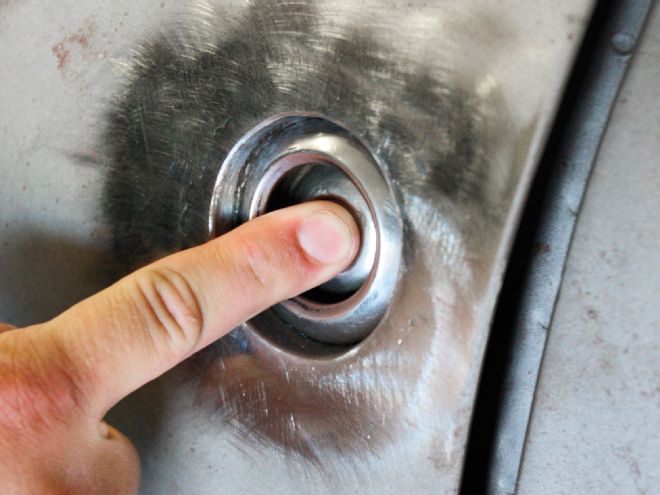
22 Our cab is shaping up now, with the seam welded, door corner radiused, mirror, window trim and badge holes welded up, top corner clearanced, and recessed Lincoln door buttons added. We'll come to those in a minute.
We followed this with some custom touches – rounding door corners, filling seams, forming a convex patch to fill the gas filler hole, smoothing the firewall and dash, and installing '46-'48 Lincoln door buttons in place of the original handles. It's the little details that make a project stand out.
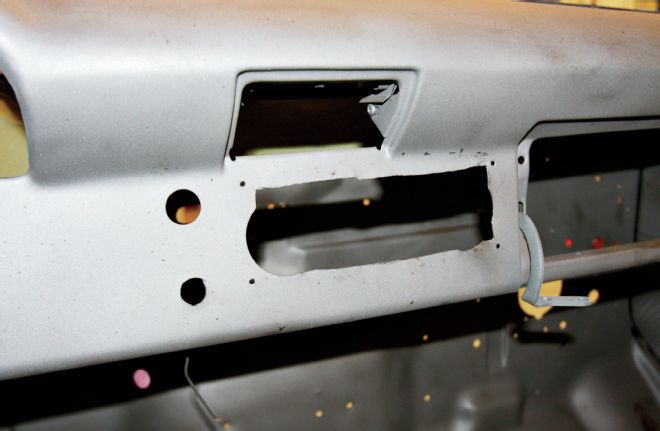
23 We figure the same guy who installed the antenna also fitted the stereo, judging by the cuts! While we were filling this, we also lost the switch holes and ashtray.
24 The smoothed dash, which will now house a row of five equally spaced art deco style knobs. Here we're determining the spacing, while allowing clearance for the knob mechanisms behind the dash.
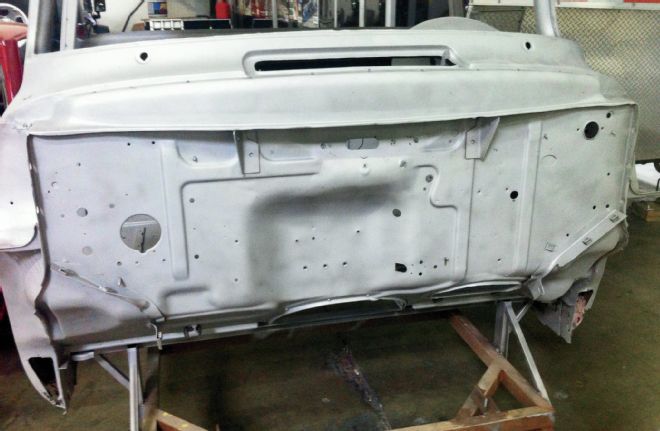
25 The original firewall was a mess of stock and added holes.
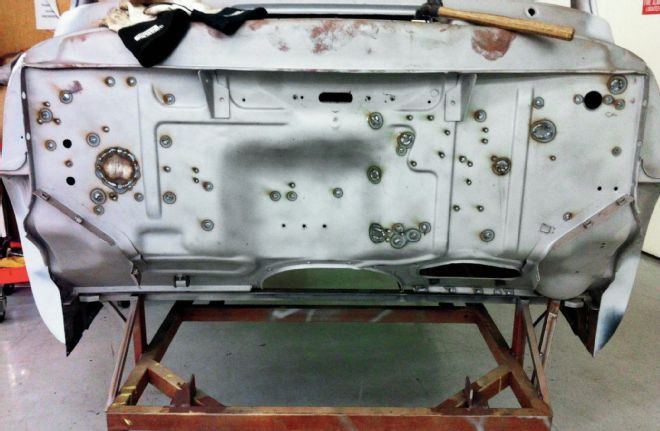
26 It takes a while to weld up over 60 holes, but the result is worth it.
27 Yes we welded up the heater and wiper motor holes, but the reasons for this will become clear. The truck will have an internally mounted New Port Engineering wiper motor, and the Vintage Air heater only requires a couple small holes for hoses. All mounts for these are welded to the inside of the firewall, eliminating bolts passing through.
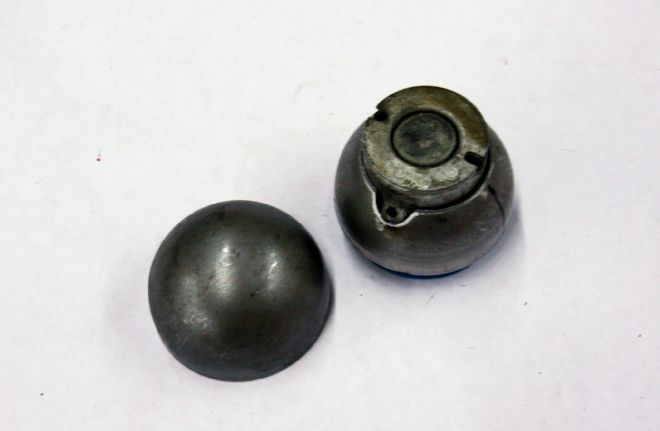
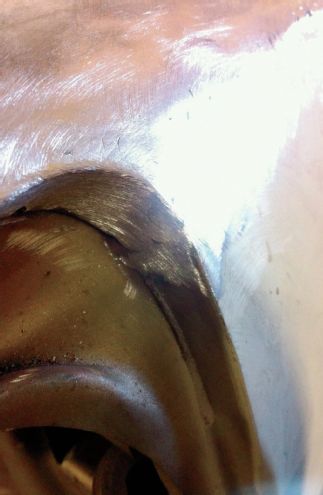
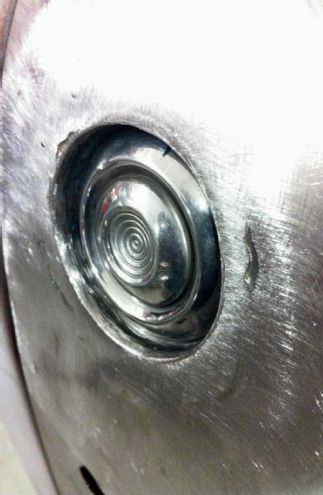
28 Now to those door buttons at the top of this story. They're eBay-sourced '46-'48 Lincoln door buttons. To french these we used these half-spheres that we discovered at our local metal supply house, and cut the back away to allow the buttons to pass through, adding a notch the secure the button with a set screw.
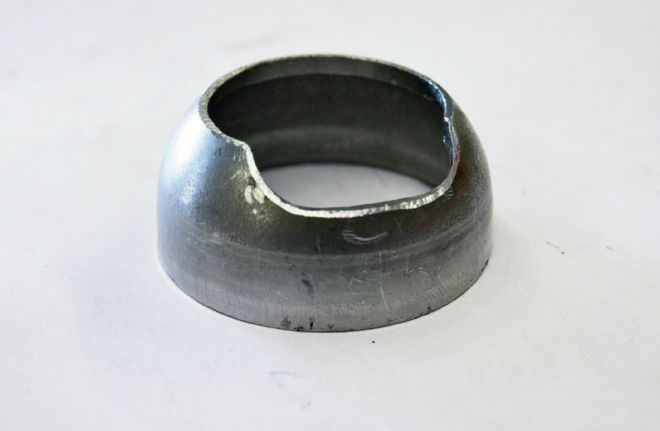
29 That notch was enlarged considerably once we fit them to the F-100 doors.
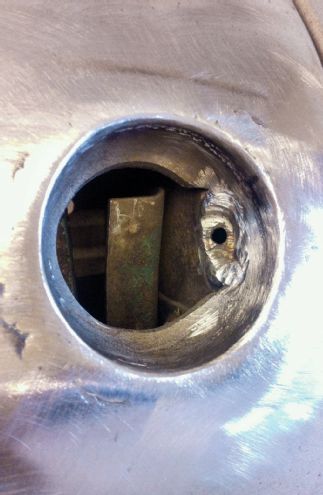
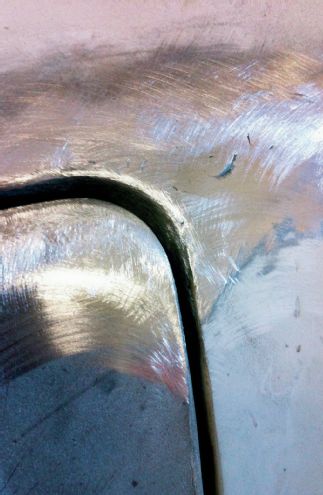
30 Welded in place, you can see how the set screw secures through the door frame from inside the doorjamb. Incidentally, these half-spheres were installed where the large hole for the original handle was, meaning once these were fitted we only had to weld up the smaller hole at the front of the handle.
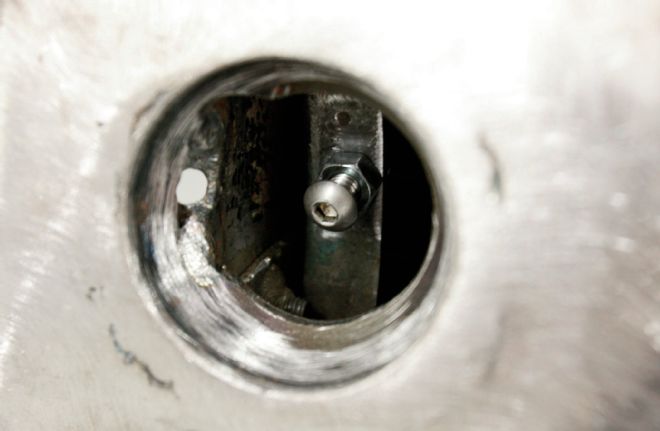
31 The stock door latches have a flat arm that actuates the latch. We added a stainless button head bolt to allow us to adjust the travel of the door button.
32 The installed button. Heavy-duty door poppers from Autoloc allow the door to spring open when the button is pressed.