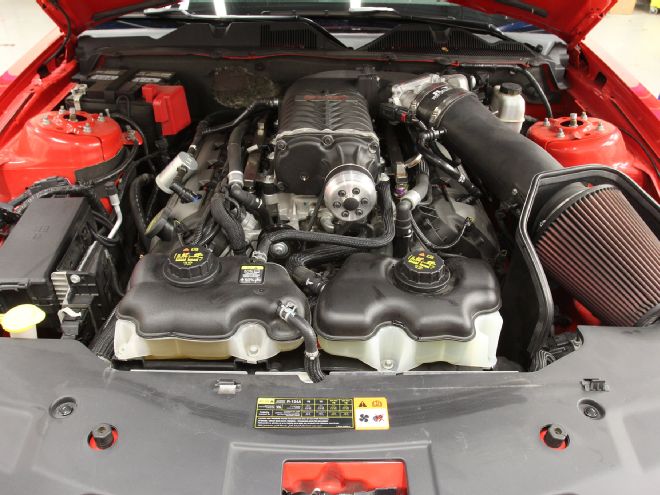
A couple of years ago we installed a VMP Ultimate Performance Supercharger system onto a 2011 Mustang GT. This car serves not only as a daily driver but also as a Track Guys weekend road course warrior at tracks all across the country. After more than 20,000 street and track miles, the VMP system has provided consistent, reliable power that has proven to be a lot of fun on both the street and the track.
You might also recall that the supercharger system was installed onto a stock Coyote 5.0, complete with the stock engine radiator, VMP's large, dual-fan–equipped heat exchanger and high-flow coolant pump. In our opinion these last two components are what set the VMP supercharger system apart from others. This configuration repeatedly demonstrated its ability to handle the heat during those 15- to 20-minute on-track and on-boost track sessions.
However, like any good racer, VMP's Justin Starkey is never satisfied with “good enough” and is always looking to improve upon his products. As the driver of this red rocket ship, we’re always looking to make performance improvements, both in our driving and on the vehicle. Thus, after a phone visit with Starkey, he mentioned that he was finishing development of an even larger heat exchanger and larger fan assemblies for the hardcore road customer and asked if we were interested in doing an upgrade onto the Mustang. Of course we were.
We want to point out that during our time with the VMP's Ultimate Performance Supercharger system on the car, we never had serious overheating issues, even when running in the stifling heat and humidity of the mid-June Mustang and Shelby events in Oklahoma. We did, however, notice an increase in engine temps when we would spend too much time closely following some of my corner-carving friends out on the track. Apparently having your nose tucked up behind some track-prepped GT500s with their sewer-pipe exhaust pointing right at the front of your car pumps a lot of heat into both the heat exchanger and the radiator. Starkey decided that this would be the perfect excuse to upgrade both the VMP supercharger's heat exchanger and our engine's radiator and cooling fan assembly.
“Our dual-pass heat exchanger and dual 10-inch fan units worked pretty well,” said Starkey, “But we found another 10-degree drop in temps on the track by switching to this new triple-pass unit that now carries dual 11-inch Spal fans. We offer our unit with a plug-and-play harness for 2007-2012 GT500, 2013-2014 GT500, and 2011-2014 supercharged 5.0 GT and Boss 302 Mustangs.”
The 5.0 harness also powers the intercooler pump in addition to the dual fans. After the engine is shut off, moving the key to the “run” position activates the heat exchanger fans and coolant pump, providing additional cooling functions after coming off the track.
Triple-pass heat exchanger
The heat exchanger that was initially installed is roughly 30 percent larger than the ones used in other positive-displacement supercharger systems on the market for the Coyote GT and Boss Mustangs. The all-new, triple-pass heat exchanger features a 13-inch-tall core and is backed by twin 11-inch Spal fans for even more airflow and cooling.
“We developed this triple-pass heat exchanger from the rigors of driving our own VMP TVS Supercharged Boss 302 Mustang on the road course,” said Starkey. “During both track and dyno testing, we were able to keep our heat exchanger temperatures low enough to maintain consistent power output, even during aggressive 15- and 20-minute on-track sessions.”
Starkey notes that the dual 11-inch fan configuration helps to keep air moving over the core at low speeds, at stoplights, and in the staging lanes. “These highly efficient fans are an essential part of making a larger heat exchanger work in a both the 5.0L Mustangs and 5.8L GT500s,” he said.
Lower intake temps allow for more timing and more power, the dual fan design keeps air moving at all times for the lowest possible temperature on the street, road course, or even on the dragstrip.
To provide additional room and airspace for the new VMP heat exchanger, we installed the Ford Racing tubular front bumper bar (PN M-17757-MBK). This lightweight tubular piece replaces the tall and thick factory front bumper structure, providing more room for the VMP triple-pass heat exchanger as well as a forward-facing tow hook. Drilling through the factory spot welds on the factory bumper structure proved to be the most difficult part of this upgrade. But with the right tools and some patience, it does come off, providing two flat mounting surfaces for the Ford Racing front bumper.
Starkey notes that the triple-pass heat exchanger will fit with the stock front bumper structure, but the tubular bumper support provides additional room and exposes more cooling fins to the incoming airflow.
Because this car does see extensive track time, we elected to leave the tow hook bracket on the bumper bar, which does require cutting a small opening in your front fascia for this bracket to extend forward for the tow hook. If you do not want to tow hook, you can simply cut the bracket off of the bar.
Engine cooling
With the new bumper support and heat exchanger installed, we turned our attention to providing the engine with additional cooling capacity. The parts VMP recommends for this is a stock Boss 302 radiator (PN M-8005-MBR) and the fan shroud assembly from the 2013-2014 Shelby GT500 (PN M-8C607-MSVT) Both of these parts are factory Ford parts, making them a simple drop-in for our 2011 GT.
The GT500 fan shroud is a pretty trick piece. The revised cooling fan design moves more air through the large opening while hinged “flapper doors” in the area around the fan opening allow air to pass through the radiator and through the fan shroud without being forced through the single fan opening.
With the VMP triple-pass heat exchanger, Boss 302 radiator, and GT500 fan shroud assembly, this 600-plus rwhp street and track 2011 GT is read to chase down and pass whatever it catches without a single worry of excessive charge air or coolant temperatures.
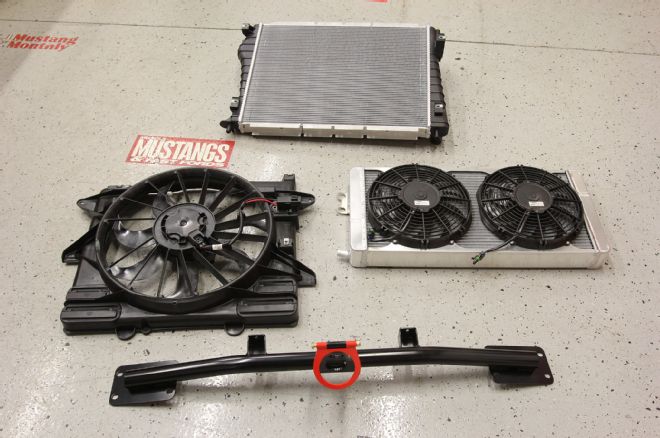
1. Heavy-duty road course use requires heavy-duty cooling components. VMP's TVS Supercharger system for the 2011-2014 Coyote Mustangs is good for it. Here are the components that will provide additional cooling capacity for the Track Guys' race red road course rocket: a Boss 302 radiator, a GT500 fan assembly, a tubular front bumper bar and tow ring assembly from Ford Racing, and the new dual-fan VMP triple-pass heat exchanger.
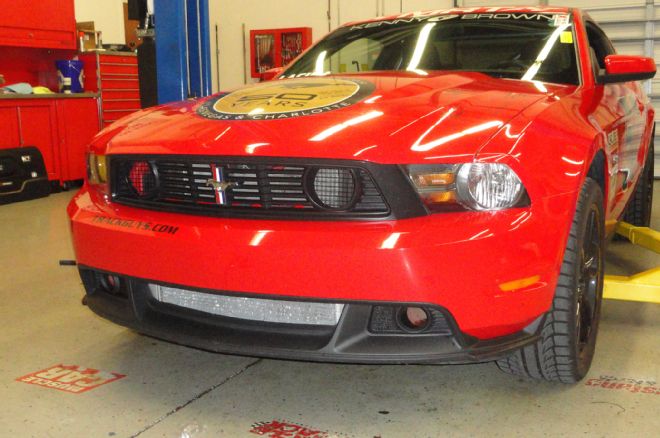
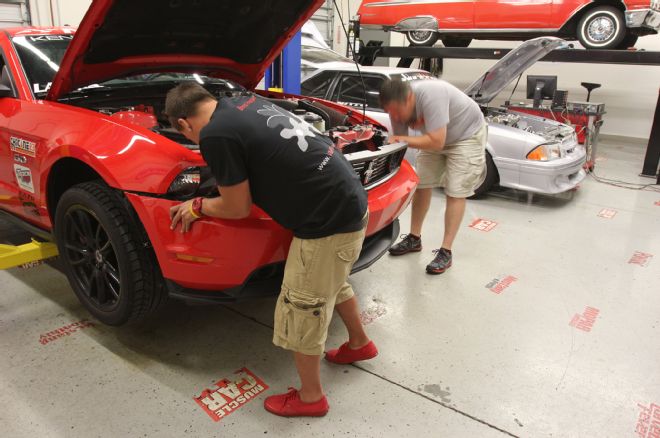
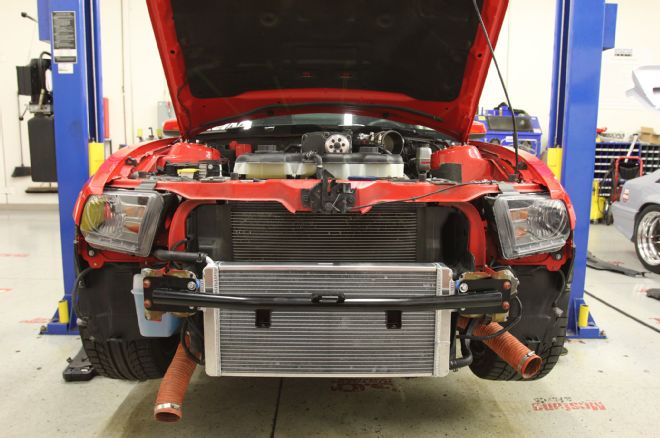
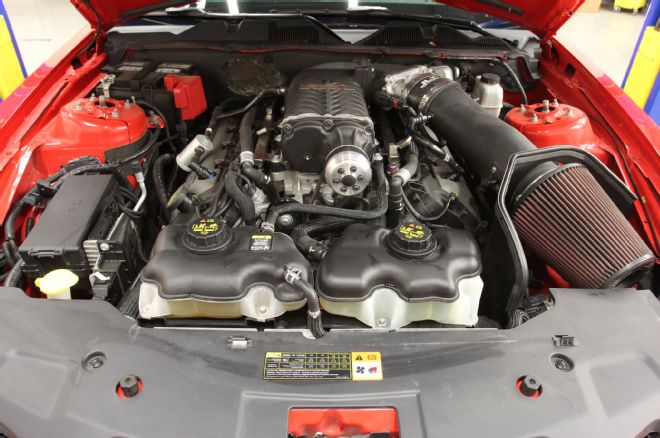
2. Here's what we are starting with, just your average 600-plus rwhp VMP TVS supercharged 2011 GT. We installed the Boss 302S grille to provide more airflow to the stock radiator as part of the initial supercharger system. About the only thing that gives this car away is the large heat exchanger filling up the lower grille opening. We resisted the temptation to make it disappear with a coat or two of black paint or put a wire mesh screen in front of it—all in an effort to maximize the heat exchanger efficiency in providing cooling to the supercharger's coolant system.

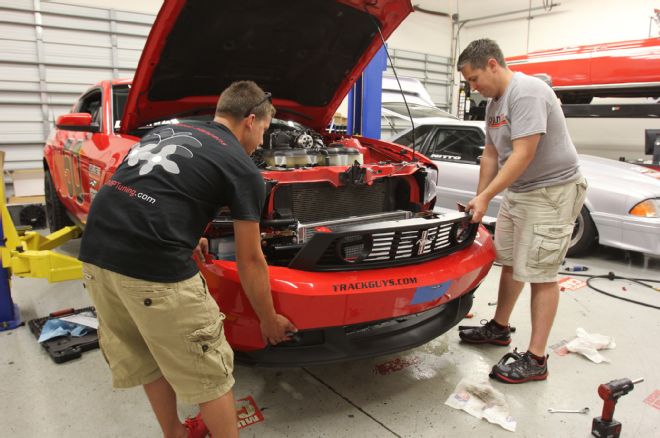
3. The installation begins with removing the factory plastic that seals the top of the grille to the top of the radiator support. Jonathan Blevins of Chicane23 jumps in to help with the project the day before the annual Track Guys event at Sebring International Raceway.
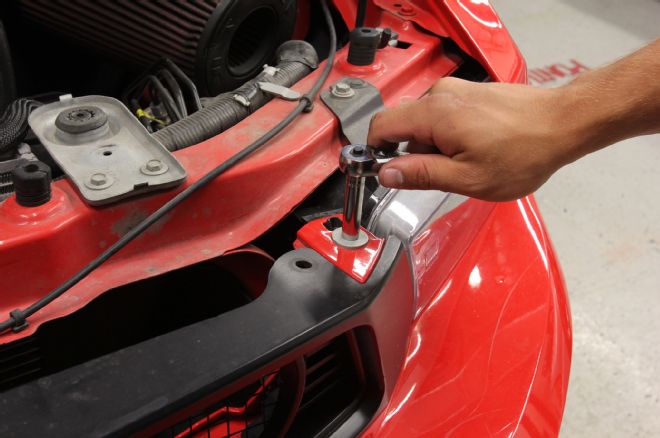
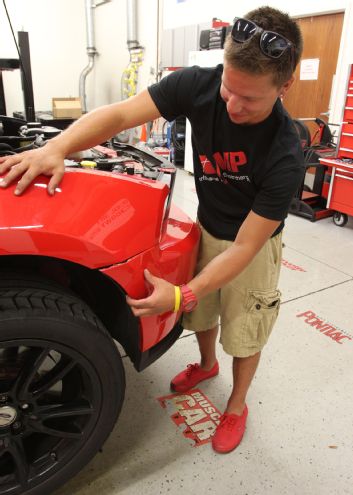
4. With the grille-to-radiator cover removed, Blevins turns his attention to removing the front bumper cover, starting with this bolt near the outer edge of the grille opening.
5. VMP's Steve Cleveland works on the pulling the bumper cover off on the passenger side. Make sure to remove all of the screws in the inner fender first.
6. With all the fasteners removed, Cleveland and Blevins handled the final removal, supporting the bumper cover with one hand and reaching down inside to remove the parking light socket with the other.
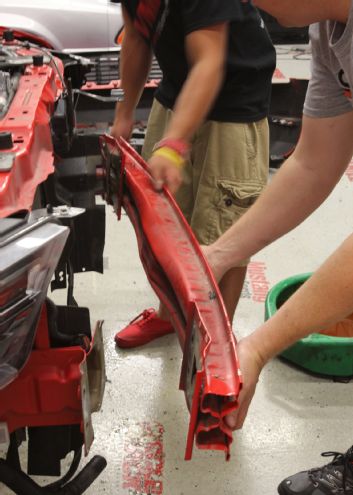
7. Cleveland makes short work of removing the foam bumper support from its steel brother. With the Ford Racing tubular support going back on, this piece will be scrapped or passed on to one of our body shop friends for repurposing.
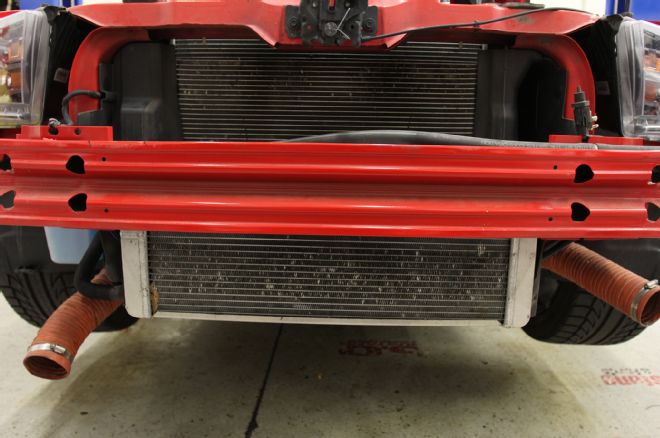
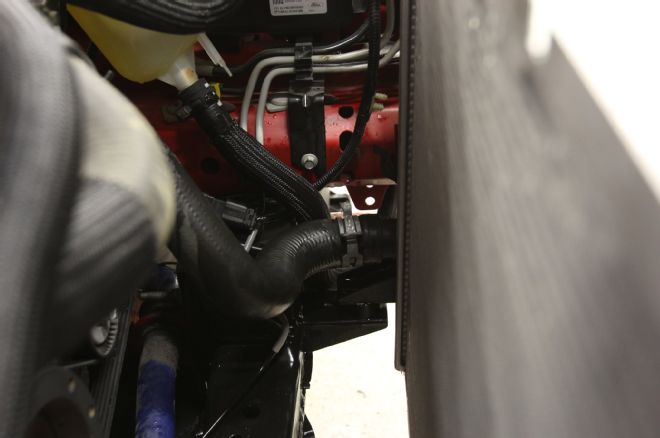
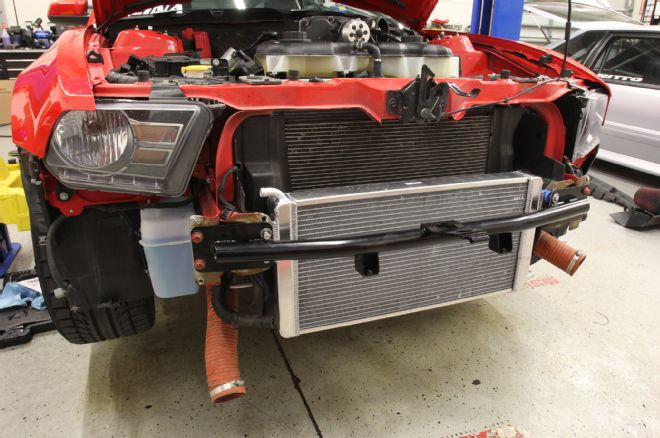
8. Here is the original VMP heat exchanger. This angle also gives you a good look at how much of the heat exchanger is located behind the armco-like factory bumper support. You can also see the amount of punishment the cooling fins have taken after two years of road course shenanigans.
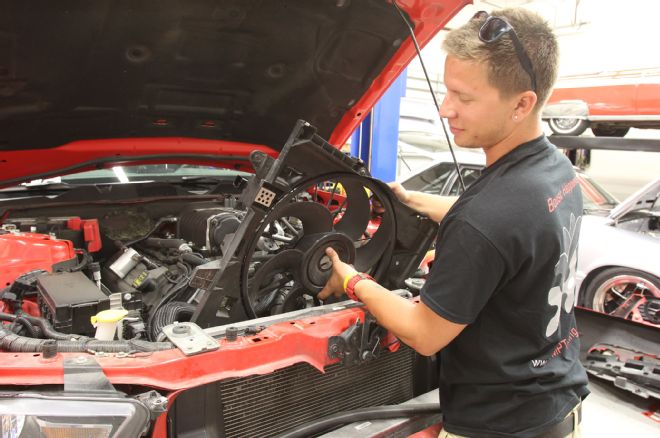
9. With the front bumper cover off, Cleveland removed the factory radiator fan assembly.
10. With the fan and shroud assembly out of the way, it's easy to get to the upper and lower radiator hoses.
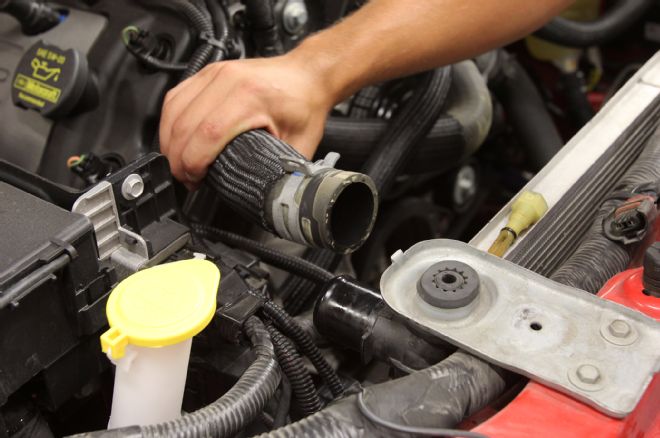
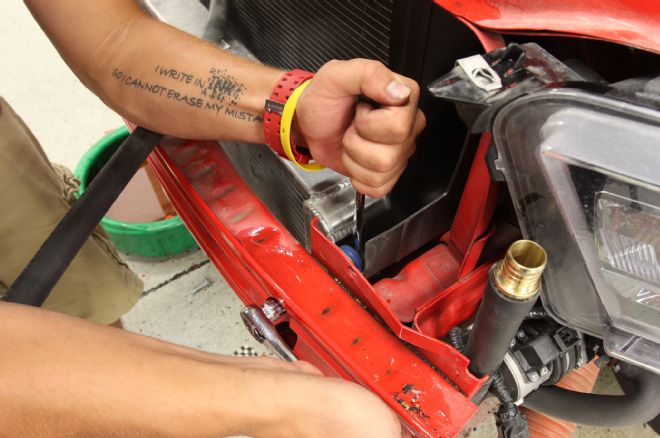
11. Upper radiator hose removal is a snap. If you've ever wanted to upgrade you engine's coolant hoses or install high-quality, worm-gear–type hose clamps, this would be the perfect time to do so.
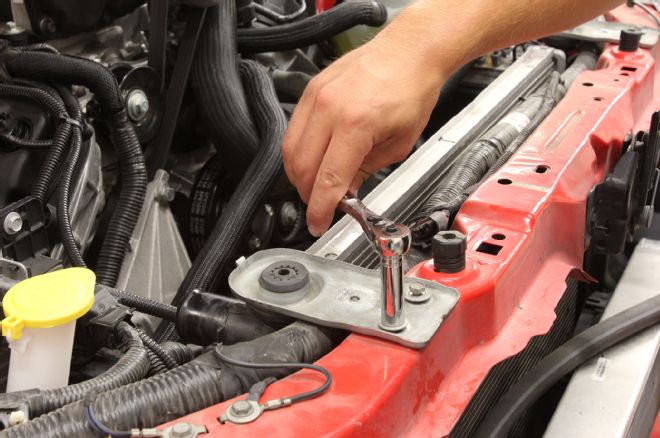
12. With the radiator drained and both hoses removed, the two brackets on the top of the radiator support are next.
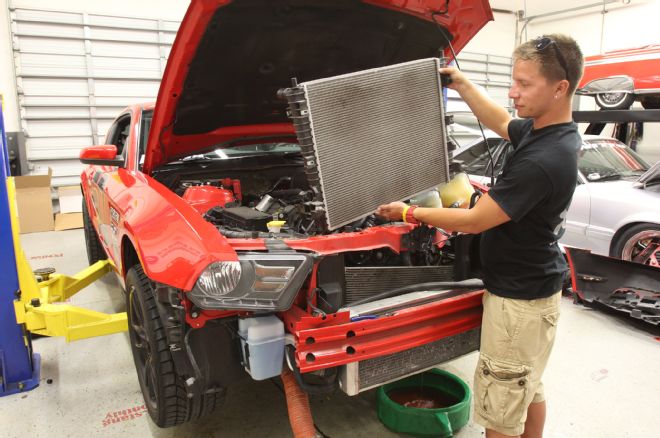
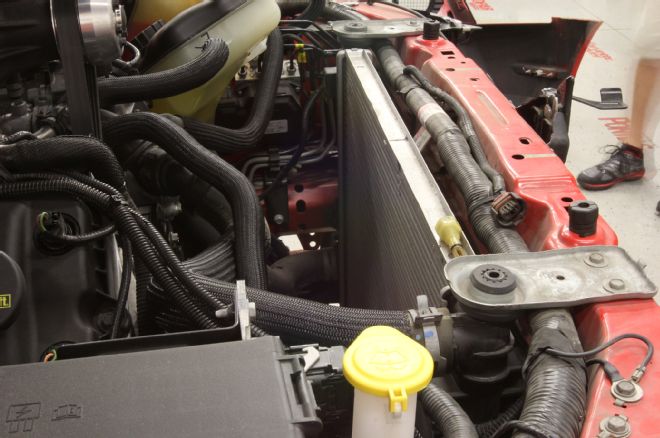
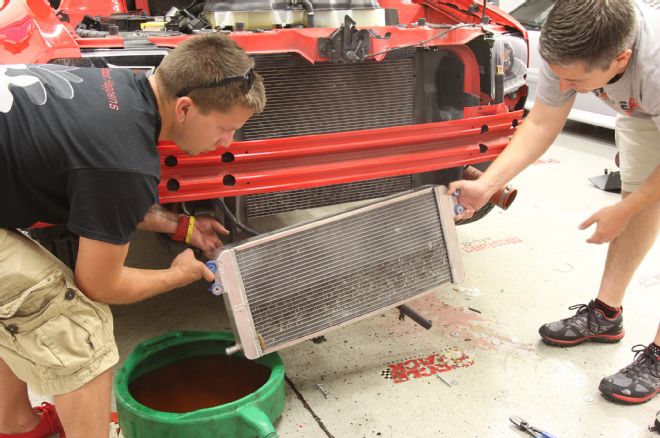
13. With the two top brackets removed, the stock radiator lifts straight up and out of the car. Take care not to damage the cooling fins or end tanks. It's always good to have a spare radiator on hand for yourself or to make someone a heck of a deal when they need one.
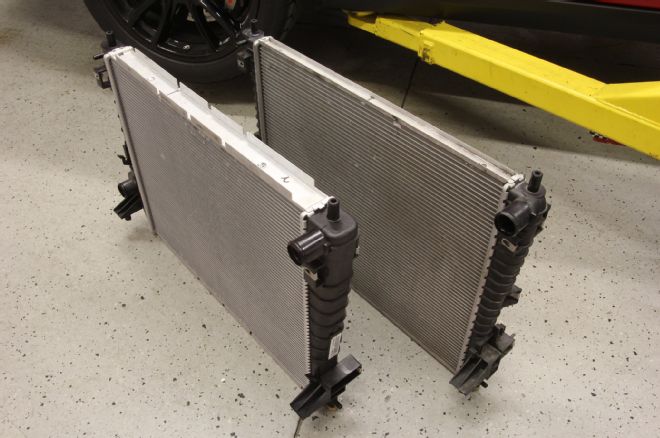
14. Side by side, it's pretty easy to see just how much thicker the Boss 302 radiator (M-8005-MBR, left) is versus the stock GT unit. Because it is a factory-designed unit, the Boss 302 radiator is a direct drop-in replacement and is a pretty sound investment for any track-going Coyote, supercharged or not. It is important to note that this radiator does not have provisions for automatic transmission cooling lines.
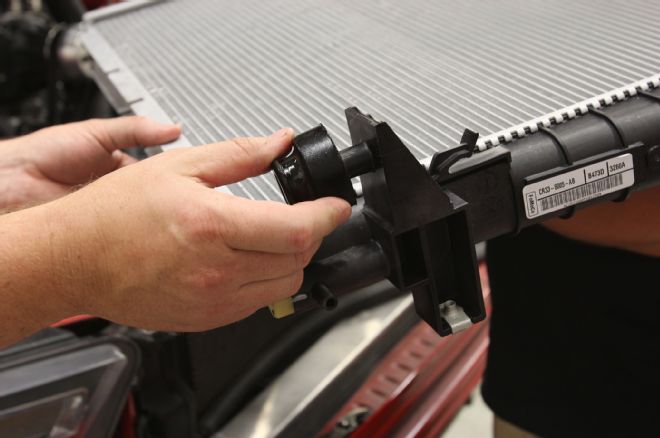
15. You will need to transfer the two rubber mounting feet from you original radiator onto the new unit. A light coating of grease makes the mounting feet go into the mount easier.
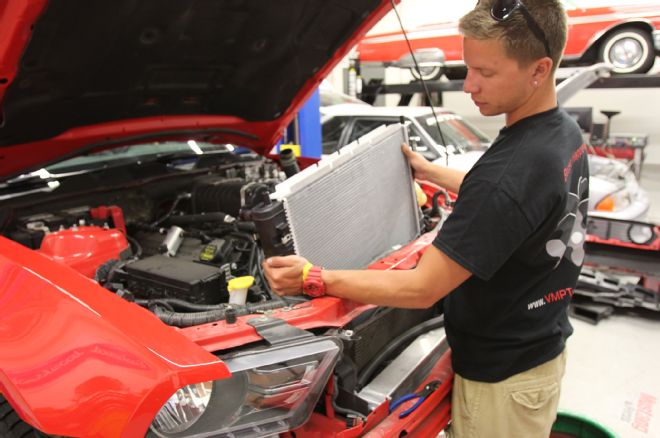
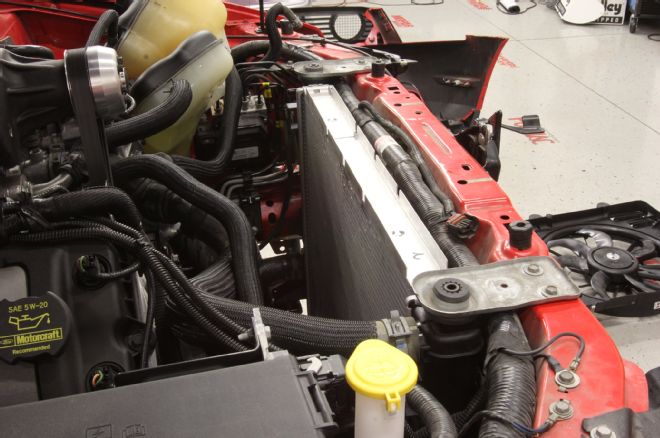
16. Back in with the Boss 302 unit. Ford Racing does offer an even larger, all-aluminum unit (M-8005-MGT). It is designed as a direct replacement for the FR500S cars and can support up to 700 hp.
17. With the new radiator in place, don't forget to reconnect the lower radiator hose on the driver’s side. Trust us, it's much easier to get to before you put the fan assembly back in the car.
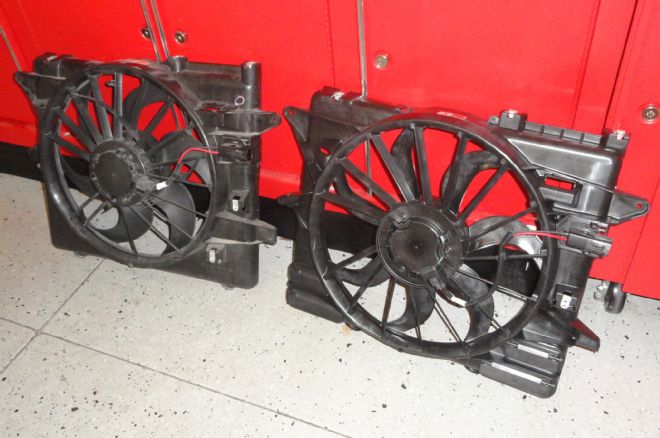
18. At first glance, there isn't much difference between the stock 2011 5.0L fan (left) and one designed for the 2013-2014 GT500. But there are differences, and when it comes to providing maximum cooling performance they are important differences.
19. Surprisingly, the fan blades themselves on the GT500 fan assembly are narrower than those of the stock 5.0L unit. The GT500 unit uses a seven-blade fan, while the original fan is made up of six larger blades. You can also see the four “flapper doors” that are located in the lower corners of the fan shroud. Guess this is what you get when you design a car with 662 hp, air conditioning, and a factory warranty.
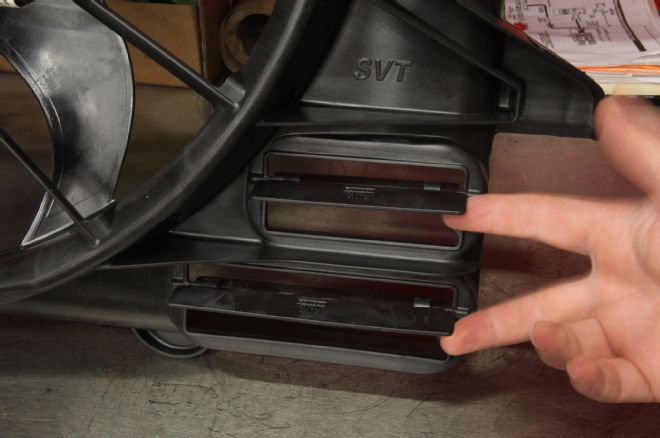
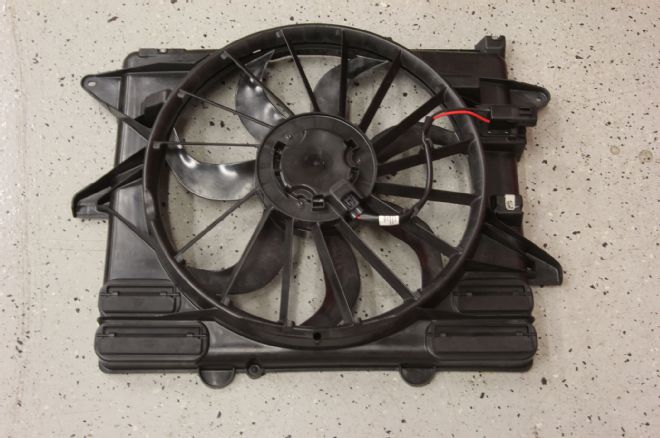
20. These clever flapper doors are designed to open up with airflow, allowing more air to pass through the radiator's cooling fins. Between the revised fan and these four flapper doors, you know the team at Ford Racing was serious about maximizing airflow and cooling for the GT500, so why not put that same technology to work on our VMP TVS supercharged Coyote?

21. Here again, because this is a stock Ford piece, it drops right in. Even through we are cutting across models with this combination (Boss 302 and GT500), this fan assembly uses the same mounting locations.

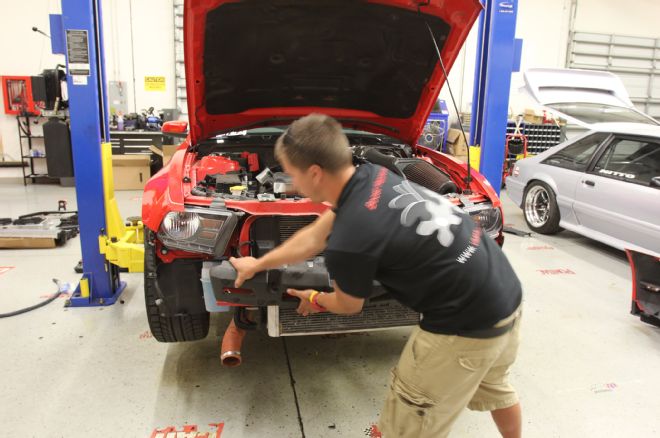
22. With the radiator and fan assembly wrapped up, Cleveland began the heat exchanger swap by draining the supercharger's coolant system.
23. The VMP heat exchanger mounts to the backside of the factory mounting plate for the front bumper support. This size of the heat exchanger requires some pretty serious mounting hardware.
24. With the heat exchanger freed of its mounting hardware, Cleveland and Blevins lowered it out from behind the bumper support. Note the darker color of the cooling fins that were exposed to the incoming air through the lower grille opening. You can also see that the dual fans managed to pull additional air into the cooling fins even when they were behind the large steel bumper support.
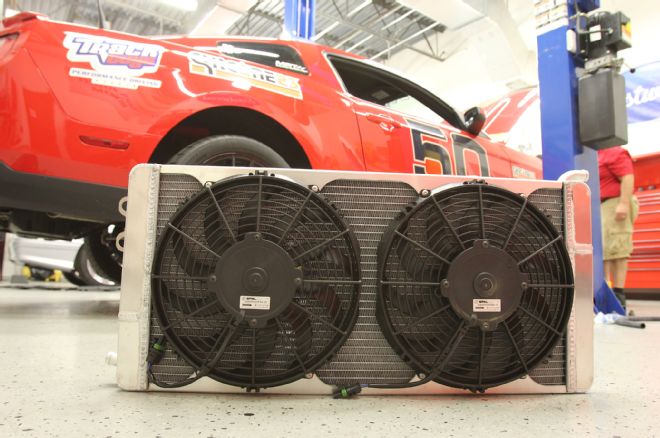
25. VMP's new triple-pass heat exchanger is taller than the previous unit. The extra height allowed Starkey to fit twin Spal 11-inch-diameter fans to the backside of the new unit. You can also see just how much of the core is covered by the two fans.
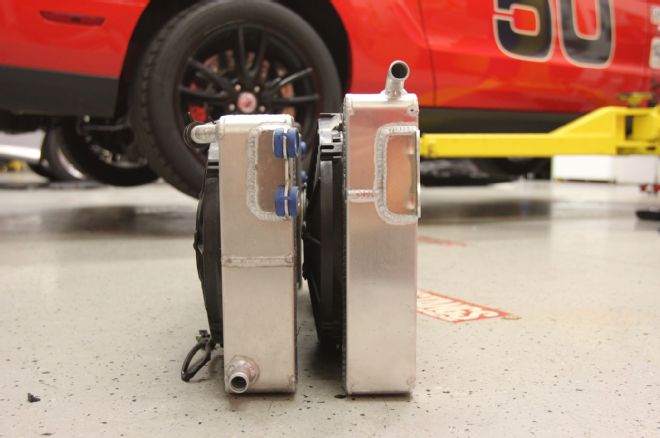
26. Looking at the two heat exchangers from the side, you can immediately see how much taller the new triple-pass unit on the right is. VMP's basic kit uses a very large heat exchanger, but when you see the new unit, you know how serious they are about optimizing charge air temperatures with this even larger unit. Another thing you'll notice is that the triple-pass heat exchanger's discharge outlet (cooled fluid) is now at the top of the unit as opposed to the bottom.
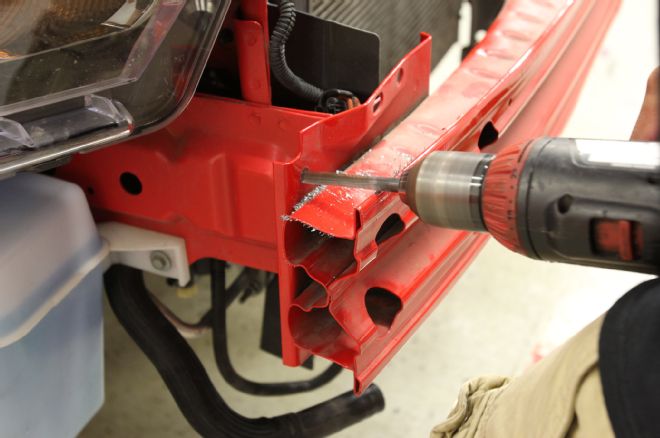
27. Another means to maximize the amount of air reaching the heat exchanger is to replace the large factory bumper support with the Ford Racing tubular unit. To remove the factory support, you'll need to drill out the factory spot welds that secure the support to the mounting plates on the car. Word of advice: When drilling out large factory spot welds, make sure you use a good drill bit and take your time.
28. The 2011 GT from the middle of the production run had a total of eight spot welds securing the support to the mounting plates: four on each side. Even with all eight of the welds drilled out, we still needed a chisel and a ballpeen hammer to free the factory bumper support. Physically this was the most difficult part of the upgrade; everything else was “unbolt, replace component, and reinstall bolts.”
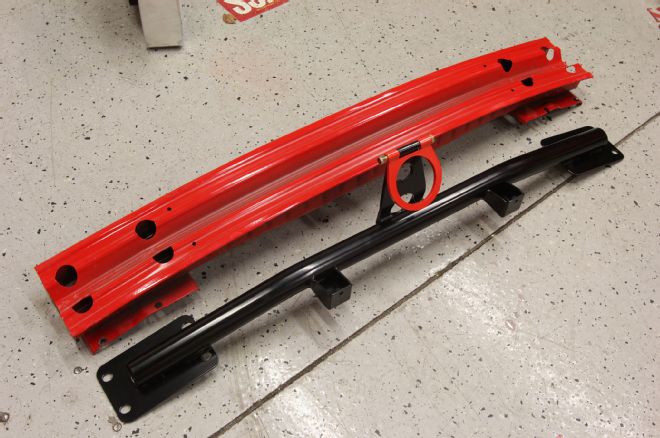
29. Side by side, it's easy to see just how much less space the Ford Racing tubular bumper support will take up behind the front bumper cover and in front of our new triple-pass heat exchanger. Even with the Ford Racing tow loop assembly, the new piece weighed in at just 7 pounds, whereas the factory support was just under 13 pounds. The two square mounting tabs on the bottom of the tubular support are the threaded mounting locations for the front splitter support rods. If you choose to install a splitter, you will need to drill two holes in the bottom of the bumper cover to provide the opening for the rods to go from the splitter and into the tubular support.
30. Here you can see just how little space the Ford Racing tubular support occupies in front of the VMP triple-pass heat exchanger. While the exterior bumper cover is still the same, this piece helps to create a significantly more open area in front of the heat exchanger. If you were really serious about adding even more airflow to the front of the heat exchanger, you could cut additional openings in the front bumper cover on each side of the two hook support opening.

31. Cleveland put the final touches on plumbing the new triple-pass heat exchanger. Here you can see the revised discharge tube location and the bushing-insulated heat exchanger mounting configuration.
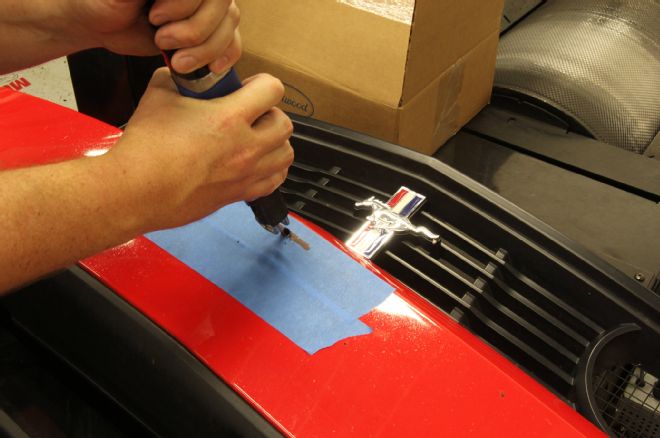
32. Having decided to utilize the two hook mounting bracket on the Ford Racing tubular bumper support, we need to cut a small opening in the front bumper cover. Once he determines the location for the cut, Blevins covers the area with some protective tape, drills a pilot hole, and begins making the cut with a small reciprocating saw. Take your time, measure twice, and cut once. You'll have a nice tidy slot opening in your front bumper cover for the two hook bracket.
33. After a quick double-check of all the plumbing connections and clamps, Cleveland and Blevins positioned the bumper cover back onto the car, starting with getting the tow hook bracket through the cut slot.
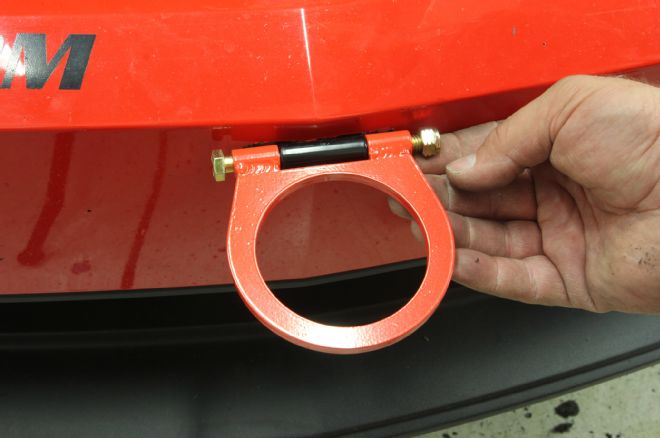
34. Once the bumper cover is back on the car, the Ford Racing tow hook is a single-bolt installation. As a road course driver, this tow hook is something you hope you never have to use out on the track—or more specifically, when you're off the track and stuck axle-deep in the gravel trap that many tracks use to slow or stop cars once they've left the paved surface. Some owners use the tow hook when winching their cars into and out of their enclosed trailers.

35. With the plastic radiator cover reinstalled, it's time to refill both the radiator and supercharger coolant systems. Because both units are larger than the ones they replaced, you will need more coolant and water.
36. Some upgrades are for appearance. However, this upgrade was for performance. The only visible part of this upgrade is the red tow hook hanging outside the front bumper cover. The Boss 302 radiator, GT500 fan assembly, and VMP TVS triple-pass heat exchanger will be doing their jobs out of sight but definitely not out of mind for this road course driver.