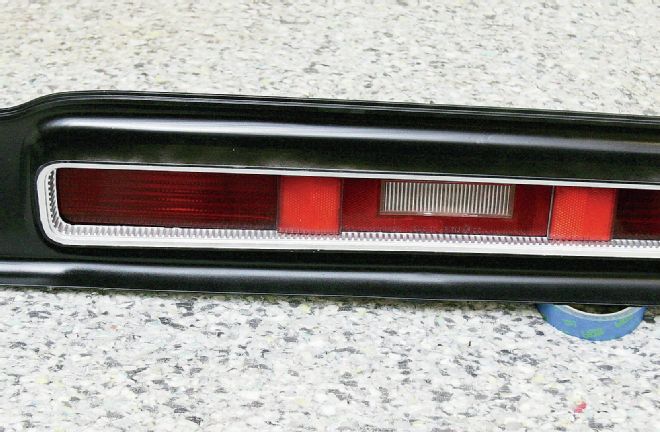
One of the many areas where Mopar muscle cars went just a cut above the norm was the view most of the opposition was used to—the rear finish panel and taillights. Mopar used this area to make a design statement, with some of the best examples being found on the upper-crust muscle cars. Sure, the plain-Jane machines like the Road Runner or Dart Swinger made a strong statement with minimal trim, however, the higher-end machines such as the GTX, GTS, or R/T came through with highly stylized rear treatments that really set them apart. One of our favorites here includes the 1971 Dodge R/T Challenger. This unique rear treatment harmonized the "Two-Slot" snorkel-style grille with a similar design in the rear trim panel, featuring bright argent corrugated snorkels leading into the deep-set full-width taillights at each side. The rear cove came through with a blackout treatment, which matched the satin black of the trim panel surround.
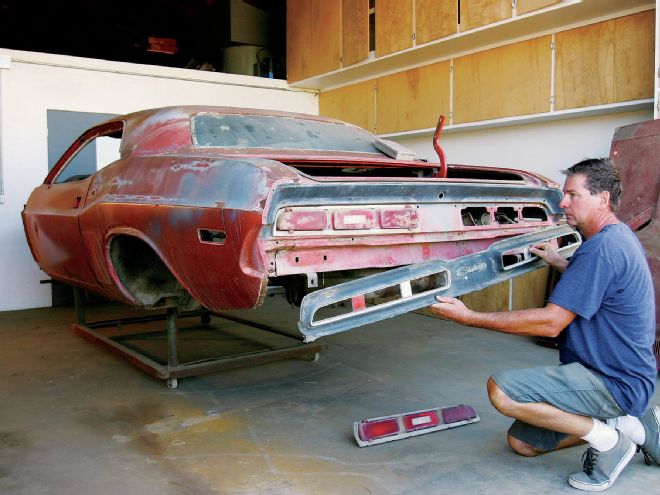
The major body portion of our Project Challenger restoration is leading to paint, and at the level we want to go, that means major disassembly. Many of the modular subassemblies pulled off can be considered mini restoration projects on their own. The more of these items that are restored ahead of time, the faster the project will progress once the overall paintwork is completed. Items here obviously include the mechanicals, such as the drivetrain and suspension, most of which can be rebuilt, restored, and assembled off the vehicle. Other subassemblies that are self-contained side projects include the grille, heater-A/C suitcase, steering column, trim, seats and interior panels, and, for us this month, the rear panel area of our R/T Challenger.
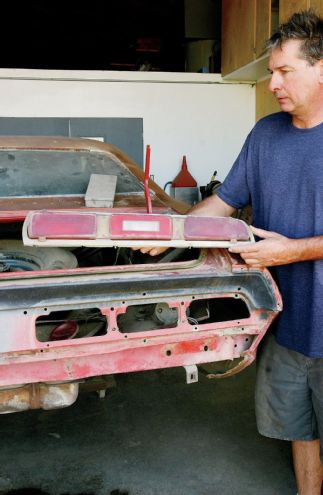
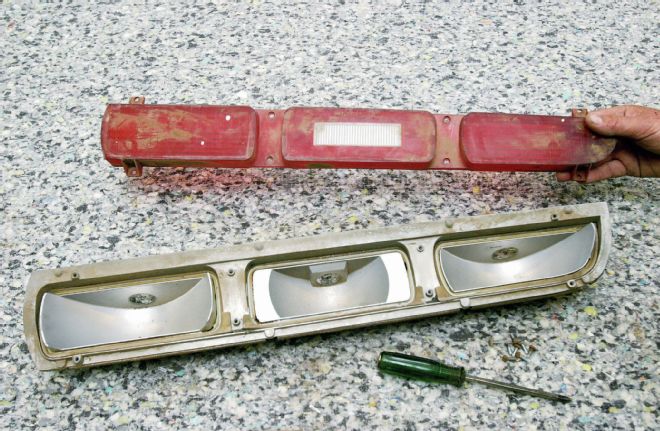
Working with these pieces requires considerable care, as much of the assembly is not reproduced, and the one-year-only parts are difficult to source. Luckily, our R/T's rear components were virtually perfect, just in need of cleaning and refinishing. The '71 Challenger's rear treatment was really an odd arrangement, with the taillamp housings and lenses bolted to the tailpanel sheetmetal, and then overlaid with the trim panel. The trim panel is a two-piece cast assembly, peened together in the center. The trim panel is not attached to the taillamps in any way, but simply shrouds the lenses once bolted to the car. Off the car, the two halves are very flimsy at the join, which can easily be broken. On R/T models, the paint scheme of the finish panel was simply satin black and light argent.
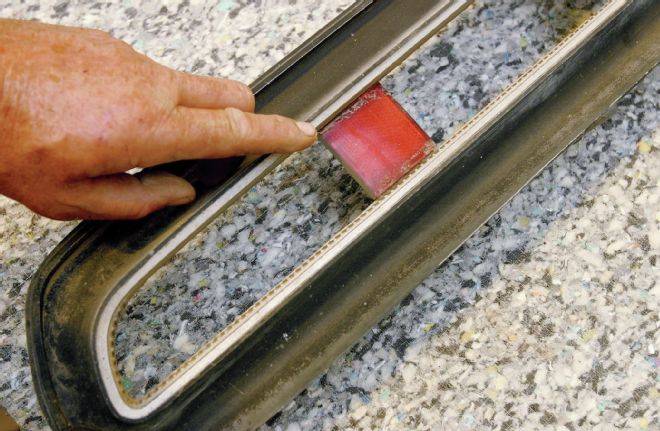
How far you need to go in restoring this part of the car depends upon what you are starting with. Normally with a very rough panel or multiple previous coats of paint, we would attack the piece with full stripping, most likely by abrasive blasting. In the case of this particular example, we were starting with a panel in very good condition and still wearing the factory finish. Here we only needed a light scuff and a light coat of paint to bring the finish back to factory fresh. Likewise, our lenses were in very good condition, only requiring a good cleaning and hand-polishing to restore the luster. More oxidized lenses will usually require machine polishing to bring the finish back to an acceptable level, while checked or cracked lenses will need replacing. Similarly, our taillamp housings were in exceptional shape, with the bright-reflectorized paint inside as well as the lens seals being virtually perfect. The housing-to-body seals will be replaced, however, during final assembly.
This portion of our R/T project was a simple and straightforward part of our restoration. When you are starting with relatively good parts, the labor involved in restoration is dramatically reduced. These components are now completed and on the shelf awaiting final assembly of our Challenger.
Mopar used this area to make a design statement, with some of the best examples being found on the upper-crust muscle cars.
The taillamp housings and the trim bezel are completely separate assemblies. The trim panel unbolts from inside the trunk, and once removed the taillamp housings and lenses can be unbolted and removed. The bulb sockets are integral with the rear wiring harness and simply pull out of the taillamp housings.
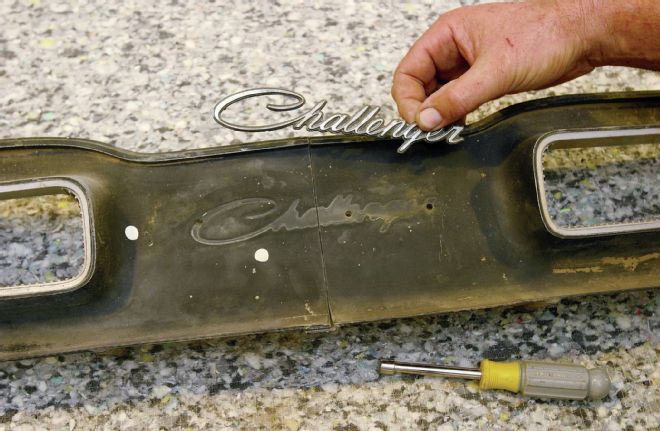
The trim panel is actually made up of two separate pieces that overlap and attached in the center via two delicate peened attachments. When off the car these can easily break, which will undoubtedly fracture the Challenger script emblem that bridges the two. Ours survived intact, and even the Challenger emblem was in very nice condition.
The trim panel simply overlays the taillamp lenses, and features four delicate reflectors built into the framework, which give the illusion of full-width taillamps, even though the lenses actually have three distinct segments. It is a very unusual arrangement.
Our lenses and housings were in exceptional shape and just needed cleaning and polishing. Rougher examples will need abrasive blasting and refinishing of the bright silver reflective paint inside the housings.
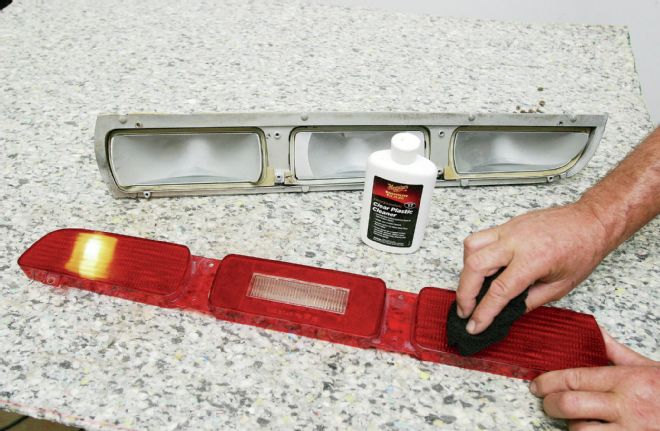
Meguiar's Clear Plastic Cleaner applied by hand was enough to bring a bright red gloss to our original lenses. If the lenses are heavily oxidized, we have had success with the same product and machine buffing.
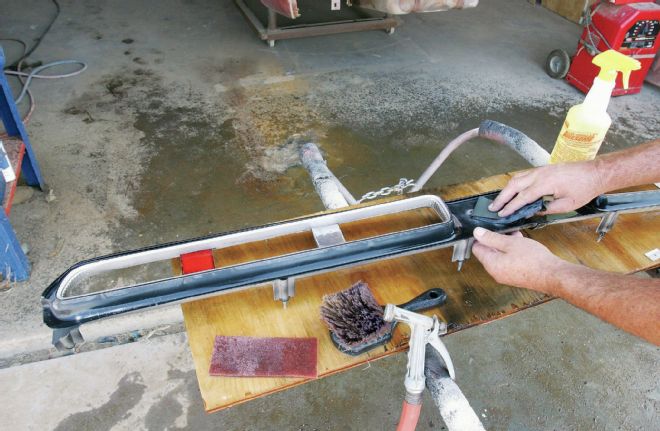
The trim panel was still wearing the original paint, and other than the paint wearing thin, there was no real damage. We simply needed to clean the part with strong detergent, and give it a scuff with a Scotch-Brite pad. Minor scratches and blemishes were sanded with #400 wet or dry paper.
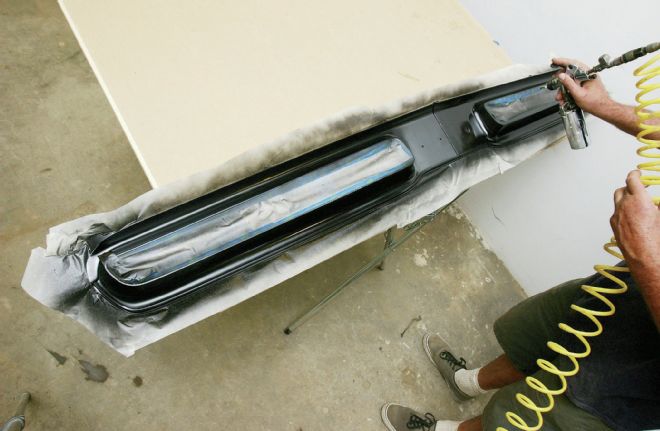
We masked the panel to prevent overspray to the backside and argent areas for paint. A Harbor Freight Tools touch up gun was used to shoot PPG Satin black single-stage urethane.
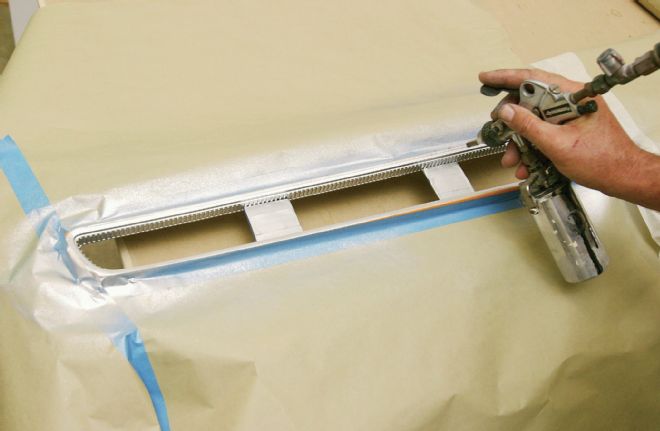
Next, the entire panel was taped, leaving the light argent taillight surrounds. Use high-quality masking tape to ensure a good edge. The paint here is a PPG fine aluminum metallic tinting base mixed by our local PPG jobber.
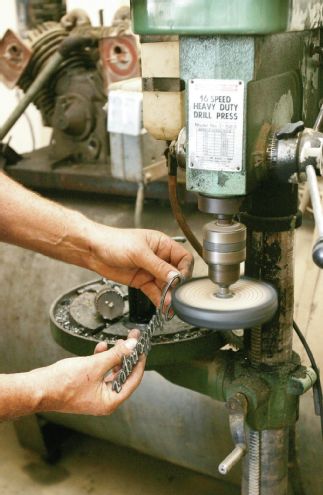
We were able to restore the center Challenger script emblem, since there was virtually no pitting of the chrome. Step one was polishing with Eastwood buffing compound using an Eastwood buffing wheel mounted to our drill press and set to high rpm. Once polished, the emblem was cleaned, and painted black. Once the paint was dried to tack free, we carefully wiped the paint with lacquer thinner to expose the chrome.
The freshly restored taillamps and rear bezel will impart a dramatic look to our Challenger project when completed. For now we will be stacking up various subassemblies as we restore them, waiting their turn for installation when our Challenger finally comes together.
Working with these pieces requires considerable care, as much of the assembly is not reproduced…